

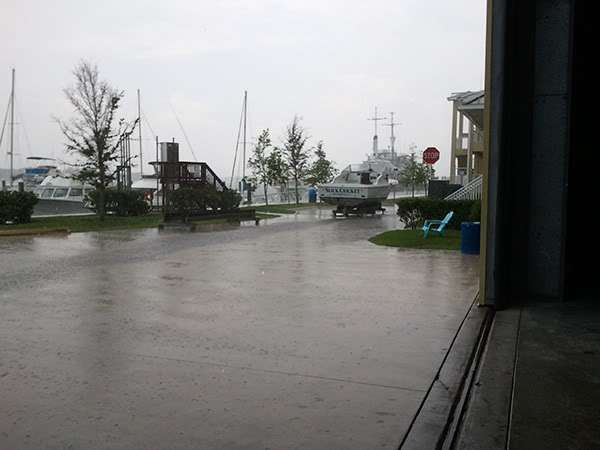
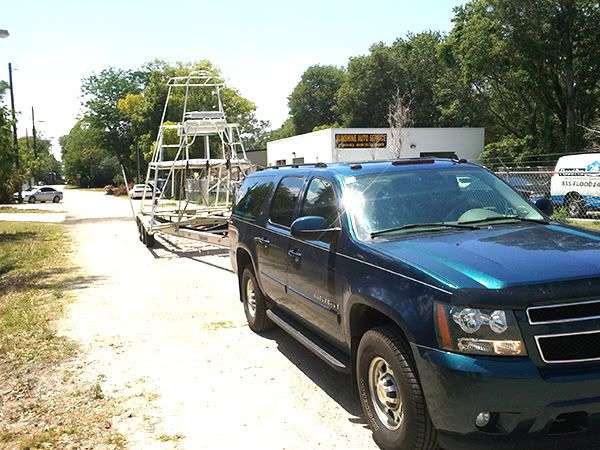
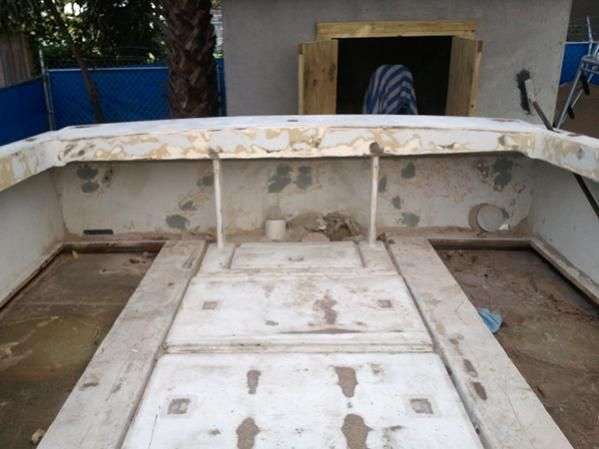
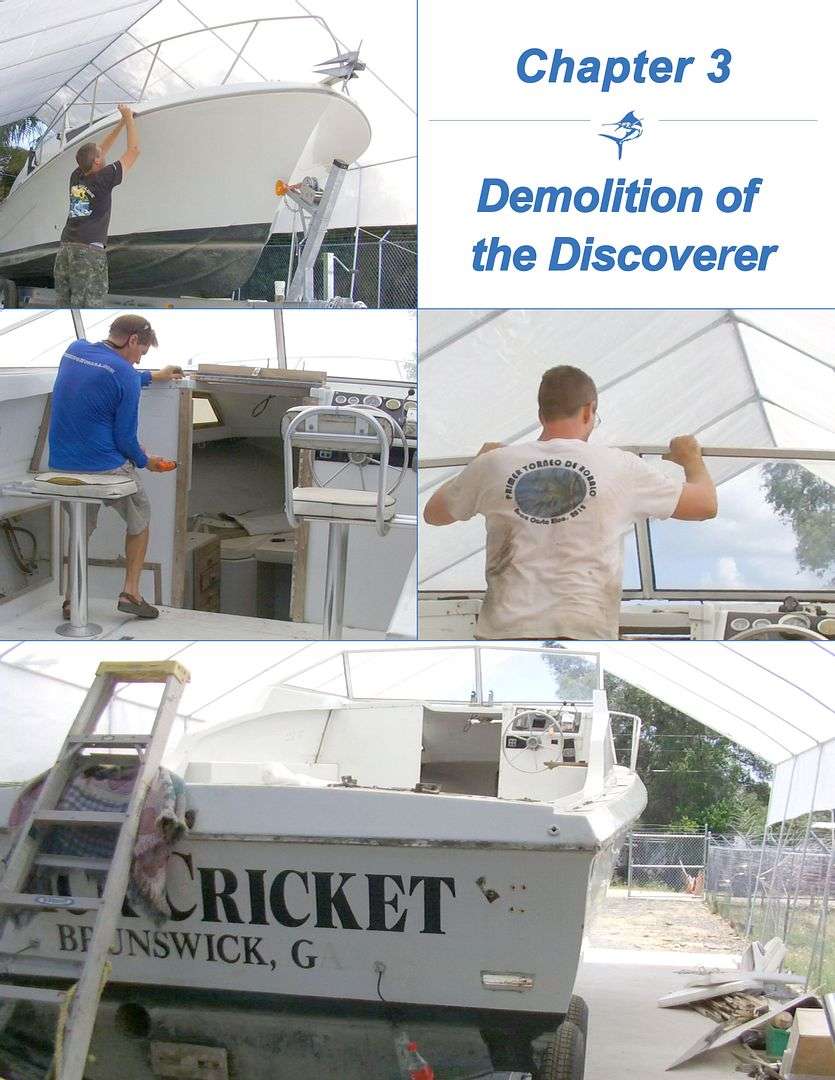
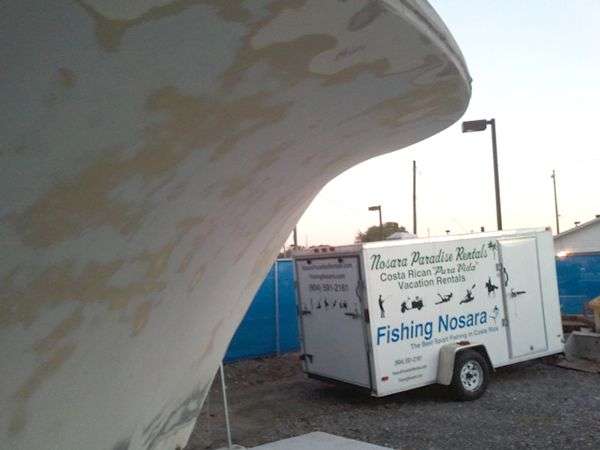
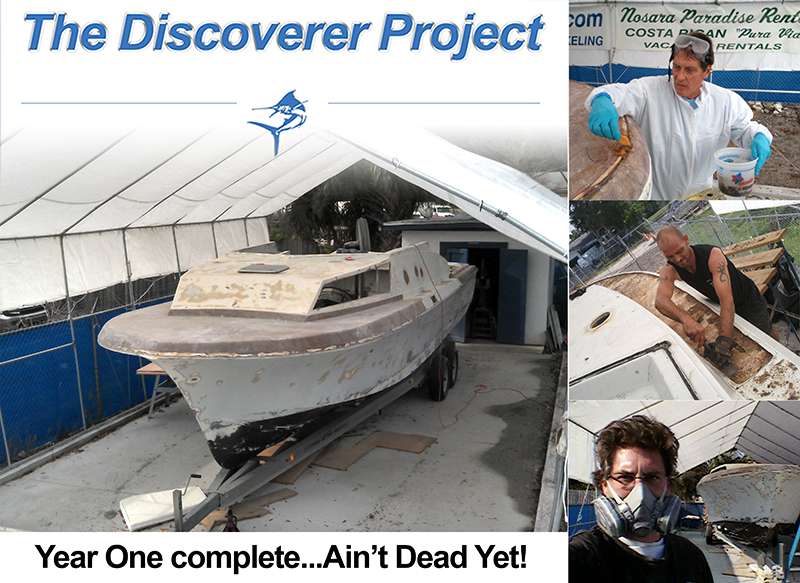
April 11, 2012 – Day 1
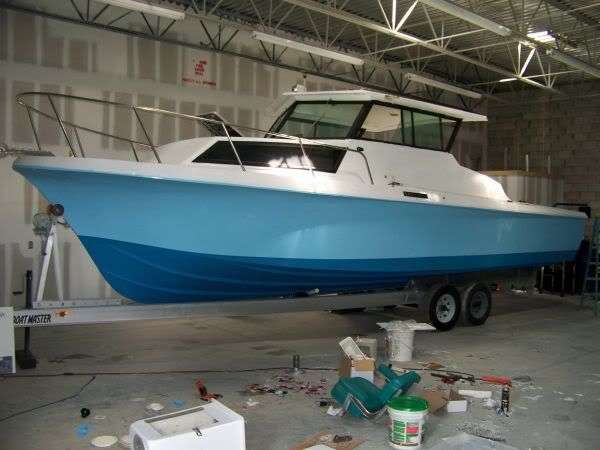
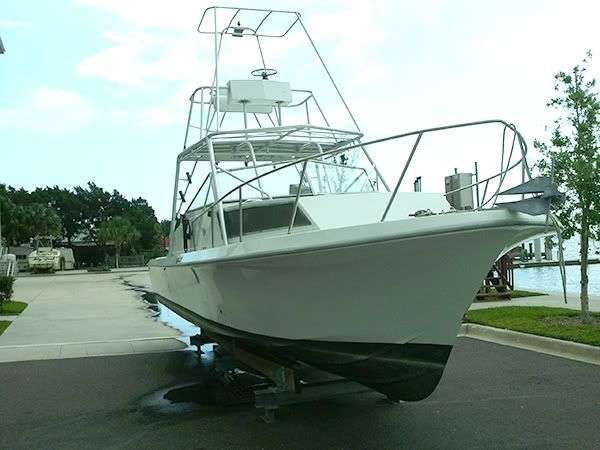
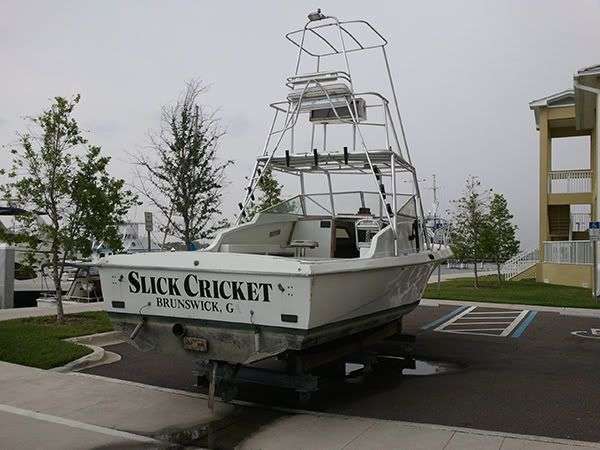
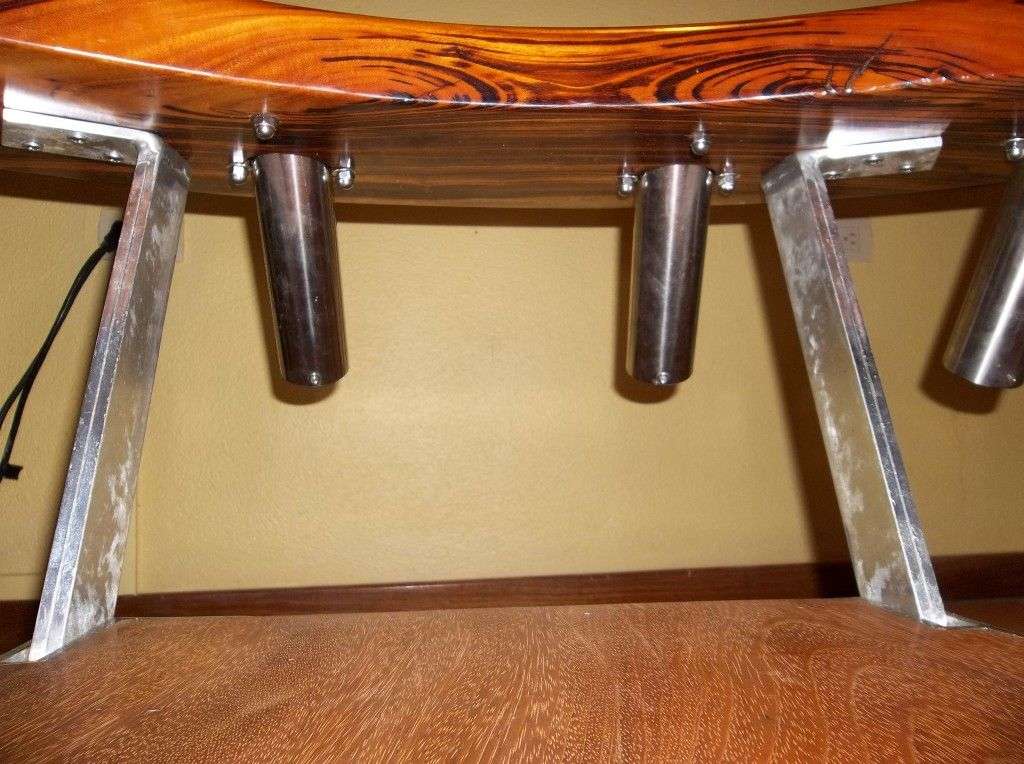
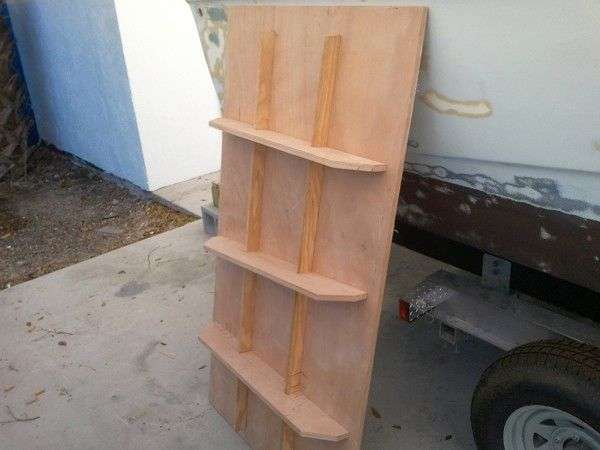
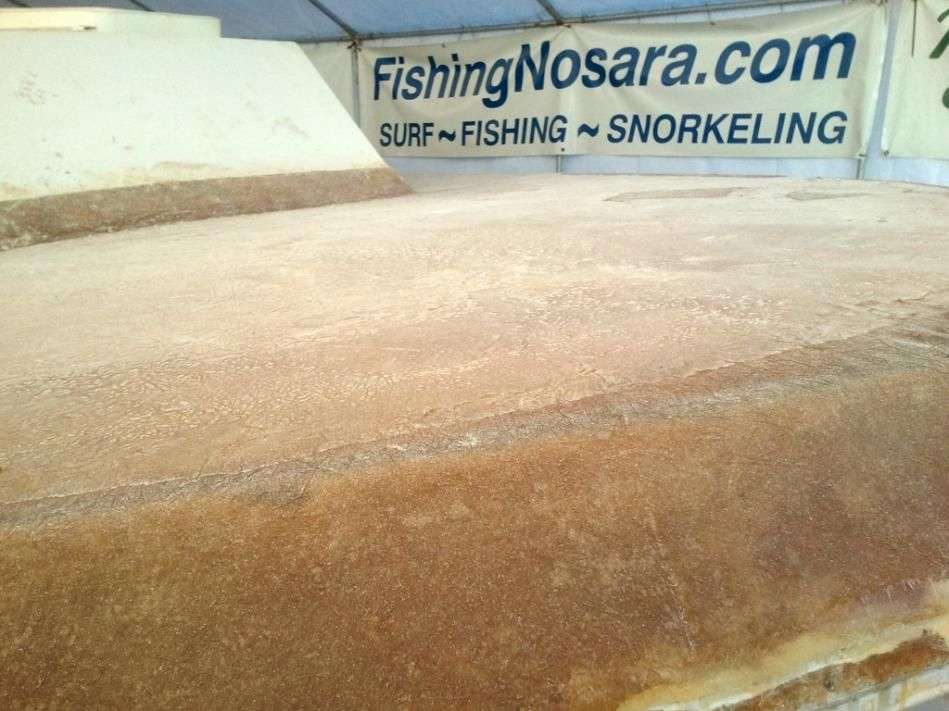
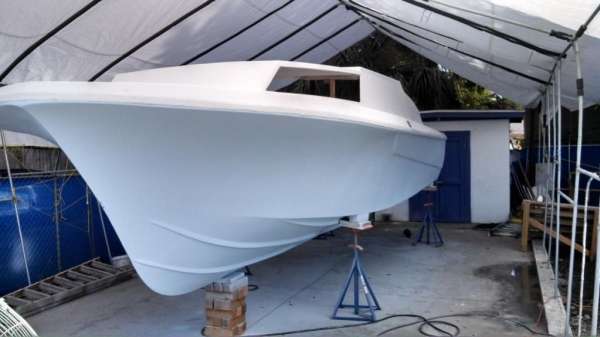
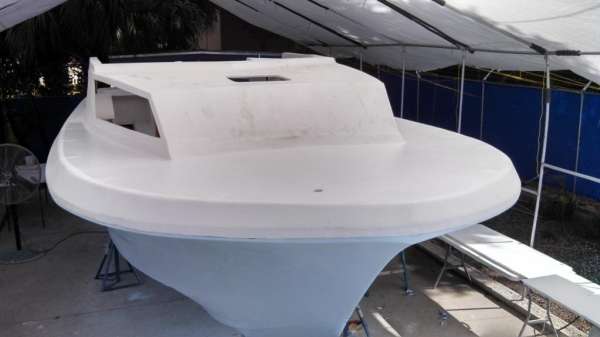
Welcome the newest member of the FishingNosara fleet, the 31-foot Discoverer!
The team gained experience with T-Craft on the Wanderer so going with the same hull is a natural choice. T-Crafts were originally built just down the road from us in Titusville, FL and though they shut down a few years back the evidence of their strength can still be seen at many marinas around the world.
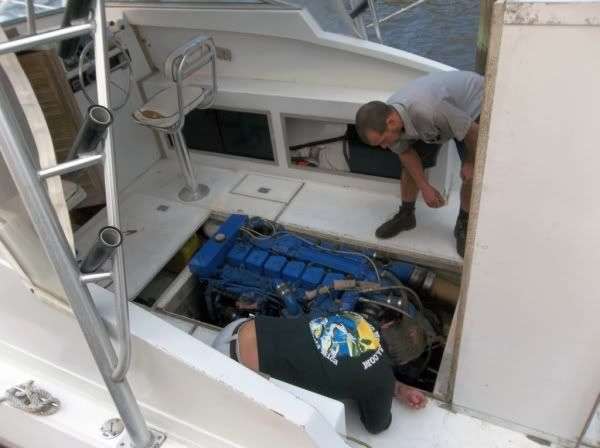
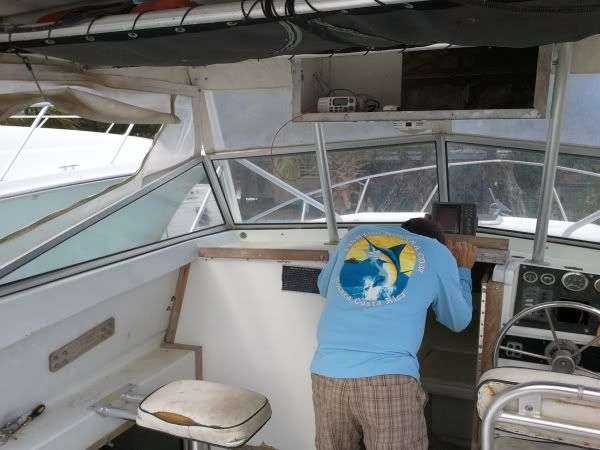
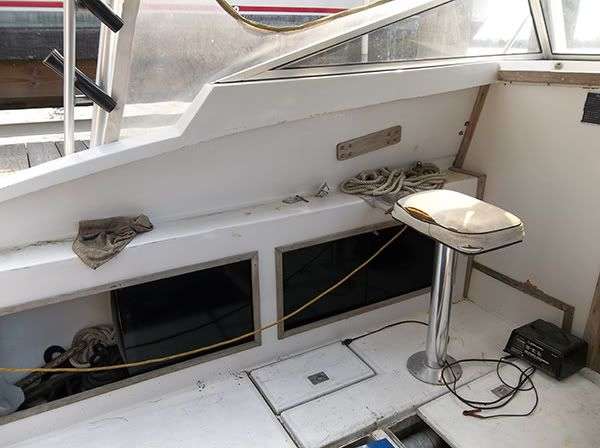
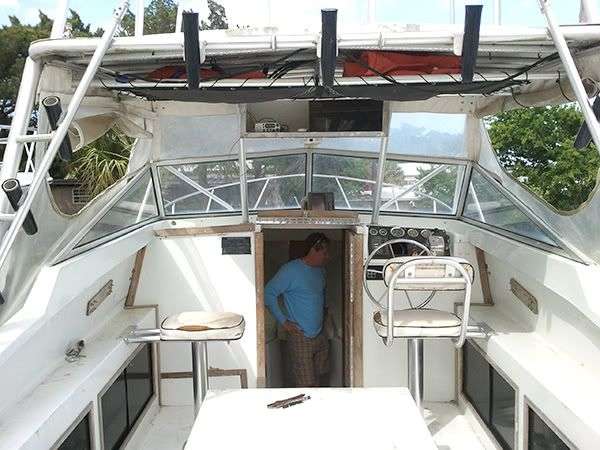
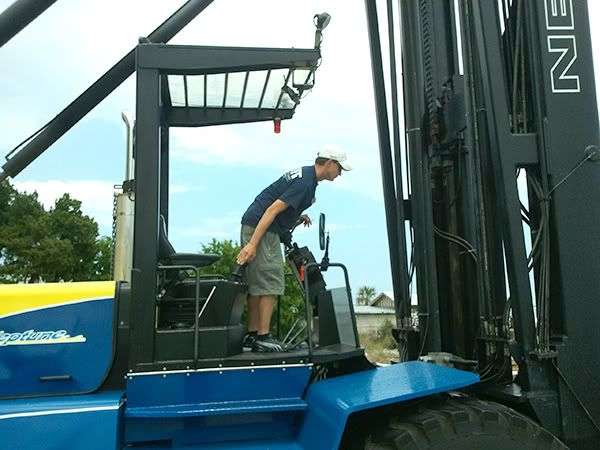
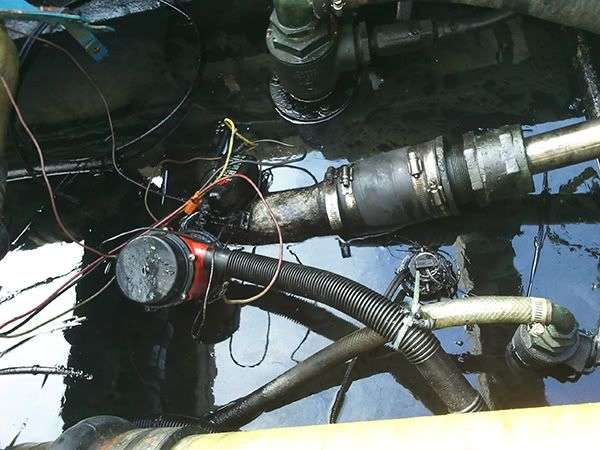
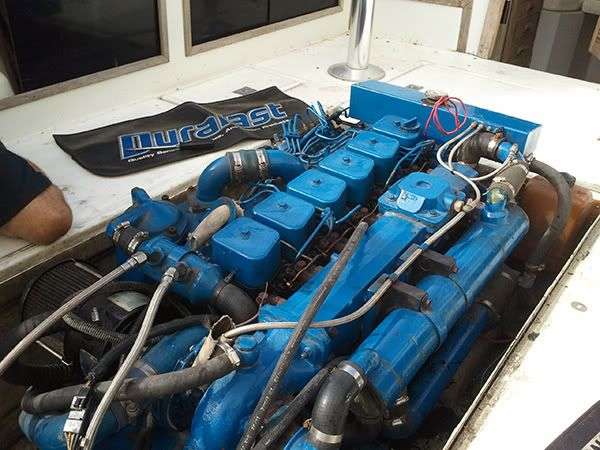
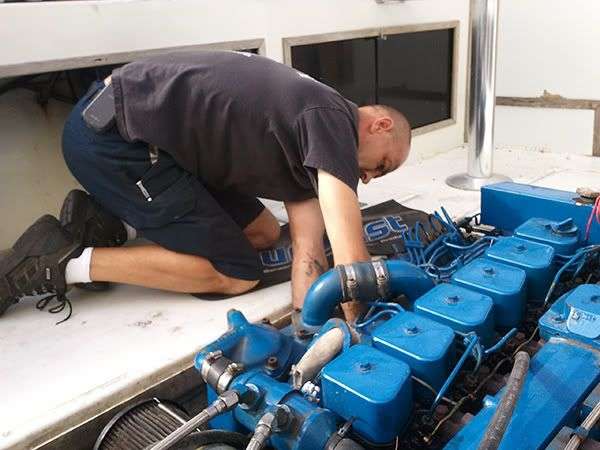
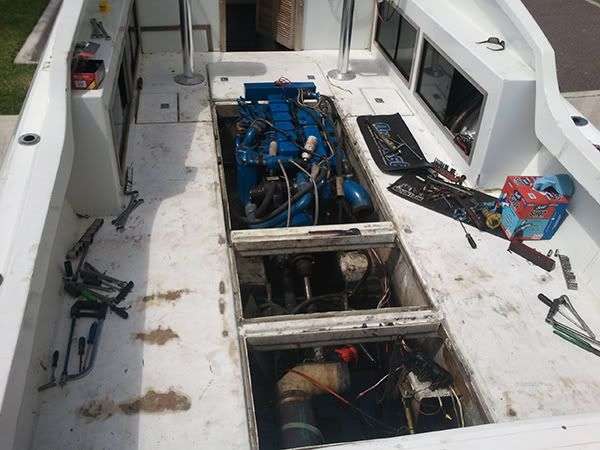
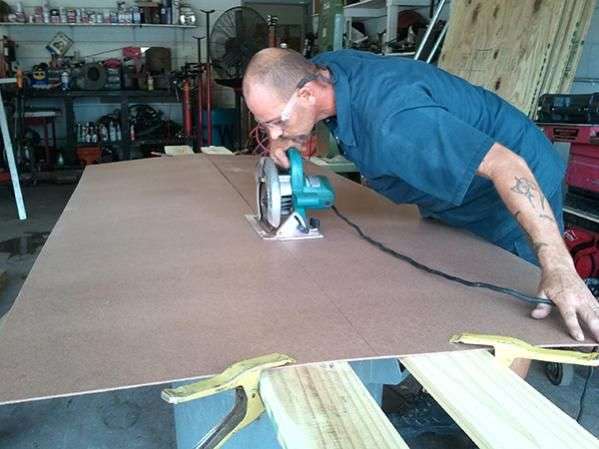
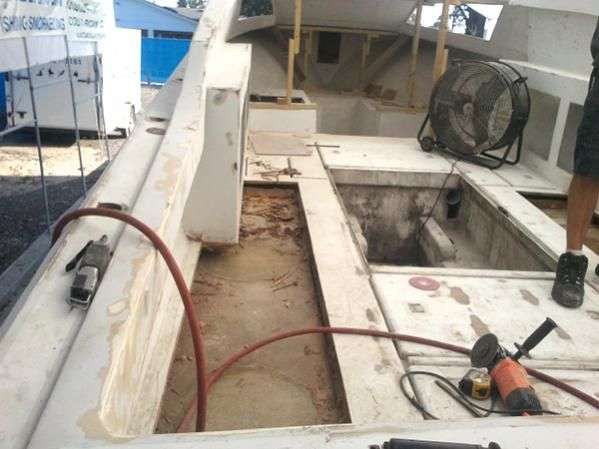
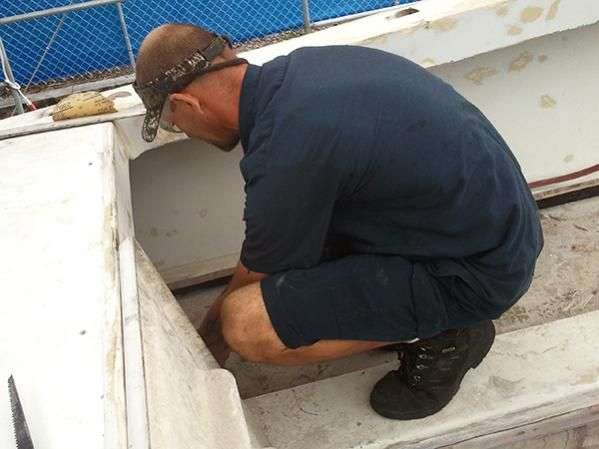
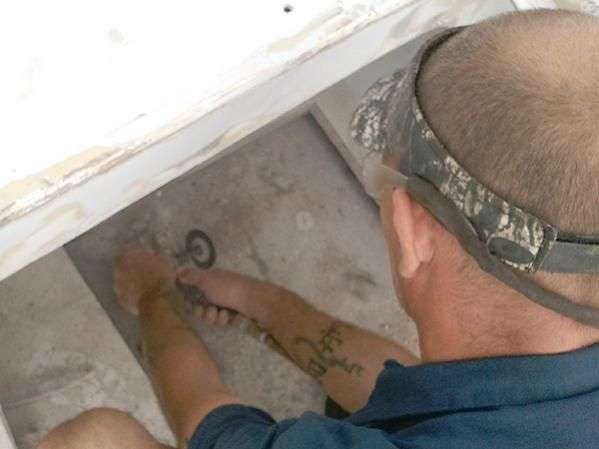
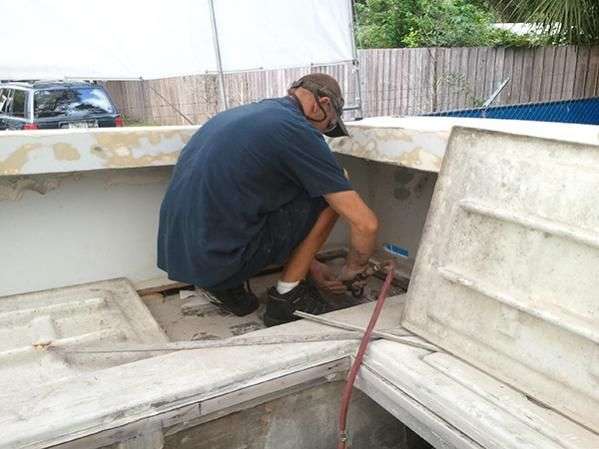
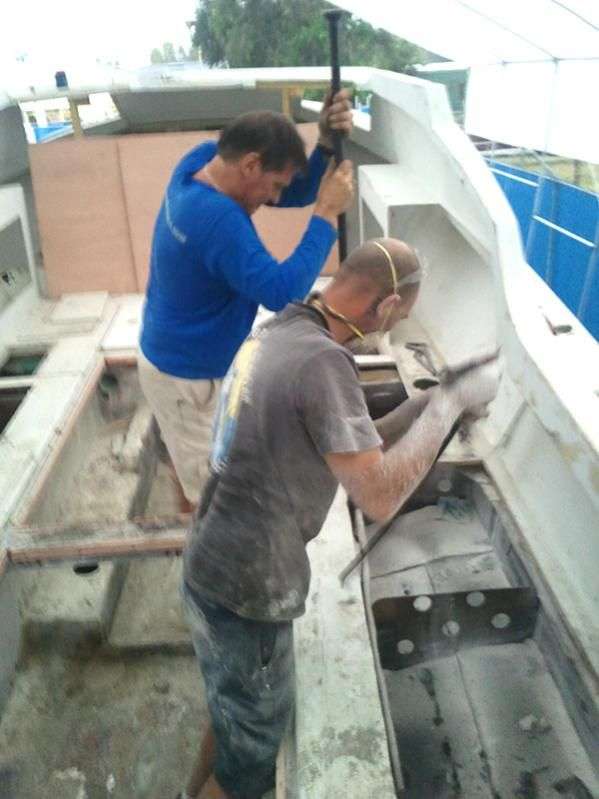
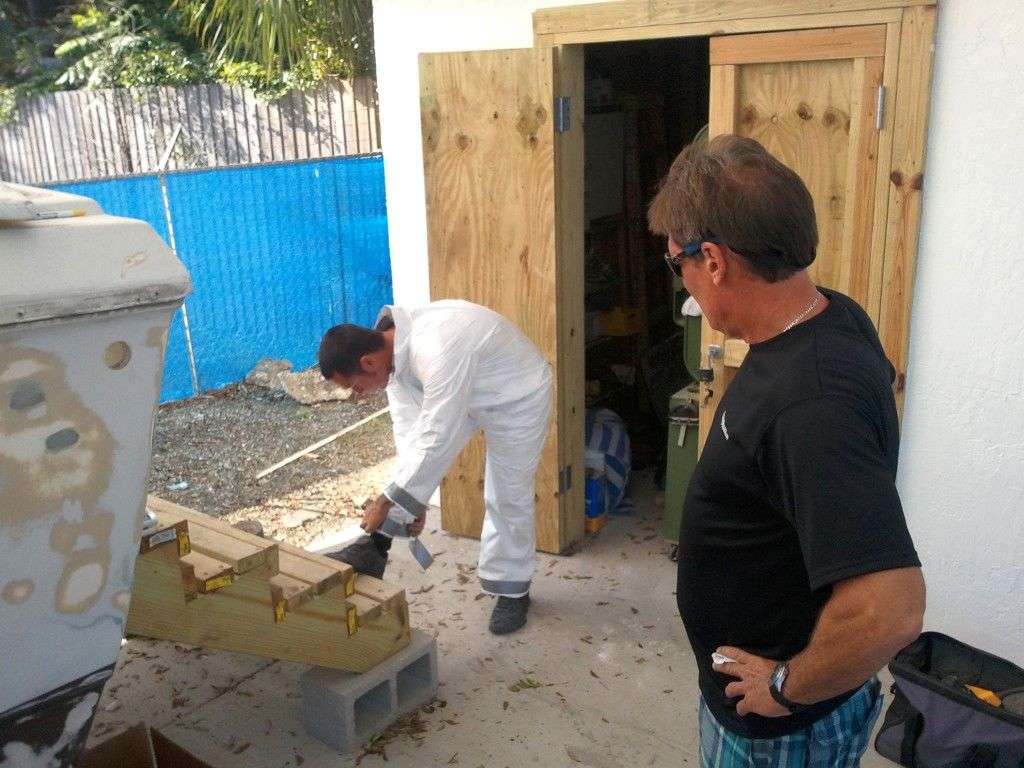
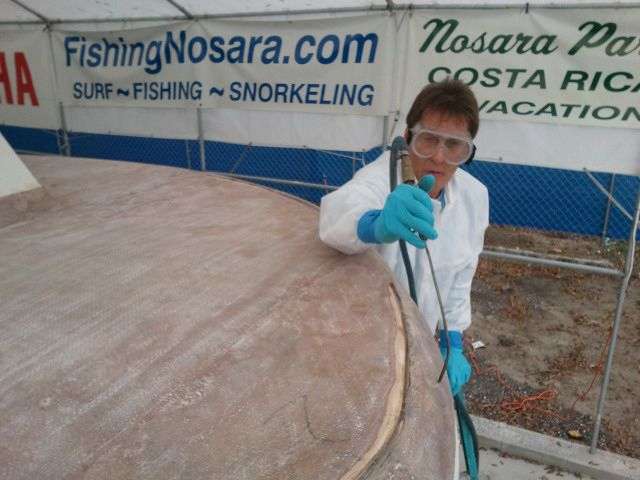
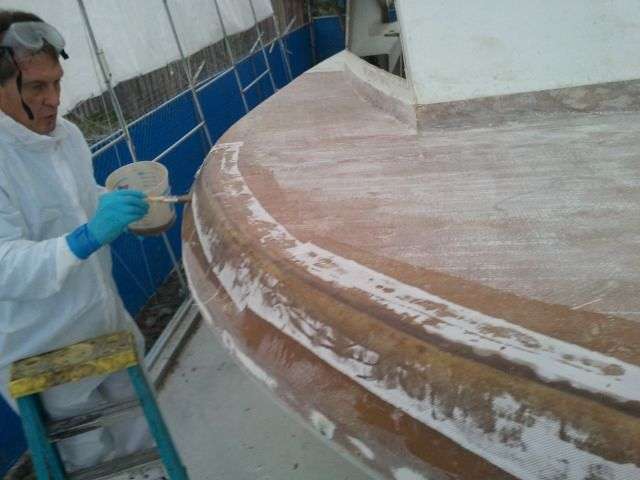
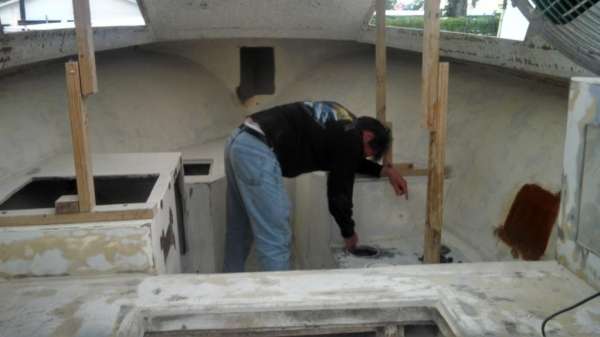
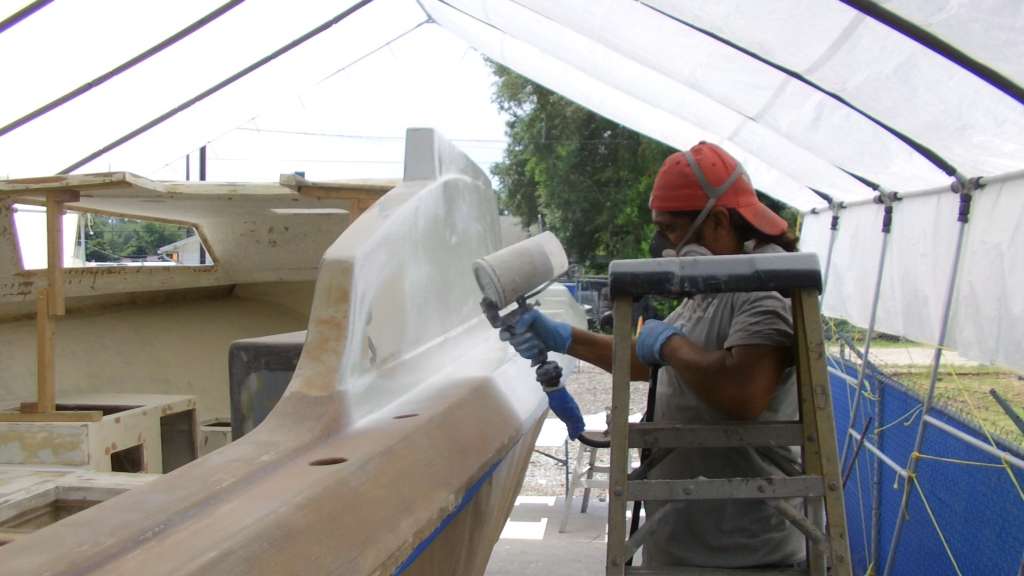
In these pictures Craig Sutton, Captain Jack, and Craig Jr. are inspecting the currently installed inboard powerplant.
We plan on selling this motor soon and converting this hull for outboard Yamahas.
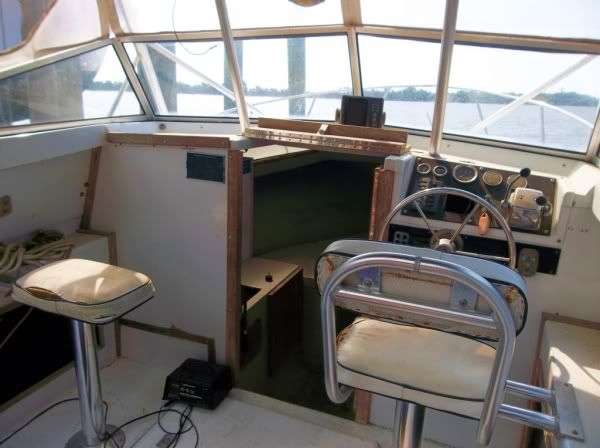
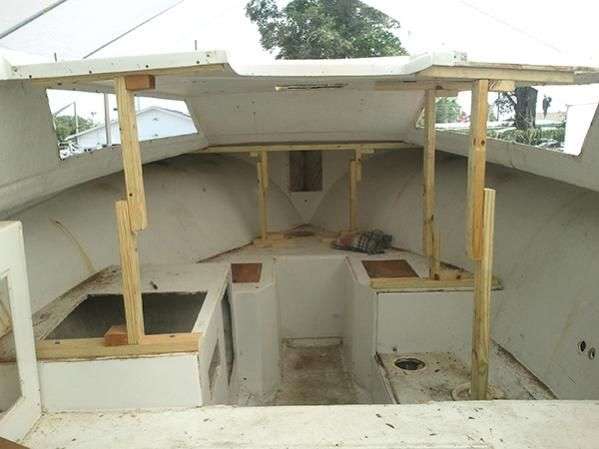
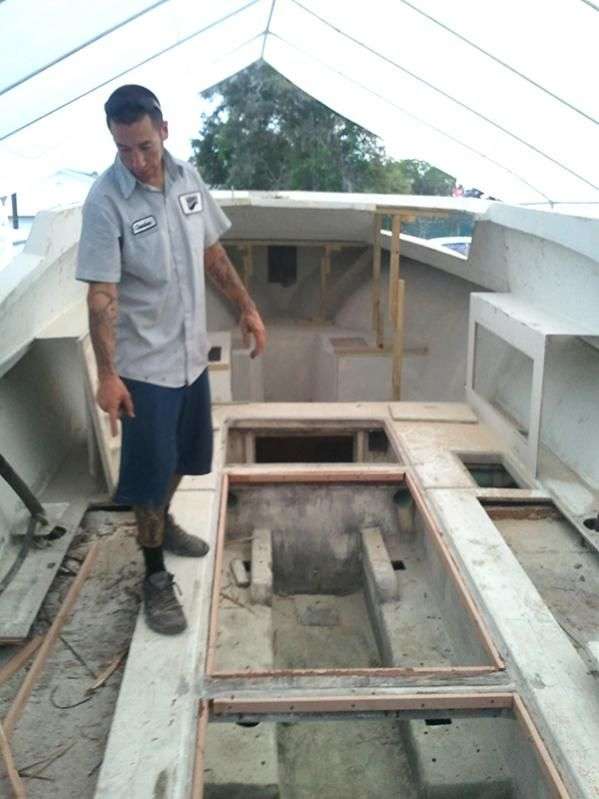
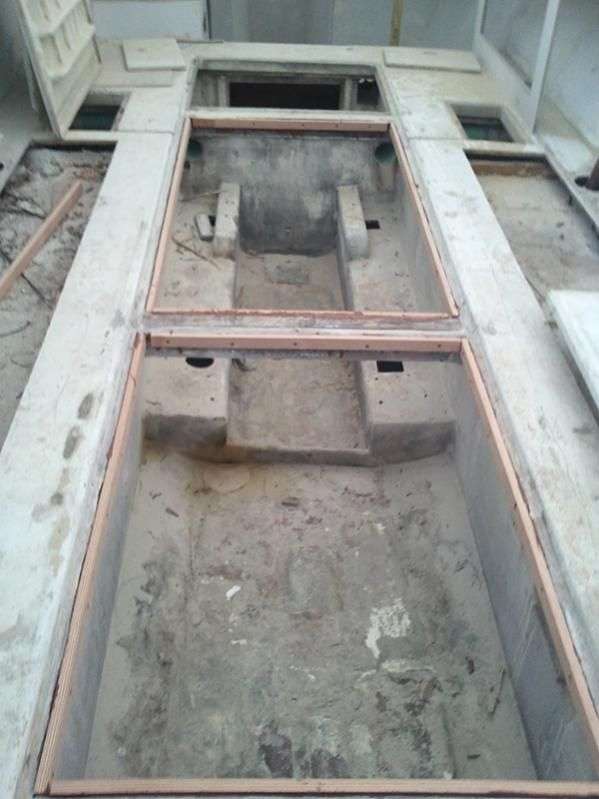
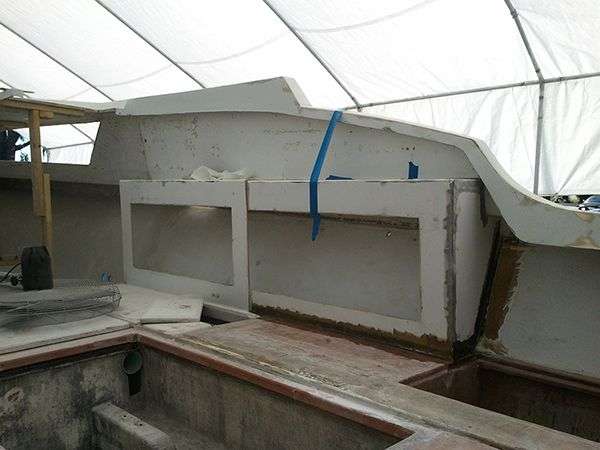
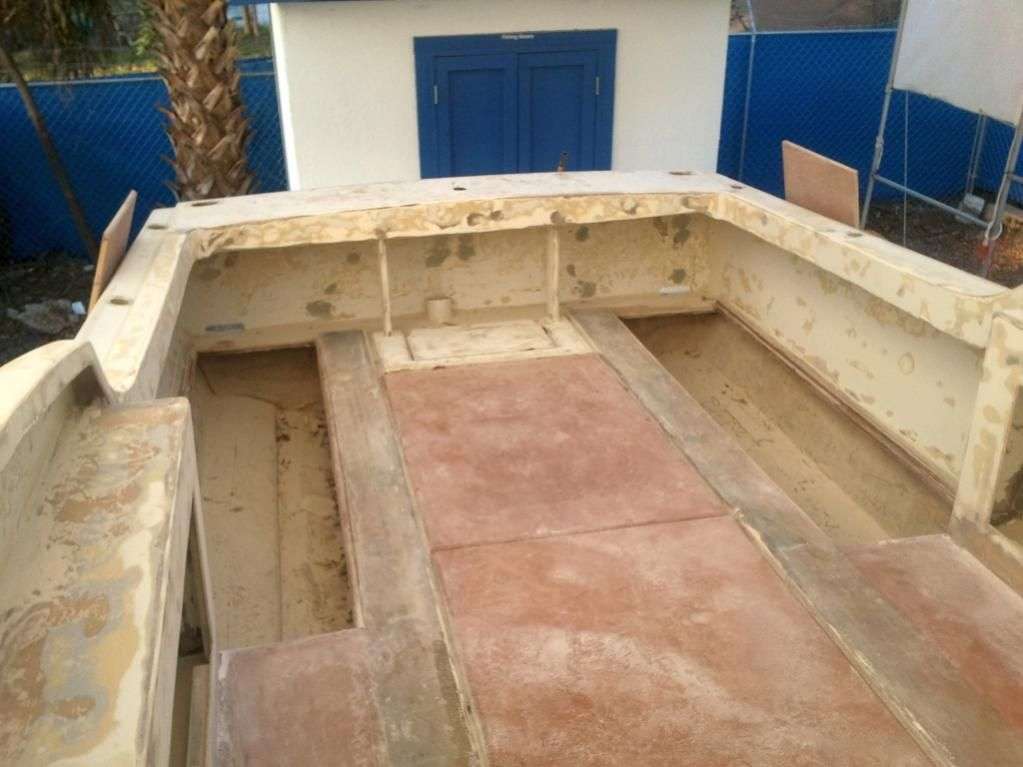
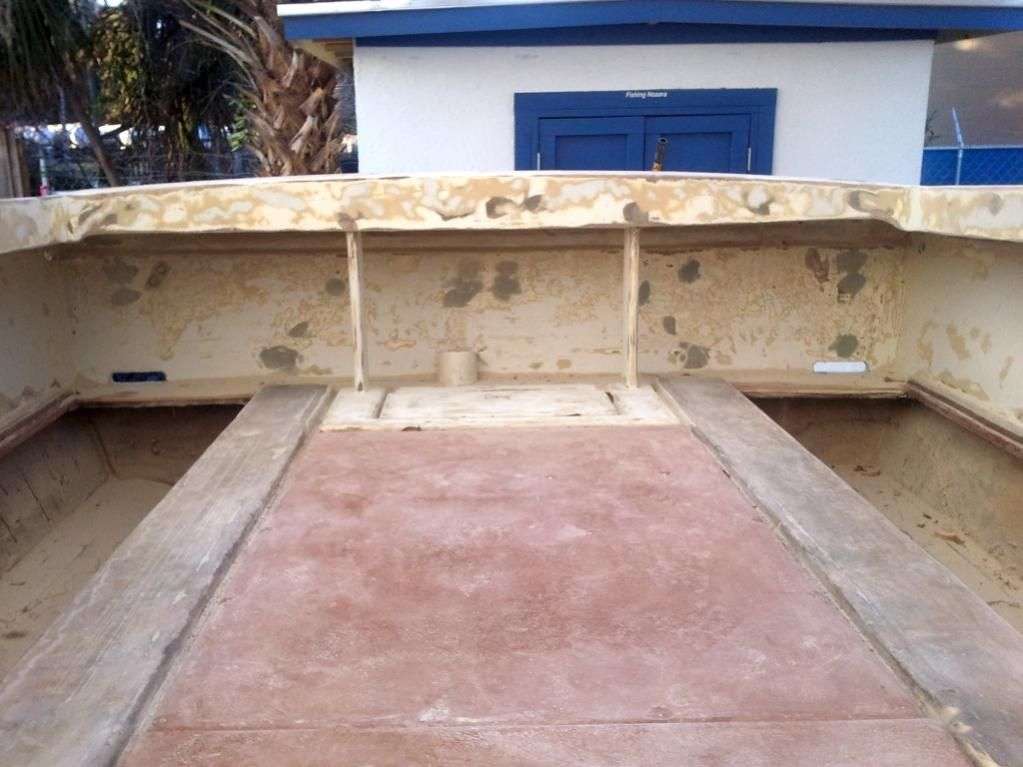
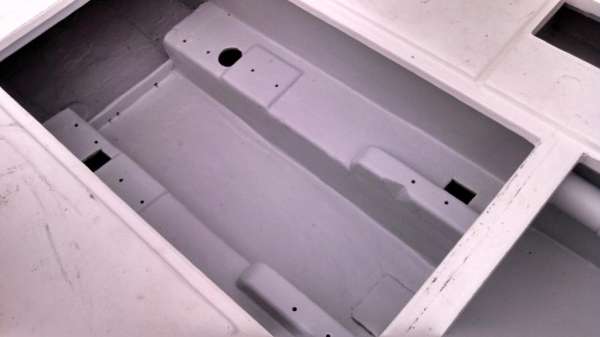
This boat is in technically sea-worthy, but the soft floors and rusted bolts are a sign that a full refit is in order. Fortunately, the core pieces are in place and the majority of this boat’s needs are time and energy-based rather than costly price-wise.
Craig negotiated a fair price for this boat and we were pumped to throw in a week in Nosara in exchange for a price break. We look forward to getting this boats prior owner Earl Newton down to our little slice of paradise either this year or maybe sometime next year…he may even get to fish on the Discoverer!
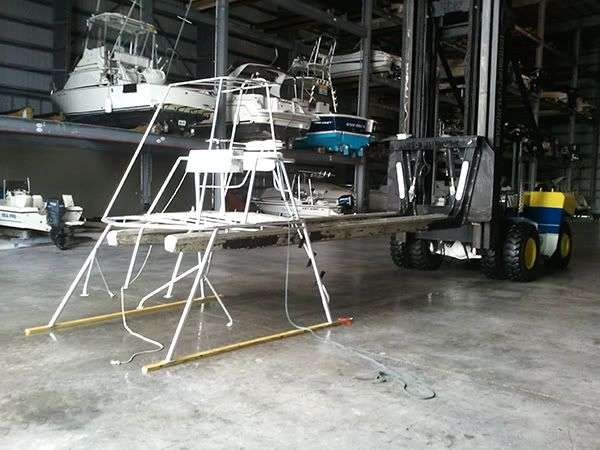
April 14, 2012 – Day 4
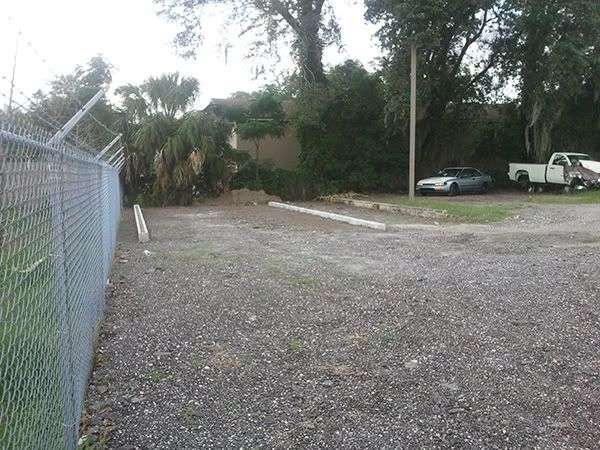
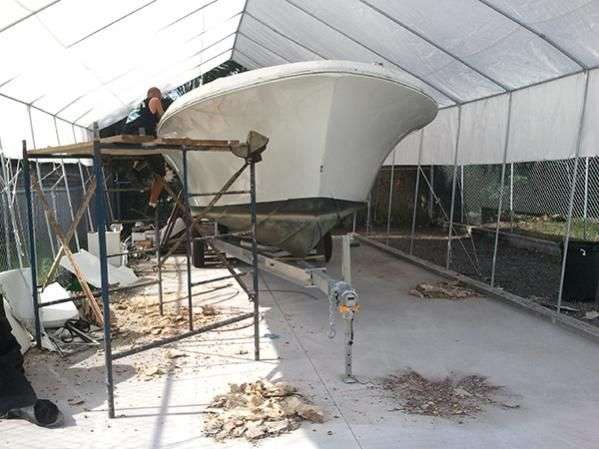
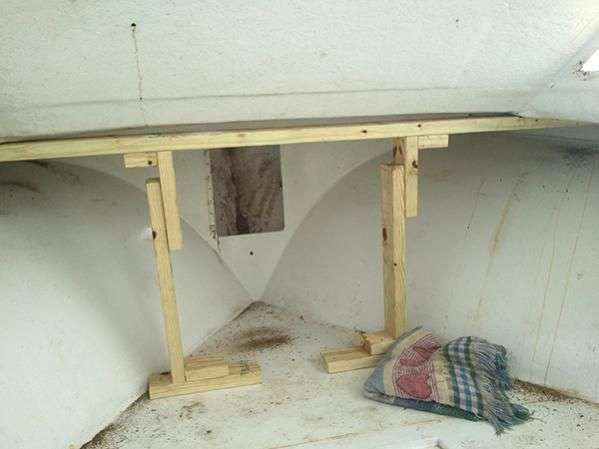
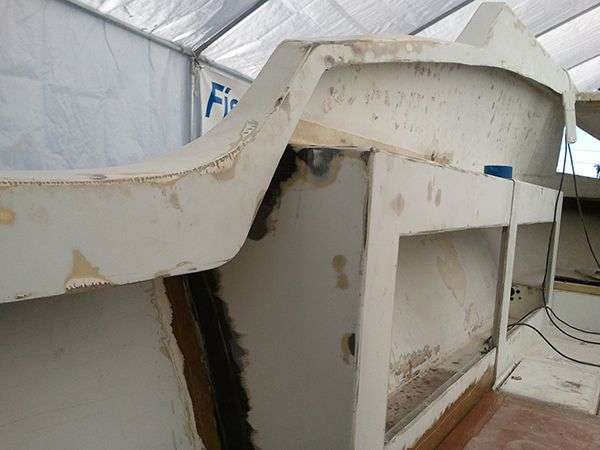
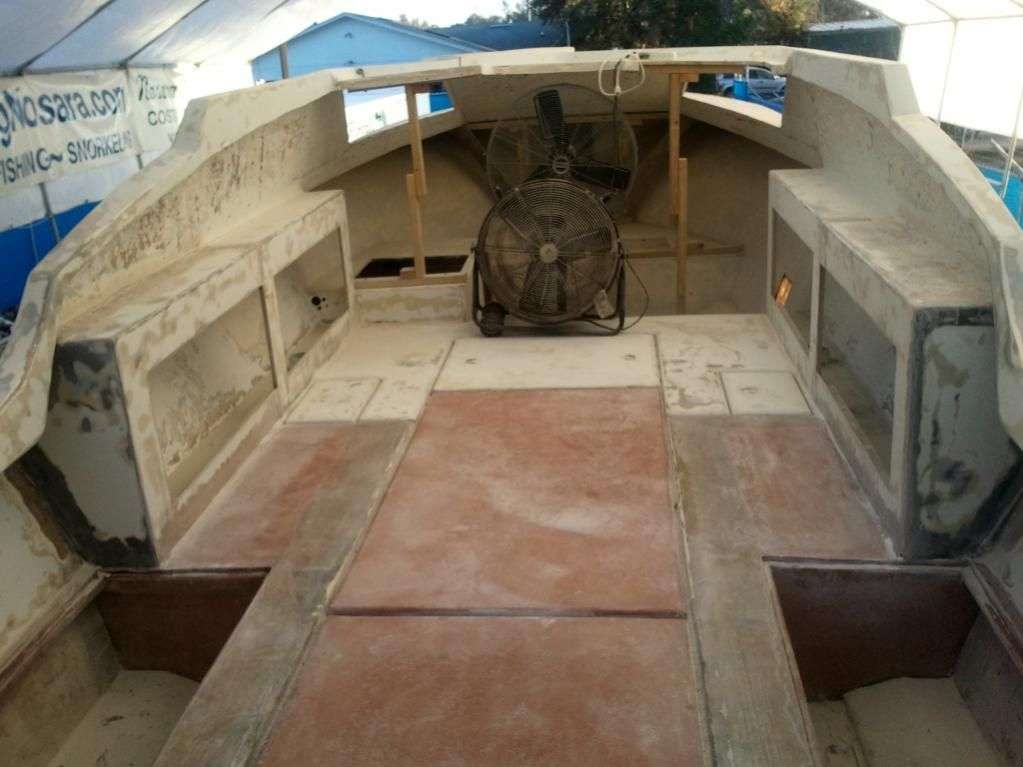
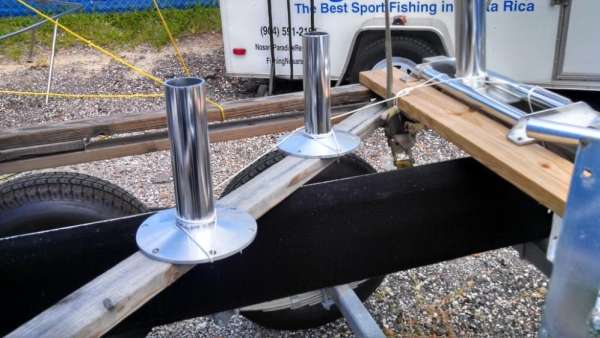
Shortly after the glow of finding our new project hull wore off, the team had to address some very tangible obstacles. First off, we had no facility to store this boat nor a boat trailer capable of hauling it.
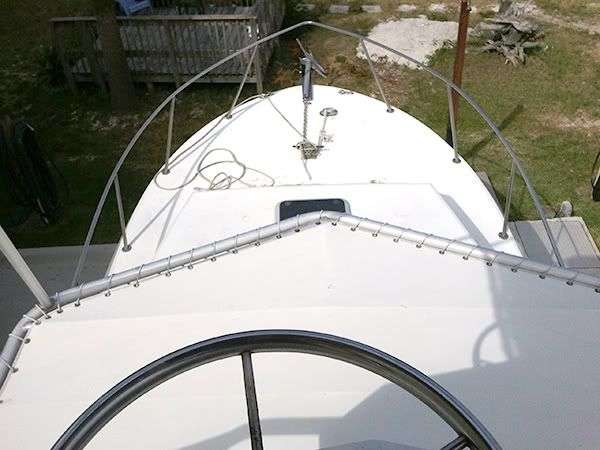
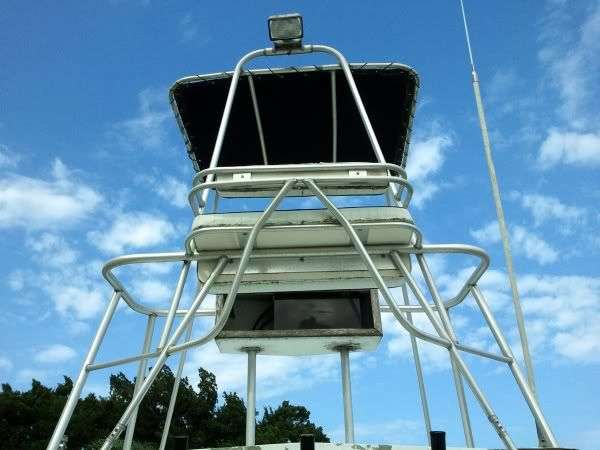
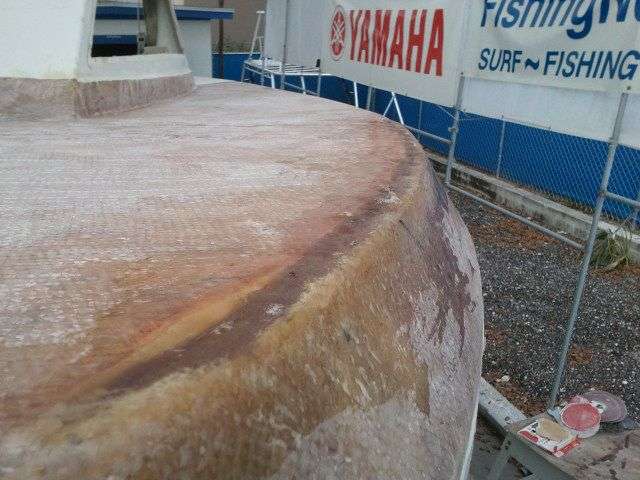
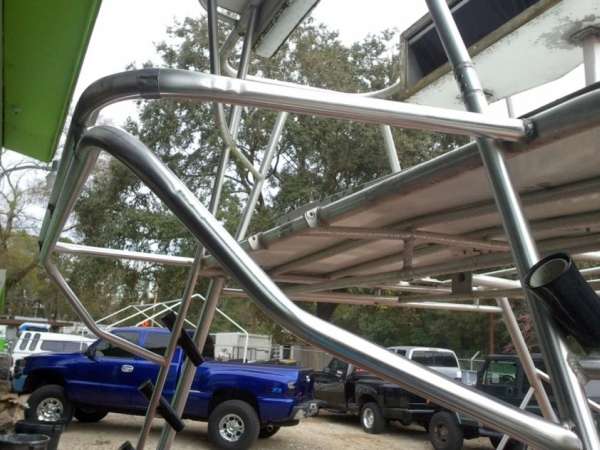
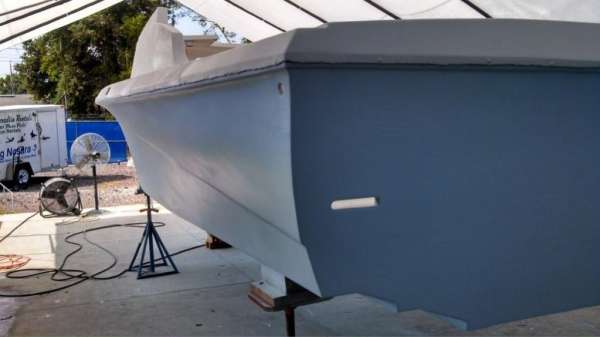
Even if we could haul it, the flying bridge on this boat stands at 26 feet. We will modify the tower to fold down into the cockpit so we can trailer this boat through the narrow winding roads around Nosara, but as she sits today the top is permanently erect.
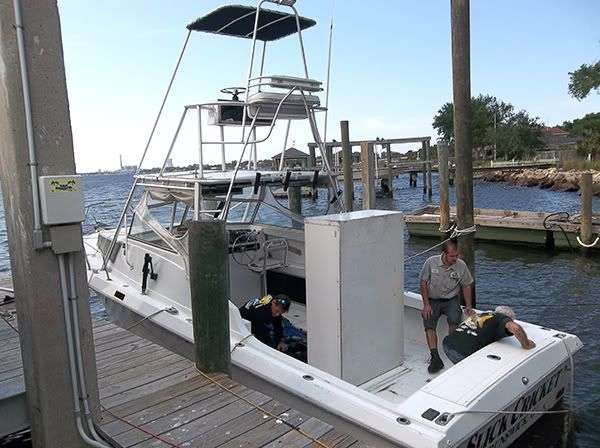
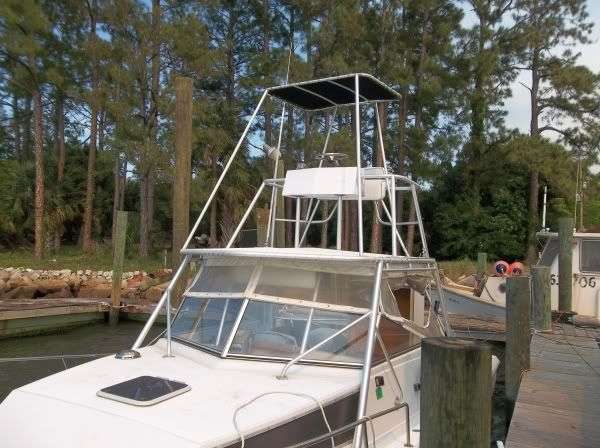
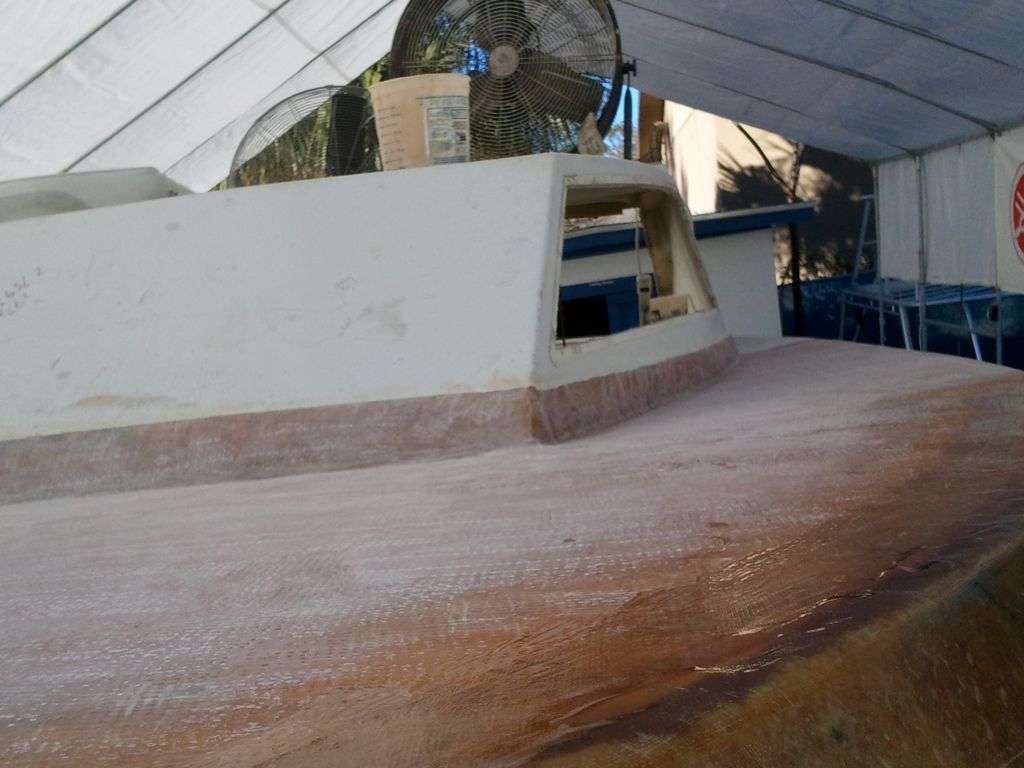
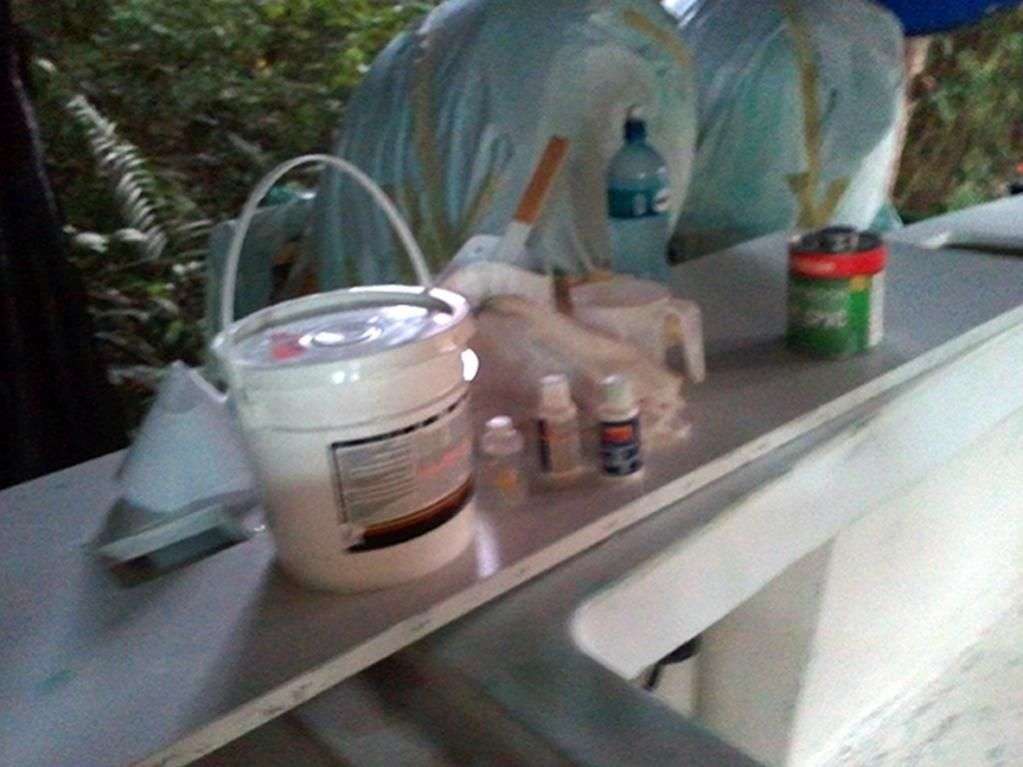
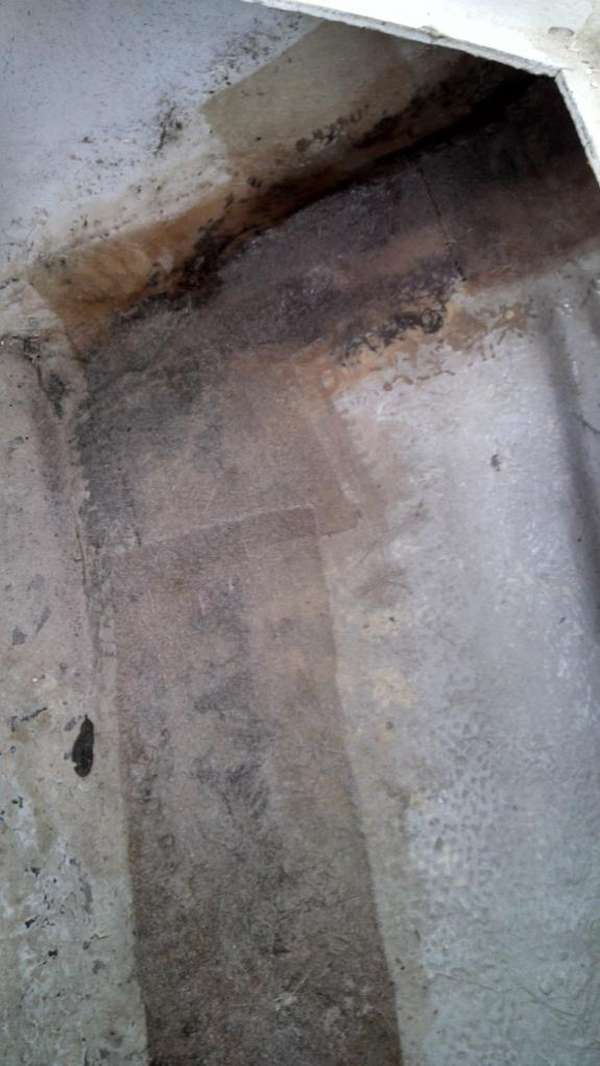
Here’s what we can surmise about the Slick Cricket as she was purchased. This is a 1982 T-Craft 30 foot hull with a Cummins B Series Diesel inboard powerplant backed by a TwinDisc Transmission; this vessel was formerly flagged as the Miss Jessi until 1994 when this high-end motor/trans combo was installed.
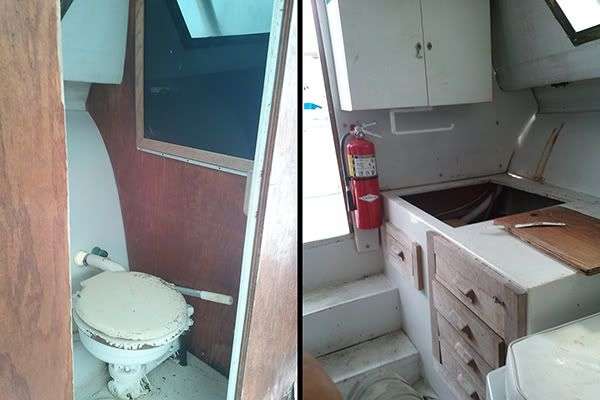
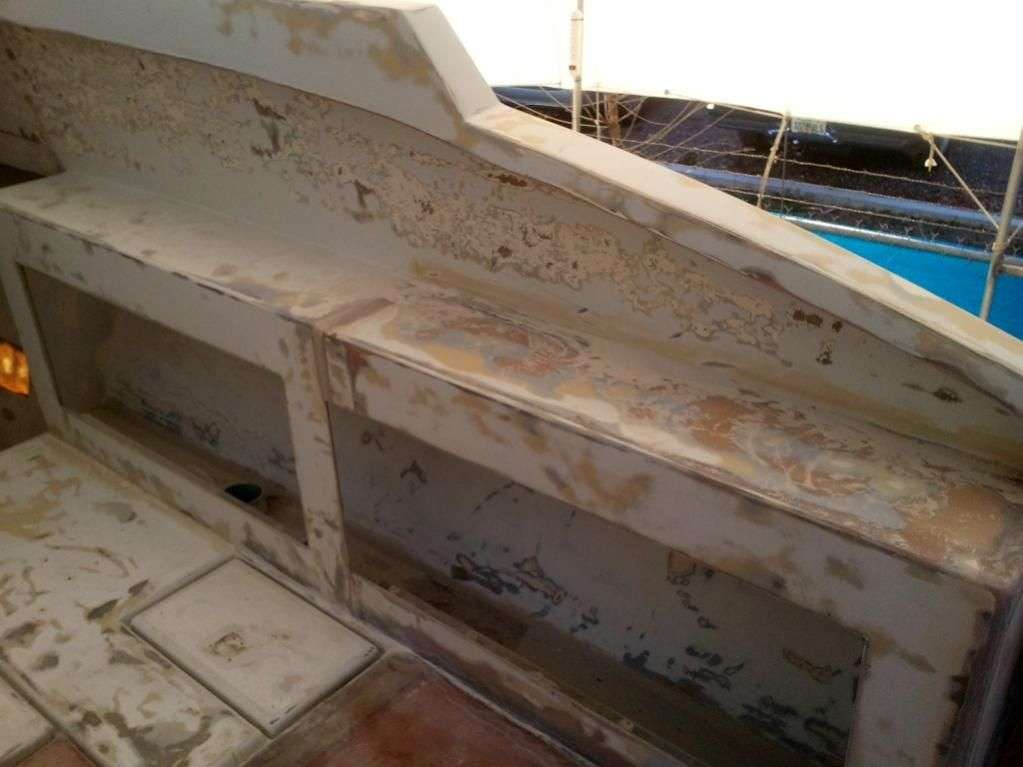
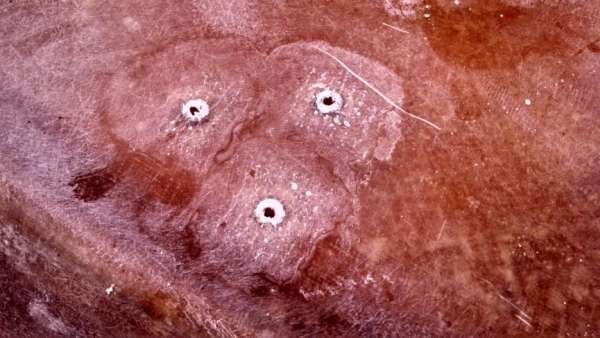
The rod holders, rub rail, and other through hole fittings are secured with wood screws rather than through-bolts. Virtually none of these important fittings have 5200 sealant in place making this hull a potential sponge of water intrusion.
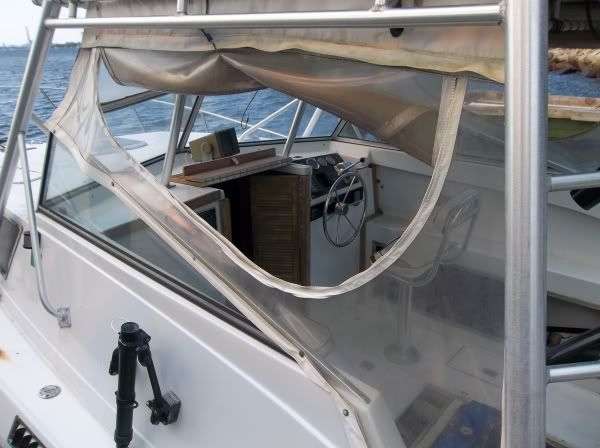
Also all of the marine fabric throughout the boat is mildewed and rotted so there will be significant sewing needs. Lastly there is a ton of layout changes in store from the rod holders to the fuel fillers…everything must go!
Basically this boat feels ‘slapped together’ and presents a different challenge from our last boat build. The Wanderer was a tight vessel when we began the rebuild; conversely the Discoverer must restored to a level of strength and quality that she has never known.
This seems like a good time to discuss the most chronic obstacle we will be facing on this build: We have virtually no money for this project.
The revenue generated by FishingNosara and Nosara Paradise Rentals barely covers the overhead, maintenance, staff and expenses inherit in running a resort in Costa Rica.
The reason we are building another boat is not that we have $100,000 burning a hole in our pockets, but because there were too many times this last season where we had to turn away clients because the Wanderer was already booked. Though we predict that the Discoverer will be a success it will not begin generating money until she is in the water.
Why am I telling you this? Well, if you want to see the perfect way to do boat work in a perfect shop with an unlimited budget and all the right tools then you may want to look elsewhere.
The FishingNosara build team consists of car mechanics, handymen, auto detailers, computer nerds, and other oddball characters and we build boats with hand tools and guts.
Over the last 5 years we’ve built world-class sportfishing vessels in a patch of dirt in the rainforest:

In an empty warehouse:
and this time we’re doing it in the backyard:
Naturally you can take away lots of boat building knowledge from this project and hopefully it helps you on your own boat projects. However it is our hope that all marine enthusiasts can draw inspiration from our commitment to hard work and creativity in overcoming obstacles rather than just throwing money at them.
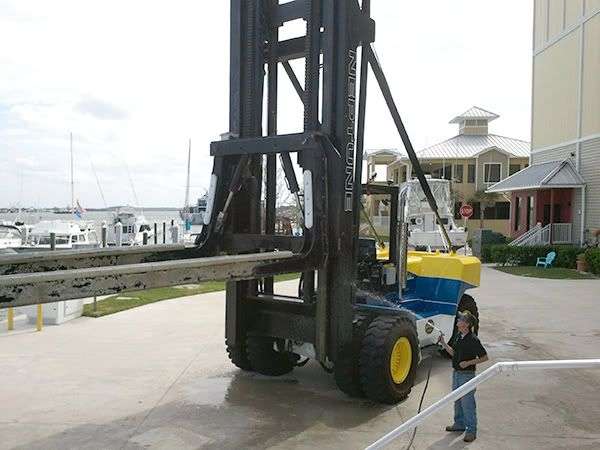
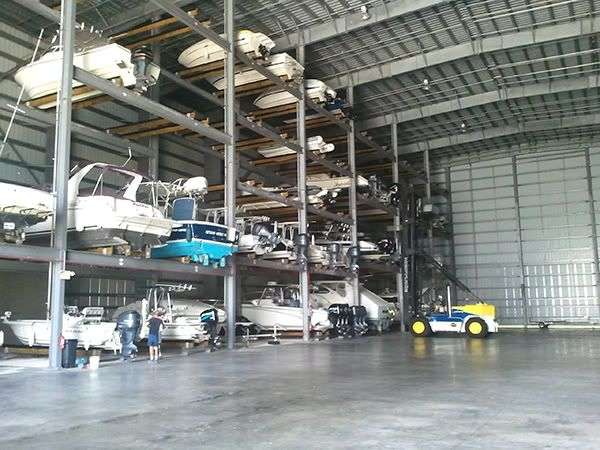
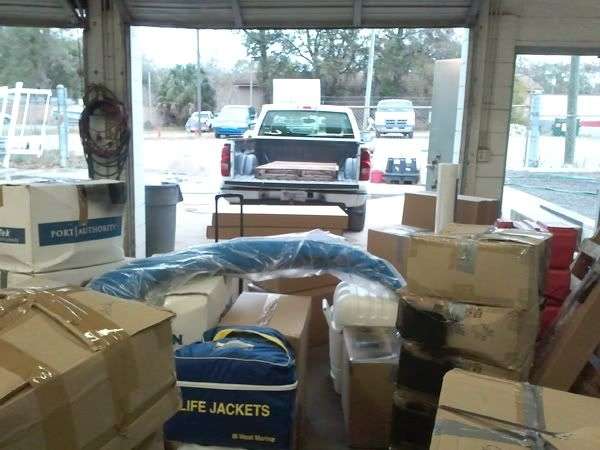
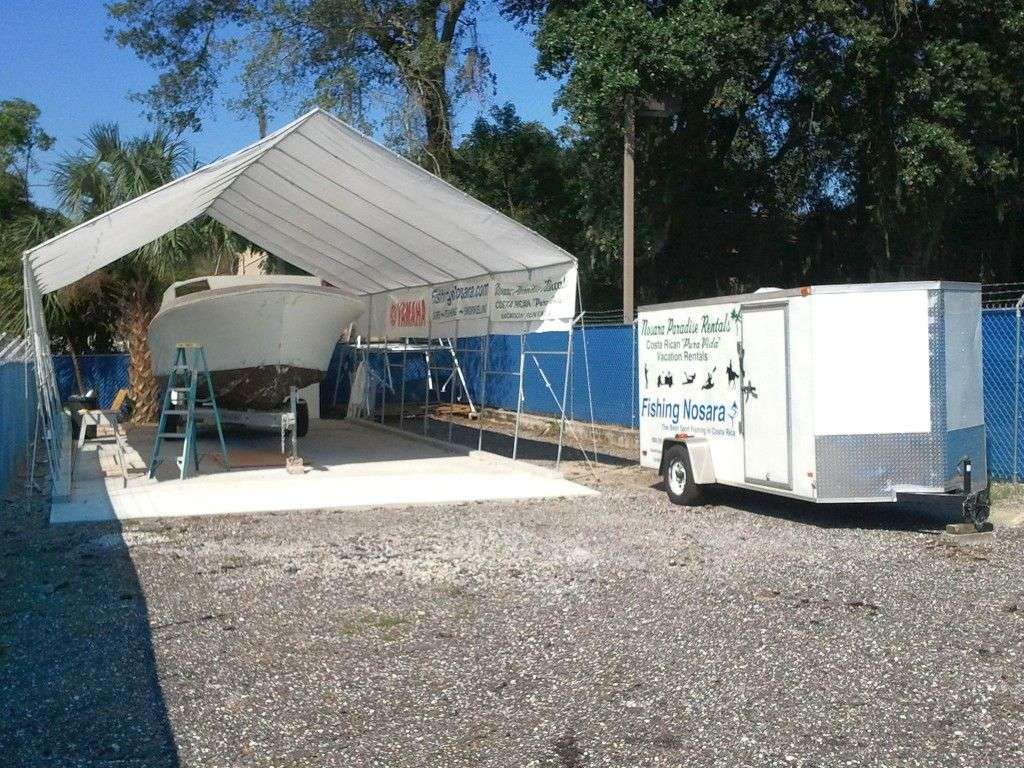
In that spirit our good friend Marcus over at Ft. George Island Marina came through for us huge. He offered us a slip for the boat in his warehouse, use of their fork lift, and space in the yard to knock out the first phase of the project.
We did him a favor by tearing out all the moldy fabric so we wouldn’t make a mess of his facility.
Marcus tucked her into her slip and we all slept a little better that night.
The Discoverer was safe and sound, and we begin to search for a boat trailer and a permanent home for our new prize.
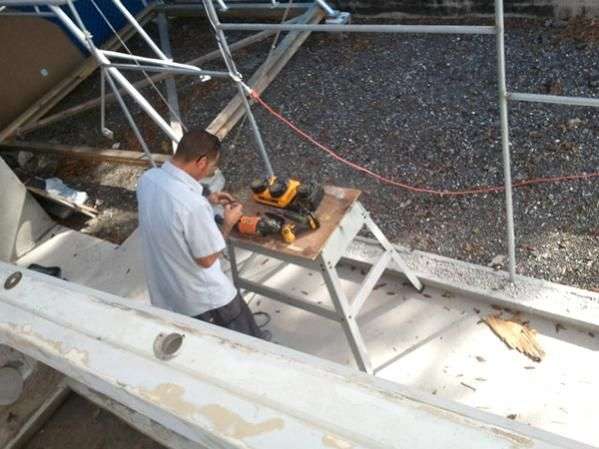
May 8, 2012 – Day 28
Matty and Captain Jack have really bad luck when it comes to rainstorms during FishingNosara projects. Let’s check the highlights:
Loading 10 golf carts into a container with only a pickup truck and one set of ATV ramps? Freezing rain.
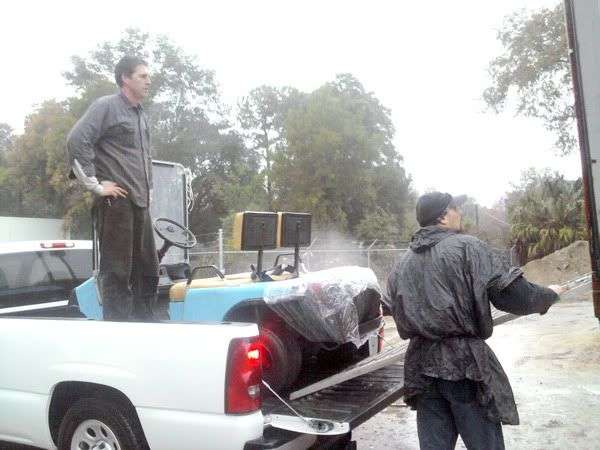
Building a pallet with all the gear for the Adventurer? Hot muggy rain.
Pulling the tower off of the Discoverer? Lighting storm with tons of rain.
Unfortunately we didn’t get many pictures of this deal since Marcus was boldly defying logic by operating the forklift in a lightning storm; I love the guts on a guy who says, “The radar says we gotta shut down in 10 minutes…I think we got time!”
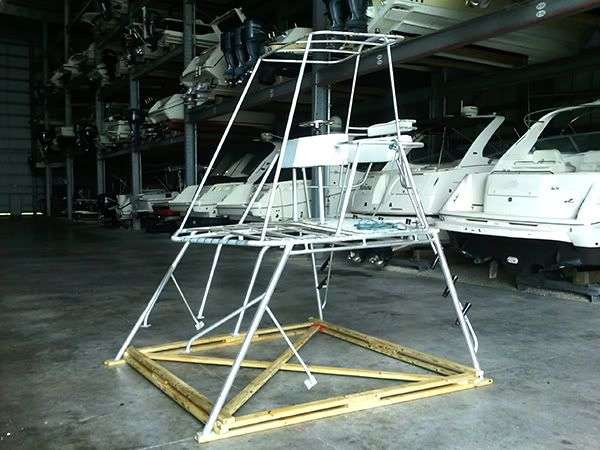
You can tell by the rain slick on the floor that we barely made it in time. It’s too bad they don’t put forklift driving in the Olympics because Marcus would bring home the gold every time.
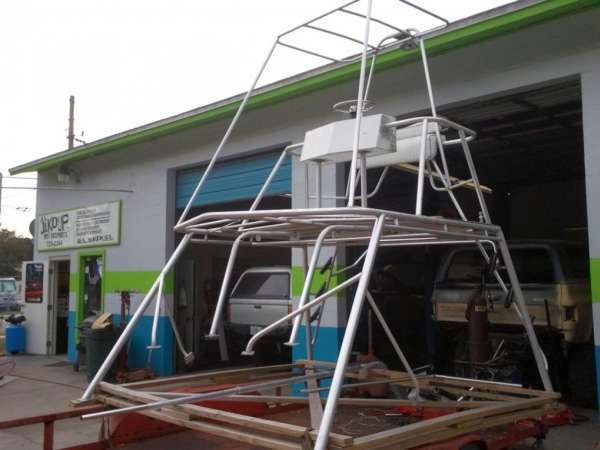
Captain Jack and Matty utilized the forklift to hold the tower up while they built a pallet-style support for the tower to rest on. This level platform will be the canvas upon which Craig Jr. executes his welding artwork so it needs to be strong and keep the tower square.

Once the rain cleared up we used a borrowed trailer to haul this monstrosity back to our shop. We’ll be setting this aside for a while as we continue to seek out a buyer for the inboard motor and settle on just the right trailer for this boat. For now we are one step closer to getting this boat on the road!
June 15, 2012 – Day 66
Enjoy the inaugural episode of The Discoverer Project. We will be presenting these video vignettes of our progress as often as possible as the Discoverer takes shape. No phony actors or multiple takes here folks, just real guys taking real risks to make a real dream come true.
In this episode we rip the motor from the hull and deliver it to our buyer. The proceeds from this sale are going straight to Magic Tilt Trailer and we expect delivery of our boat chariot in about 10 days.
July 15, 2012 – Day 96
August 12, 2012 – Day 124
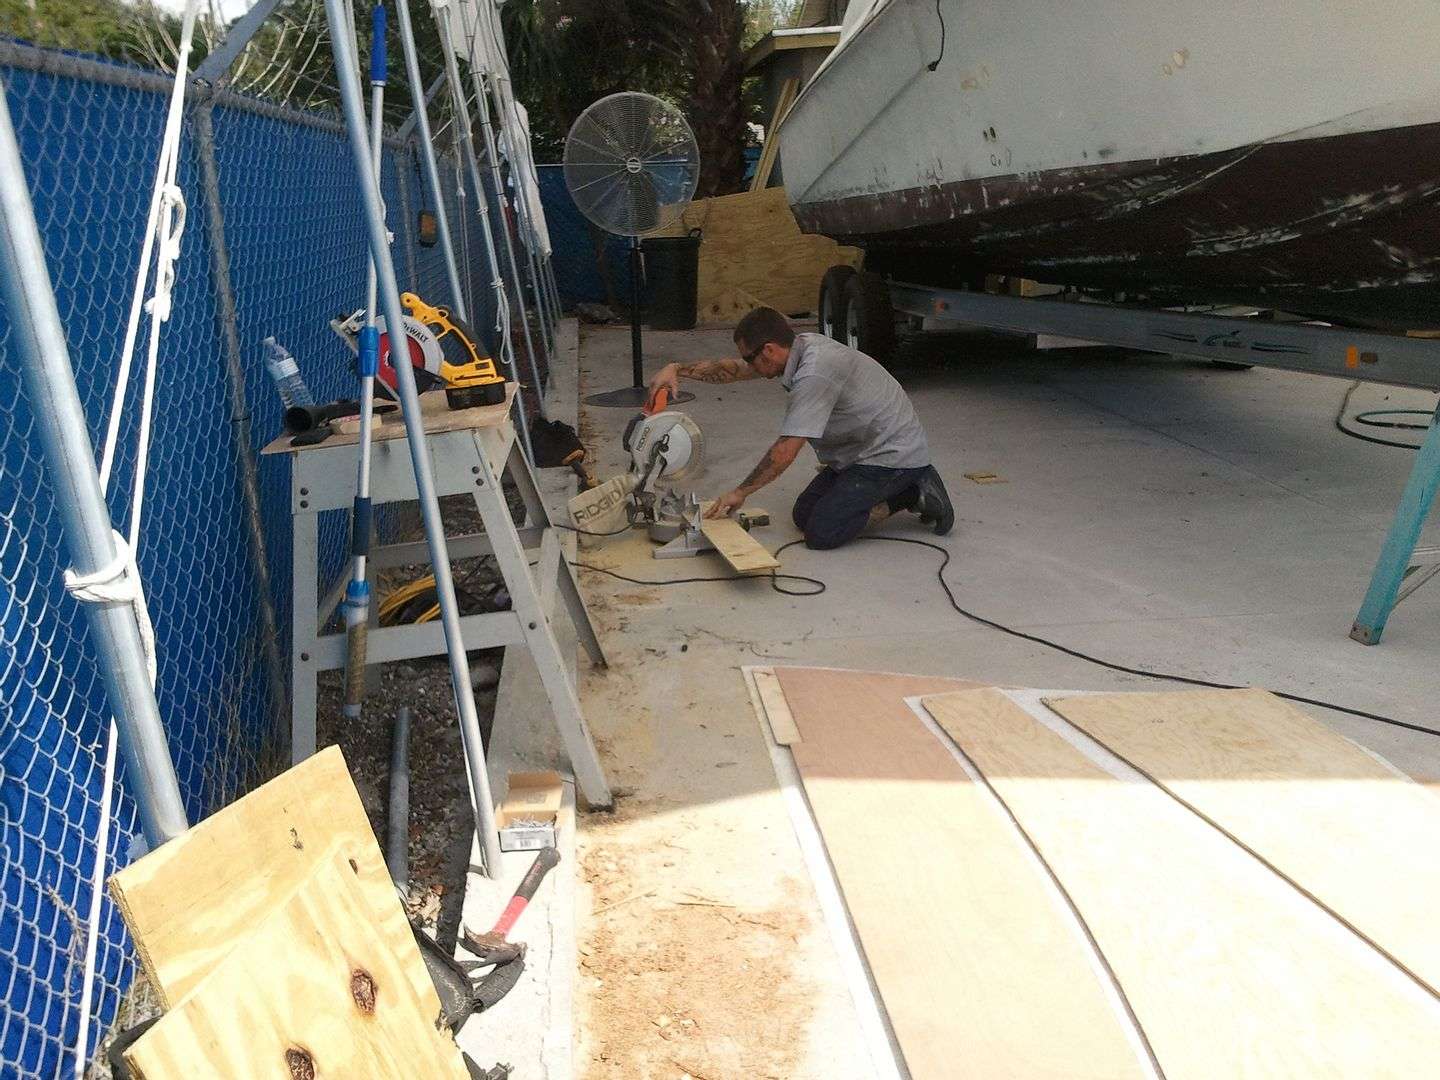
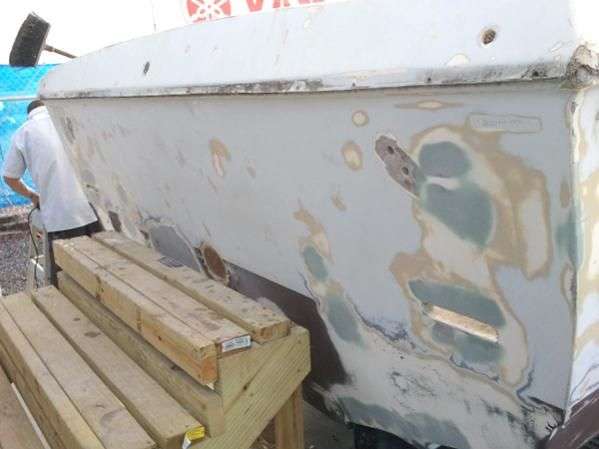
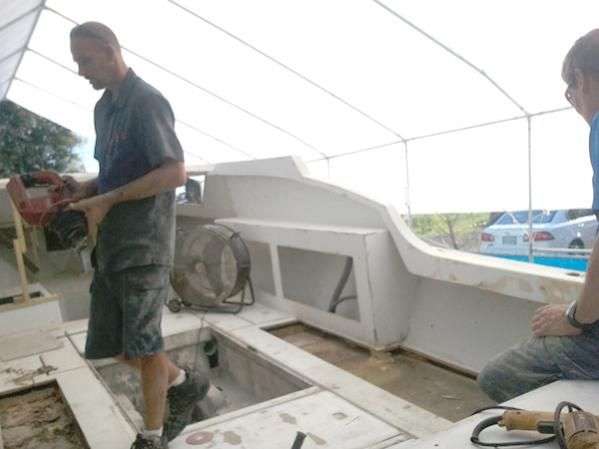
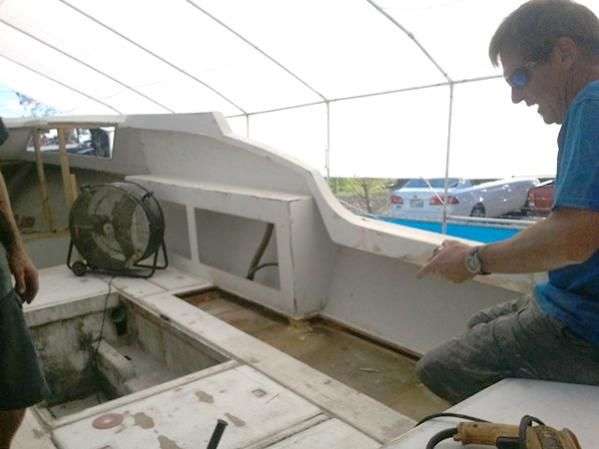
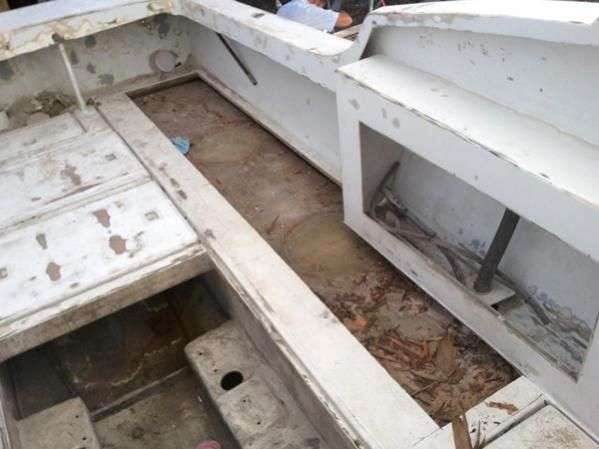
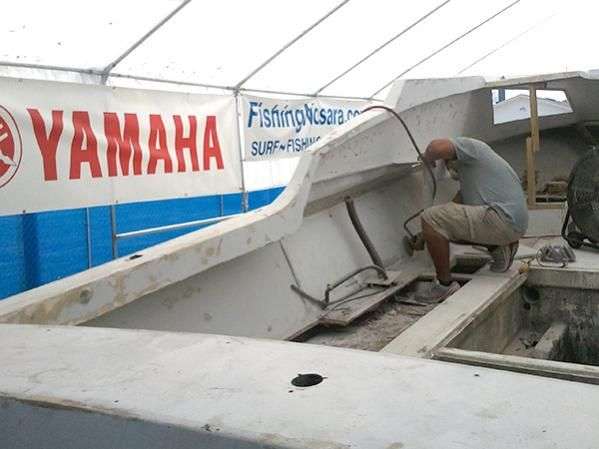
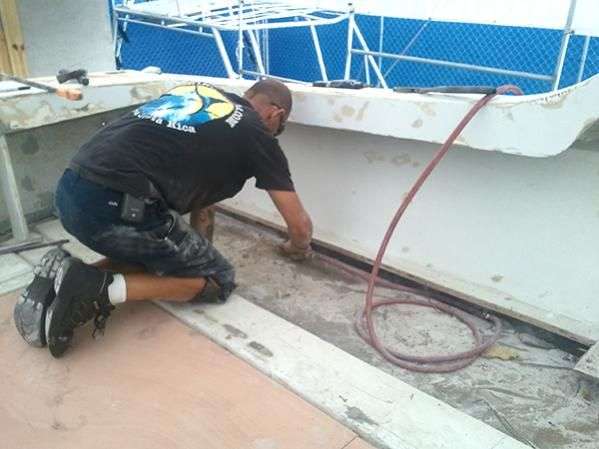
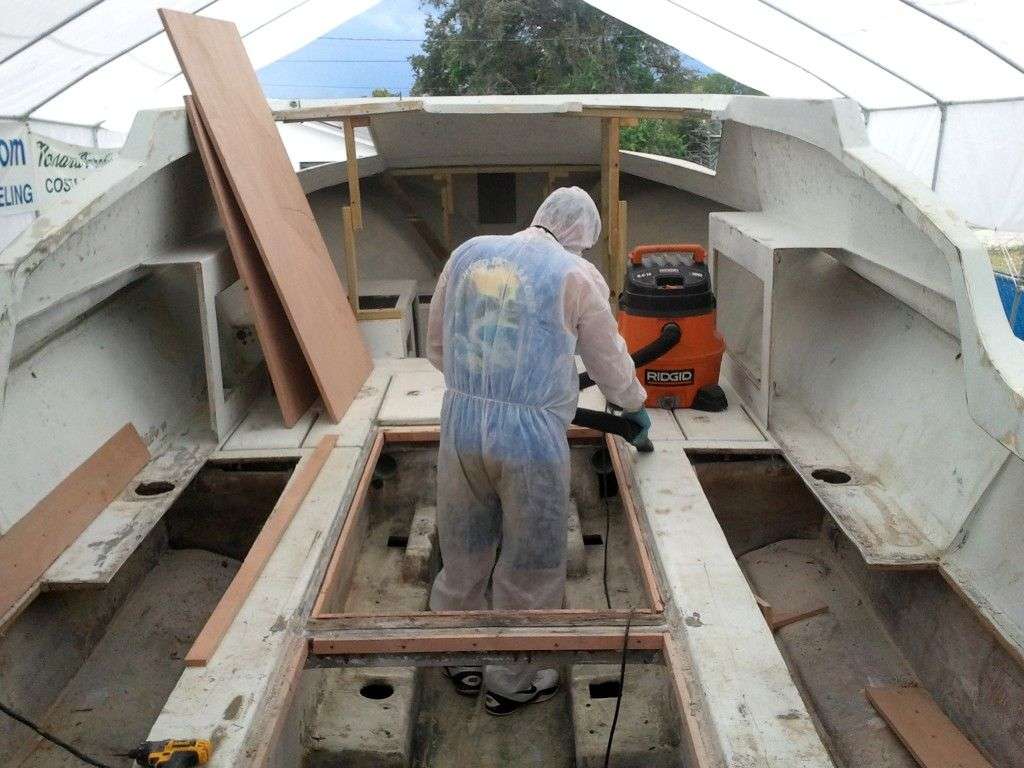
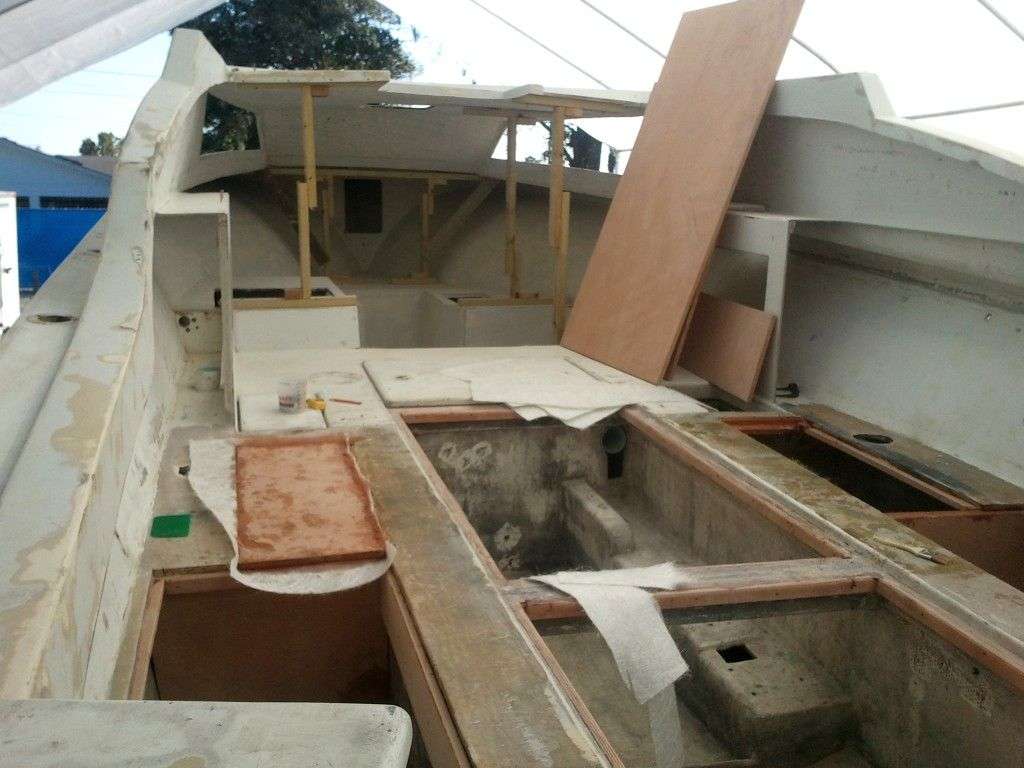
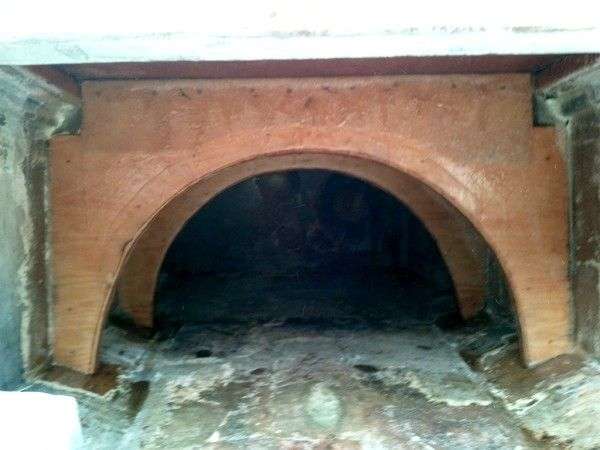
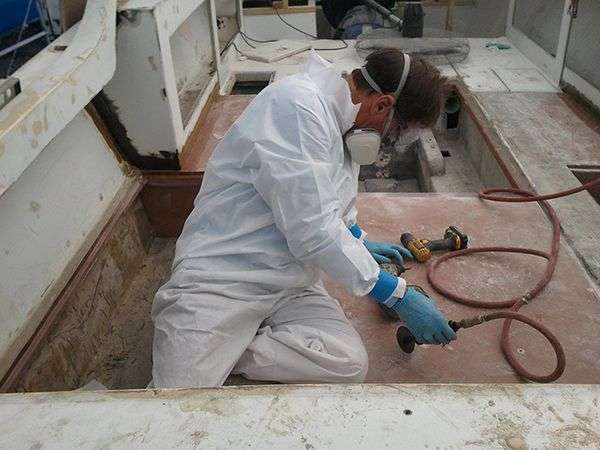
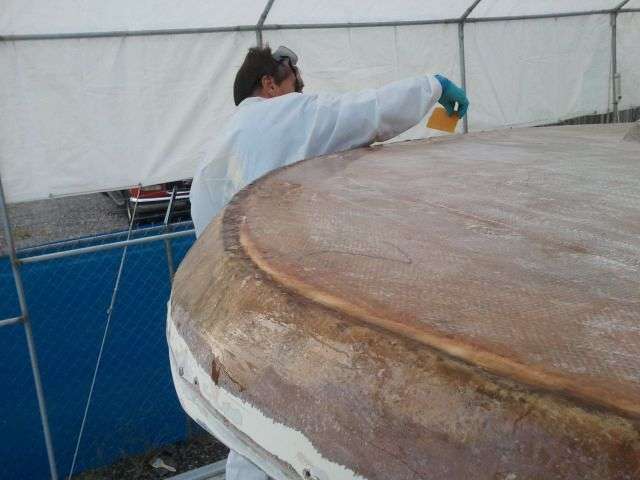
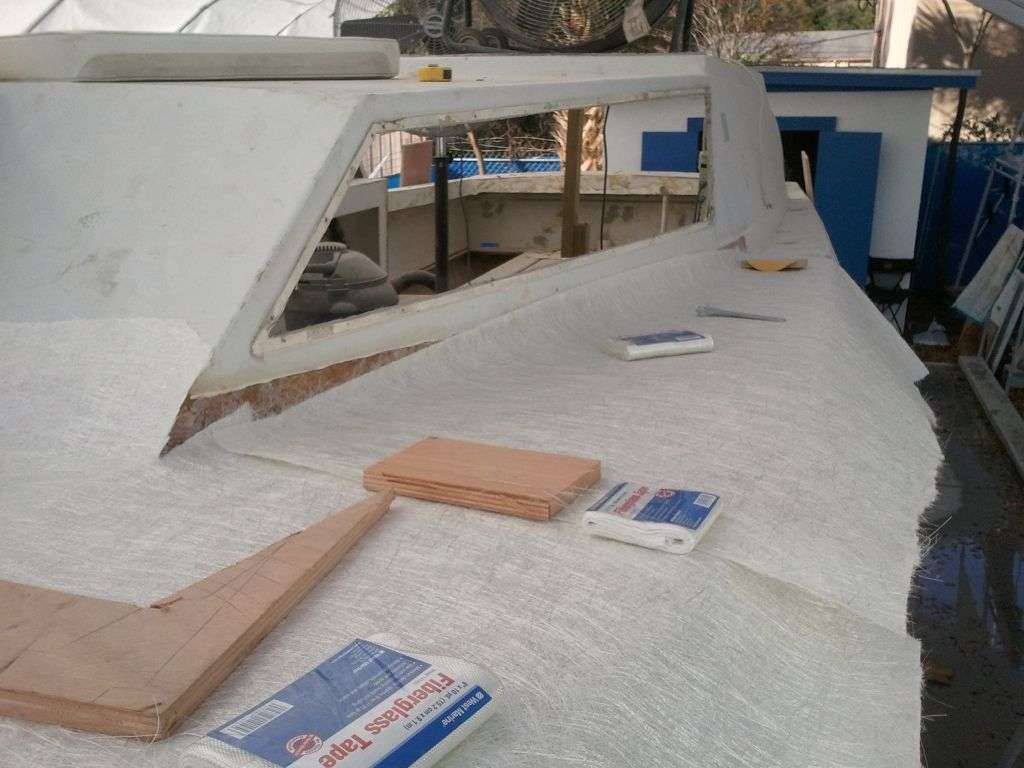
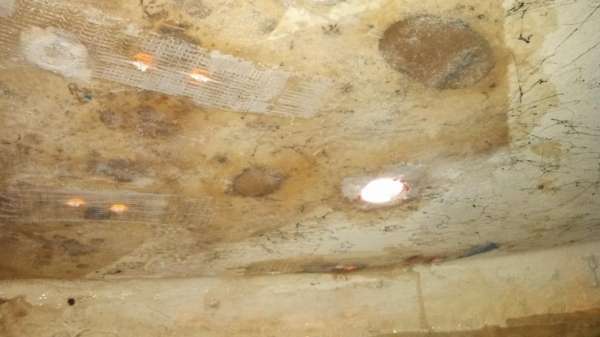
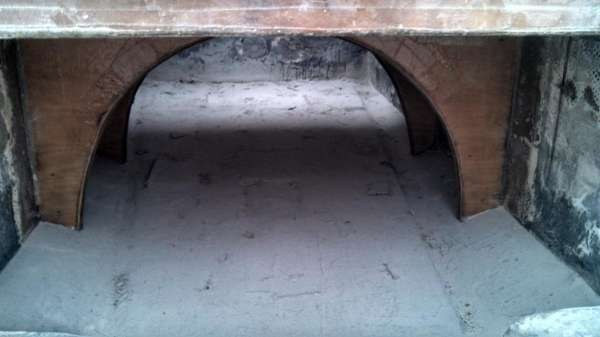
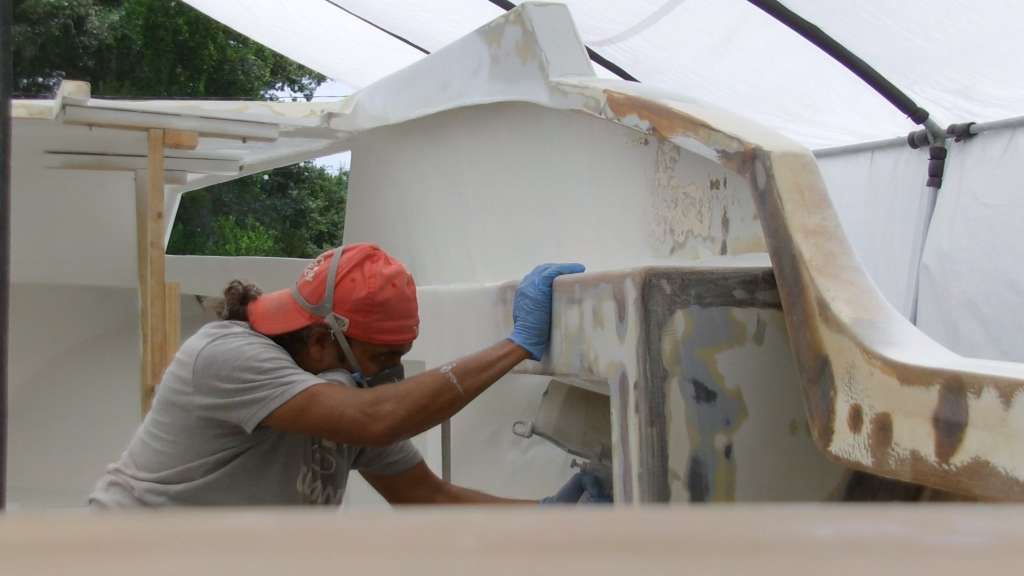
Howdy all. Work continues on The Discoverer Project as we strip all of the thru-hull fitting and other metal from the hull. The idea is to have a totally naked hull with most or all of the holes filled in before we paint.
Episode 3 will detail the demolition process, but for now take a gander at these pictures as we stake up the cabin then remove the partition walls.
We will use these old dividers as patterns for new partitions which we plan on making out of 3/4in Starboard. This will save weight without sacrificing strength.
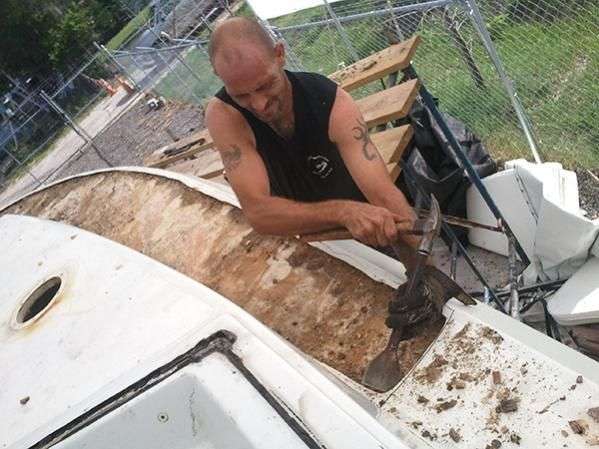
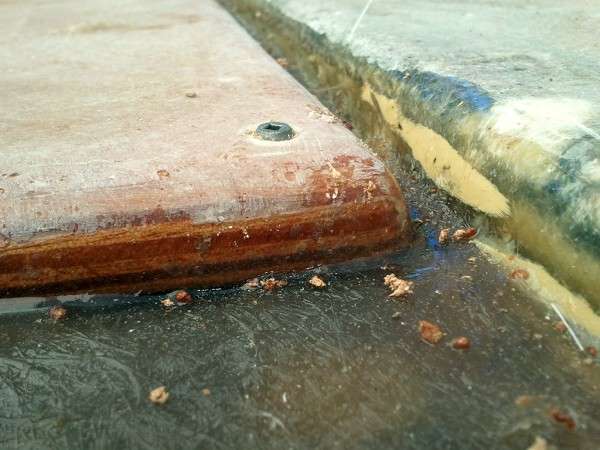
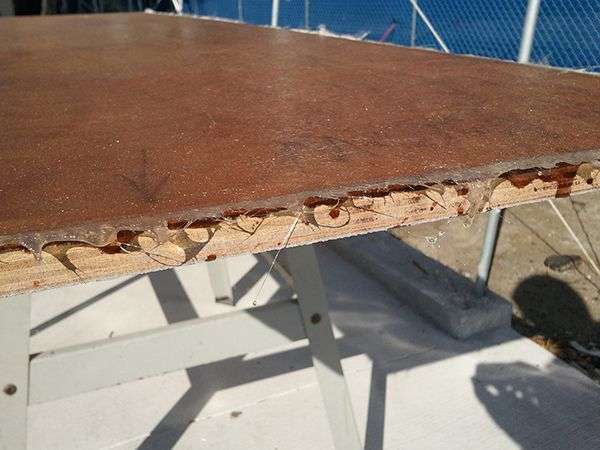
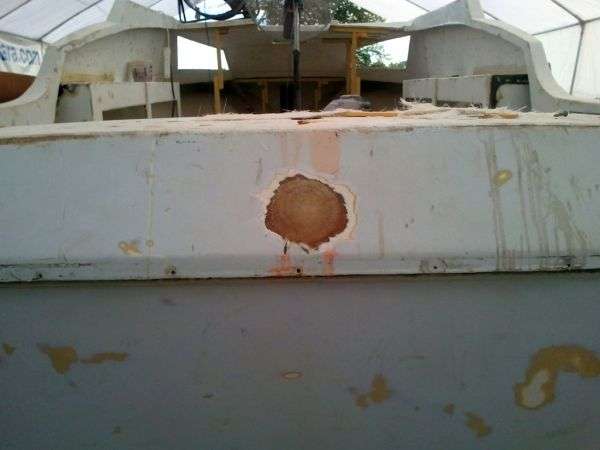
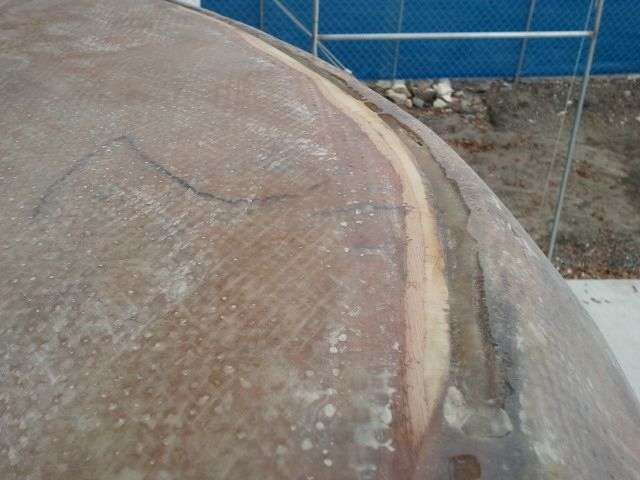
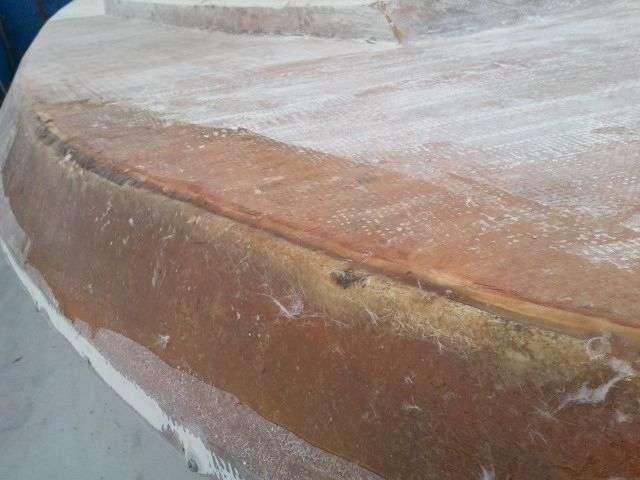
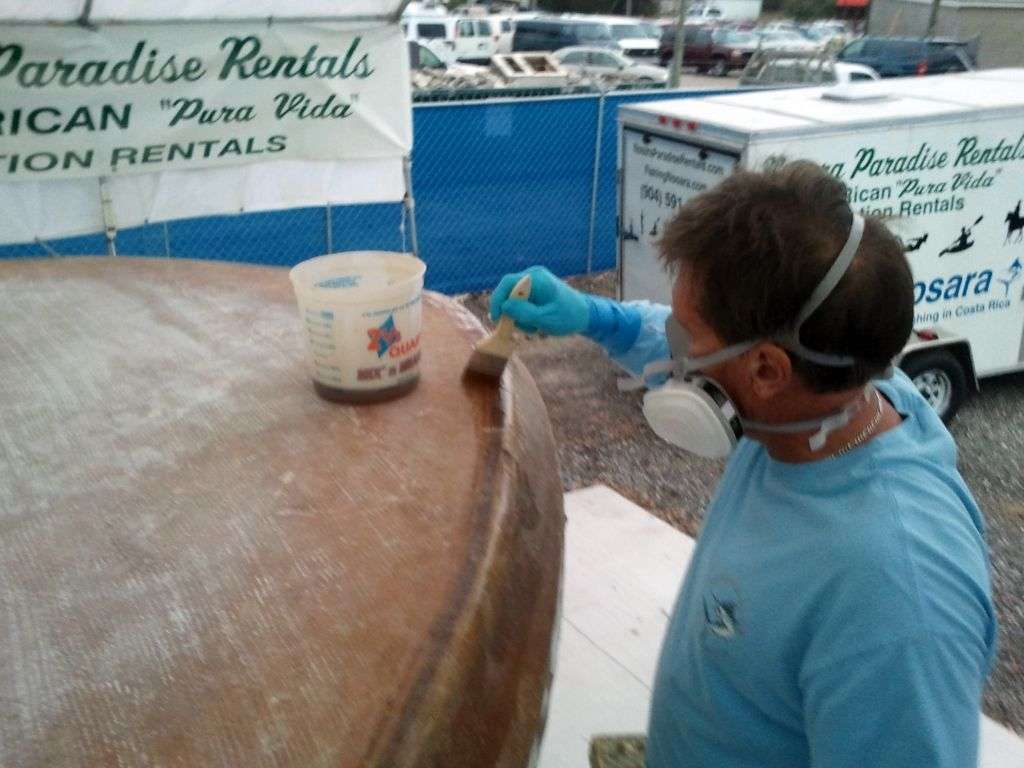
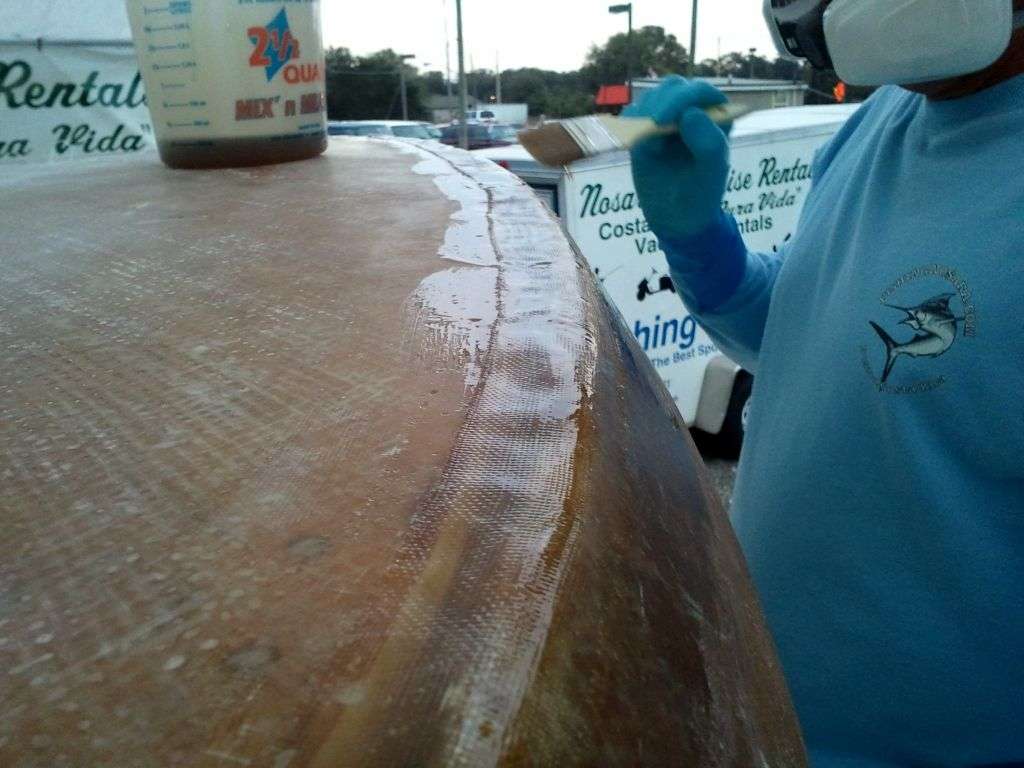
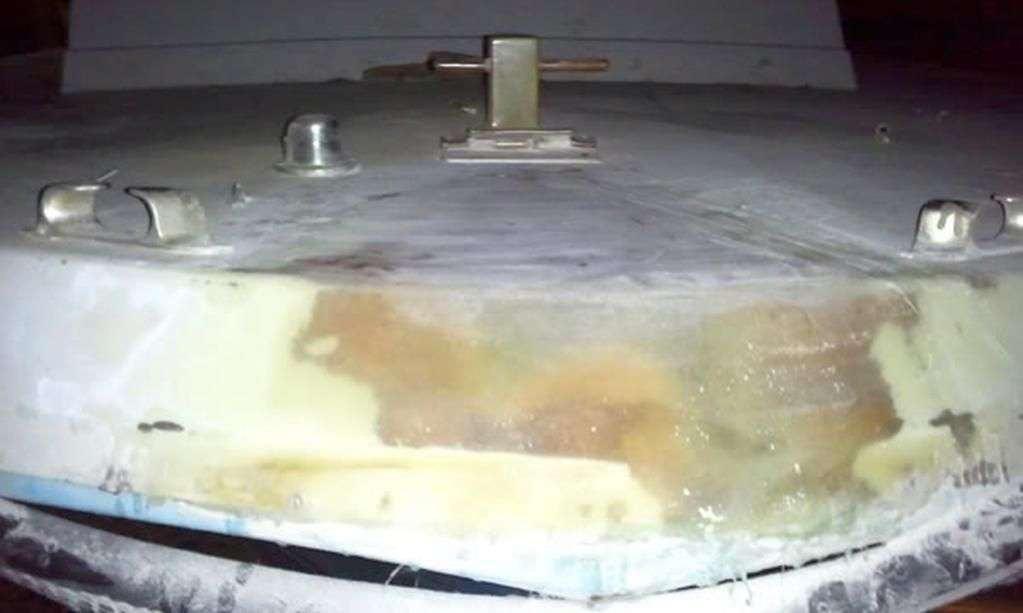
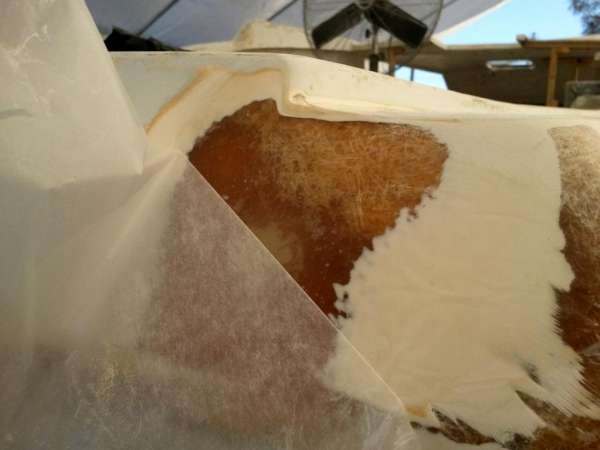
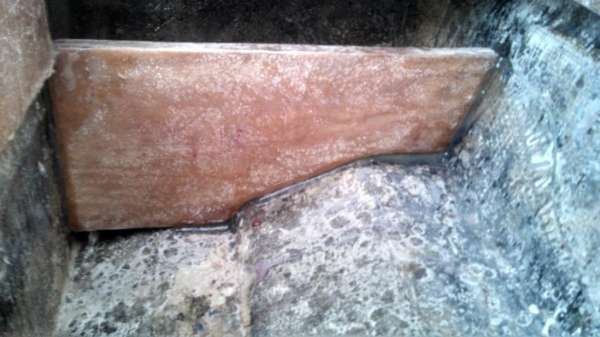
Jack has been busy cutting off the top layer of fiberglass on the nose and scraping away the old rotted wood underneath. The jacklegs who put this boat together last time got cheap and didn’t use any 5200. The soupy, muddy condition of the ‘wood’ proves once again how valuable that little white tube can be.
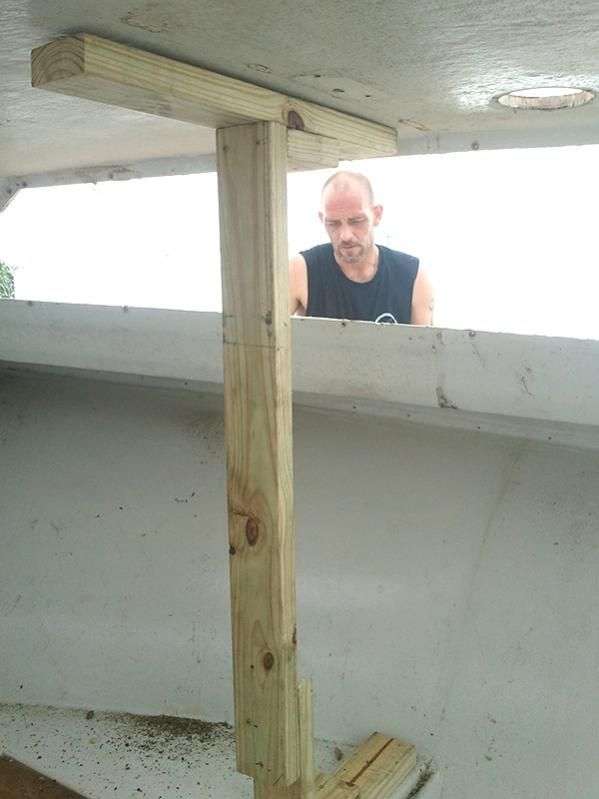
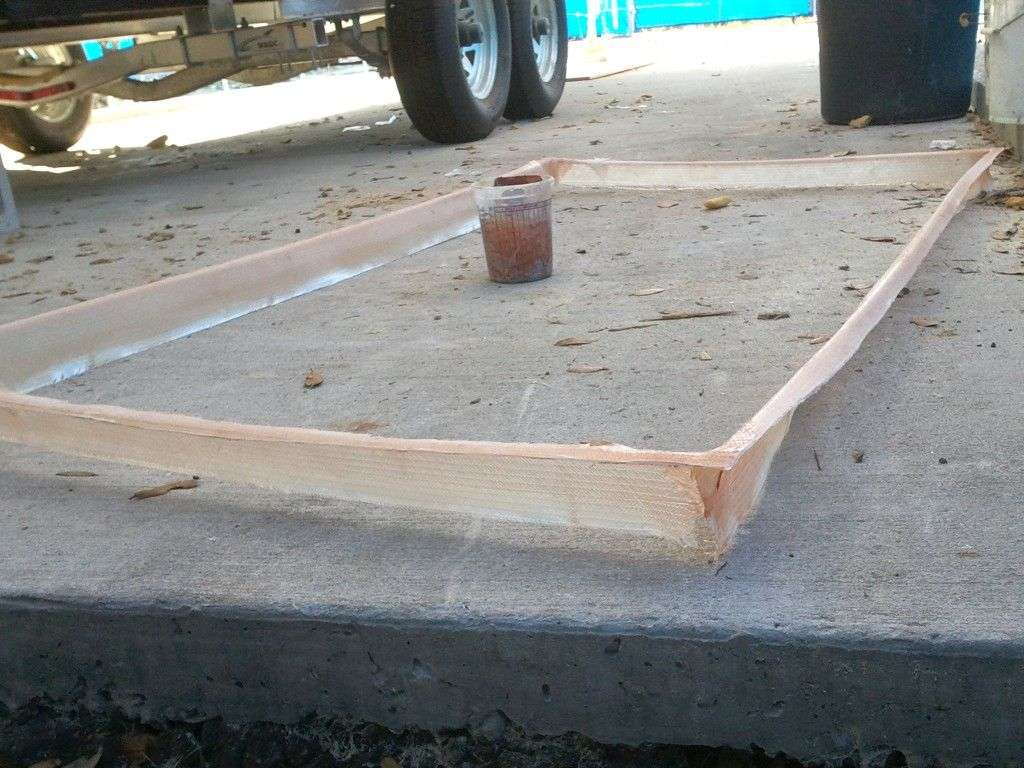
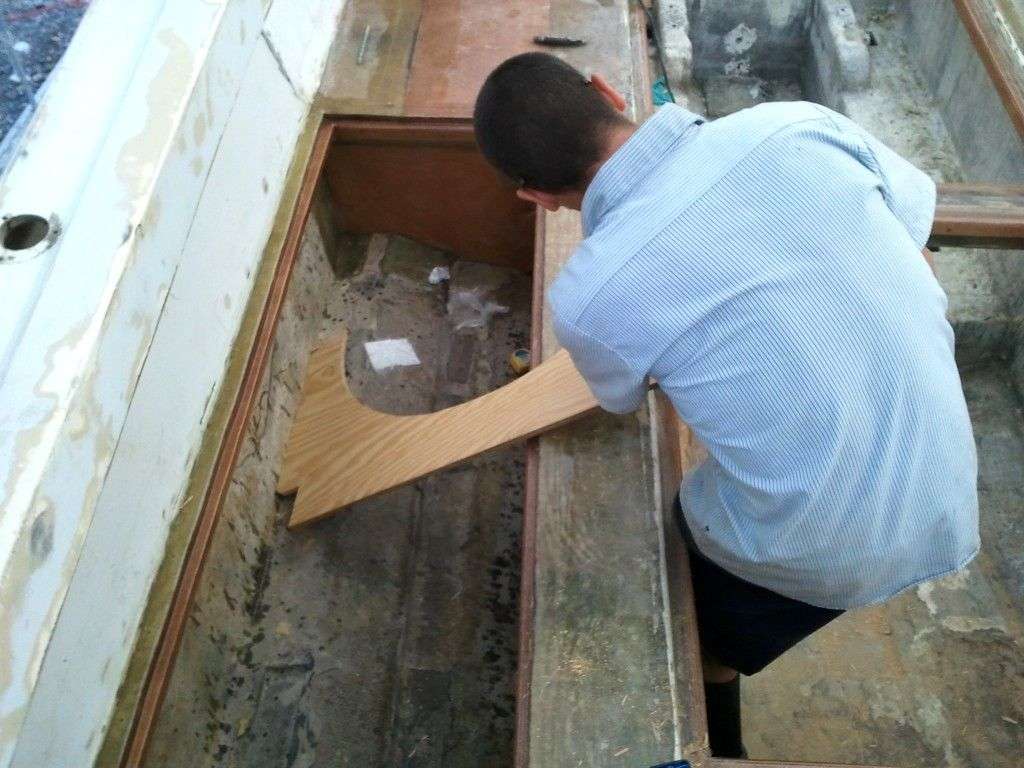
Craig and Jack are just beginning to figure out how best to secured our new dancefloor of marine plywood to the nose of the Discoverer. We are using this thin board as a beginning template, but we’ll wait and see how this elements turns out.
Episode 3 should be posted sometime this week, until then we welcome your comments on our progress so far.
Florida Sportsman Boat Building Forum
August 24, 2012 – Day 136
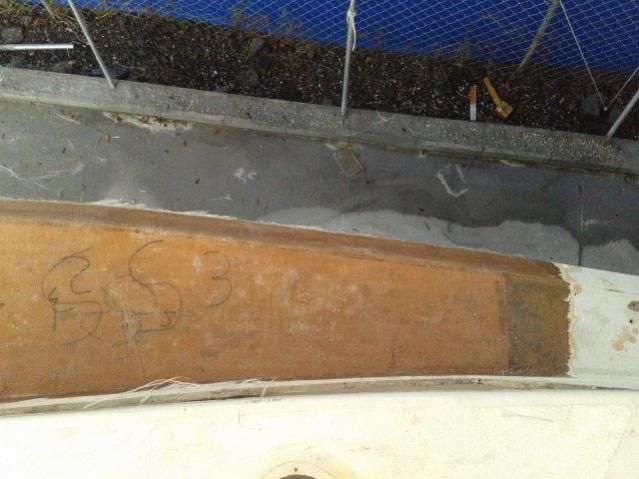
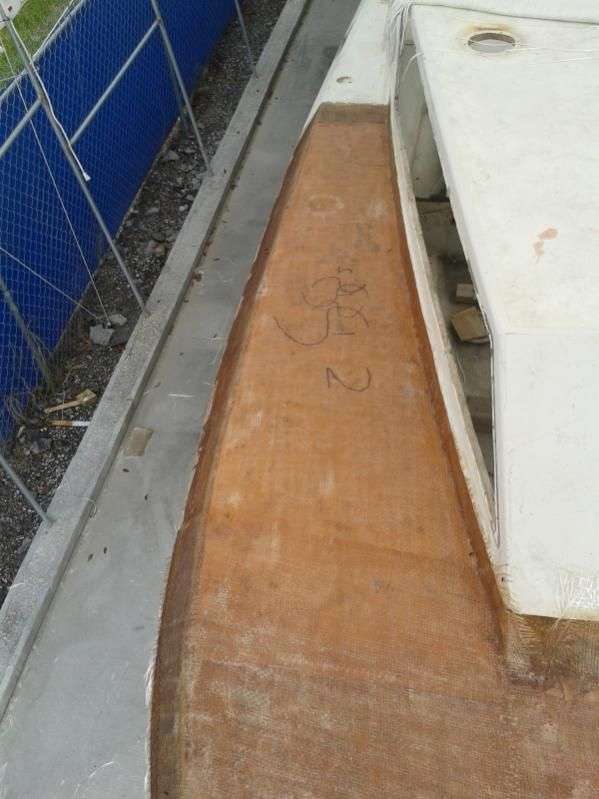
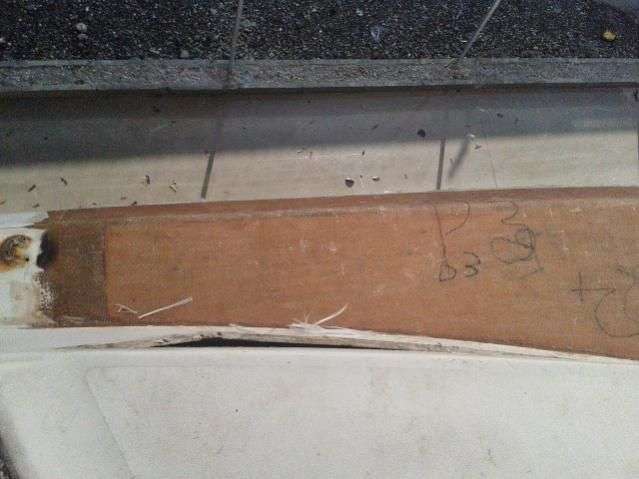
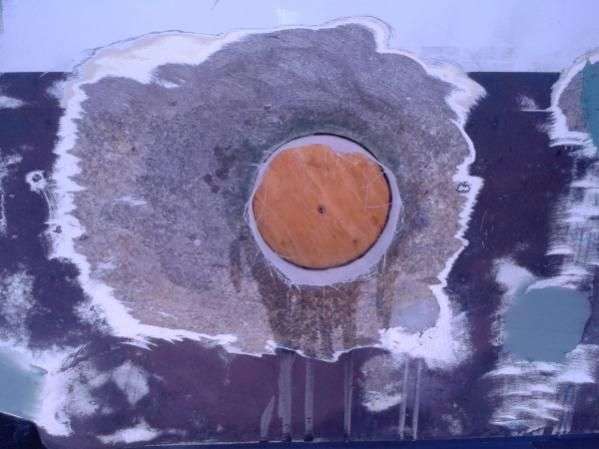
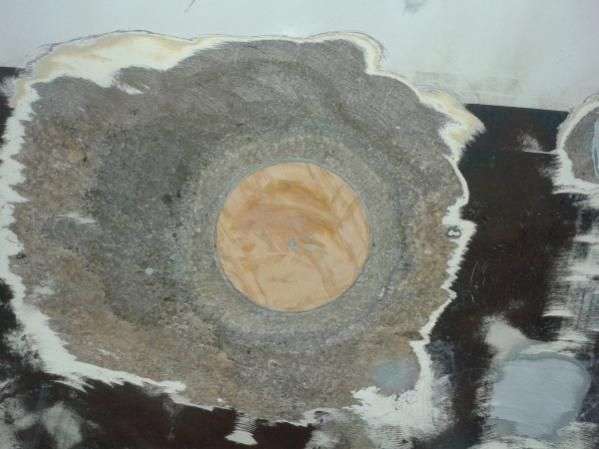
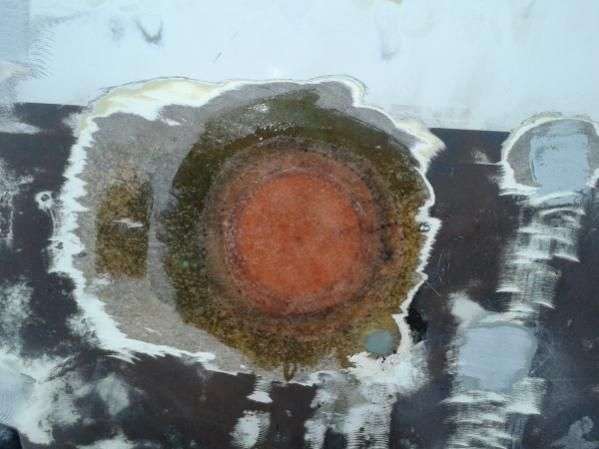
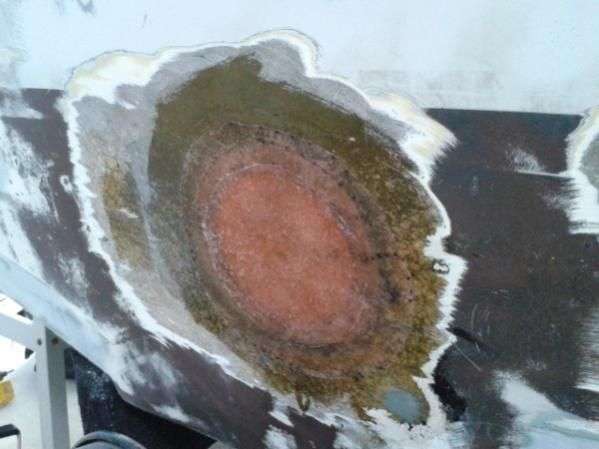
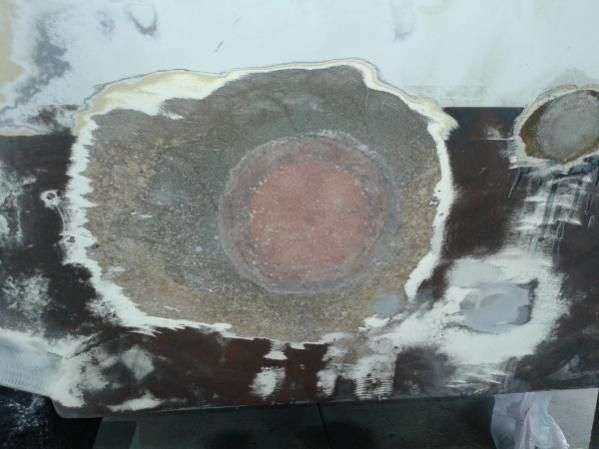
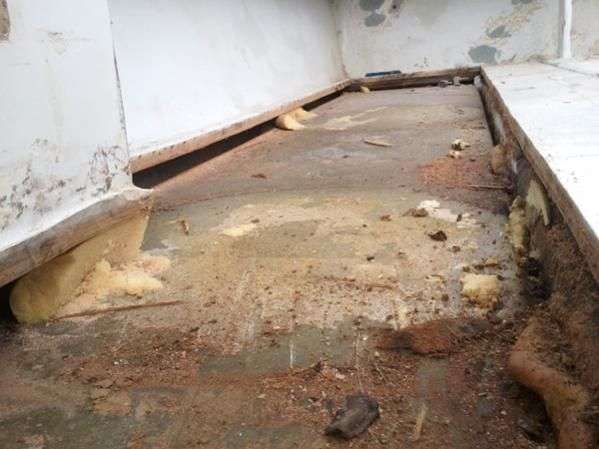
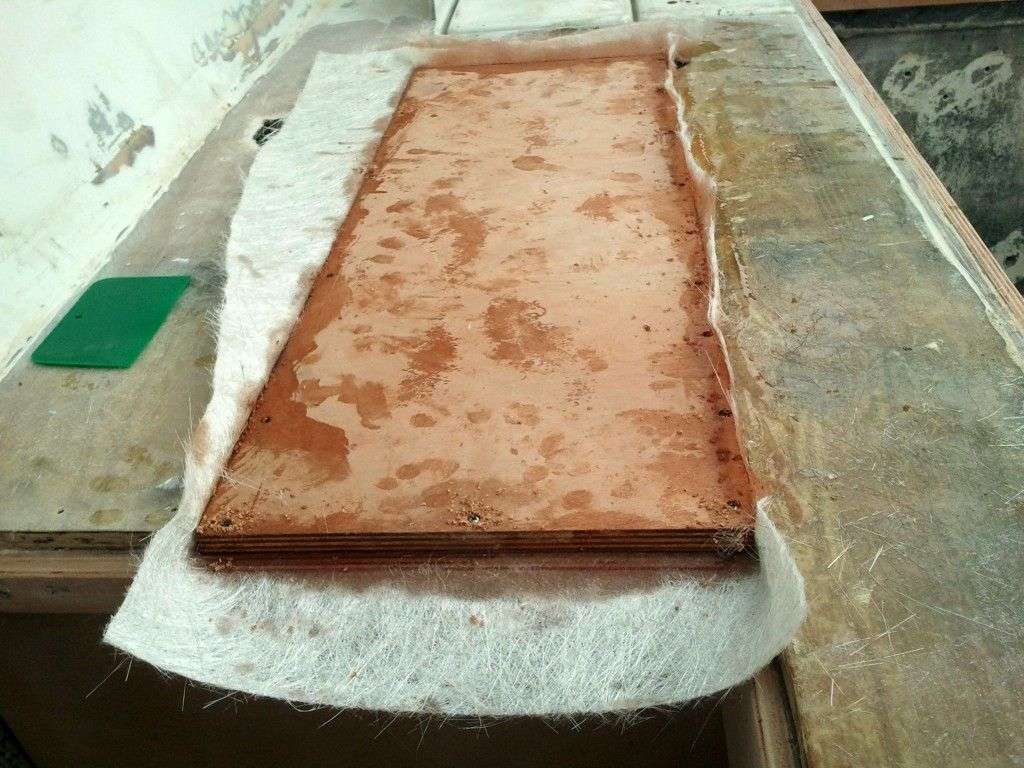
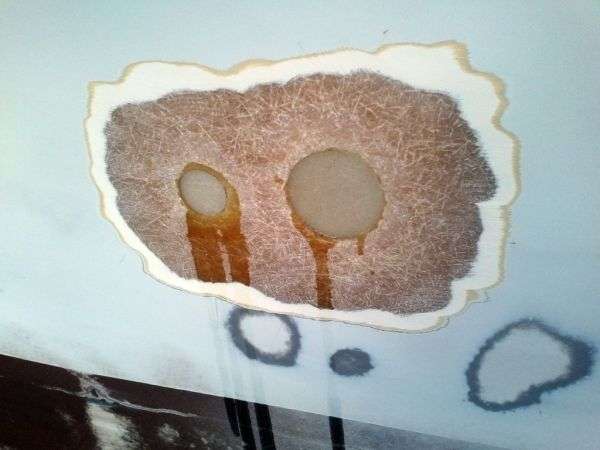
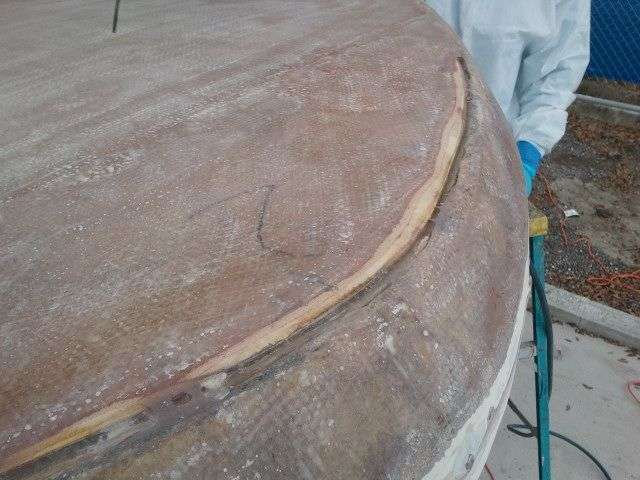
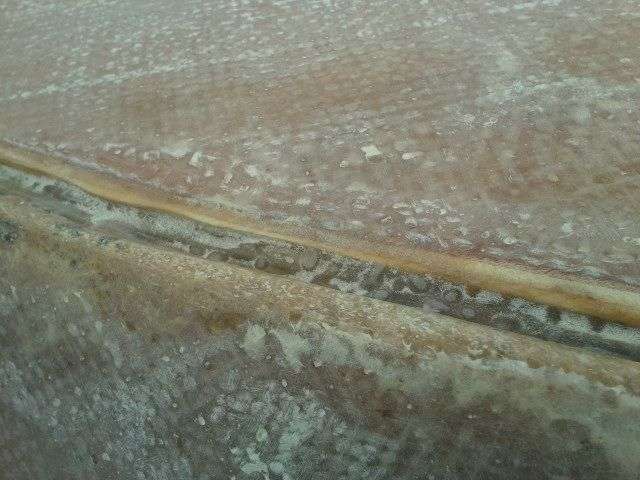
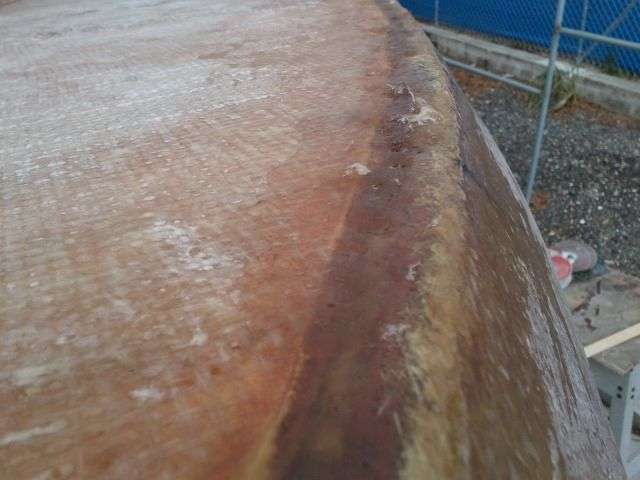
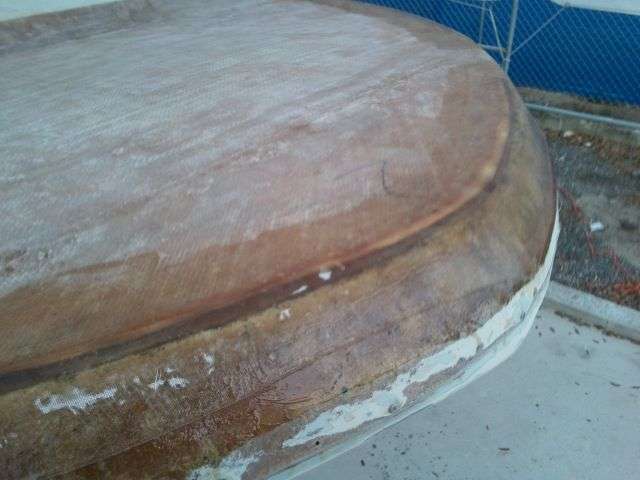
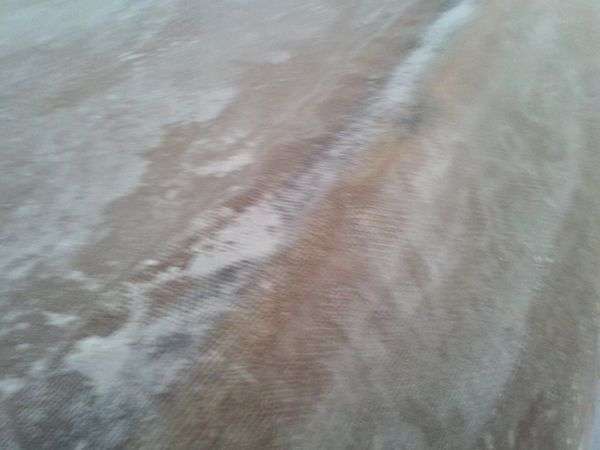
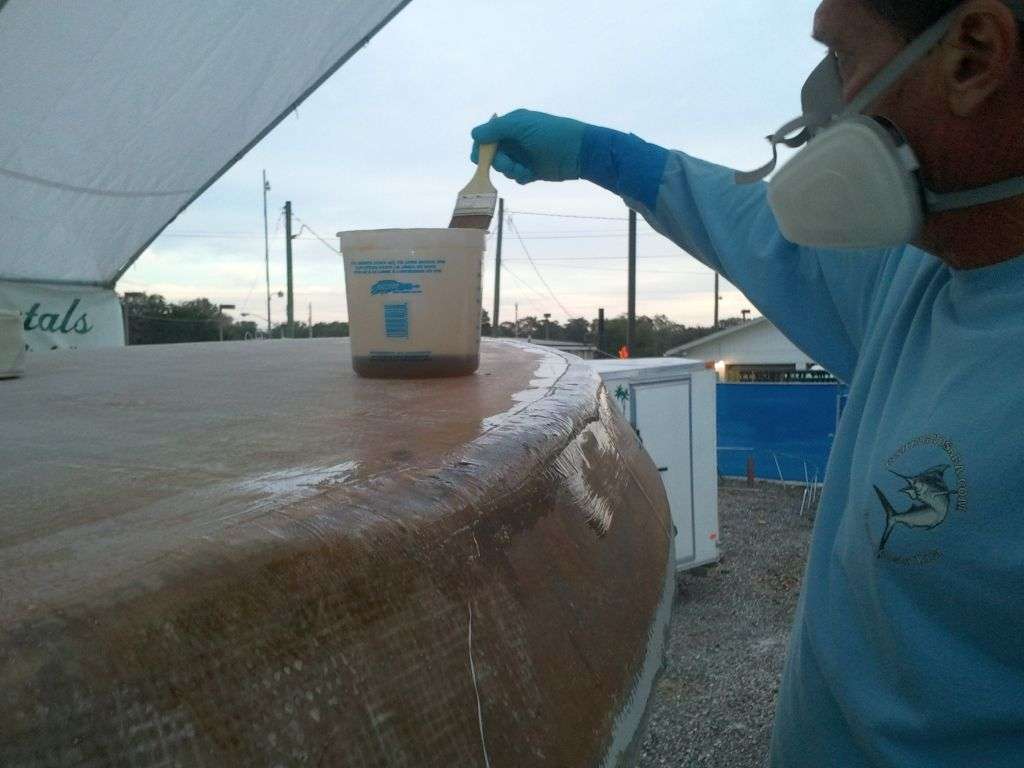
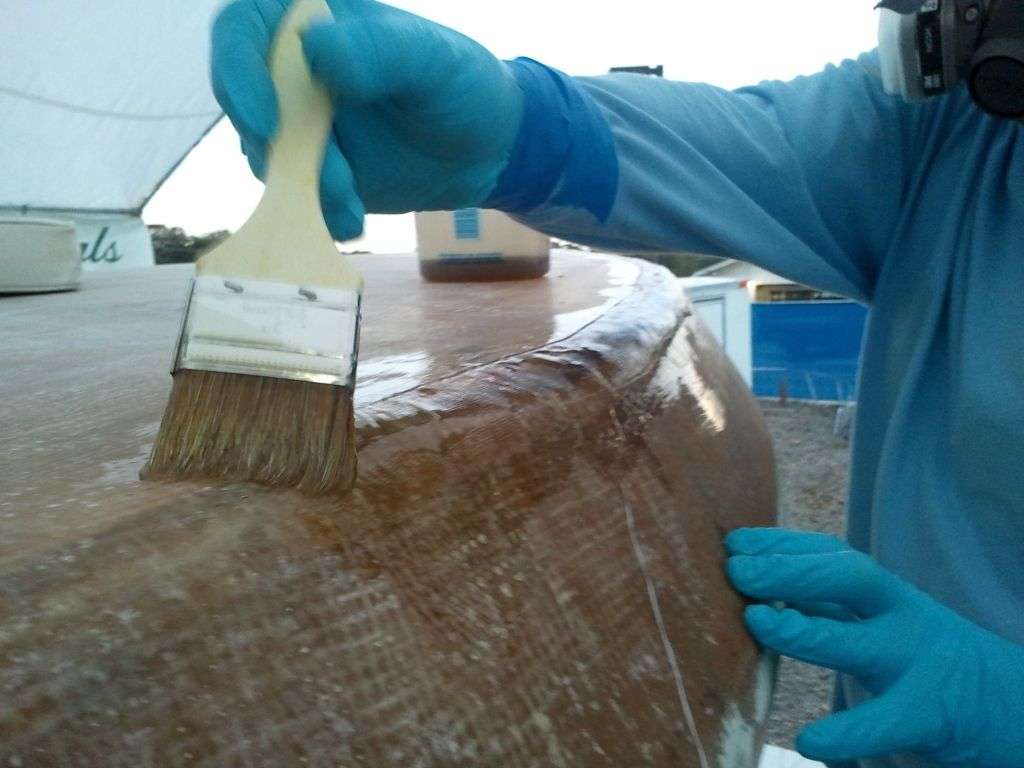
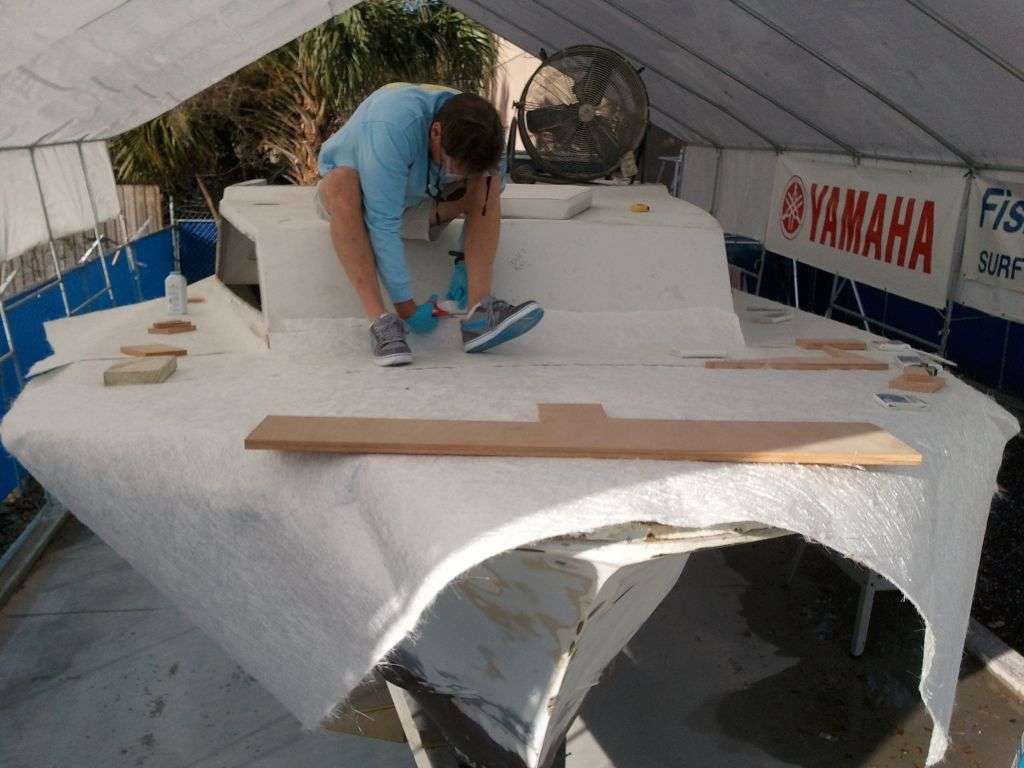
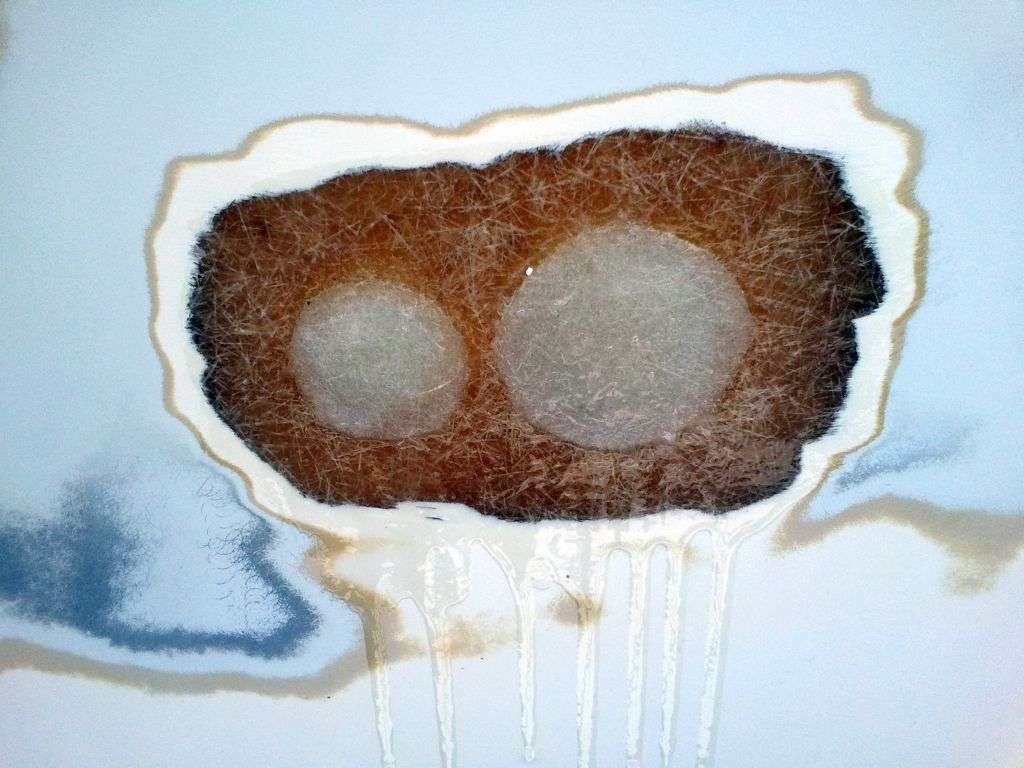
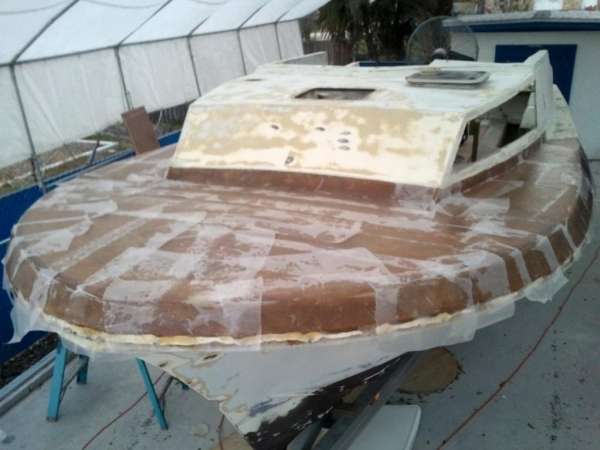
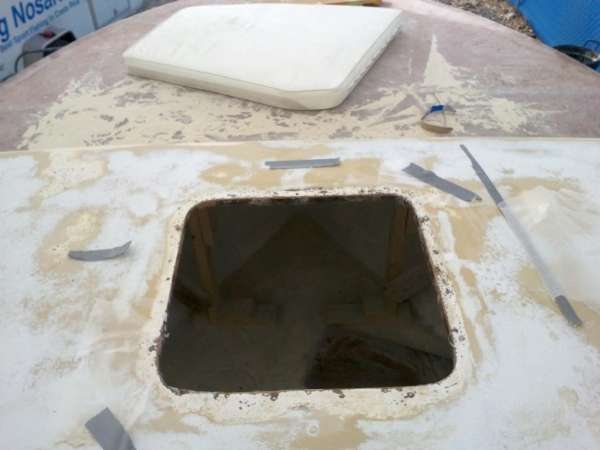
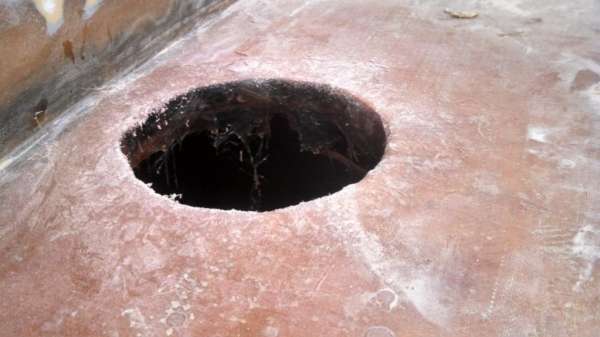
Craig has made steady progress on the nose job for the Discoverer. So far we have got the top layer of fiberglass off and have discovered that the ‘wood’ has rotted away to the point that a full replacement is necessary.
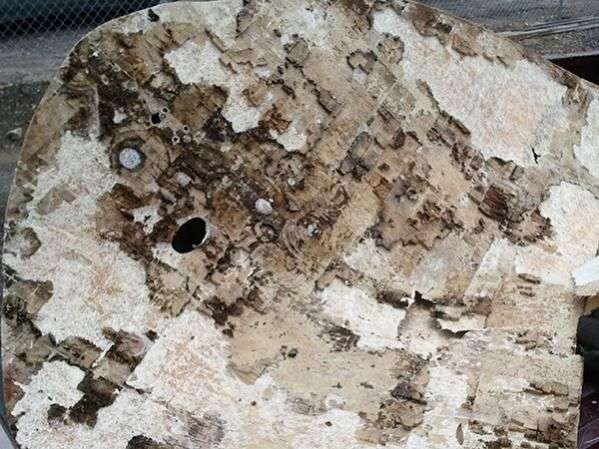

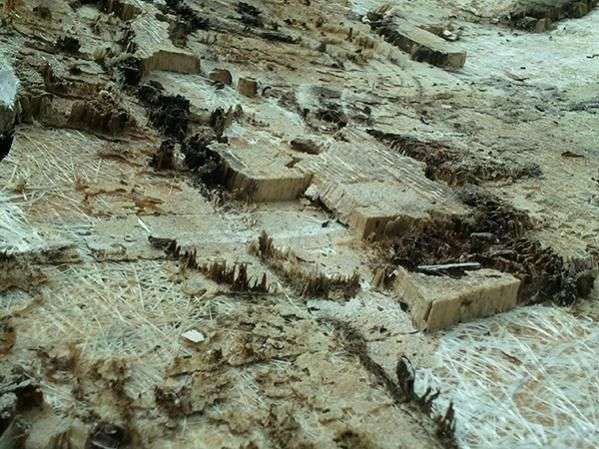
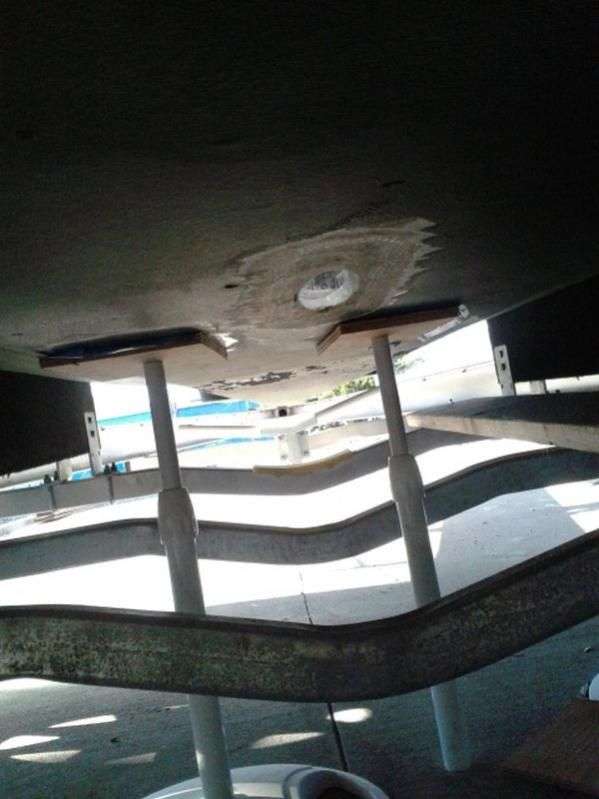
Take a look at the underside…there is no way that this soft floor would last for any length of time. The little cubes of wood are the random pieces that did not rot into oblivion, so this image should give you an idea how much slop was sandwiched in the fiberglass of this boat.
Our goal here is to fabricate a new front deck section out of 3/4′ marine plywood and fiberglass it in place of the old rotted floor.
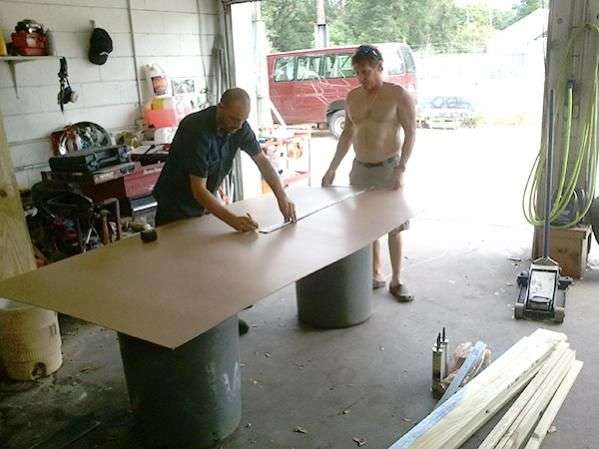
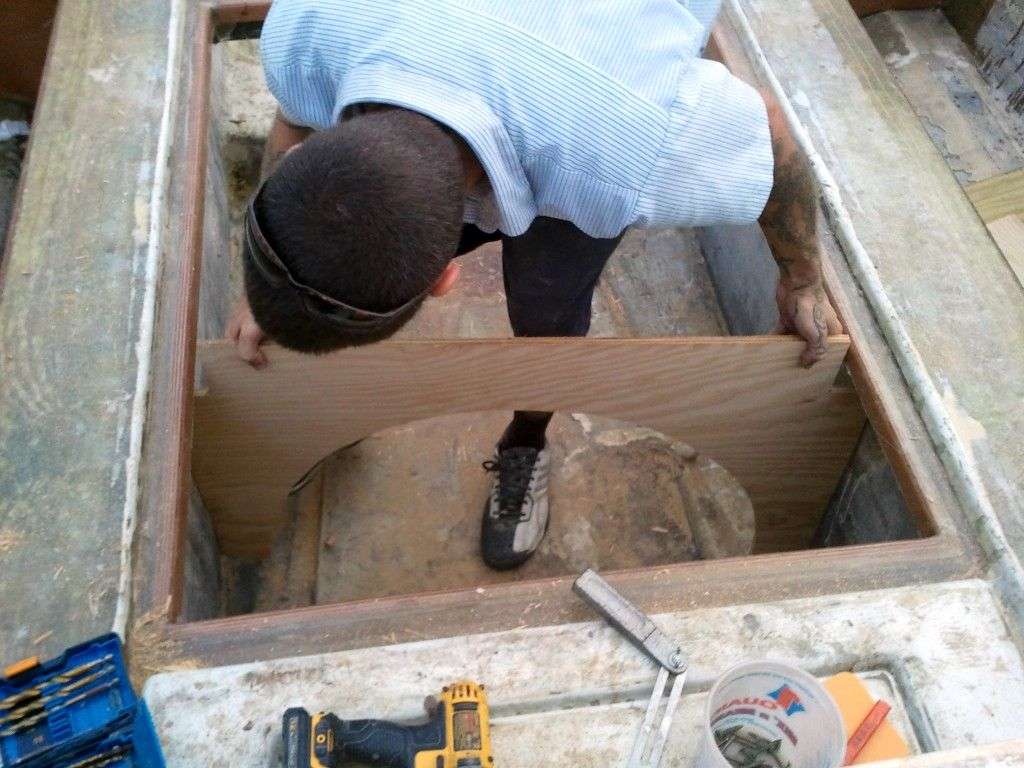
Jack and Craig made a pattern out of butcher paper, then transferred the pattern to a 1/8″ piece of pressboard (See previous post). The press board is a rigid enough that we can grind on it like a piece of wood to make it fit the hole; once fitted we can to the cut ‘for real’ on the expensive plywood.
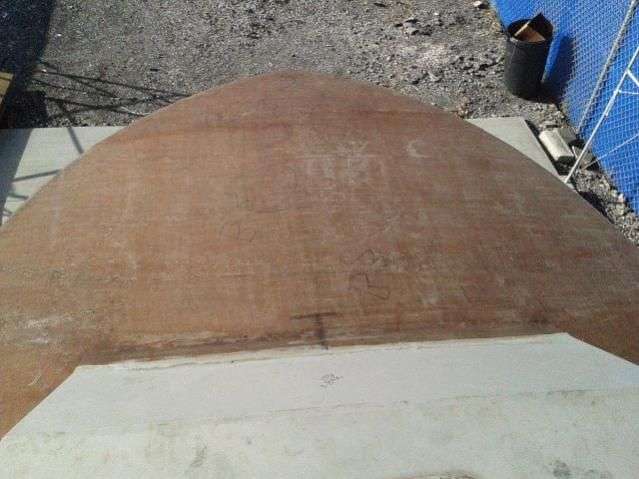
We discovered a problem immediately when we completed the pressboard mock-up. The tip of the nose is 4’10” from the base of the cabin, and as you may know plywood tends to come in 4′ wide sheets.
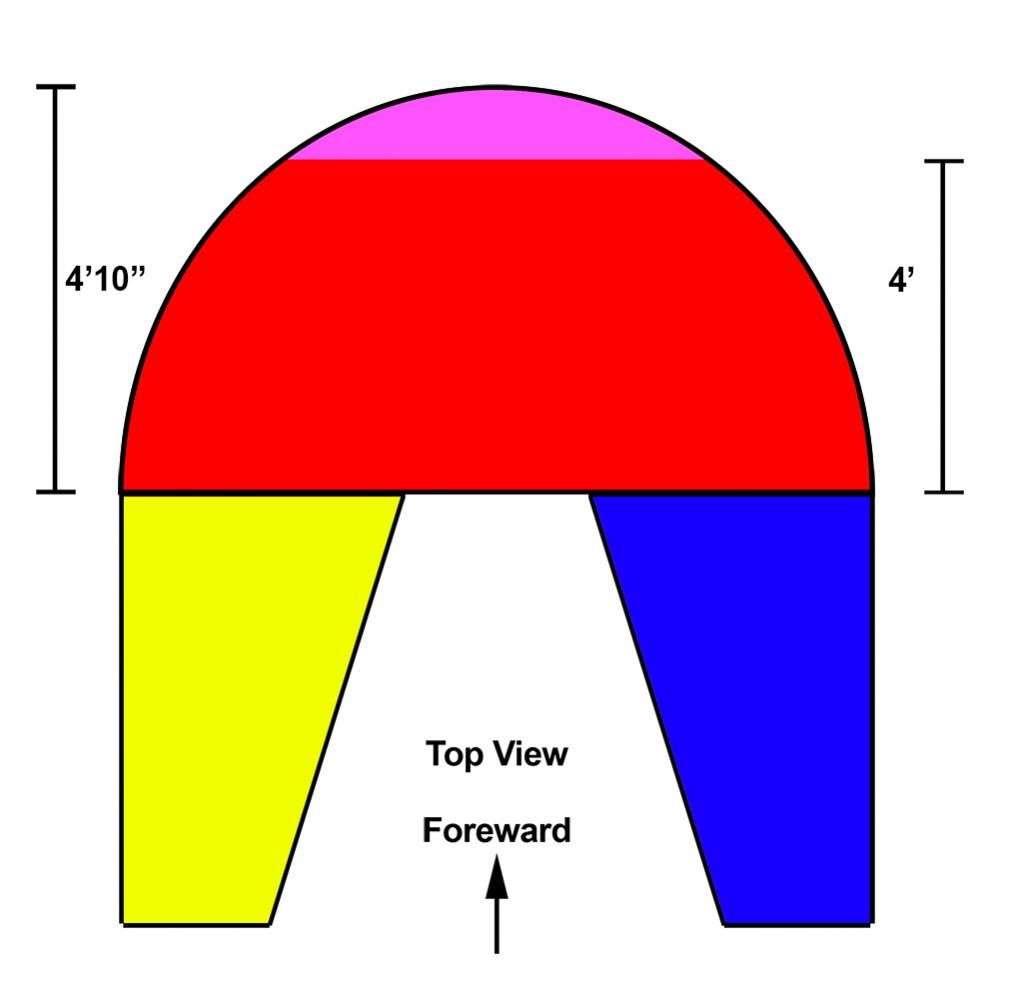
You can see in this graphic that our only option would be to scab in a 10″ wide piece to round out the nose (purple) and some how retain the strength of the wood in this particularly vulnerable point of the boat…we moor our boats so the nose anchor pulpit has to be the strongest part of the boat (See last year’s Wanderer repairs in our Off-Season Maintenance blog post to see what happens when the nose isn’t sturdy)
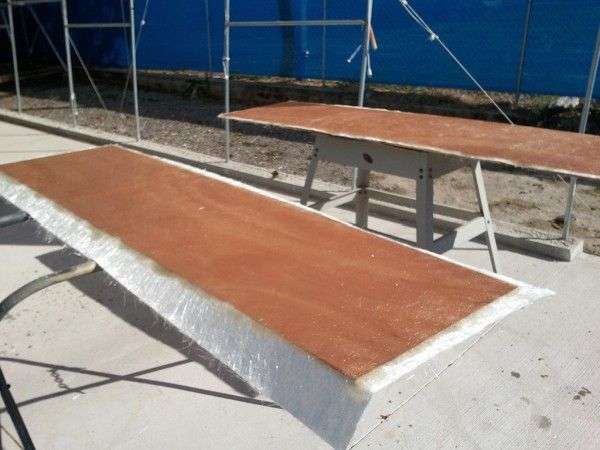
Amazingly the guys at Hood Distribution tracked down a beautiful 5′ x 10′ piece of marine plywood which makes this job about a million times easier. Now we can build the nose out of a single piece which will make this nose drastically stronger and the install less of a headache.
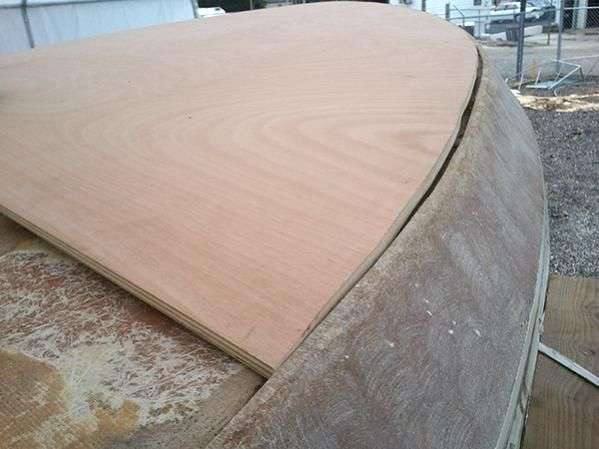
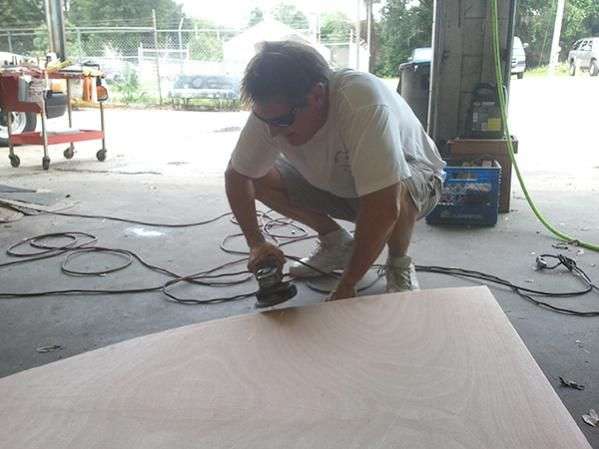
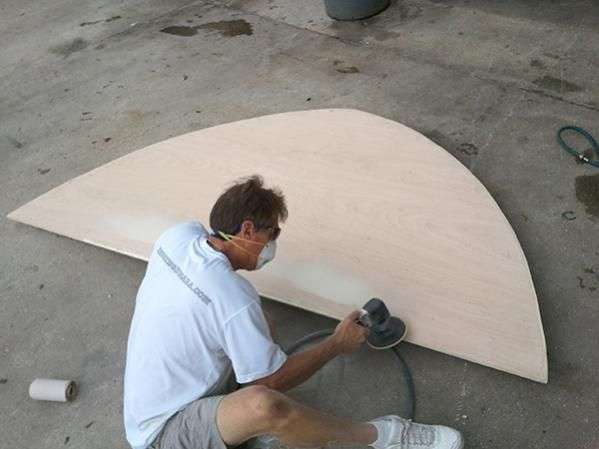
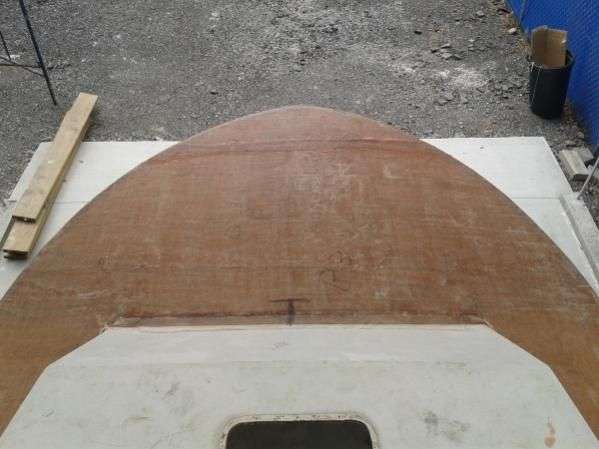
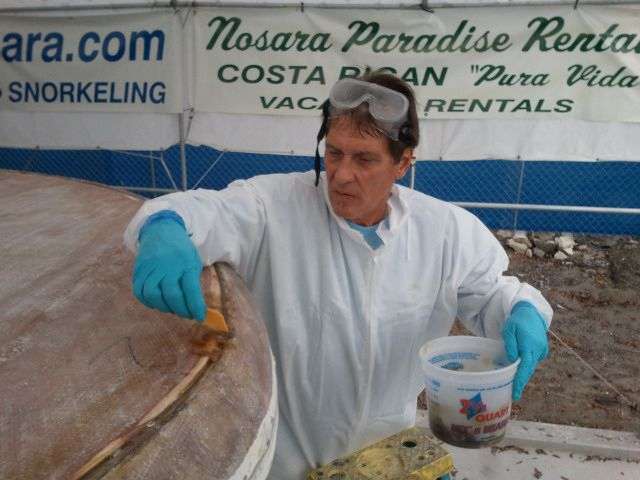
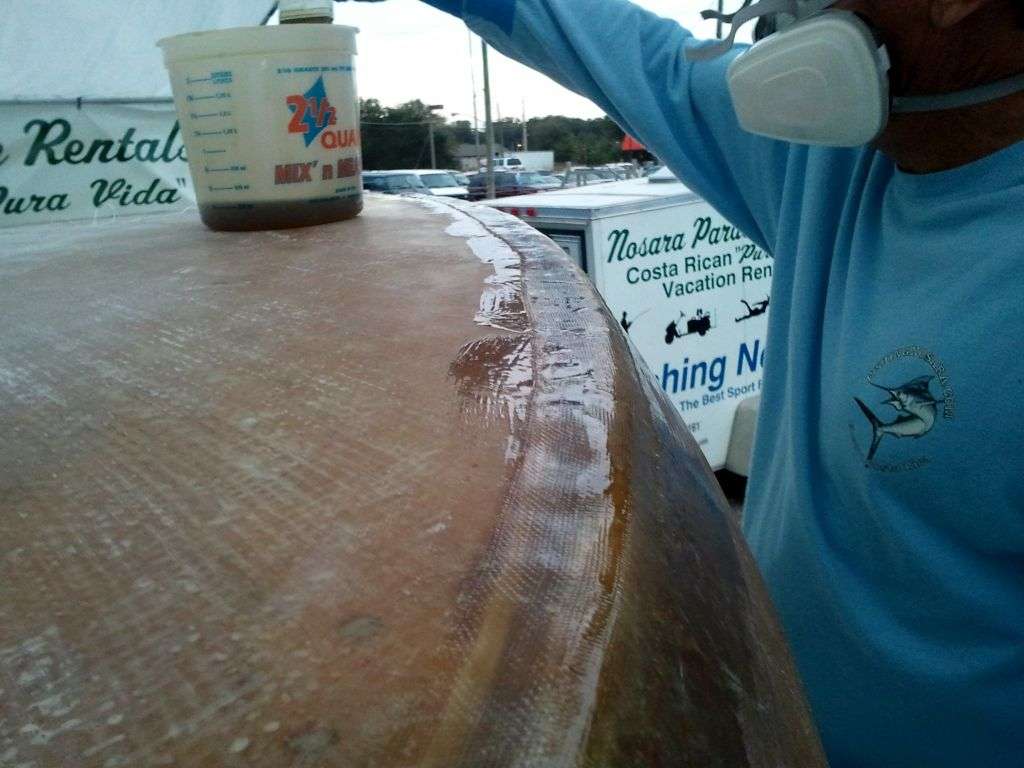
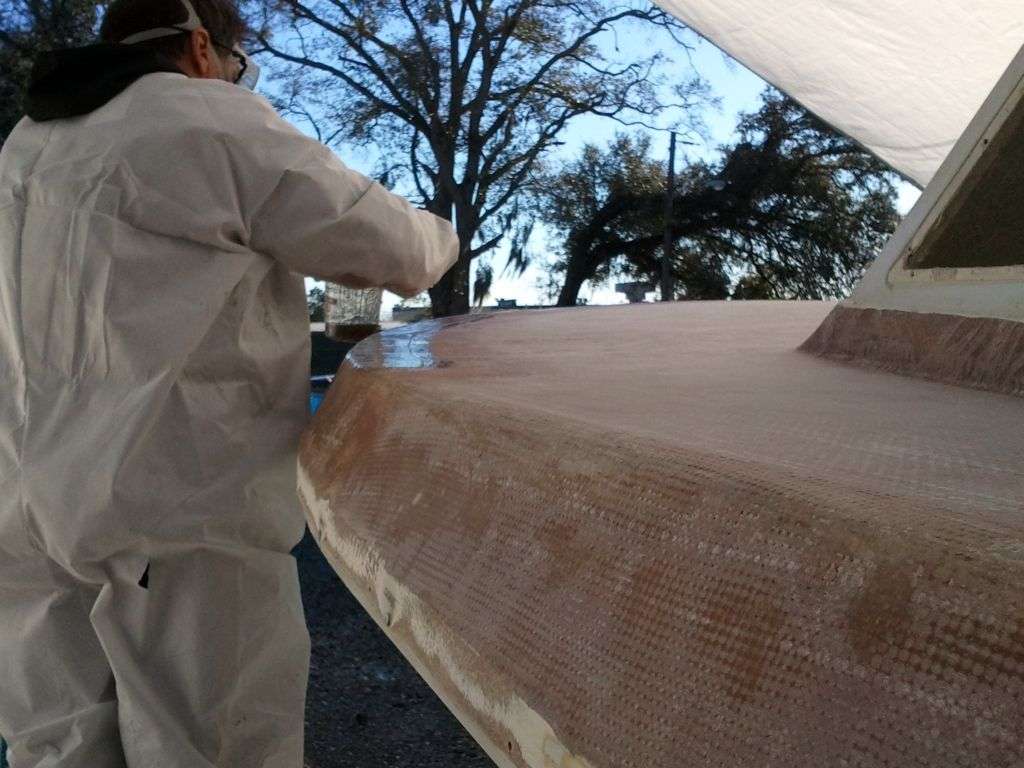
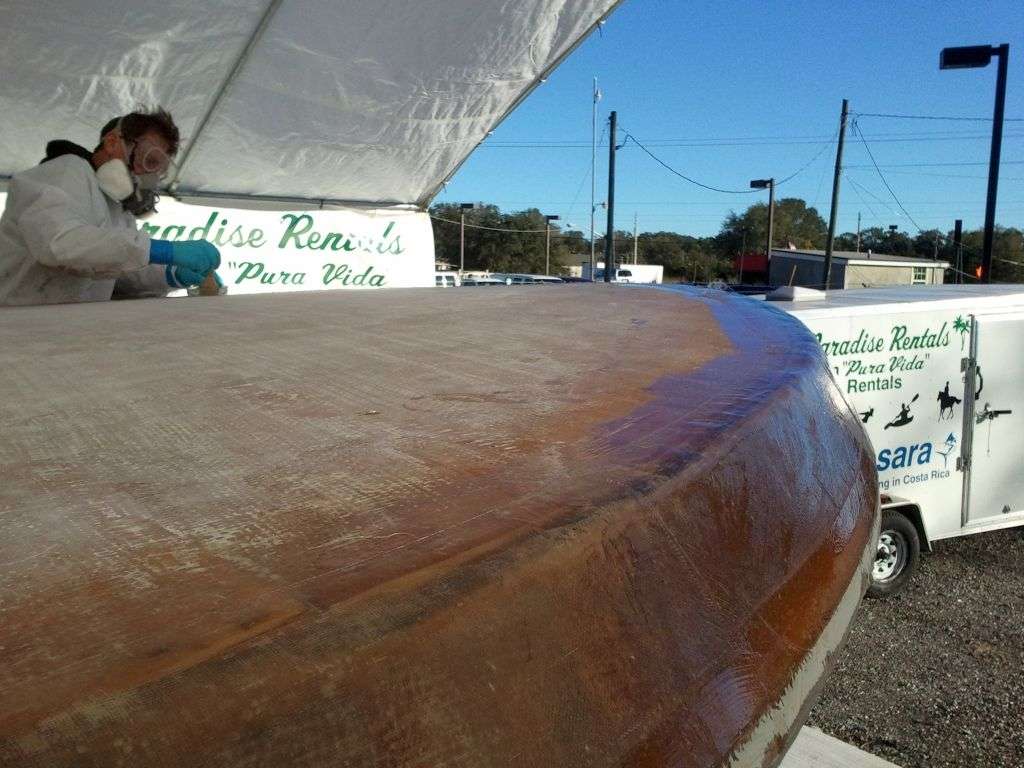
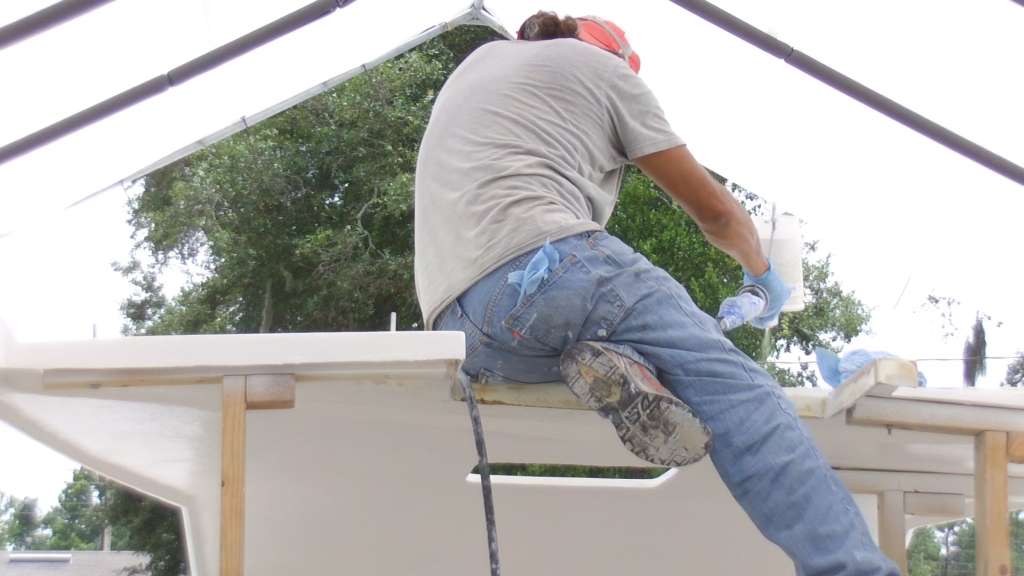
Craig transferred the pattern to the marine plywood and cut the rough shape with a jigsaw. Then he sculpted the wood down to form with an air powered disc sander armed with 180 grit paper.
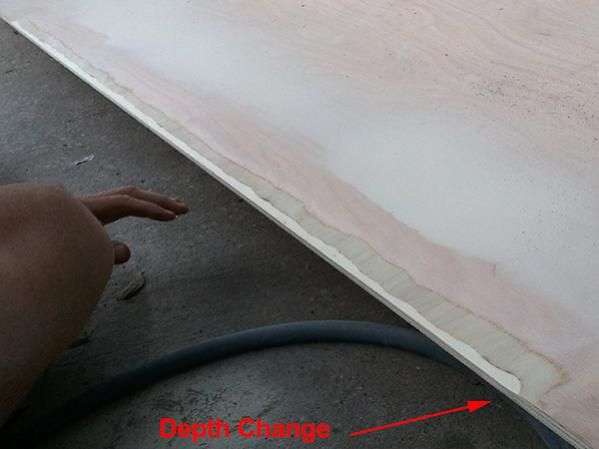
After a quick test fit on the boat, Craig continued by tapering the underside of the deck to mate with the tapered edge we created on the hull. The idea is to make a clean mating surface where the wood and the fiberglass transfer weight between each other with as much surface contact as possible.
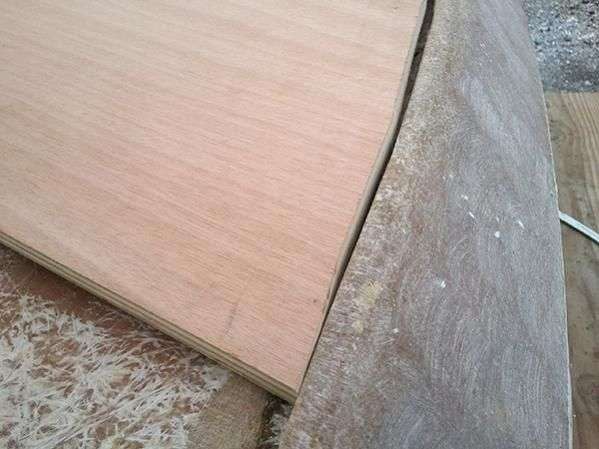
The final step was to flair the flat edge that mates to the cabin. Craig removes about 1/4″ of wood and takes care to make a smooth bevel at the edges.

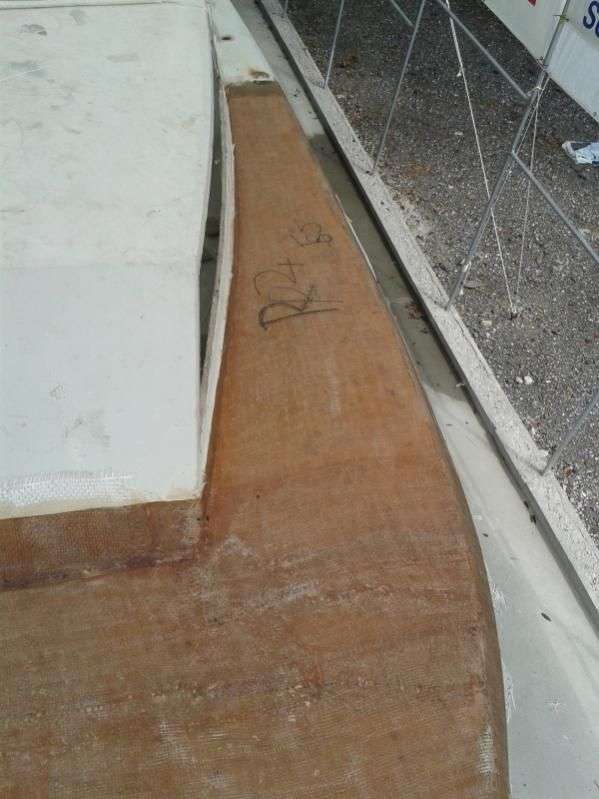
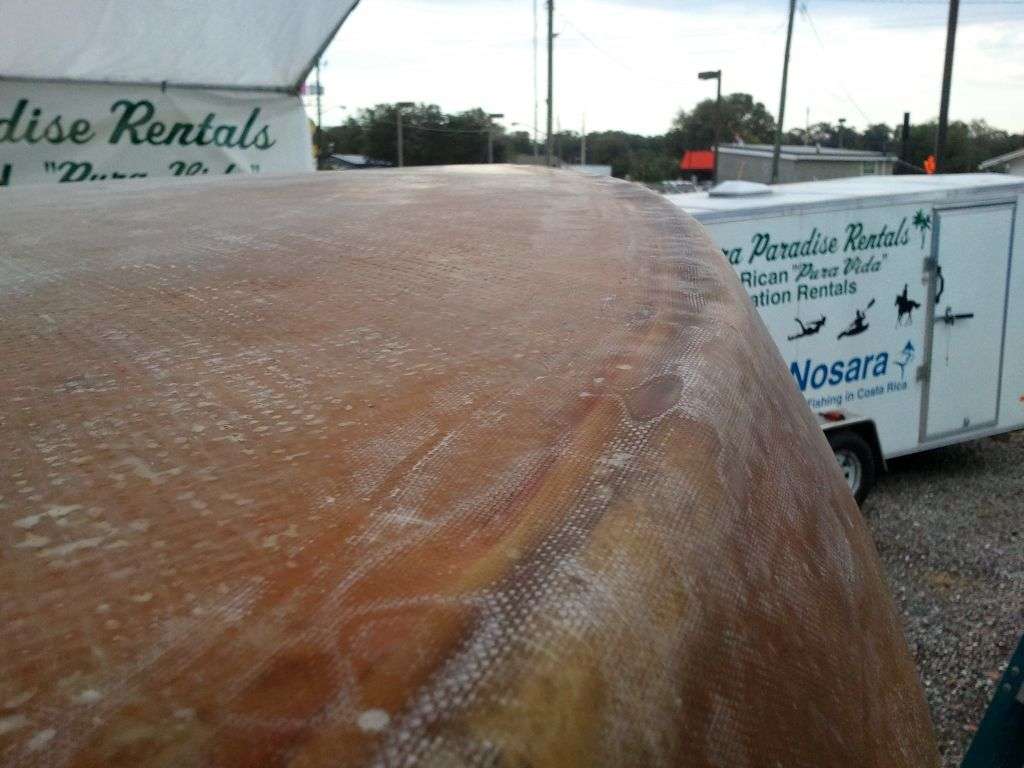
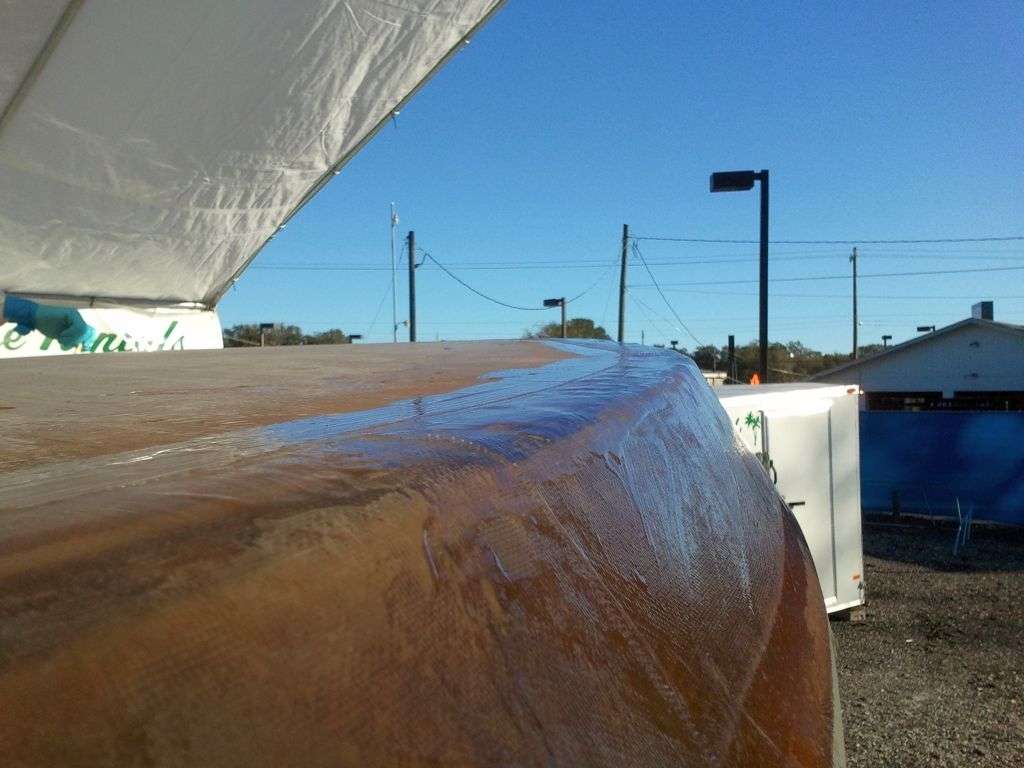
We want to leave some flexibility for Charlie our fiberglass expert to do a final round of grinding before fitting this piece. Still we are pretty excited about the progress so far on this new dance floor and are looking forward to laying some down some coats soon.


September 10, 2012
Wow time flies when you are having fun and the FishingNosara Build Team has split up to double the fun. Craig, Craig Jr., and Matty are in Nosara right now overseeing the first major refit of the Wanderer. After 600+ trips over three years of excellent service, our flagship is getting a full strip down, re-prime and re-paint as well as some corrections to design flaws and construction errors that have sprung up over the years.

Look at Captain David and Mate Carlos getting after it! Grinding off bottom paint SUCKS and all the goggles and facemasks in the world can stop the micro shrapnel damage and the itching that follows. This is the hardest work we’ve ever demanded out of the boat crews and they are gritting there way though it; still I’m sure that they will be happy to get back to fishing.
We are currently on day 4 of 13 for this project and will have a full update in the September Fishing Report due out in mid month.
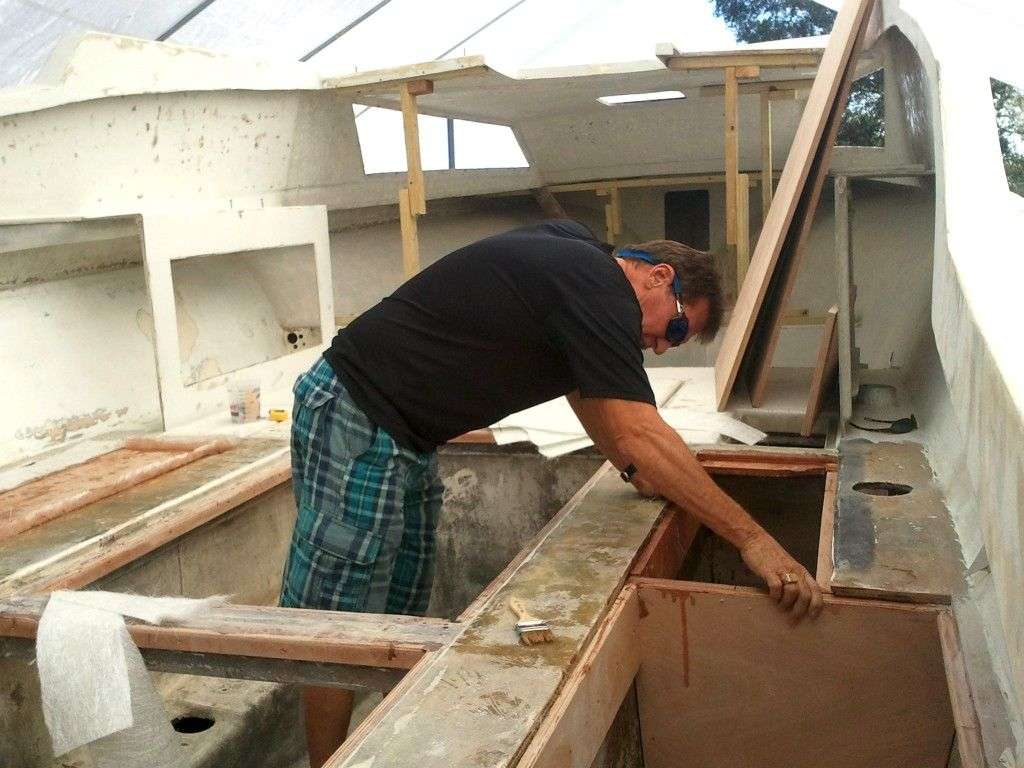
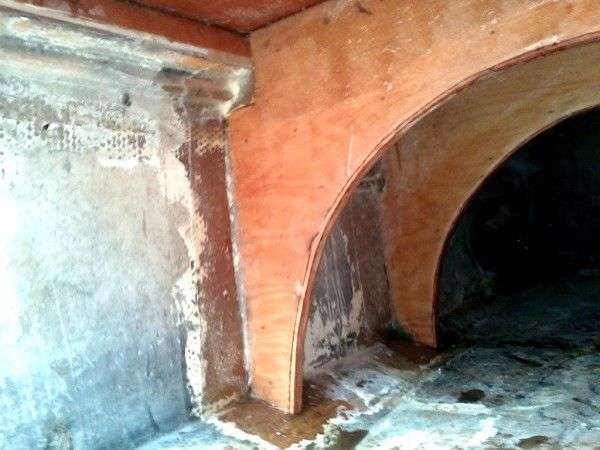
Back at headquarters we have Captain Jack Weinmann and Captain Charlie Keen up to their elbows in fiberglass as they give the Discoverer a strong front deck to replace the nasty mess we inherited (See last post). Now we have chronicled Jacks boat building prowess at length (See all Jack related blog posts) however Charlie is a newcomer to the build team but not new to the FishingNosara family.

We have sponsored Charlie in the El Cheepo Sheepshead tournament and worked closely with his auto body repair shop that happens to be situated about 300 feet from the Discoverer shop. This guy paints about 8 cars a day, runs a tight boat of his own, and recently found time to build an operational hovercraft.
Still Charlie has some misgivings about the size of this project and he relatively small scale experience with fiberglass construction. To me fiberglass work is like black magic and the fact that it is even possible is spooky and amazing. You hear stories about temperature and humidity screwing with the hardener/resin ratio and then hear other stories where an improper mix causes a boat fire and you kind of wonder how smart it is to be screwing with this stuff.
If there is one this that can be said about The Discoverer Project is that there is a lot of outside advice, both solicited and otherwise, that comes through big for us. Our buddy Chappy turned us on to a sweet product called Woven Roven which is essentially a fiberglass mat as thick as your grandma’s afghan rug. We learned from Charlie that epoxy resin is the way to go for high-load areas like a deck versus polyester resin. Even though epoxy is much more expensive that poly in this case it is worth every penny.
Any comments anybody has regarding fiberglass, resins, fillers please chime in on the comment board at let us know what we don’t know, which is quite a bit.
September 6, 2012 – Day 149
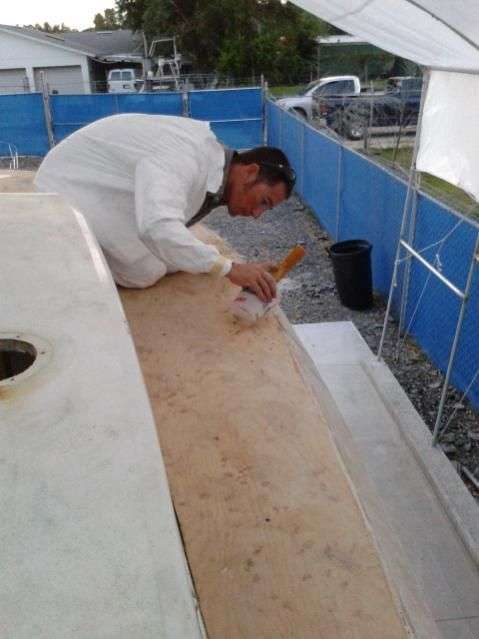
We put down a thick layer of epoxy resin on the underside of the new deck and on the cleaned scraped layer of fiberglass (ie the backside of the cabin ceiling). We added a layer of 2oz. fiberglass mat (standard, not he roven) then sandwiched that matte under the wood.
To pull it all together Charlie shot wood screws through the top into plywood blocks that an assistant was holding below decks; this squeezed the fiberglass/epoxy/plywood sandwich and hopefully pushed out any air pockets or bubbles.
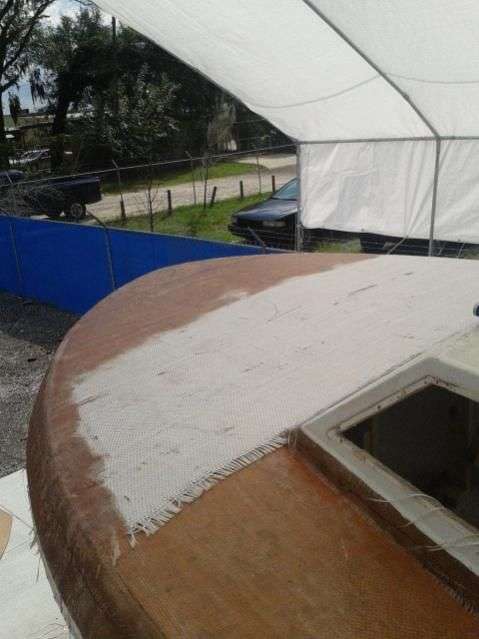
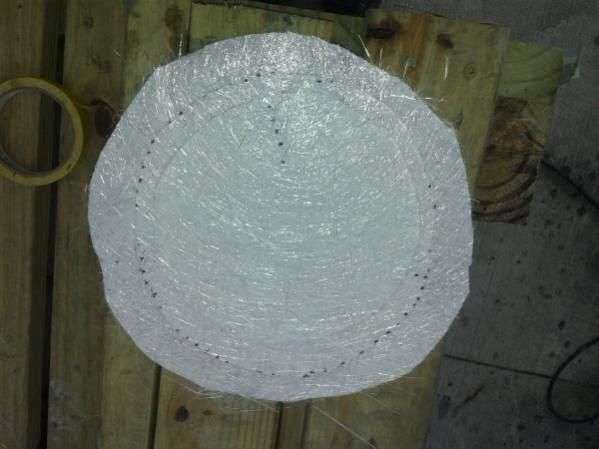
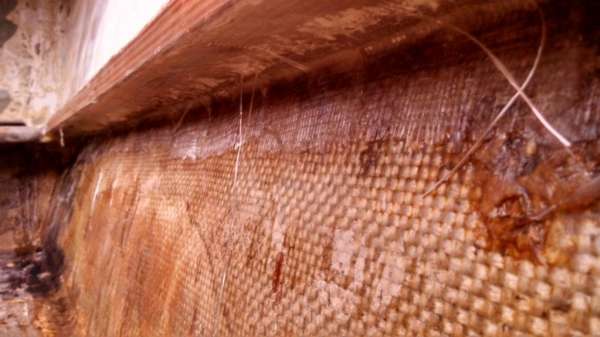
Most recently Jack and Charlie installed the first two layers of Woven Roven and the pictures tell the tale on this stuff:

We hope to have the deck done soon and then move on cutting up the floor and pulling out the gas tanks. I feel confident in the deck and think that it will be easy to apply what we have learned on the much less geometrically challenging fuel covers.
Jack and Charlie have kept the pedal to the metal while the rest of the team is rehabilitating the Wanderer down in Costa. The shop in Florida is humming with the songs of DA sanders and the air is thick with the syrupy stench of fiberglass resin.
The boys finished off the second coat of Woven Roven and they report that it is sturdy as a brick.
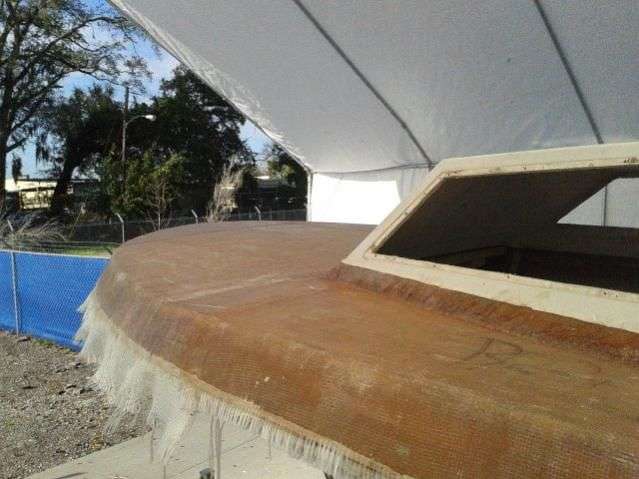
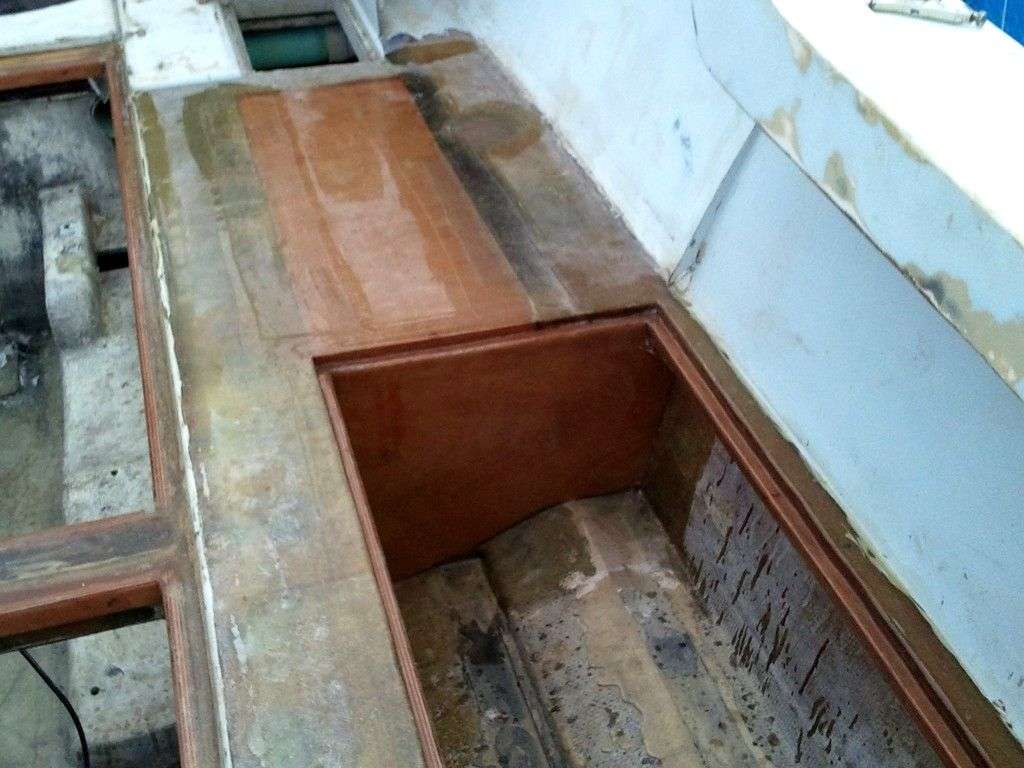
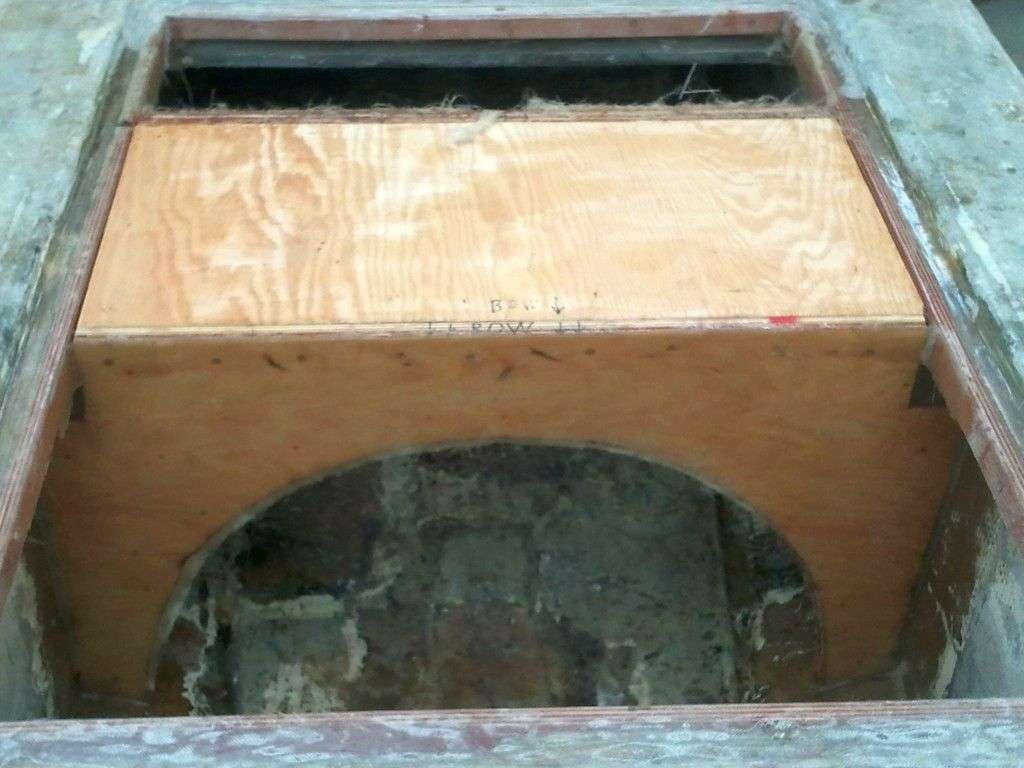
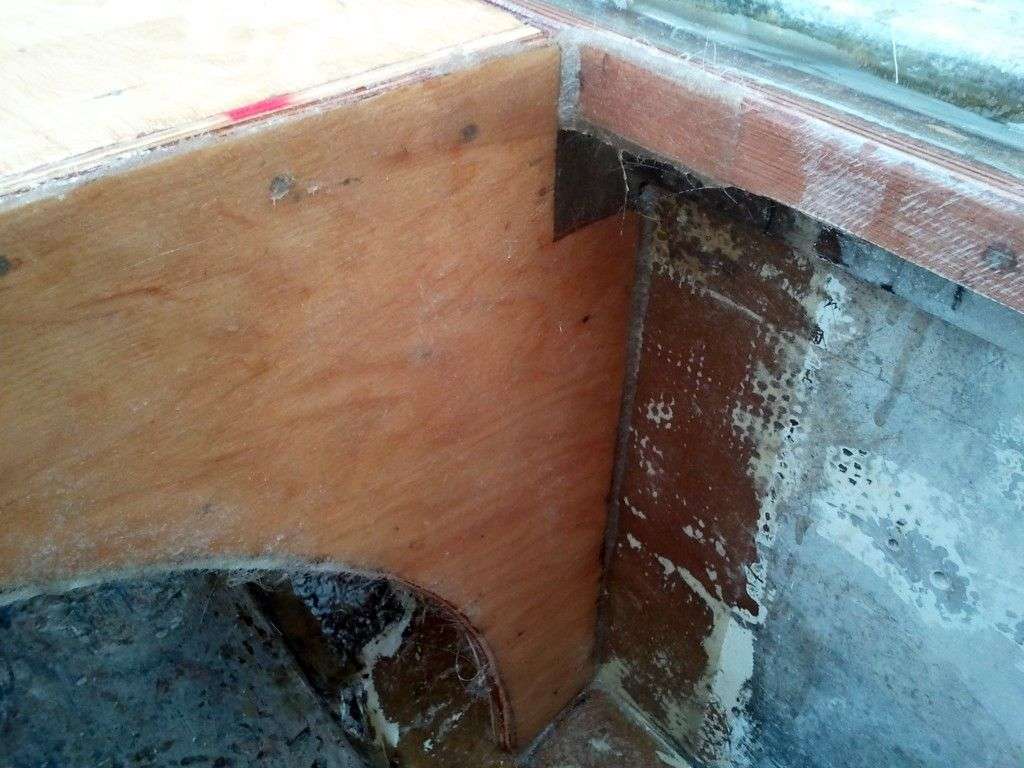
We are really pleased with the fit of the marine plywood deck pieces. All of the pattern transfers worked perfectly from the white paper all the way to this finished 3/4 inch cut. Here is the finished assembly after being glassed into place:

While they had the carpentry and fiberglass tools out they went ahead and took care of the former exhaust port in the rear transom. They fared the surrounding fiberglass to accept the topcoat and cut a circular plug from the marine plywood scraps. Now this area is as strong if not stronger than the rest of the hull.

The front deck of the Discoverer is firmly in place and sturdy as a brick Check out these results:


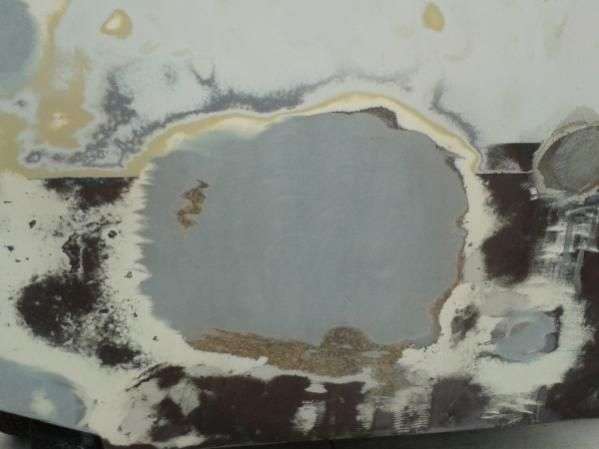
Charlie Keen is a fiberglassing fool! He has parlayed the momentum established from the front deck piece into a full-on resin renaissance. He has filled almost all of the holes left behind by the old water pickups, the propeller shaft, and the inboard exhaust port in the transom.
Clearly the prop hole (above, the odd shaped hole to the left) is a difficult patch due the the extreme angle of the hole, but Charlie made this patch look like a walk in the park.
During the stripping process Jack removed the transom exhaust portal with an angle grinder and did a good job of leaving a smooth hole for Charlie to patch. Take a look at the step by step process:
A wood plug is cut for the hole and the surrounding area is ground down to accept the plug, then the first of several fiberglass mats is applied. Notice the holes punched in the weave which allow for trapped air bubbles to be pressed out of the wet resin.
They sand the finished fiberglass lightly so it will accept a covering patch of resin mixed with body filler. This completes the repair and this area is now an indistinguishable part of the transom. After priming and painting there will be no evidence that this hole was ever there.
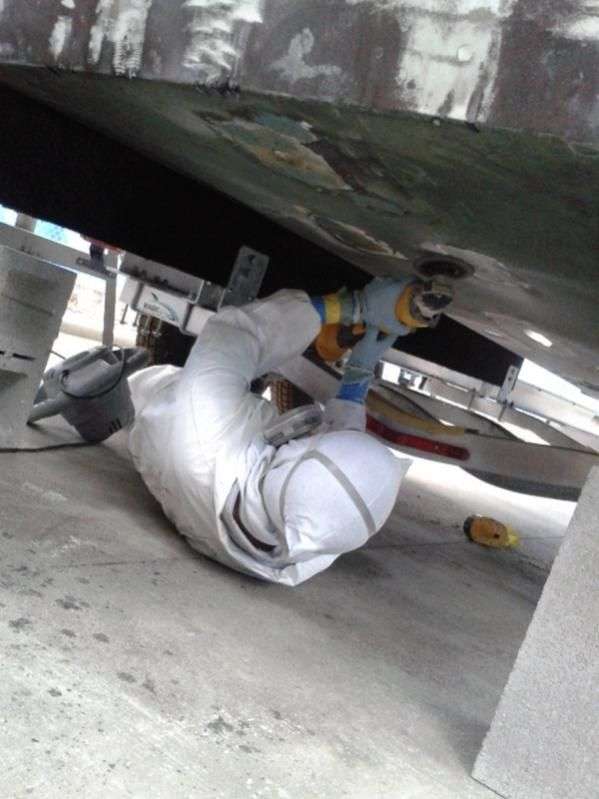
Jack took this time to catch up on some overdue trailer modifications. Remember that in Episode 2 of The Discoverer Project we had to slide a piece of plywood under the nose of the boat so that it would sit correctly on the trailer. Permanently fixing this problem requires lifting the boat off of the trailer and repositioning the cross supports. Here is a view from the bottom…not a great feeling being under a dangling boat, but with these mods complete the hull should rest nicely for years to come.
It has certainly been and exciting few weeks as the Discoverer begins to take shape. We look forward to reporting on more good progress soon.

September 29 – Day 172
Well the team is back together as Matty, Craig Jr., and Craig Sr. put the finishing touches on the refit of the Wanderer and made it back to Florida last weekend. We finally got our hands dirty on the Discoverer again after a barnstorming trip to Tampa for the Florida Sportsman Expo the day after we got back from Nosara.
So through the hazy fog produced by jet lag, culture re-acclimation, and soothing wives/girlfriends angry with us for always being gone, let’s take a look at the current state of the Discoverer:

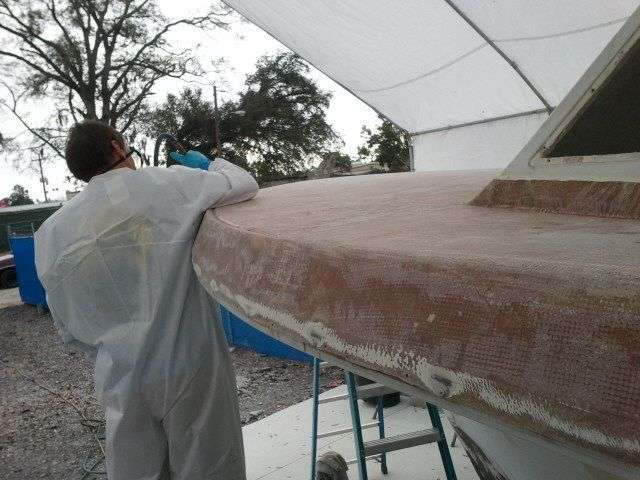
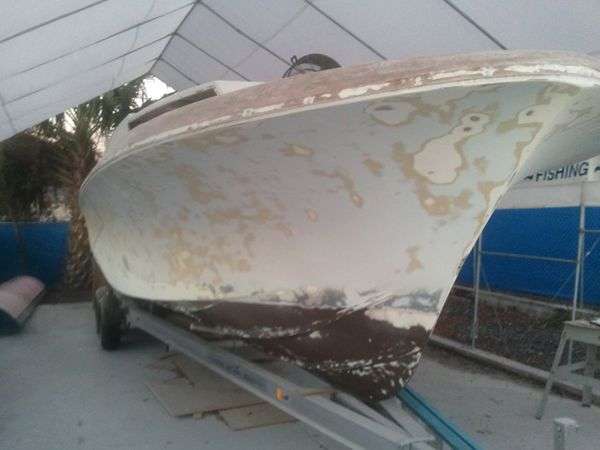
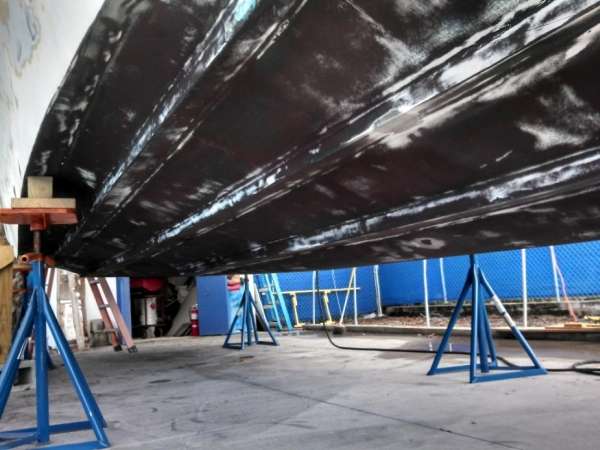
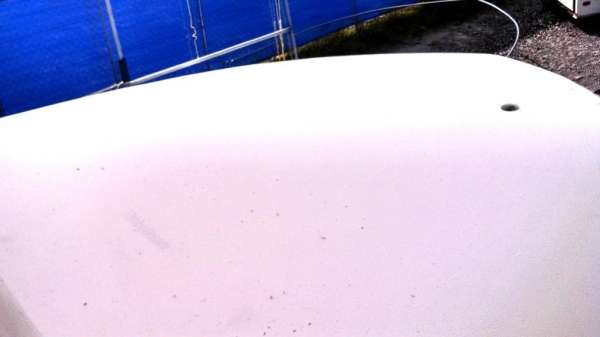
You can see that the DA sanding of the hull is moving along nicely, and we almost have all of the shiny spots roughed up. One more day of sanding and she will be nearly ready for paint.
Charlie Keen has worked his magic on all of the holes in the rear transom as well as the pickups under the boat; last post we mistakenly reported that the boat was being lifted on pipe jackstands when in fact those stands were holding in the fiberglass plugs.
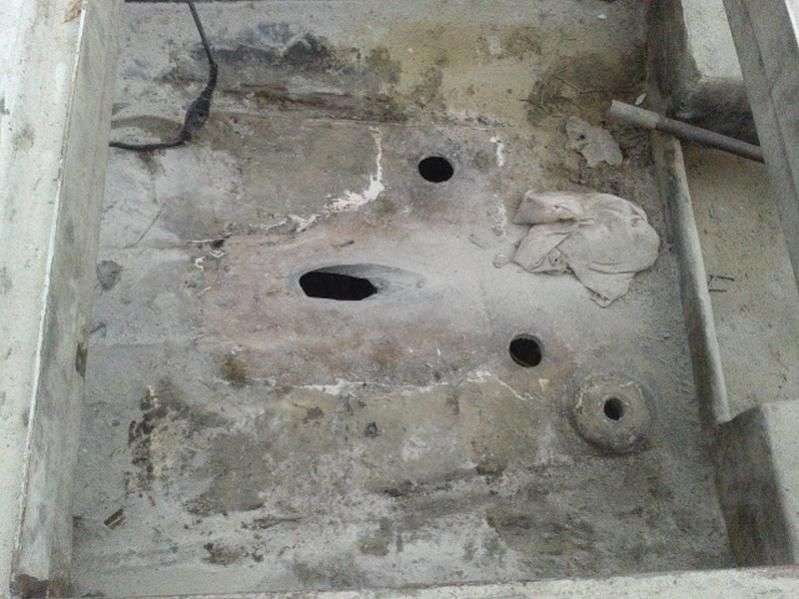
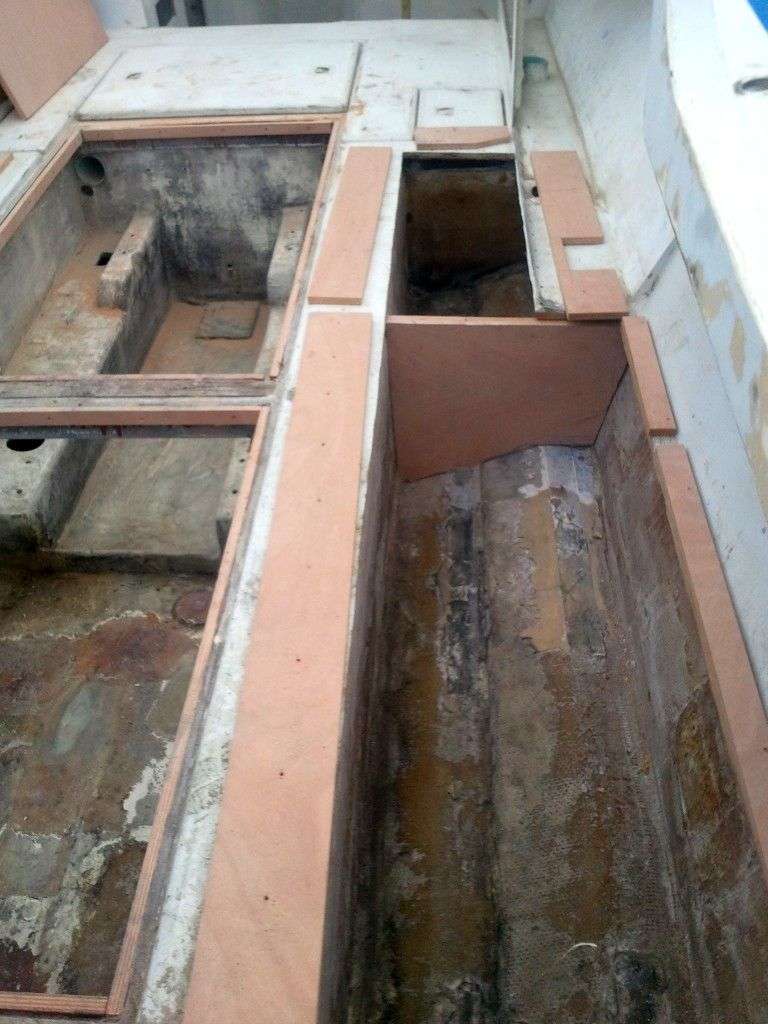
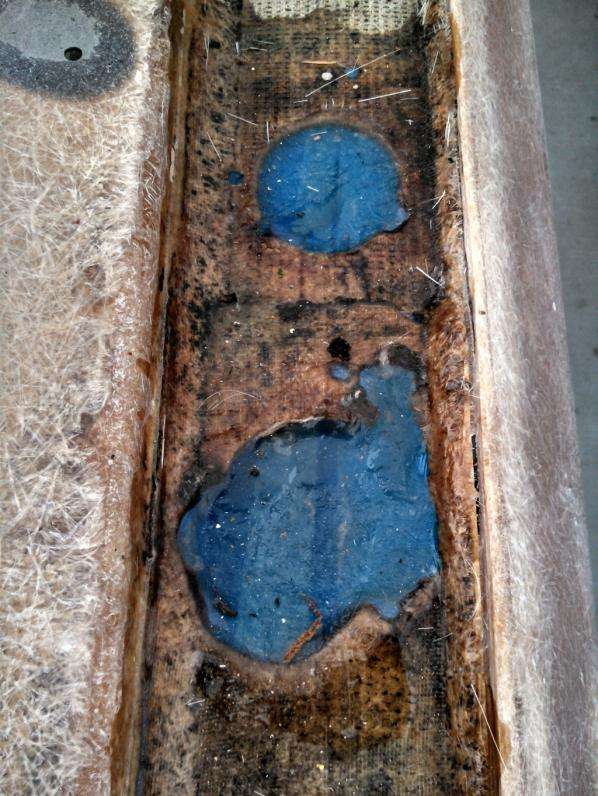
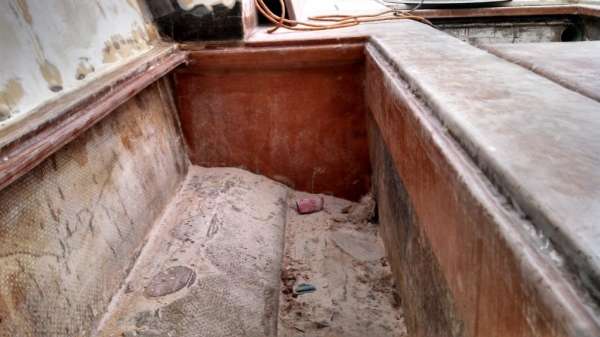
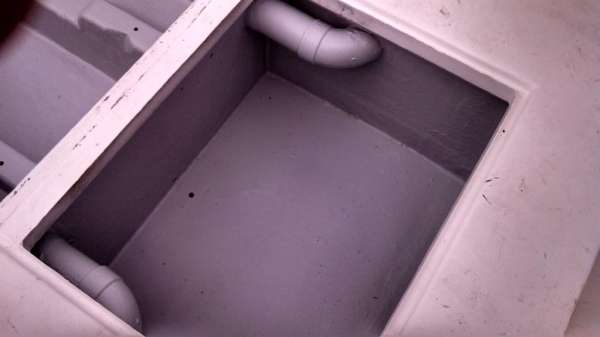
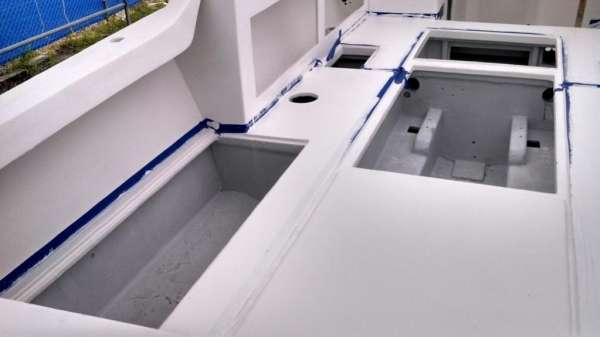
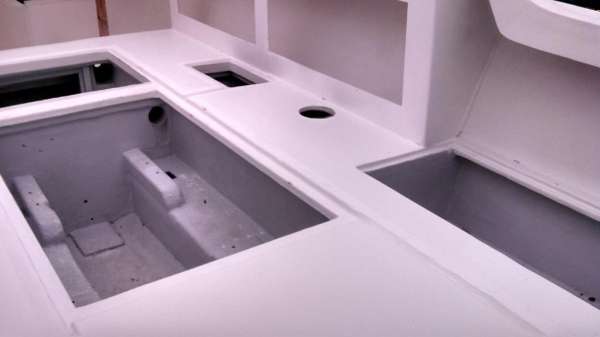
Notice anything missing in that last picture? If you said “half of the floor that covers the fuel tanks” then you are correct.
We weren’t sure the size or conditions of the fuel tanks until Craig and Jack started cutting, and what we found is shocking. This pair of 120 gallon tanks are the largest I’ve ever seen in a T-Craft and getting them out will be a challenge.
Notice that in the rear these tanks butt up to the transom, and up front they are covered by the side benches. These benches are fiberglassed directly to the hull so their ain’t no removing them except via the sawzall. On the Wanderer the 100 gallon tanks lifted right out through properly cut access panels; on the Discoverer we will have to get more creative.
Our working plan is to drain the tanks then cut them into small enough pieces to remove.
Afternoon Update:
Just ran outside and shot some up-to-the-second pics. Here is the aforementioned jackstand that is holding in the bottom fiberglass plugs:
Here we see the starboard side bench cut out to allow for removal of the tank. This cut killed our cut-off grinder, so it’s off to the hardware store to buy another…bummer.


October 1, 2012 – Day 165
October 6, 2012 – Day 179
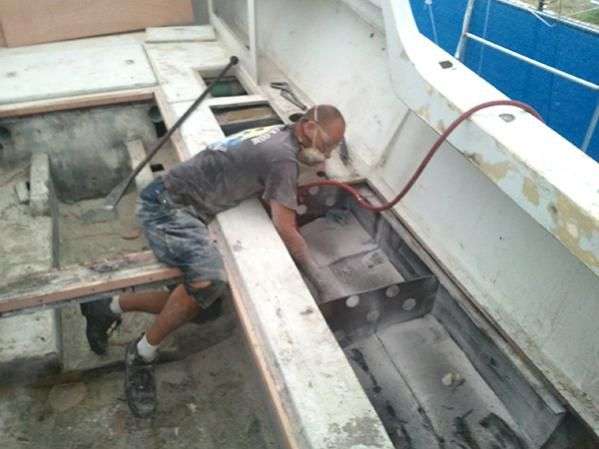
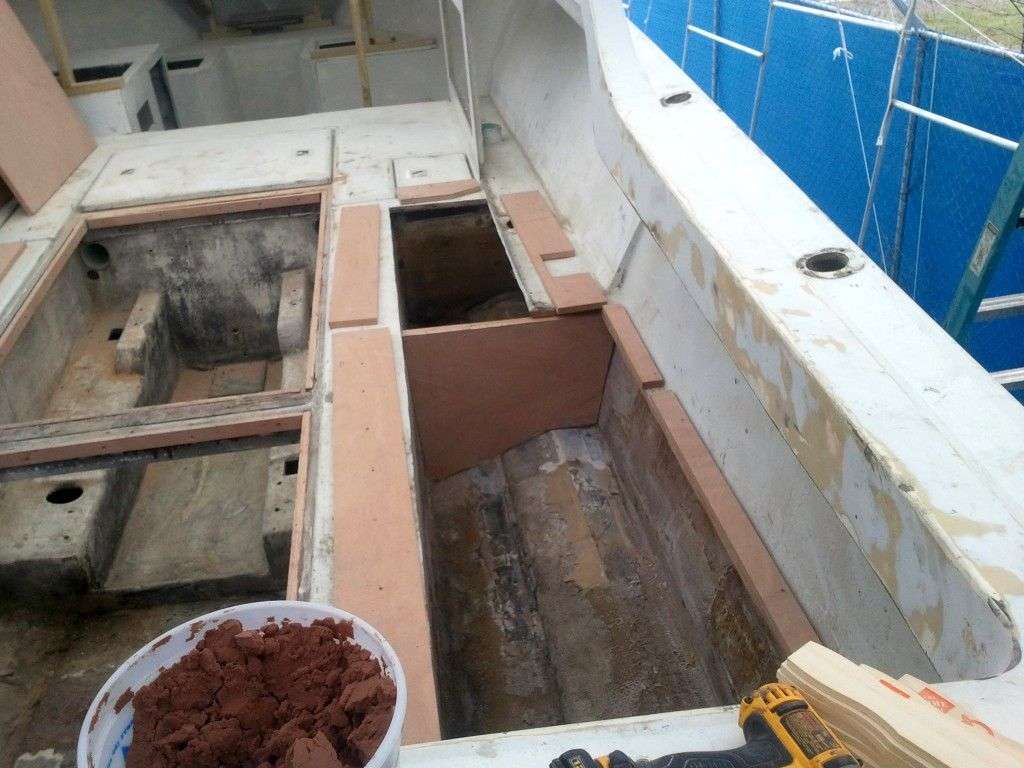
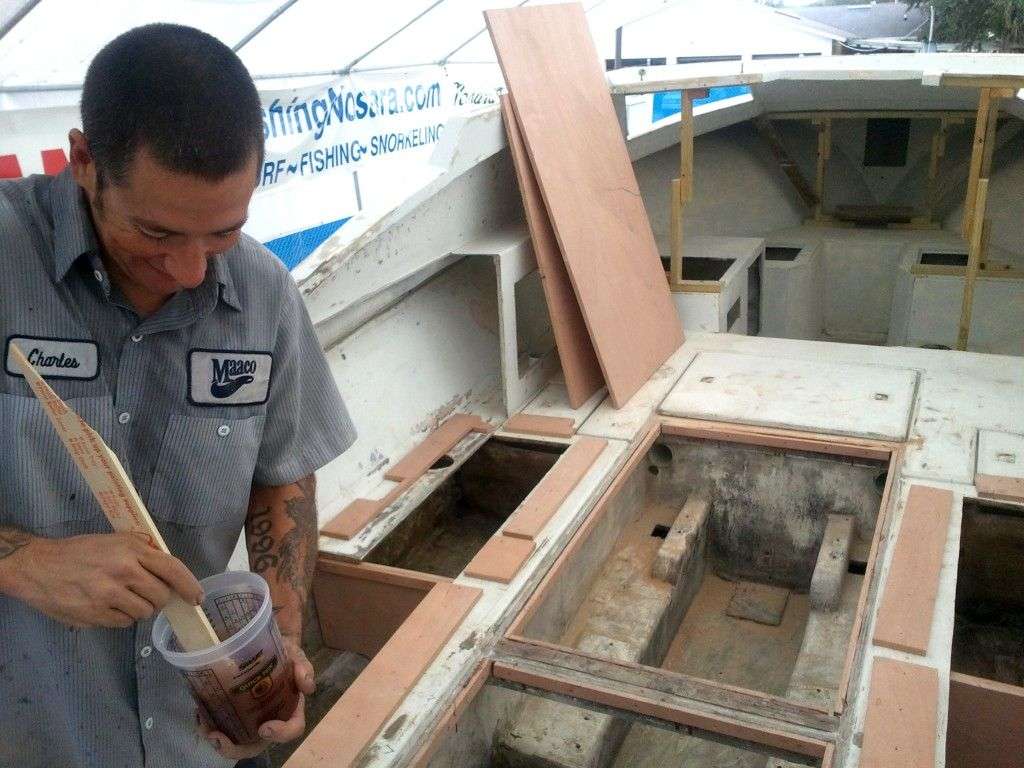
It’s been a dirty week of work on The Discoverer Project as we moved below decks into 20+ years of diesel-flavored sludge and muck. Charlie has taken the next step in fabricating the floor by installing these 1″x2″ runners along the edges of the fuel tank compartments and the center compartments.
These will be encapsulated in fiberglass to ensure that they are watertight and Charlie has an idea that is common among expensive custom boats: in every spot that will receive a screw, we will drill out about a 1 inch hole and fill the hole with epoxy resin. This way the wood never gets penetrated by a screw.

It’s a little tricky to line everything up, so stay tuned as we progress on this element.
In the last post we removed the deck plates over the fuel tanks, and to our surprise these tanks are much larger than we anticipated. The tanks run flush to the transom and extend all the way forward, almost to the seat pedestals. We estimate that each tank holds 120 gallons of fuel.
Jack began the delicate work of cutting an access panel into the top of the tanks to allow for our friends at Independent Waste Oil get their sucker hose into the tanks.
Remember on every aspect of the fuel tank work everything must be done twice.


Handy trick: Raise up the front of the boat as much as safely possible while draining the tanks; this ensures that a maximum amount of sludge and fuel make it out of the boat.
The Discoverer will feature aluminum tanks similar to those on the Wanderer. Aluminum tanks are far more lighter and durable than their fiberglass counterparts, plus by having them fabricated to fit we free ourselves from the existing dimensions of the holes in the floor. We are very pleased with the tanks built for us by Atlantic Coastal Welding in Jacksonville on the Wanderer, so we plan on using their services again.
However before we start designing the new tanks, the old ones gotta go!
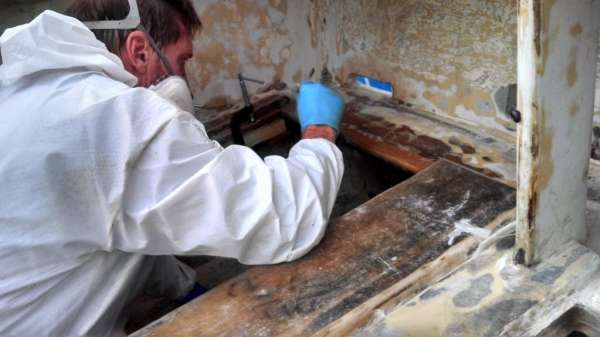
This is tricky because of the limitations of the situation. First off, you can’t use a sawzall or any other ‘deep-cut’ tools because of the tight clearance between the bottom of the tanks and the outer hull; one slip and we are patching a gash in the side of the boat.
Also, you can’t generate too much heat because of the low flashpoint of the leftover diesel fuel mix, so forget about torches, jigsaws or body saws.
The only tool for this job is a low-RPM cutoff grinder borrowed from Jack’s automotive toolkit. Jack kept the RPM’s low and made long scoring cuts rather than digging in and dragging.
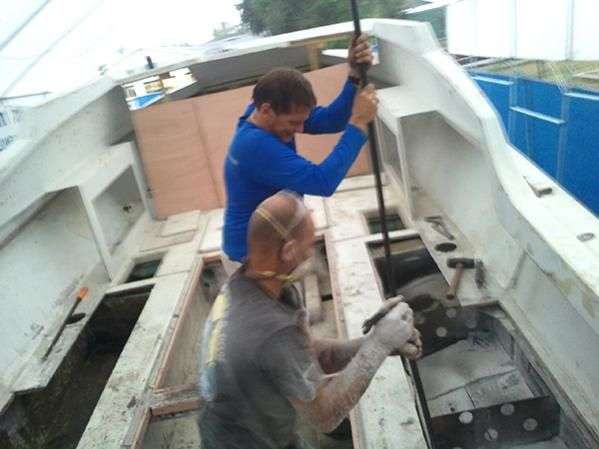
This is an arduous and nasty process, but Captain Jack ain’t scared of a little grinding dust. In the above picture he has already cut away the 3/4″ lid of the tank and proceeded to cut out the horizontal baffles. Here is a close-up of the baffles:
Jack and Craig then cut horizontal grooves into the bottom of the tank (carefully!) so the tank could be removed in sections. The tank is way too big to come out in one piece…quite frankly I think they built this boat around the tanks!
Even with the sectioned removal approach, we battled a layer of foam insulation that held the tanks in place. No exotic way to knock this out; just the old fashioned prybar and balls.
With the tanks gone, Charlie can begin fabricating the new covering boards for the forthcoming aluminum fuel tanks. Meanwhile we will begin cleaning our sanding dust and wiping the hull with acetone. It won’t be long until we are prepping for paint and then it is off to get the transom installed. Stay tuned as we continue work on The Discoverer Project.
October 18, 2012 – Day 191
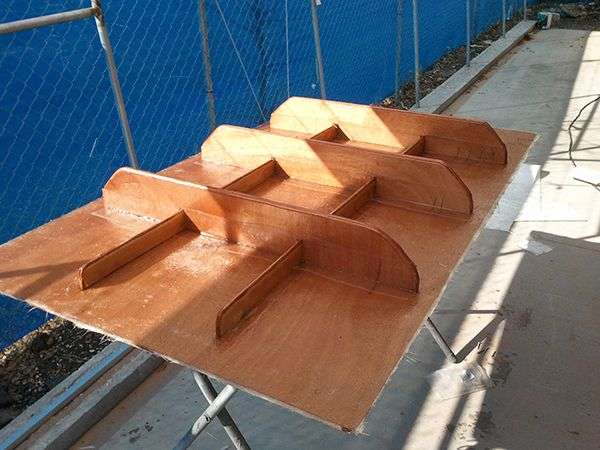
It’s been another crazy week on The Discoverer Project as we have moved ahead with sub-floor fabrication in the cockpit. Craig and Jack made a heck of a mess grinding and cutting out the fuel tanks (see last post) so the first step was to clean up the evergrowing mess of fiberglass dust and wood shavings.
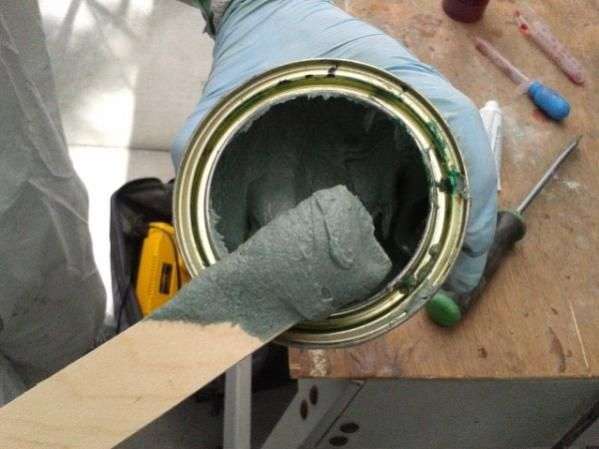
Charlie has already cut replacement rails for the holes in the floor and now begins the process of glassing them into place. The red clay-like material in the foreground is actually millions of microballoons that (when mixed with hot fiberglass resin) turn into a putty that can fill gaps much better than fiberglass alone.
Charlie laid his first round of fiberglass tape around the two large central openings, then cut six pieces of marine plywood that will be encapsulated in glass and eventually become the new floor for the Discoverer
That night disaster struck as a fog bank rolled through Jacksonville and wrecked havoc on the fiberglass resin setting up. When Charlie showed up to check his test section of fiberglass the whole piece detached.
There is no avoiding moisture-related setbacks when you are working on a boat outside in Florida. Fortunately we are getting to the time of year when the temperature and the humidity are on the decline and hopefully we can get through all of the fiberglass and paint work before the summer starts again in February.
On his second attempt Charlie achieved adhesion and could move on with enclosing the forward deck holes. Since the forthcoming fuel tanks are significantly smaller than the old ones we will fill this dead space with marine foam; you can never have too much foam in a hull.
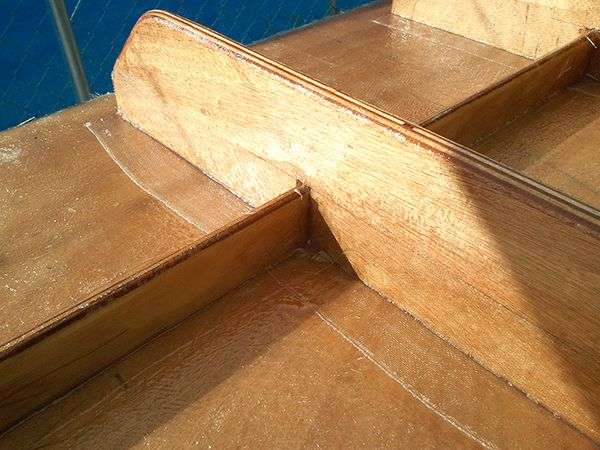
The next trick up Charlie’s sleeve is to build a fiberglass arch intended to tie the fighting chair directly into the stringers. On the Wanderer we struggled with the best way to secure the fighting chair; not only must it withstand the abuse of reeling in 600+lbs. Marlins, any fighting chair gets grabbed alot by anglers and crew seeking balance. Sometimes the weight of three people are yanking on this thing so through-bolting it to the fiberglass floor is just not strong enough for us.
On that boat the solution was to screw a 3/4 stainless steel plate into the stringers horizontally. It did the trick strength-wise but weighs alot and is not very elegant. Charlie has proposed a dynamite solution with which we are quite happy.
This arch will receive another coat of glass that will fully secure it to the stringers, and once it does we will have a perfect spot to secure the fighting chair on the Discoverer. Speaking of fighting chairs, check out the rebirthed Wanderer chair:
First Mate Alex really outdid himself on this project. I can’t wait to see this baby in action come November 1!
Next up for Charlie is finishing the covering decks for the fuel tanks and running final surface coats of fiberglass to the cockpit floor and the front nose deck.
Meanwhile we are waiting for our fuel tanks to arrive and getting our ducks in a row for the upcoming month of hanging the transom deck and painting the boat. Stay tuned for more fun as it happens!
October 29, 2012 – Day 202
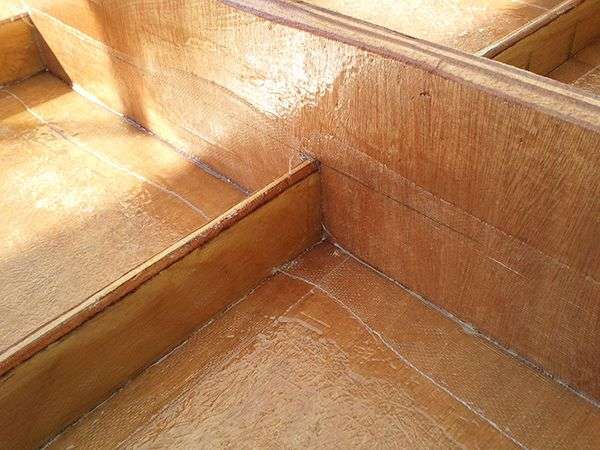
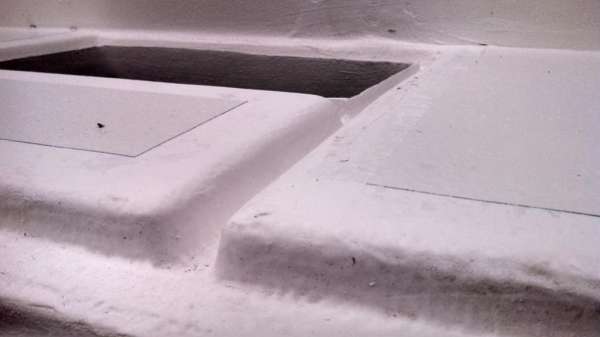
Another great week of fiberglassing for the Discover has come to a close and we are pleased to report that we are in the home stretch. Charlie got down to the finishing touches by finishing off the corners of the aft deck opening and securing the permanent cover to the floor. We use a flexible fiberglass woven tape for the edges of the openings and standard 4 oz. mat to encapsulate the deck covers.
Charlie will remove these screws once the fiberglass sets up and then fill the holes with epoxy. The screws are in place to ensure that the whole deck is under pressure so no air bubbles get trapped within.
Here is a finished corner after a full day of setting:
This cover is now a permanent part of the floor, but beneath the surface it holds a powerful secret; Charlie finished glassing in the fighting chair support arch and this trick installation will mate the chair directly to the stringers for maximum fish-fighting strength.
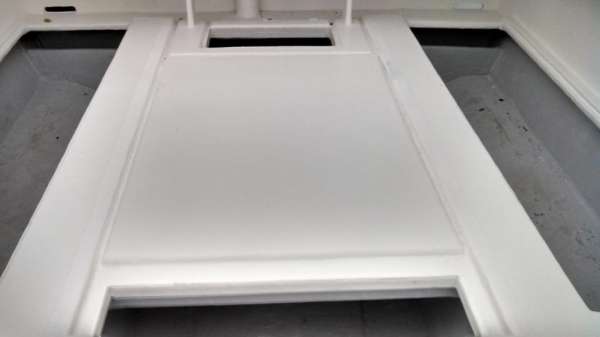
The next step is to prepare the removable floor sections. The fuel tank covers have already been encapsulated with fiberglass mat:
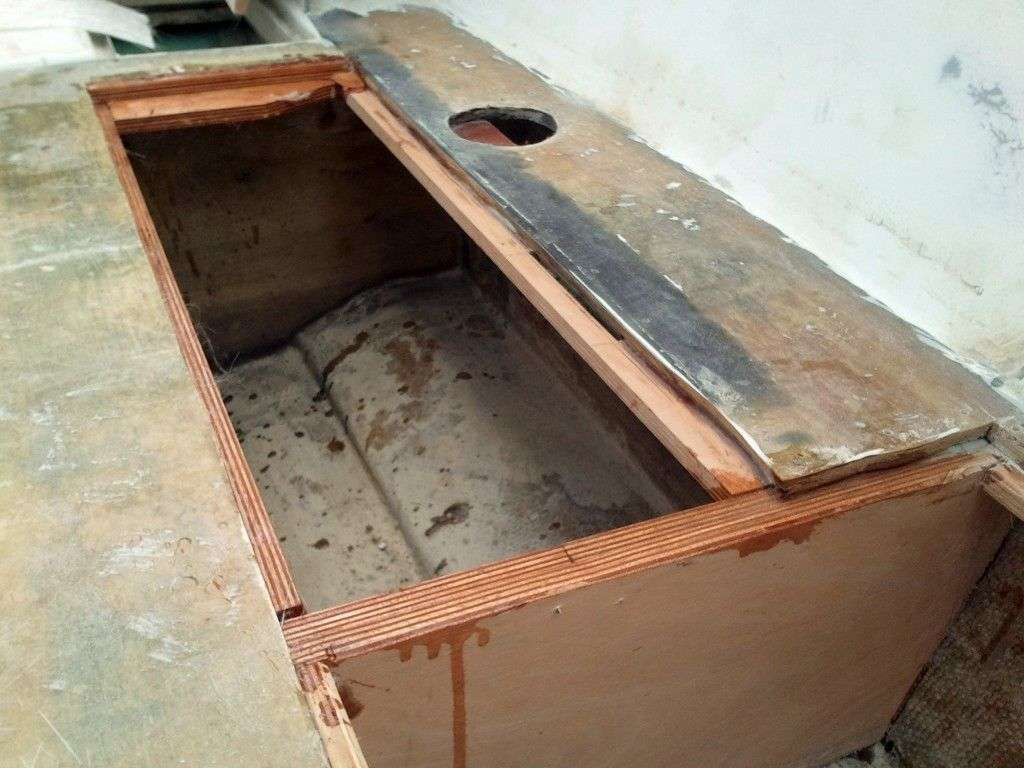
Lastly, check out the underside of the in-floor fishbox lid. Once fiberglassed this section will help with the rigidity of the hull and the boat as a whole. This piece should be pretty cool when it is completed.
We just returned from an excellent weekend at the Ft Lauderdale Boat Show and are primed to get back to work on The Discoverer Project.
November 15, 2012 – Day 219
November 16, 2012 – Day 220
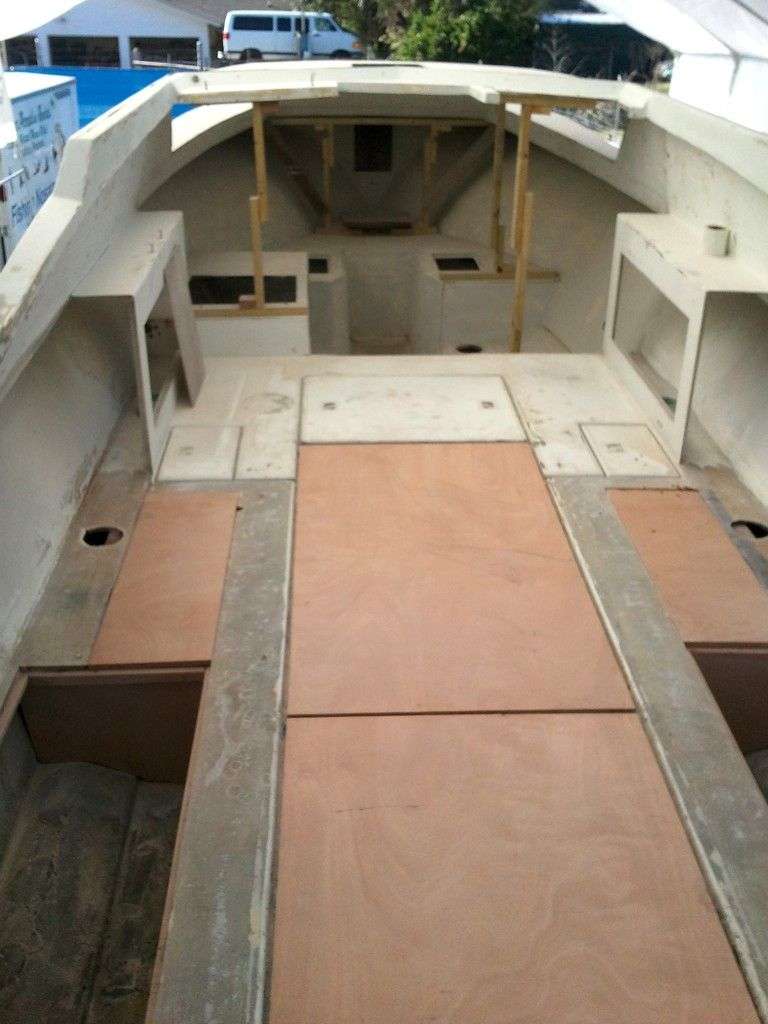
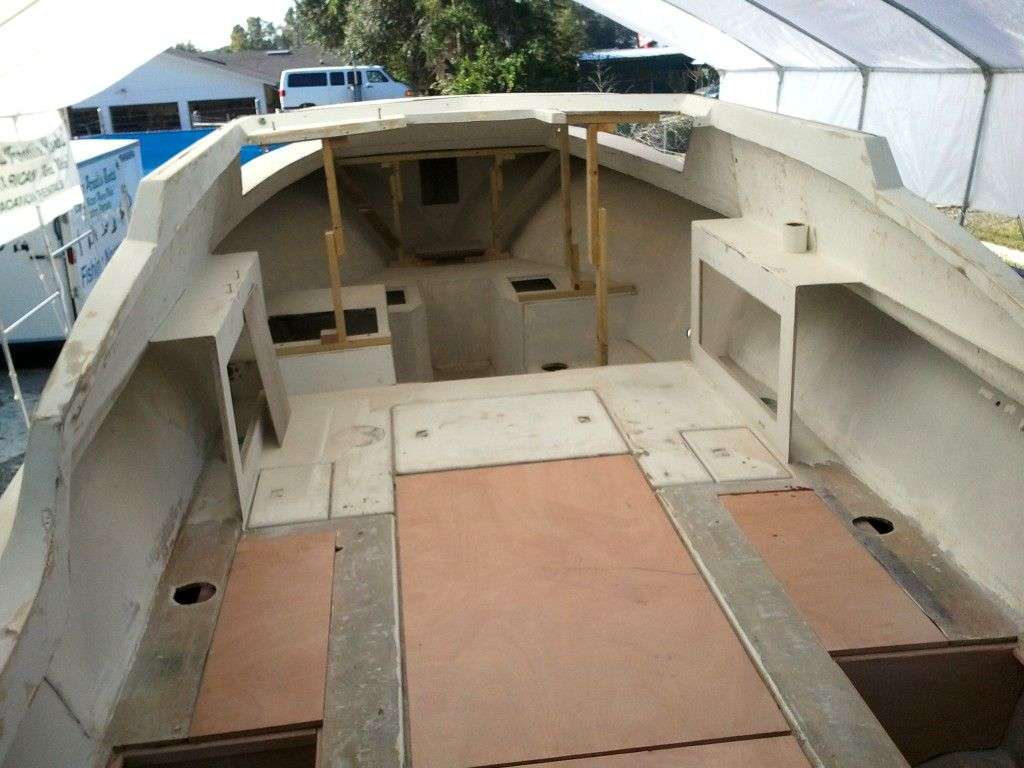
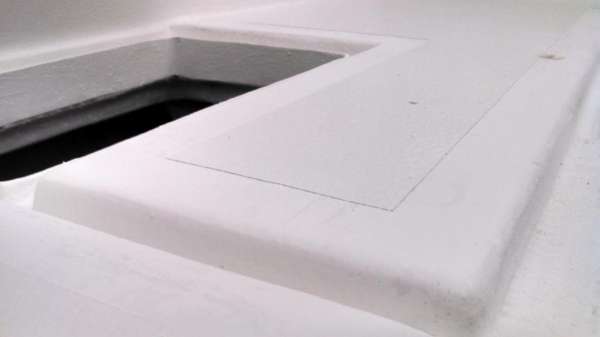
Progress continues as we begin to finalize our new floor sections for the Discoverer. In these photos we see that the top and bottom of the new fuel tank covering boards are completely encapsulated in fiberglass. The next step is to apply layers of flexible fiberglass tape around the edge to finish the entombment.
The fiberglass tape is so useful because is it otherwise impossible to wrap fiberglass matting around corners without creating air pockets. Here is a close-up of this tape job on the underside of the new fishbox.

This solution is much more durable and elegant than building up layers of chopped strand or foregoing the mat altogether (sometimes called ‘hot coating’)
While the new pieces are curing safely under the tent, Craig and Charlie re-installed the shelving along the sides of the cockpit. These had to come out to remove the fuel tanks (see last post) and once the final tape layer is applied, no one will be the wiser that they were ever removed.
Most recently we removed the temporary screws that were holding the fighting chair arch and rear floor together as one unite. Now that the fiberglass has cured we can remove the screws and fill the old holes with epoxy.
You can see that Craig had to grind away the top coat around the screws to access the heads, so a final coat of resin with be required before prep sanding this area.
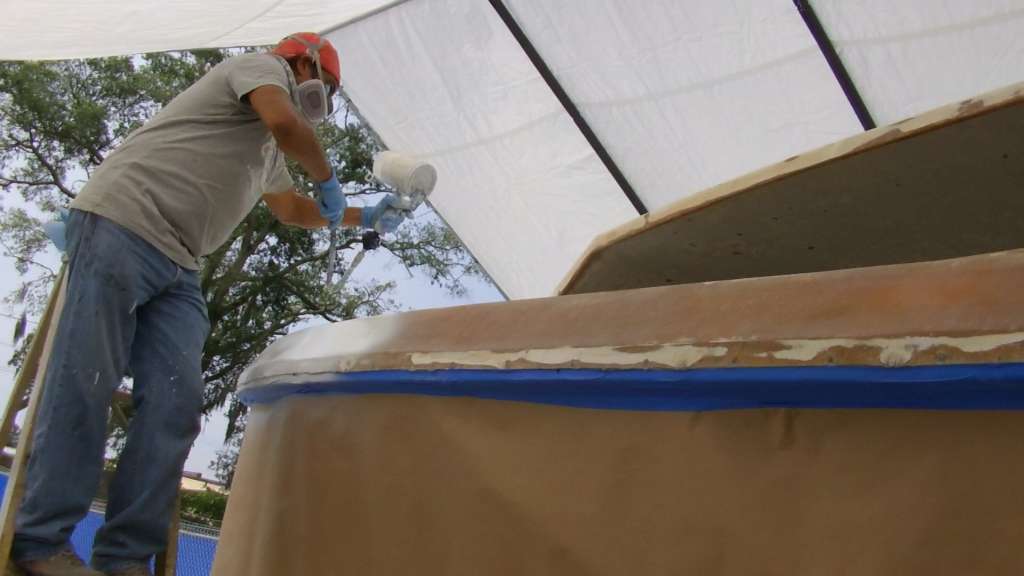
Charlie is almost done with the fiberglass work and has a few more holes to fill around the boat before painting begins. Jack and Matty are currently proceeding with prep sanding the front deck and will soon move to the rest of the hull. It is our goal to be spraying paint before the end of November. Stay tuned!
November 21, 2012 – Day 225
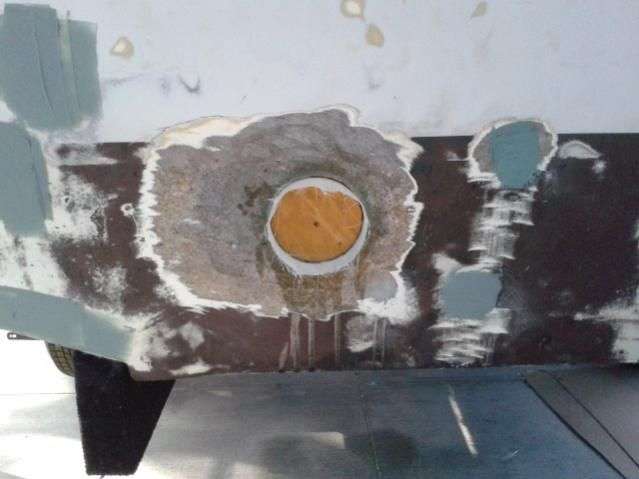
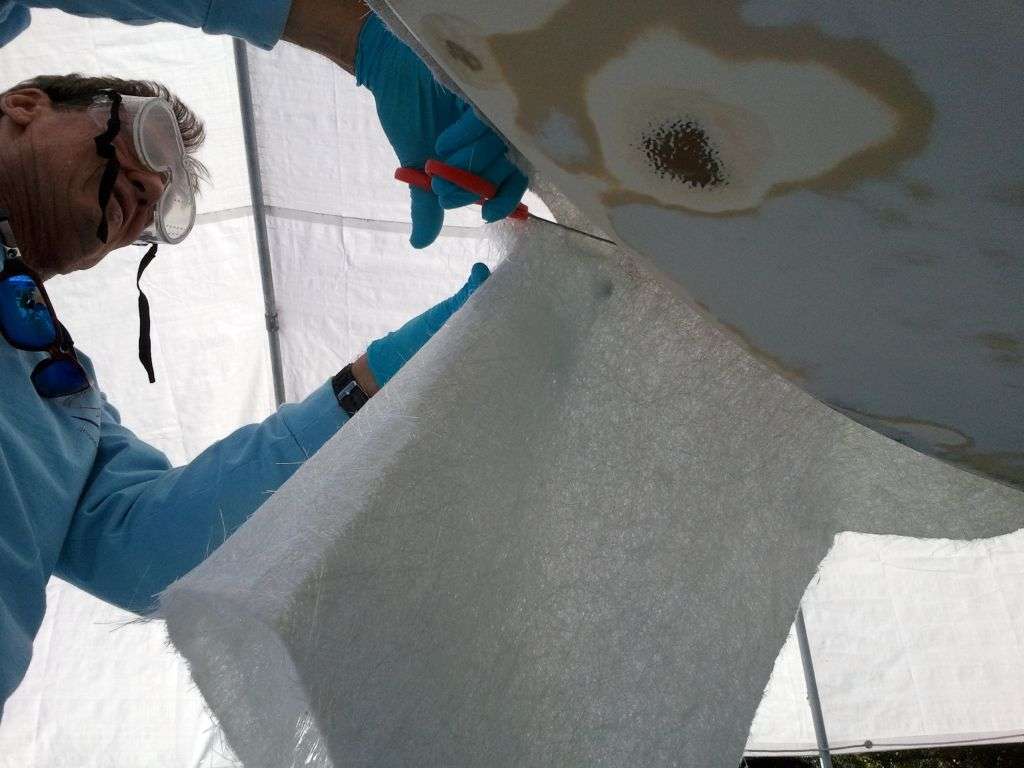
It’s Thanksgiving week and with all the talk of stuffing, and getting stuffed, etc. Charlie decide to ‘stuff’ some more holes in the Discoverer. As we rapidly approach the final prep sanding phase and look forward to applying paint, we keep finding more and more little issues like these that need addressing.
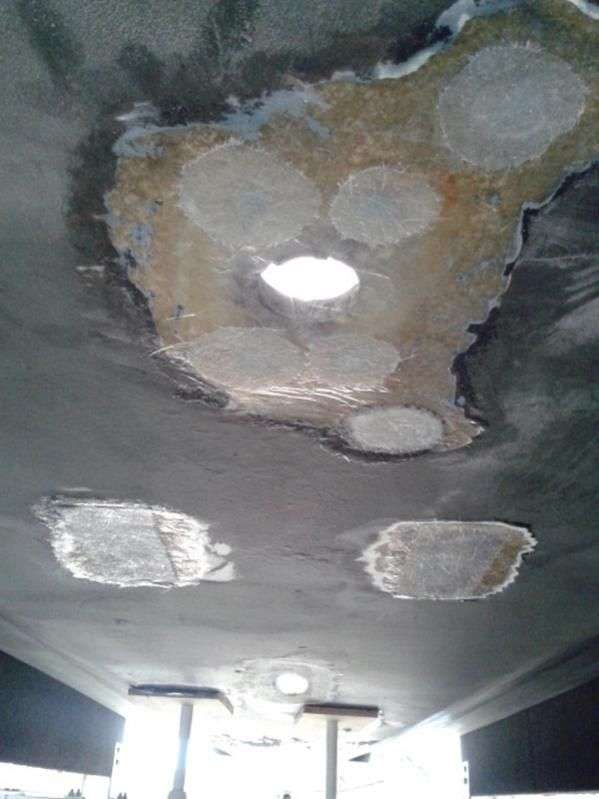
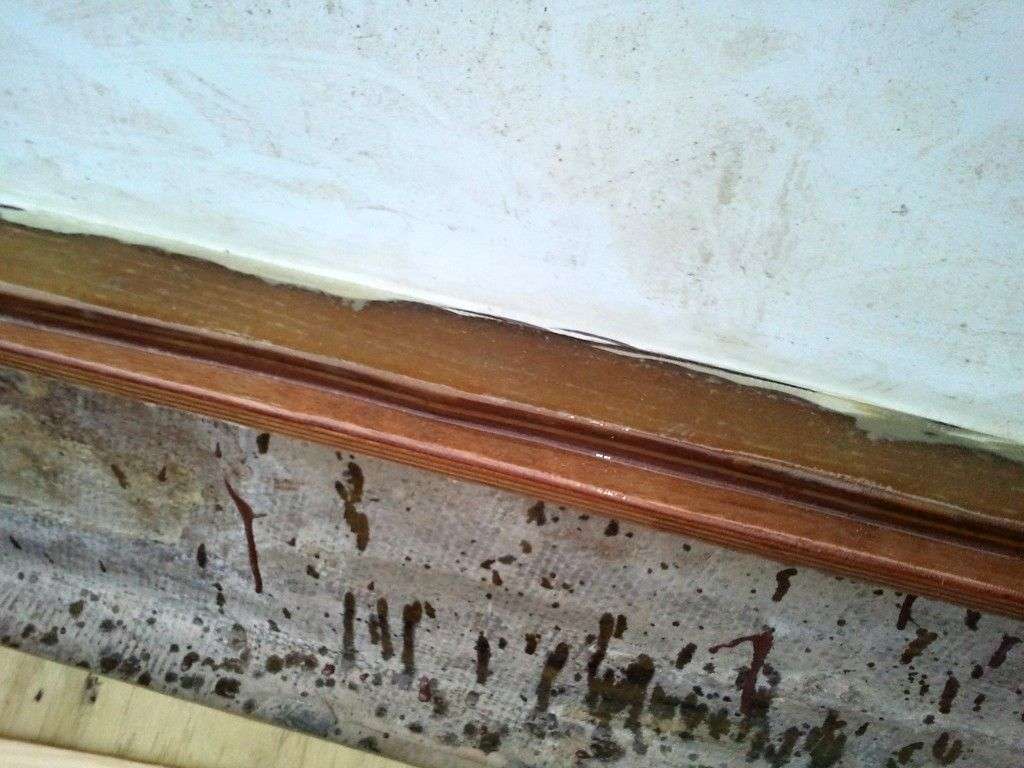
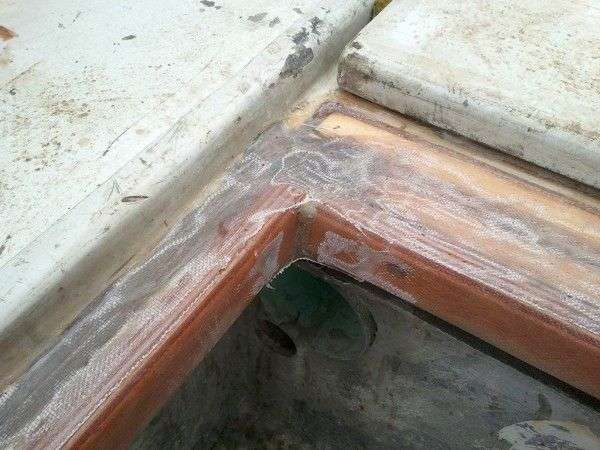
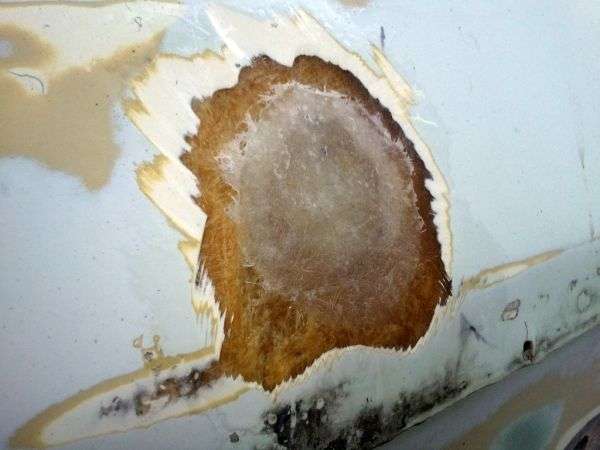
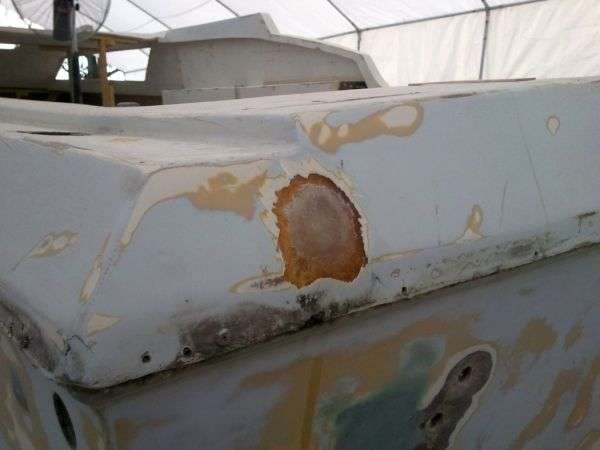
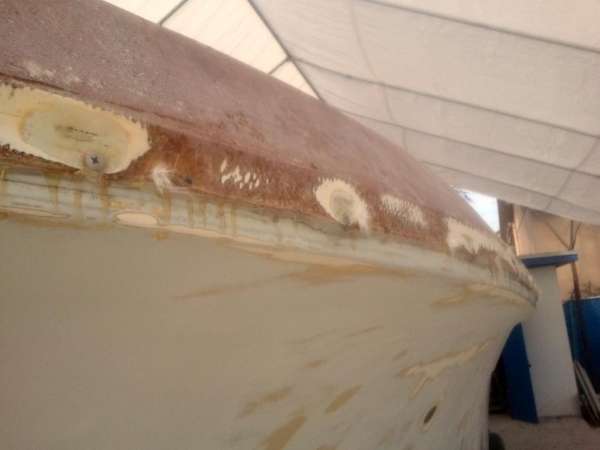
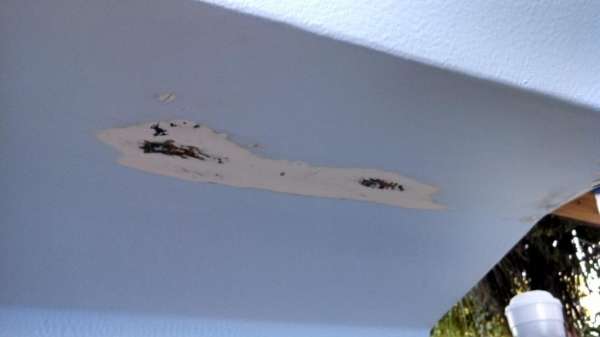
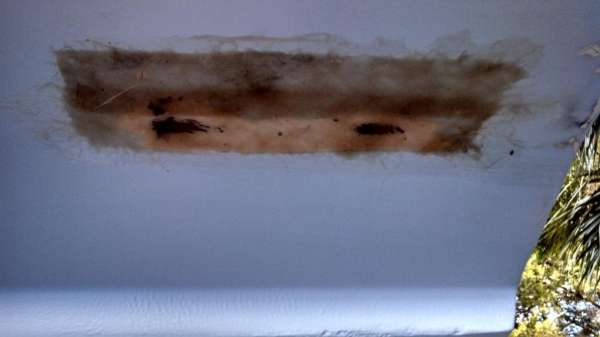
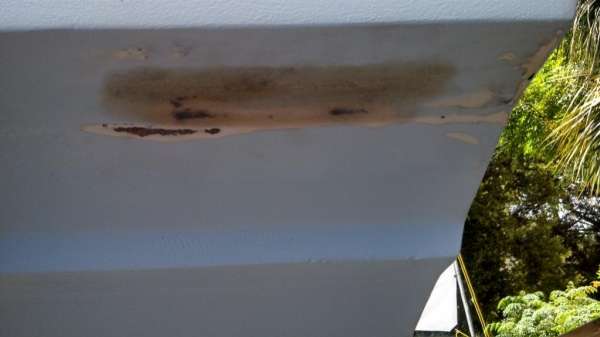
These holes along the top of the aft gunwale are a pretty straightforward fix. The fiberglass and wood are still sturdy this far above the waterline so the fiberglass is truly ‘plug and play’.
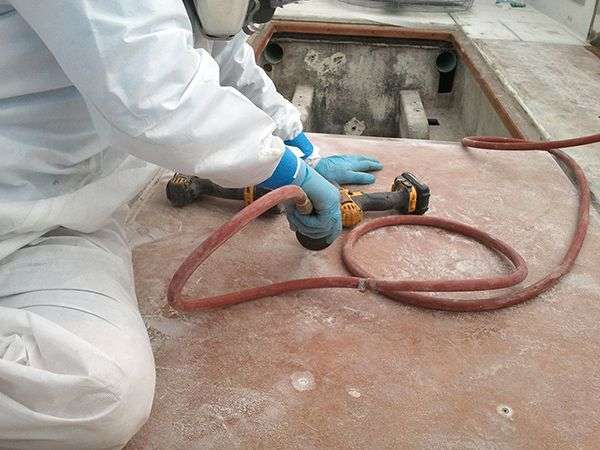
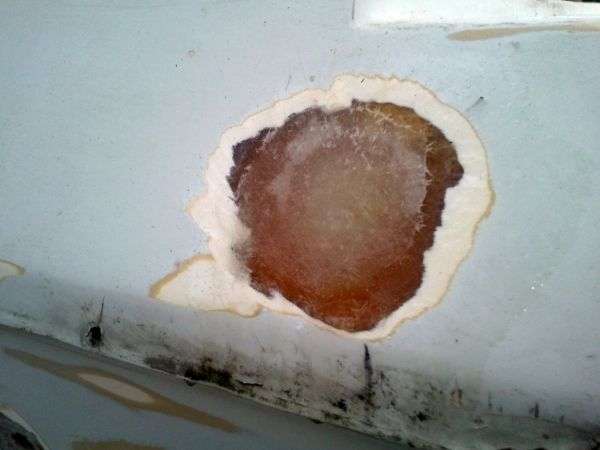
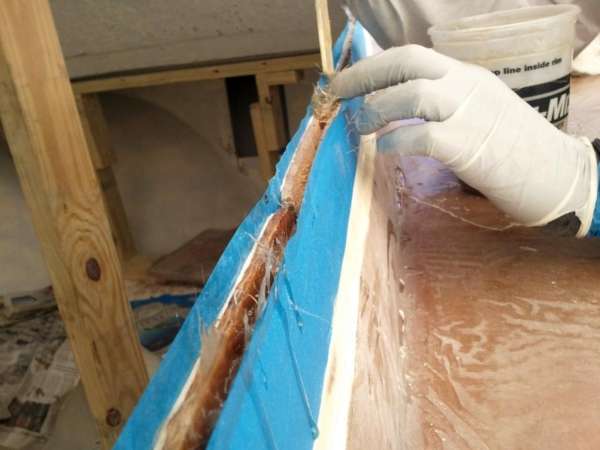
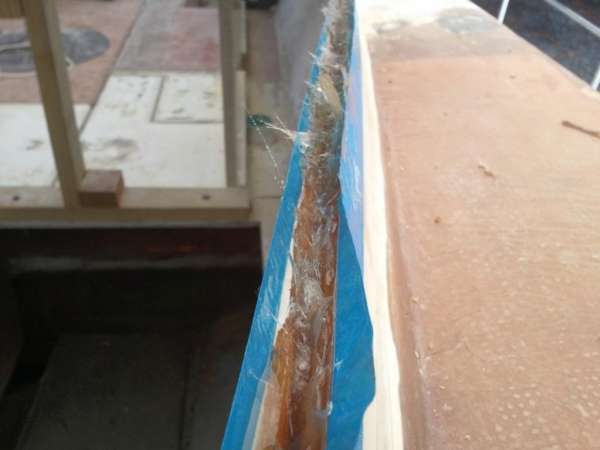
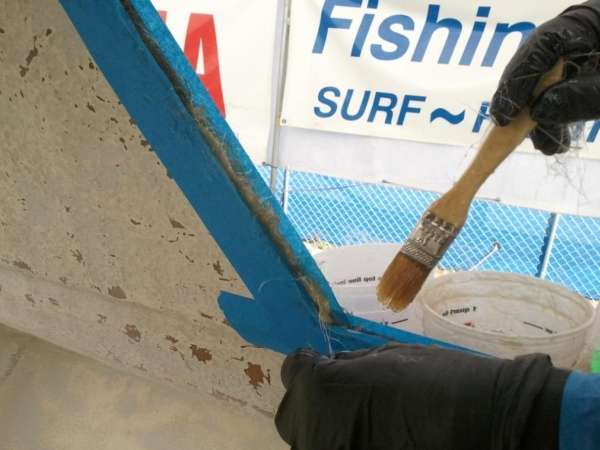
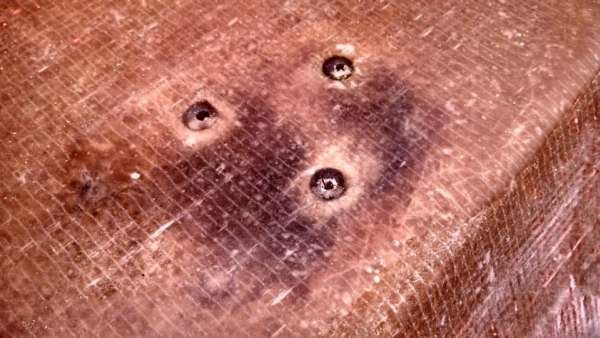
Up near the head was a whole different story. The pair thru-hull fittings were (Surprise, surprise) lacking any 5200 sealant so water has intruded around the holes. The damage extends about 4 inches outward from the hole so Charlie had to scrape out the damaged wood, stuff the crevice with chopped strands of fiberglass, and push the hot resin up to fill the void.
So far the inside of this pair of holes is all patched up and the outer layer is coming soon.
December 19, 2012 – Day 254
Sorry for the long layoff, but we’ve been super busy standing behind the sanding machine for the last three weeks. Matty has grown fond of his new Porter Cable electric DA sander and has been wearing out lots of 80 grit and 40 grit sanding discs.
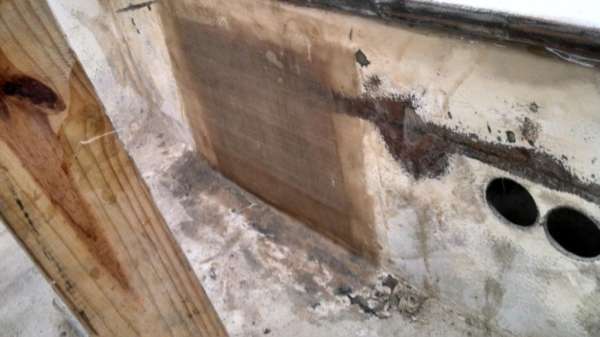
During the sanding process we discovered a flaw in our front deck installation (see previous posts). The bulk of the deck set up perfectly, however some significant air bubbles formed on the outer edges of the installation.
Matty used a grinder to expose the affected area and to rough up the surrounding area to accept the repair:
Then Craig went around the area with a compressed air blower to clean all of the dust out of the crevices; any trapped sanding dust could create more air bubbles and put us right back at square one.
We mixed up a load of resin / hardener with a bunch of chopped-strand fiberglass for thickness, then Craig worked quickly to fill the voids before the material set-up.
Here’s a look at the finished application of the raw fiberglass material:


Craig followed up with a double-thick layer of fiberglass tape to secure the area and to provide a better surface to begin finalizing the curved lip of the deck.
The next day Matty came back with the sander and knocked down all the high spots to match the level of the deck. The low spots remain, and will be filled up to level by the forthcoming layer of resin and fiberglass mat.
We are getting close to finalizing all of the fiberglass repair and will be shooting our first layer of gelcoat very soon.
Clearly The Discoverer Project is gaining momentum as we near 2013.
December 27, 2012 – Day 262
Craig rolls into the office the day after Christmas and throws the fishing calendar down on the table. “We need another big boat!” he exclaimed, pointing at the line for the Wanderer.

He’s right! A quick look shows the blue beauty fishing every single day except Christmas (and that wasn’t due to lack of demand) and clearly the market is primed for the arrival of the next great Costa Rican Sportfishing vessel. The only thing standing between the Discoverer and the blue water is about 1000 hours of labor and God-knows how many dollars.
Nothing to it but to do it, so Craig got back to work on the new front deck of the Discoverer. Here is how we left things before the break:
The high spots have been block sanded down to the same level of the rest of the foredeck, and the spots that are still shiny are lower than the surrounding level. Craig applies liquid resin / hardener with no additives (also called a ‘hot-coat’) to the low spots, then we add another layer of fiberglass tape over top of the resin.

The idea is bring everything up to the level of the foredeck, and if we accidentally build it up too much that’s no problem because we can always bring it back down with the sanding block.

After an overnight cure and some early morning sanding, Craig returned to repeat the process; there are no shortcuts when it comes to building up levels of glass like this, just lots of time spent on a sanding block.
Finally the entire deck is at the proper level! All that is left to do is a final touch with the block sander, then clean it up and add our final layer of chopped strand.
Here is last bit of this deck that will ever see the sunshine:

Craig is fired up to keep this thing moving so he began forming the chopped strand sections even though Matty had one more round of block sanding to go:
Meanwhile Charlie came around and added another coat to his hole repairs by the bathroom and the rear transom. He moves like a ninja and makes this stuff look easy, but trust us this is high-level detail oriented work:

We are stoked for the final coat of chopped strand and you know where to find the pics…right here baby!
“Thats a lot of work, I am curious to know if you have calculated the amount of weight you have added with all that glass and resin?
I am also wondering why you did not use non woven biaxial fabrics to save weight and improve the overall strength? You could have also used a light weight fairing putty to fill the low spots on the deck and skipped that final layer of matte.
It seems like you guys are doing more work than you need to but I will give you tons of credit for taking on the job. Good luck and keep them pictures coming.”
-Dave Meyers, Florida Sportsman Forum Senior Member
January 30, 2012 – Day 296
Hi Dave,
Thanks for the reply! You are totally correct that the approach we are taking with the nose seems extremely overbuilt, and common wisdom tells that a lighter nose / bow means a softer ride, better gas mileage, and less horsepower required to get up to plane.
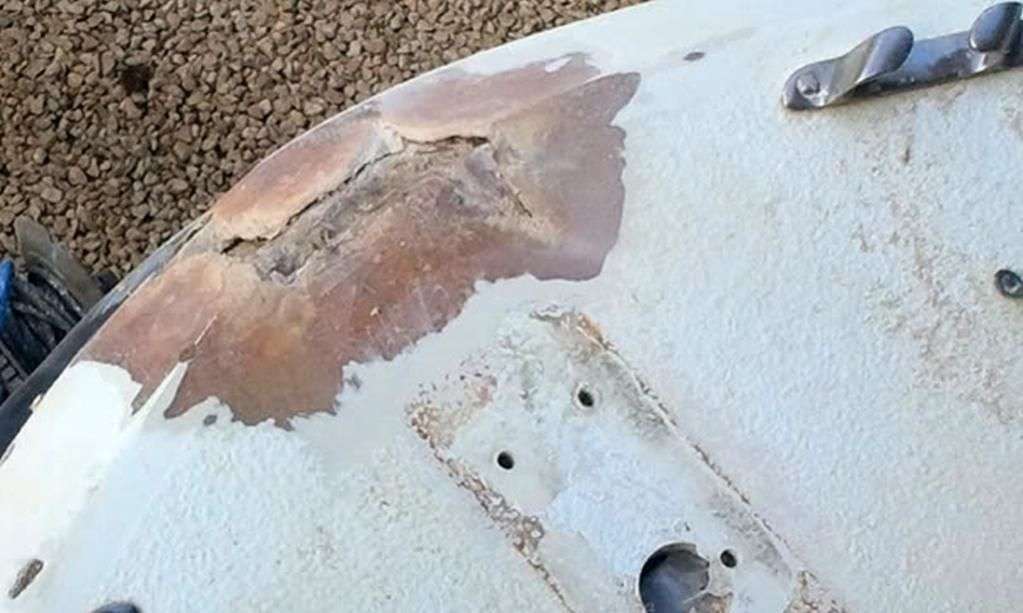
We currently have a boat almost identical to the Discoverer in service down in Costa Rica and the front deck has been a constant source of concern in our specific application. We keep this boat (the Wanderer) in the water year-round tied off to a mooring point and last year a freak set of waves swelled into our harbor at Garza Bay.
The Wanderer incurred serious damage from this event as a rouge wave came over the back, filled the cockpit, and sprung the whole boat up on her nose. When it crashed down, here was the result:
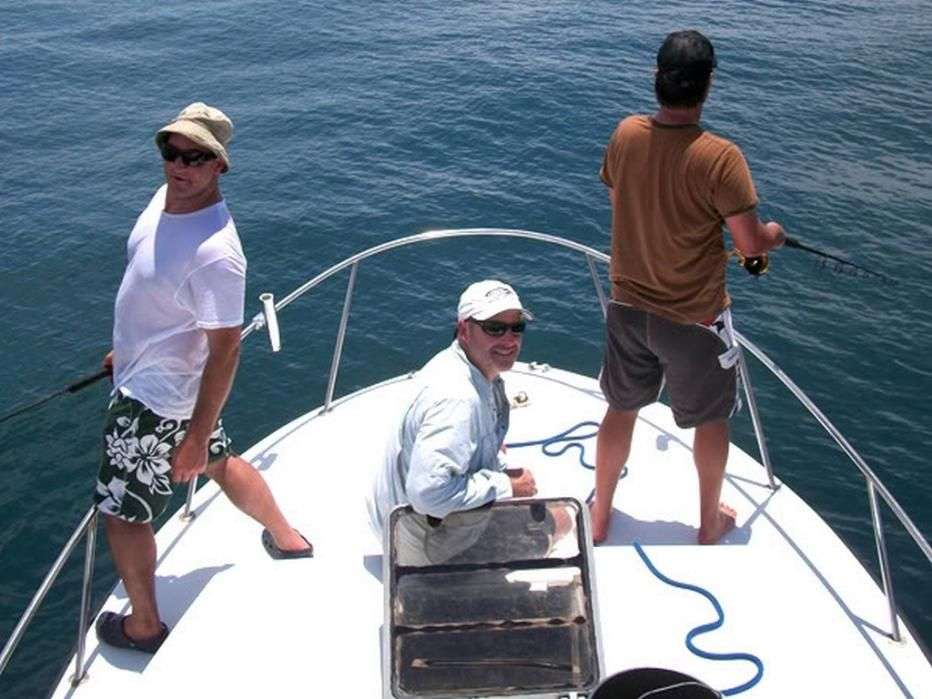
Also as a charter boat we have come to expect the unexpected when it comes to client behavior. Sometimes we have hardcore anglers want to sight fish off of the bow; other times we have 10 yoga students who want nothing more than to hang off the bow and look at dolphins:


The Wanderer has taught us the value of having a strong foredeck because the unexpected is always right around the corner for us. Read the details on the whole in-country repair process here: Wanderer repair – September 2011
As for the weight issue, we have a very short ride to the blue water (less than 6 miles) and never need to exceed 25 knots even during tournament time. With the Discoverer I figure we have added approximately 75 pounds to the nose so far and will probably end up just short of 100 pounds added by the end of the process.
As for the finish work, you are also right that we could use either a lightweight fairing puddy or even a micro balloon mix to fill the low spots rather than fussing with whole sheets of fiberglass mattes. However in this case we are trying to replicate the materials that are available to us in Costa Rica.
You see our area is so remote that there are no legitimate boat suppliers. The only materials we can acquire locally for repairs are standard polyester resin/hardener and matte. The best way to make sure that we can easily repair this foredeck with local materials is to only use locally-available materials from the start.

Another example of this is our choice to spray gelcoat rather than marine paint…you can’t find good marine paint anywhere in Costa Rica, but gelcoat is available in almost every hardware store. Here is a link to our last gelcoat spraying escapade: Wanderer Refit – September 2012
It seems like you guys are doing more work than you need to but I will give you tons of credit for taking on the job.
You are totally correct, and thank you for the kind support. We will keep the pictures coming and should be spraying gelcoat soon. Here you can see that Captain Jack has plowed ahead with prep-sanding the interior and the cabin. A little more clean-up and a few more repairs and we will be throwing material at her in the next few weeks.
February 15, 2013 – Day 313
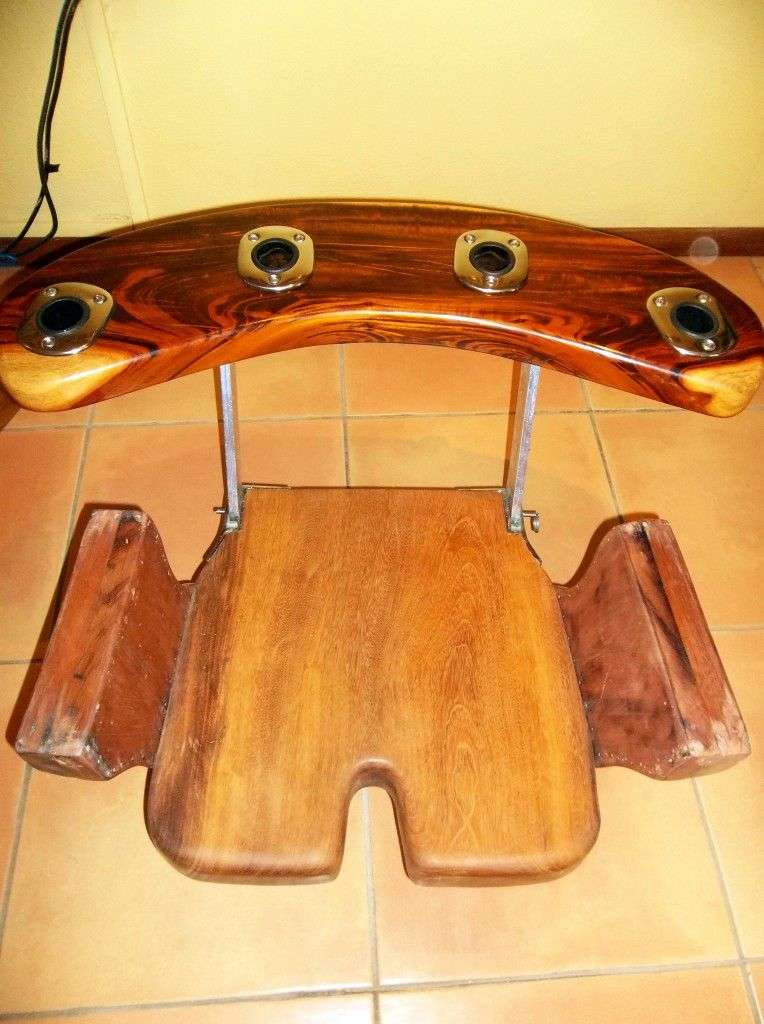
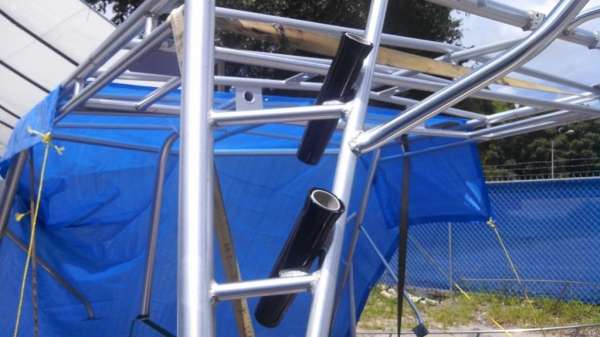
Work on The Discoverer Project has reached a fever pitch as we have multiple irons in the fire right now. First off, the tower has been delivered to our sister shop over at All Jak’d Up Motorsports where the master fabricator Craig Sutton Jr. has begun the modifications. He has already added our shade extension to the rear:
In addition to increasing the sun cover for the clients, this hoop drops the rod holders a few inches which will allow for quicker access to the rods by our Costa Rican crewman who are all under 6 feet tall. Craig Jr. will also be adding breakaway hinges to the upper superstructure so we can fold the tower down for road transit. Should be exciting and of course we will keep you up to speed as progress unfolds.
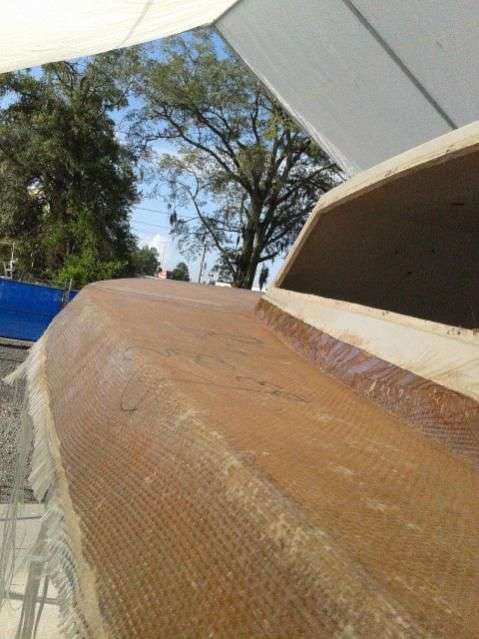
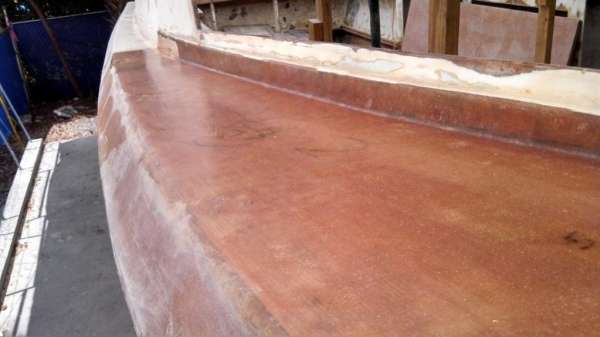
Also, Matty is running himself ragged trying to perfect the final surface fiberglass repairs to the foredeck, rubrail area and transom. The foredeck has been a long process but it is finally coming to fruition:

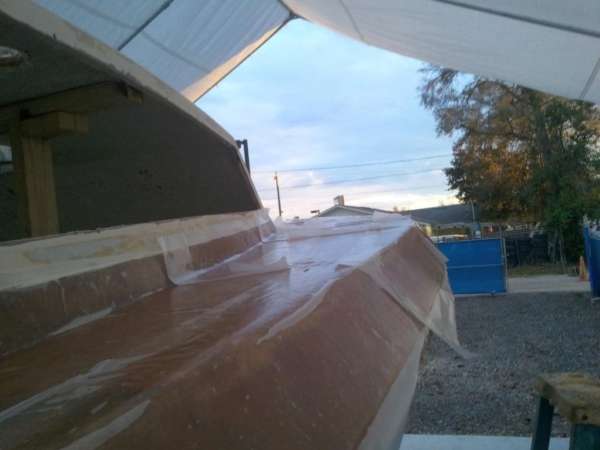
We were turned on to a technique that surfboard repair guys use involving wax paper on top of hot resin. The wax paper allows you to smooth out air bubbles and force resin down into small crevices and holes that can form while building up layers of fiberglass.
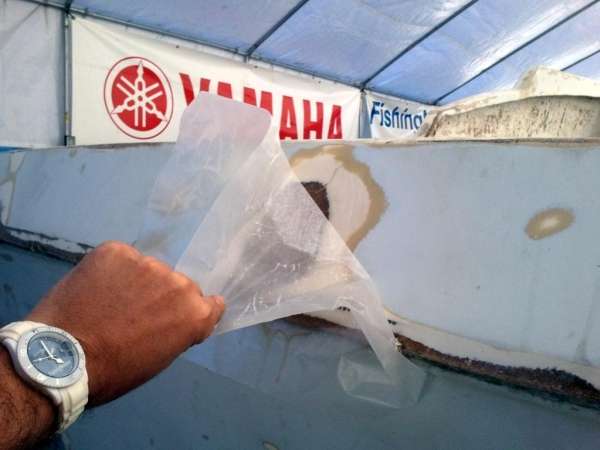
An added bonus is that the paper traps the heat from the catalyzer and makes the form cure much more quickly.
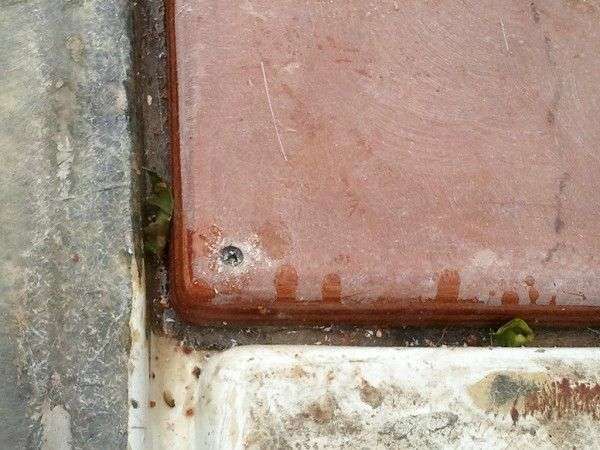
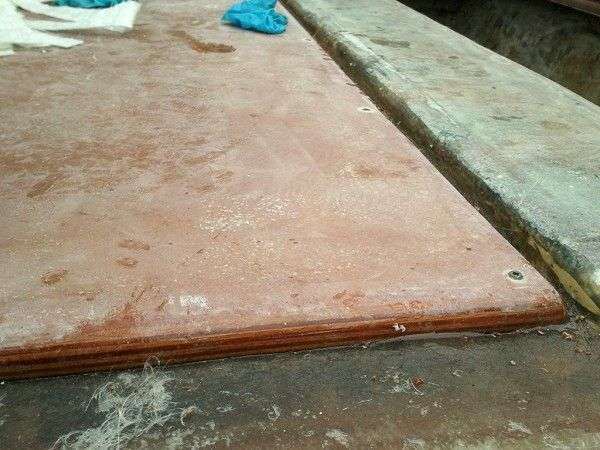
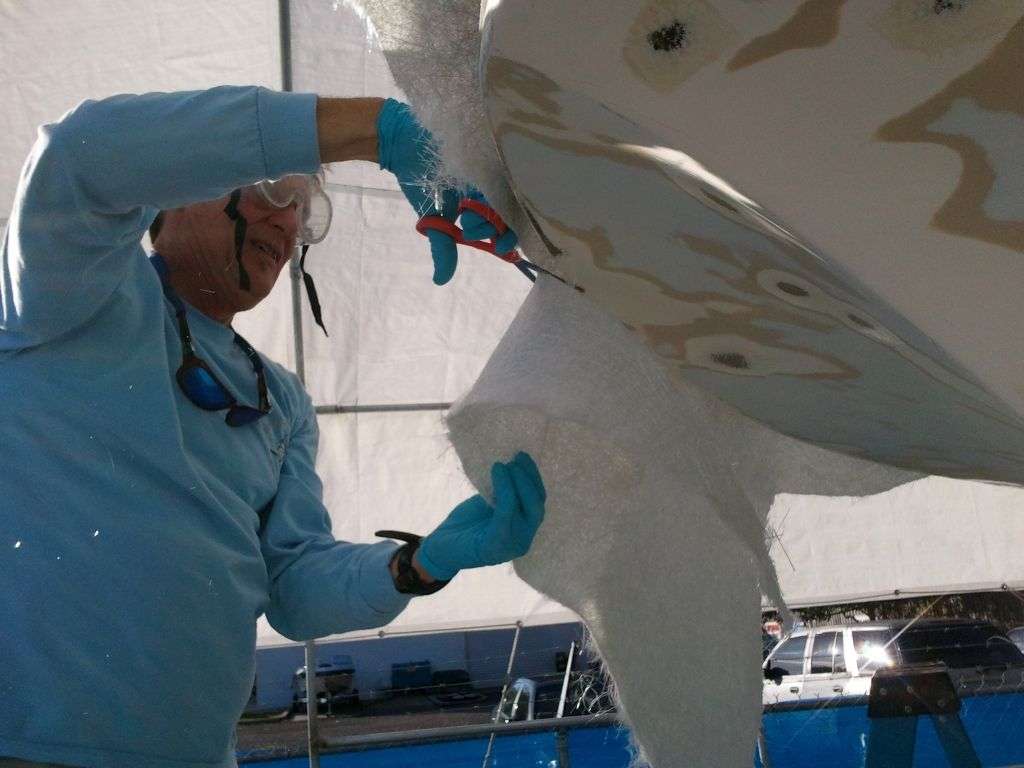
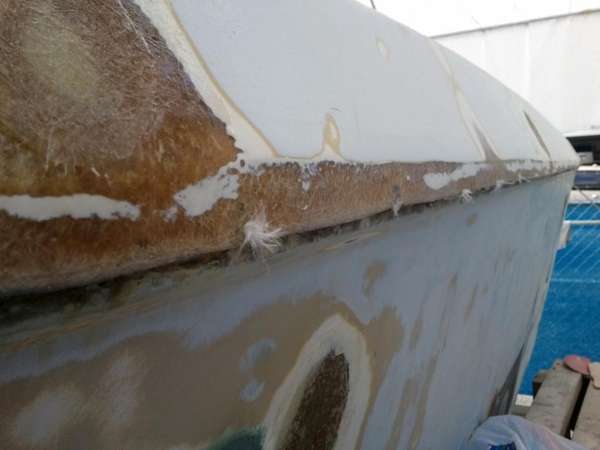
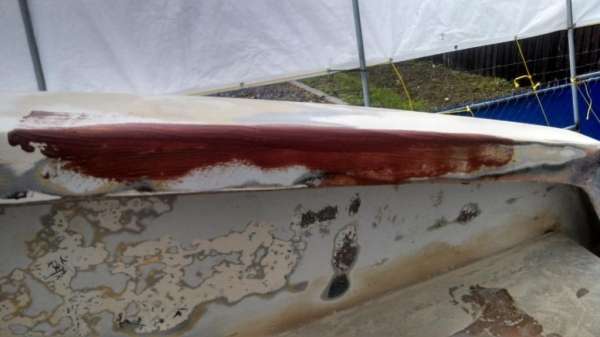
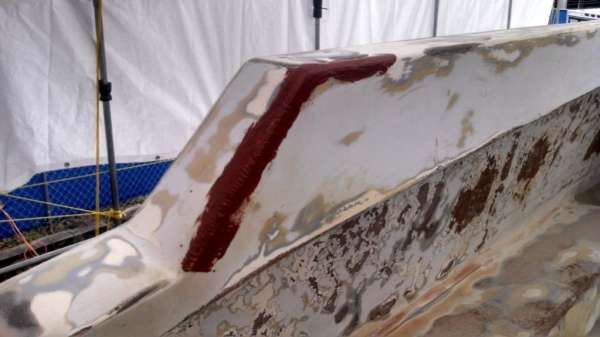
For the rub rail we elected to fill all 117 of the old holes with fiberglass plugs. The quicker and easier approach would be to run a layer of glass around the outside and be done with it, however we want as fresh a start as possible once we get to assembling the rubrail, so this tedious effort is worth it.
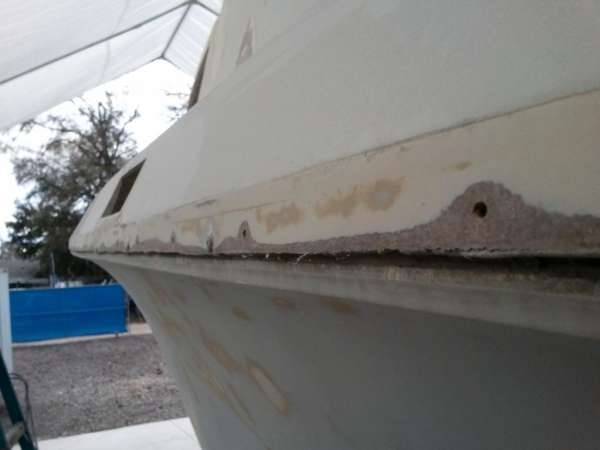

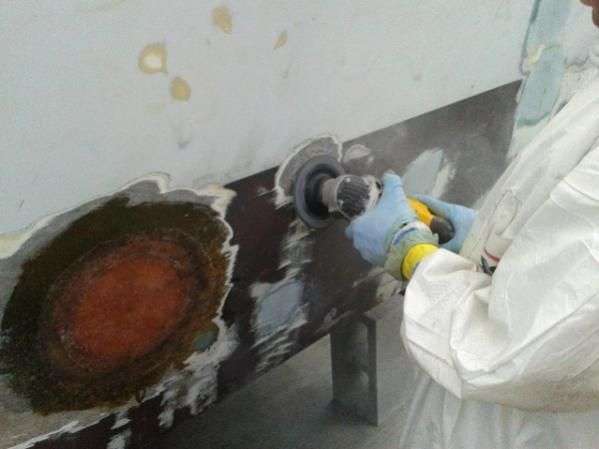
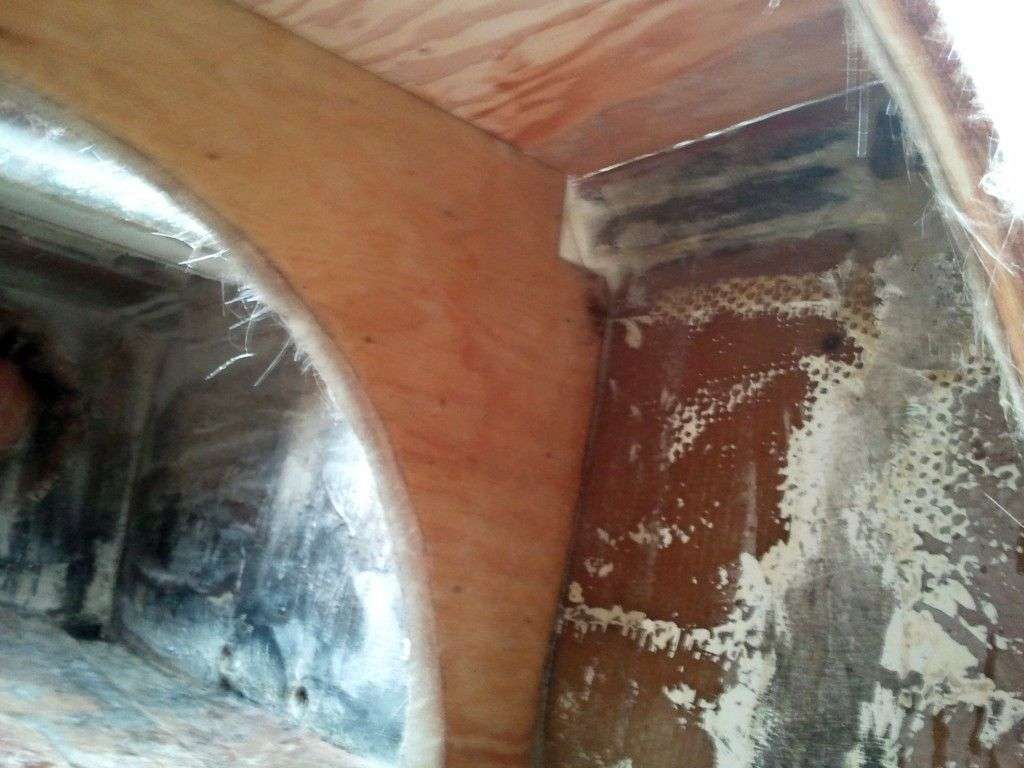
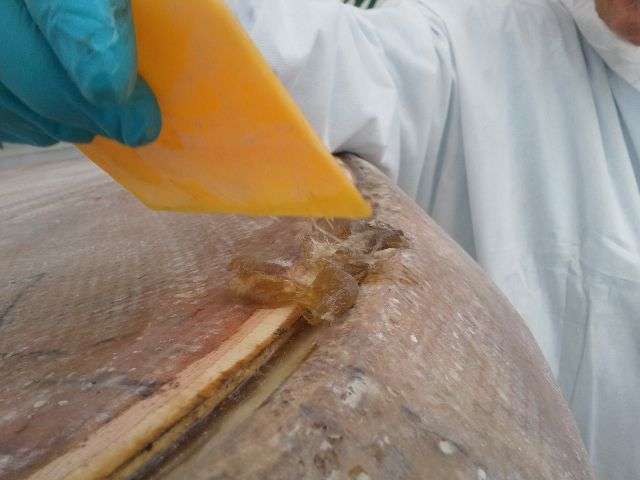
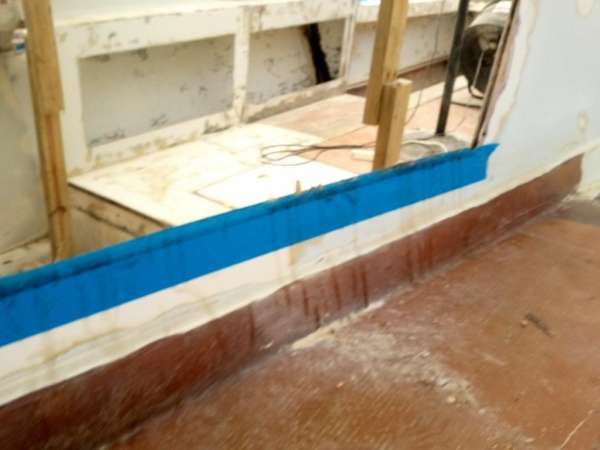
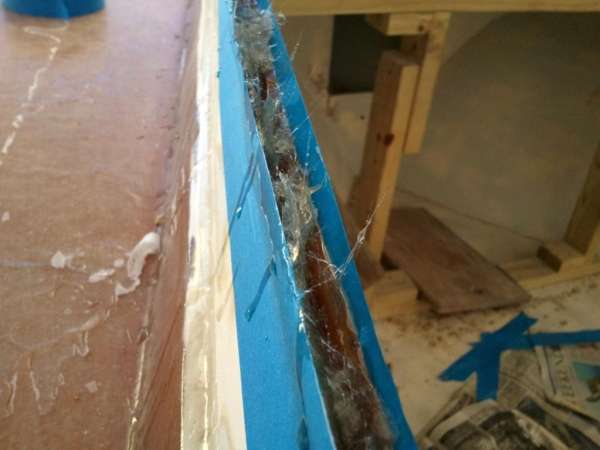
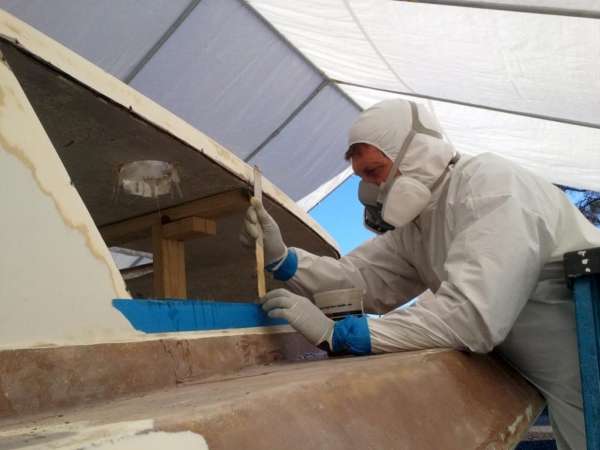
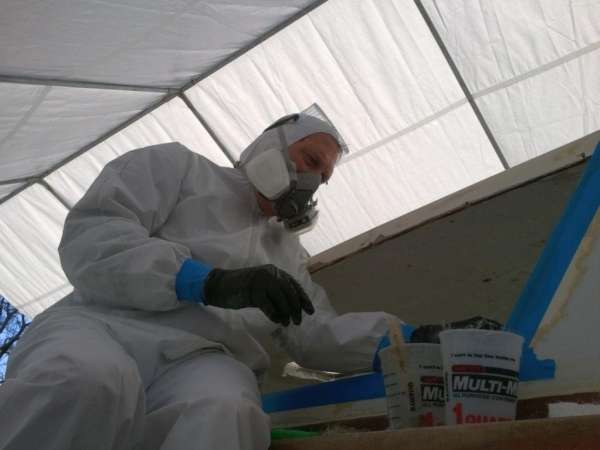
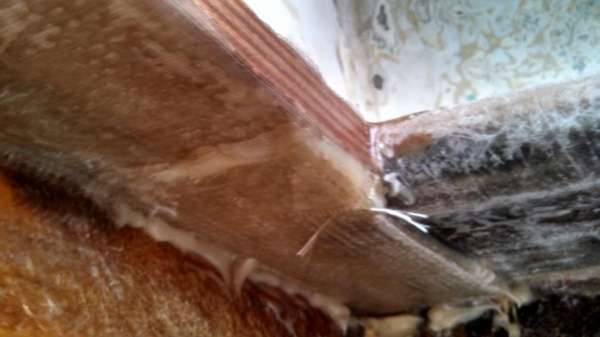
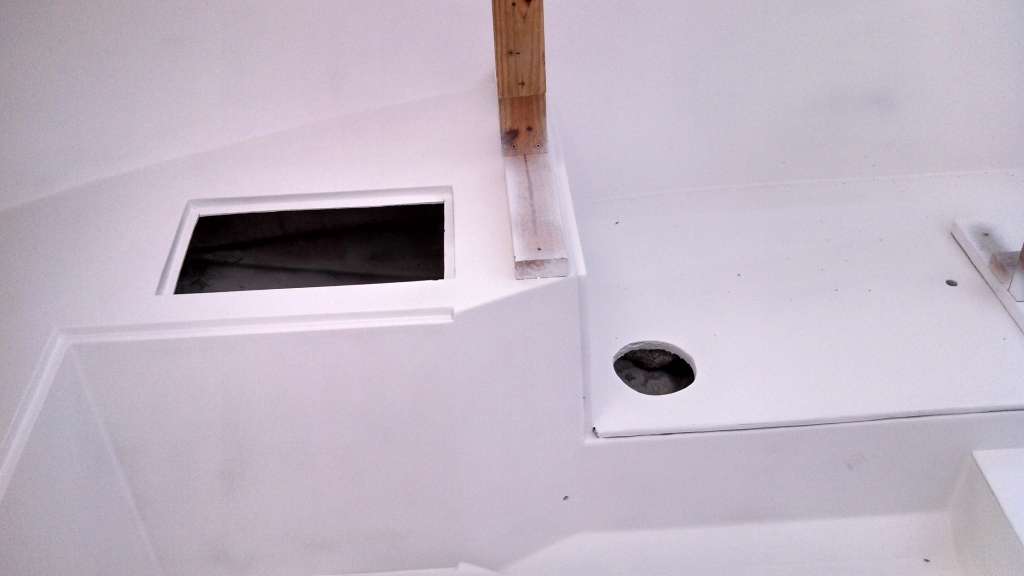
Lastly, Craig Sr. is doing everything he can to strengthen the areas around the hull where water intrusion has eaten away the wood. Of specific concern is the area around the forward deck hatch and the cabin windows.


The previous owners knew that water was leaking through the windows and rather than repair the leaks properly, then laid a bead of epoxy caulk over it and called it a day. Well that trapped moisture really did a number on the wood so Craig is taking this opportunity to fix it right. He picked and blew all of the rotten wood from between the hull elements, then methodically pushed a chopped-strand/resin mixture into the crevices. It is essential to do this in layers so as not to create trapped air pockets.
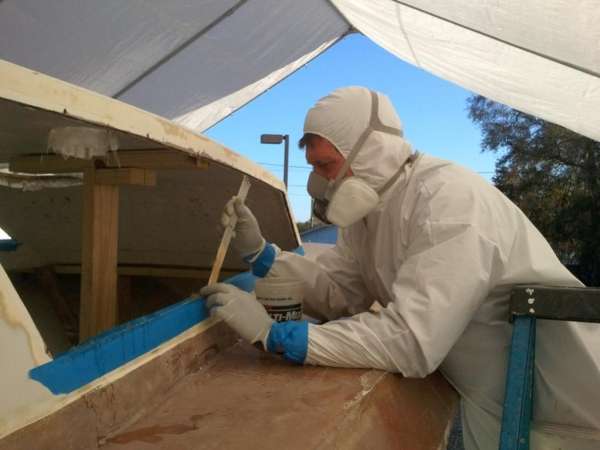
It seems like everywhere we look there are more areas that need fiberglass repair, though fortunately we are getting better and better at it each day.

We are still working hard and holding out hope that there is a pot of gold at the end of this rainbow.

![]()
February 25, 2013 – Day 323
Hi folks!
These are the kind of threads that have been going back and forth on my emails:
Matt: Sorry I didn’t get back to you on Saturday because I was busy working on the boat.
CR Office: No problem, how long for the Discover?
Matt: Fish on by December 2013 at the latest, November 1 at the earliest. Why, do you want to switch jobs?
CR Office: No thank you. See you in 2014 ha ha
So it is safe to say that we are chomping at the bit to continue progressing on The Discoverer Project but with the daily demands of jobs, wives, and serving lots of fishing clients here in the high season, it is hard to find time to invest in the boat.
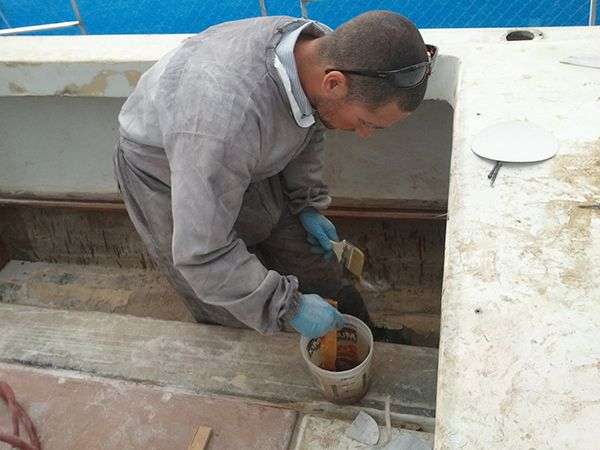
Still we are plowing ahead with the small details to get this thing ready for paint. I went around the whole cabin with fiberglass plugs and epoxy filler and sealed up all the holes, big and small:
Before:


After:


This is a major undertaking that we did not expect to confront; on the Wanderer most of the holes were very well serviced (tight bolts, real stainless steel, ample 5200) we got to reuse most of the holes. On the Discoverer we have “discovered” that the previous owners were not as apt as the late Captain Jack Woodruff and instead put their faith in crappy wood screws, polychrome bolts from Home Depot, and no sealant at all.
Basically, I don’t trust a single hole on this boat so they are all getting filled and fixed.
For the top of the cabin I overdrilled all the holes to find good wood, then inserted plugs of torn-up fiberglass matte with a metal pick, forcing the material into all the null spots between the hull. I applied the hot resin with a pediatric syringe to keep the mess under control while still being able to apply the resin with some PSI behind it; between this and the wicking effect of the chopped-strand matte I am confident the these rotted out holes are now watertight plugs.


They still may look like holes, but once the gelcoat hits them no one will ever know they existed.
We also are attacking the problem from the underside with a really handle epoxy product called West 610 from West Marine / Port Supplies line of products. It’s a caulk gun-applied binary epoxy that is great for filling gaps and adhering parts; I burned through two tubes running around the underside of the cabin cap, rub rail line, and under-gunwales filling up everything that looked out of place:


These repairs may look nasty now, but once sanded down flush with the surround bulkhead (once again) no one will ever know they existed.


Also we finished wrapping the starboard side window in fiberglass tape. On the port side we tried to wrap it all with one 4-inch wide piece of tape. We learned the hard way that this stuff will bend 90 degrees, but not twice with one piece. It took a few hours with a horse syringe and a micro drill bit to fill up all the air pockets, and the raining hot resin to the forehead serves as a reminder not to try and cut corners to save material.
Here is the proper way to do it, with two overlapping pieces of tape:


In the bathroom we cut out a piece of the wall to remove the toilet, and wouldn’t you know it that we lost the piece? We made a patch out of 3 pieces of woven roven, then after an overnight cure screwed it into place over the hole and ran a coat of tape around the seams to get it trained into place.


The next day came a bead of the 610 epoxy caulk around the edges to really hold it down.

Coming up this week we will remove the screws, fill in the holes, then run a couple of fresh pieces of glass over the repair.
Before leaving for Costa Rica last week, Craig undertook the difficult process of filling the load bearing holes with pure epoxy resin. Most of the holes Matty hit will never bear more load than a compass or a radio clip, but these holes here are where the tower, rubrail, and outriggers connect; each of these objects bear extreme strain under open-sea conditions.


Craig uses the pressure of the syringe to force the epoxy resin deep into cavities all around the holes. Epoxy resin is more expensive than Polyester (which we have used heavily throughout the project) but when fully cured boasts over 2000 PSI of compressed strength (feel free to correct me forum folks, I got that number off the internet somewhere and don’t know for sure)


Lastly the cabinets on the side of the hull had to be cut in half to remove the giant fuel tanks (see prior post). It was a real PITA and to make matters worse when we reinstalled the back halves they didn’t perfectly line up flush with the front halves. Rather than go crazy trying to make these large pieces setup at a perfect level, I decided to “fake it” by applying layers of chopped strand matte in the low spots, then use wax paper (an old surfer trick) to form the curing hot resin to shape.


A little more work with the sander and these will be level seats for our clients’ behinds.
At this point in the project we are fairly experienced with this fiberglass repair process and the speed of our progress is picking up. Unfortunately March is the peak of our show appearance schedule and most of us will be out of town for 15 days out of the month. But you can be darned sure we are going to maximize every second we can to keep things moving towards a fish on for the Discoverer.
![]()
March 16, 2013 – Day 342
Hey guys. This week Matty and Craig are in Somerset, NJ promoting FishingNosara at the Saltwater Fishing Expo:
This means that Jack has the shop to himself and can get some work done without getting distracted by our shenanigans. We are so satisfied with the way the foredeck came together that we are repeating the same process on the side gunwales.

Here you can see that Jack has peeled back the top layer of fiberglass to expose the rotted wood beneath. We turned out to be pretty wise in this decision, because if you look closely several sets of rod holders have been drilled in this boat’s history.


The only way to be sure that OUR rod holder holes will be strong to replace this entire section with a fresh piece of marine plywood.

Before we left for New Jersey we took a visit from Earl Newton, the man who sold us this boat back in April. Earl is a great old boat man and is always a great source of advice for us on this project.

Earl dropped by the shop to discuss some last minute details for his trip to Costa, and we are proud to report that his fishing day on the Discoverer‘s sister ship the Wanderer brought multiple great Sailfish releases plus some nice Mahi for the dinner table.


Great work Earl…can’t wait to see you back at the shop for a good fishing story!
![]()
March 26, 2013 – Day 352
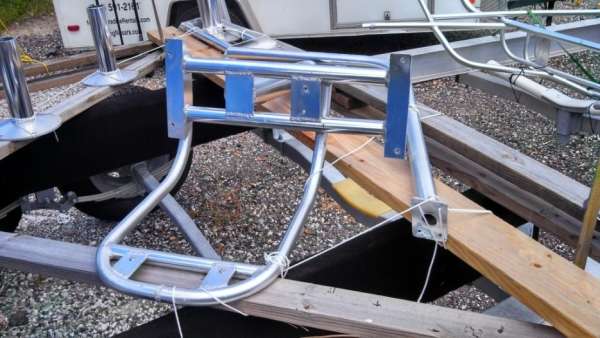
The whole team is back together in the shop and we have some great progress to report. First off Craig Jr. has finished his modifications to the tower:


The extended hoop on the rear will provide extra sun-shade to the fish-fighters in the cockpit. The real trick part of the modification is that now the tower can be removed for road transportation:


Great work by Craig Jr. and the whole crew over at All Jakd Up Motorsports!
Meanwhile we saw in the last post that Jack has completed gutting out the old rotted wood on the side gunwales, so Craig came in and fabricated epoxy plugs to fill the voids from the old rod holders.


The epoxy is really clear but the plugs look blue in the pictures because of the painters tape on the bottom.

Now we are ready to start fabricating the new wood.

We will be using the same marine-grade plywood we used for the foredeck, and as before want it to be as tight as possible to the edges so that the wood carries the stresses, not the fiberglass.


Craig is busy sanding the “floor” of this repair so that the new piece has a solid surface upon which to bond. The next step will be to encapsulate the new wood in fiberglass. Once it cures we will set it into place and start building it back up to the level of the gunwale.


This used to be difficult, but now that we’ve got the hang of the fiberglass process this one should go smoothly.
![]()
April 1, 2013 – Day 355
The fur has really started to fly in the boat shop as Craig and Matt are half-way through the replacement of the cockpit gunnels. This area had been completely eaten away by water intrusion with about three generations of rod holder holes to show for it. In the prior post we cut the new wood and prepared the ‘floor’ of the repair to accept the planks.
There is still an important step in preparing the planks: fully encapsulating them in fiberglass matte. This adds another layer of protections from future water intrusion, however if we install the rod holders correctly (with 5200 and through bolts) then this element shouldn’t ever come into play.


It’s a little tricky to made the fiberglass tape wrap around 90 degree corners so we encapsulated these pieces in two separate pours: first the top and bottom, then the sides and edges. In hindsight this was the backwards way to do it so I will use foresight and say that next time we will start with the edges.
We don’t want to leave anything to chance so we added another layer of protective fiberglass over our previous rod holder repairs. This is a little bit overkill but better safe than sorry.


We gave the planks and the floor a final pass with the sander and mixed up a batch of epoxy resin to glue the whole thing together.


This is the strongest epoxy that Fiberglass Coatings makes and takes a full 72 hours to cure. Rather than fuss with complicated jigs and clamps we opted for an old trick we’ve developed over years in the car industry.


Any ballast would do to apply this steady downward pressure, but hey we have lot of batteries around so why not?
Craig made a quick save when he noticed wet epoxy falling out of the back of the floor and thoughtfully lowered the boat trailer to level. This leveled out the pour, but there was still some voids that Craig filled by hand while the epoxy was still wet.


While we wait on this to cure we have tackled a few other projects around the boat and are feeling good that our ‘to-do’ list is shrinking by the day. Here are some of the side repairs:
Fiberglass Belly Band


Fill Voids around the tower mounts

Repair cracks in the cabin bulkheads


Finish leveling the side seats


This has been one busy week but we are stoked about the rapid progress. This week we will be finishing the gunwale repairs and tackling the last rotted element: the rear gunwale and deck.
We should be able to apply everything we have learned to-date on this, the final repair before spraying our base layer of gelcoat.
Comments are encouraged and welcomed. Stay tuned!
![]()
April 5, 2013 – Day 359
Hey guys and gals. It’s been another busy week and we are really on a roll now.

Little taste of Costa pulled up to the bar next door, and the office staff in CR got a kick out of this picture.
We were excited to remove our battery ballasts to find that our new wood has indeed adhered to the gunwale floor. The next step is to pour epoxy resin mixed with phenolic microballoons to fill up the voids between the new wood and the old hull.


This epoxy sets up slow and (with the microballoons added) has a paste-like consistency. This makes it easier to work with than straight liquid epoxy.


While waiting out the 48-72hr. cure time Craig busied himself with a few nagging repairs in the cabin and around the exterior. When working with slow-curing material it is essential to have other things to work on, otherwise one is tempted to rush into an area that is stull curing.


There are still some low spots on the inner gunwale that need to be built up so Craig got into it, while very carefully avoiding the still-curing epoxy around the wood.


This is a step when the details really count, and by paying special attention to the corners and seams we are hoping that our final layers of fiberglass mat will set up smooth and flat.


Once these low areas are built up we can form the new gunwale lip and lay up a few sheets of woven roven to finish the side gunwale repairs.


Yee haw!
![]()
April 11, 2013 – Day 365
![]()
April 25, 2013 – Day 379
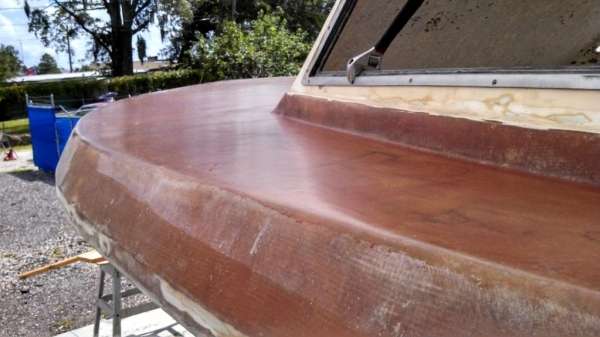
The Discover Project has increased to a fever pitch as we close in on a major milestone: completing major reconstruction of the hull. Once achieved we will spray the gelcoat and basically at that point we are back in our comfort zone. The entire project to date has been ‘off the edge of the map’ for us as we have no significant experience with fiberglass or hull repairs; once we have a strong gelcoated hull we know what to do with it.
Since the last post we ran a full mat of 90 degree bi-axial fiberglass down both gunwales. This layer encapsulated the new wood (see last post) and since we ran it all the way to the foredeck also serves to tie all our repairs together into one surface. This stuff is really cool because the ribbing makes it roll over corners smoothly. A little work with a block sander and this whole repair will be complete.

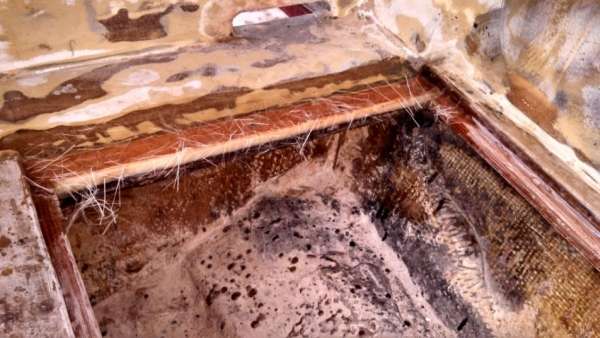
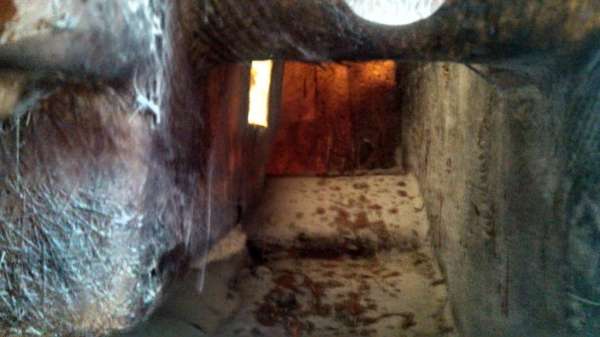
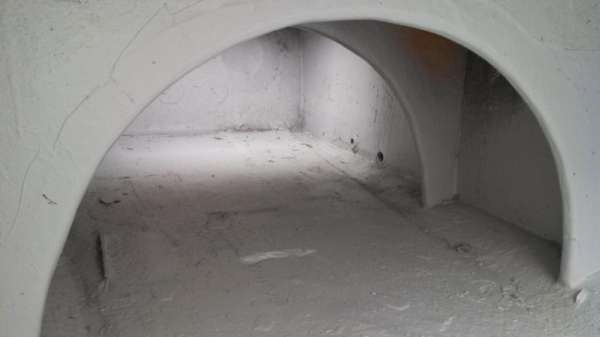
The looming storm cloud for this phase of the project has been the rear transom deck. We could tell by standing on it that the wood is softer than ice cream on a hot day, but a glance underneath revealed even more problems.


Apparently they had a pair of livewells cut into the deck at one point in time, and then someone else came in and attempted to patch them up. The result is pure waterlogged swiss-cheese; none of this area is strong enough to ‘build-up’ and incorporate into the finished product so it’s time for a fire sale (everything must go!)

The first step is to mark out the cut line. Since the existing fiberglass is so thin and weak we used a small flashlight to mark our line from below. This is a handy trick to make sure that you cut out the bad parts while leaving the good.


The next step is to score the cutline with an angle grinder or cut-off wheel. Once the outer layer of fiberglass was pierced we got our first close look at the disaster area:

Uggh. That is nasty. The third step is to cut out the ‘floor’ of this deck with a skill saw; we add a slight angle (10 degrees) to the blade to help create a beveled edge for the forthcoming deck wood.

Once the big nasty wreck came free, the final step was to clean up the cutline and edges.


After a few days of head-scratching we have devised a plan to make this rear transom deck stronger than ever. We will reinforce and strengthen the fore side of the hole and create a lip for the wood to rest upon. Then we will build wood rib supports from the fore to the aft of the hole. As long as we measure our angles correctly the new wood should curve smoothly and fit the rest of the lines on the hull.
The first step is to build three sections of stiff fiberglass sheeting to build up the decayed lip on the fore side of the hole:


These were made by pressing two sheets of woven roven together between wax paper. We trimmed out the edges with a grinder and glued them into place with West Marine 610 epoxy. We couldn’t lay our hands on clamps big enough for this application, so we reverted to the ole’ tape-and-wait approach.


The overnight cure was a success, so first thing the next morning we sealed up the edges of the sheets with bi-axial so that no liquid would pour out of the sides and bottom.


Then we poured a thick mixture of epoxy and phenolic microballoons into the channel. The viscosity of this material means that gravity will pull it downward, filling all of the impossible-to-see cracks and crevices below. Once cured this should make the forward lip hard as a rock.


After a day’s curing we are ready to finalize this forward lip. I little touch-up grinding and a protective topcoat of the 610 epoxy and this are will be ready for wood. In the meantime we also got the aft lip prepared by grinding off the old material and creating a good surface to which we can bind the ribs.


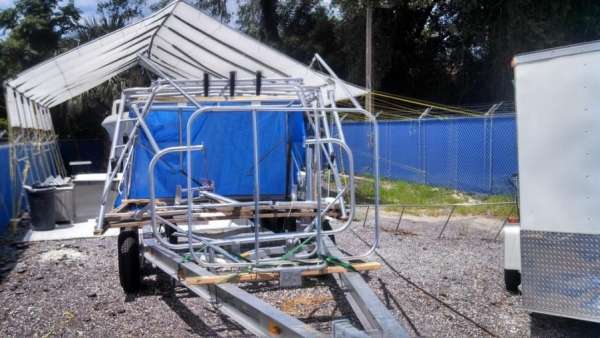
In the next post we should have the ribs in place and the deckwood ready to go into place. We will have some extra hands on the project this weekend to help put the boat up on stands and finish sanding the whole thing. The much-dreamed of day when the repairs are complete and the gelcoat is flying is near…once that day gets here I hope this truck is ready to get emptied:

’til next time….
![]()
April 29, 2013 – Day 383
Over the weekend we finished installing the four stringers that will support the forthcoming wood for the rear transom deck. It started simply enough by gluing together two 1/4″ pieces of marine plywood together to form a 1/2 inch piece. Then we cut out four pieces about 30 inches in length; the hole itself varies from 23″ to 24″ so at this point you want a little extra wood.


Then we test fit each piece and label them according to their slot…certainly would be a fail to let these things get mismatched.


We used a plumb-line and some simple trigonometry to make sure that each stringer fits the slanted back wall of the transom. Here is an example of the fit we are going for:

Once we have a rough fit we encapsulate each stringer in fiberglass matting; an addition to strengthening the wood and making in watertight, this also add thickness that we can grind away until we have the perfect fit.


Here are all the pieces in place, supported by temporary screws:


The final step is to lay down some fiberglass to lock these stringers into place. There are some tight corners here, and one small mistake can prevent a stringer from locking in properly.


After an overnight cure, we were not pleased to find that two of the four stringers failed to adhere:


Fortunately with fiberglass, you can always grind it off and try again. Here is the final result.


This week we will be shaping and installing the top piece, then we will run our top layers of woven roven and fiberglass matting. Ideally this repair will seamlessly match the prior repairs to the side gunwales. Stay tuned!
![]()
May 9, 2013 – Day 393
Hey everybody! Craig and Matt are in Nosara this week trying to catch fish, so here are the pics from last week. To finish the major reconstruction of the rear transom deck, Craig ran fiberglass tape around all the corners underneath the deck. The idea here is to create a seal to catch the forthcoming epoxy mixture.


These are very tight corners and it is virtually impossible to create a perfect seal with no air bubbles with a single piece. That’s why Craig laid all of these corners with two layers of tape; it’s twice the work but is the only way to be sure it will work properly.

With the new plywood secured to the stringers and all the seams covered, Craig proceeds to pour epoxy mixed with phenolic microballoons into the void. This mix should penetrate all the gaps and created a bullet-proof level of strength for this whole section.


You can see in these shots that the back-fill worked to perfection with nary a drop of the red stuff falling through.


All that’s left now is to wait 24-36 hours for this epoxy to fully cure and harden, then it is on to finish fiber-glassing.


Meanwhile we are continuing to search for little spots that have evaded our repairs so far with Craig tending to the anchor box and Matty continuing to shape the rear deck, gunwales, and foredeck.


![]()
May 30, 2013 – Day 414
Hey everybody!
So we are back from Costa and fired up to keep jamming on the Discoverer so we can take it on down south for a good old time.
In the last post you can see that the new piece of marine plywood has been laid on the new stringers. After the initial epoxy set up, Craig backfilled around the entire piece with an epoxy/microballoon mixture. Notice in the final picture that all the edges were coated in fiberglass tape so that the epoxy would not seep through around the stringers.
The week before we left for Nosara it rained everyday and we couldn’t pour any fiberglass to encase the top of the marine plywood, which was still raw and exposed to the elements. The last day before leaving we got a break in the humidity and poured a hasty piece of woven roven over the wood.


You can see that there were air bubbles along the edges and that everything is far from level, but at least it is encased and can withstand the rain while we go do this:


So once we returned the next step was to level out the hasty pour from before and get a fresh start at making this thing look right. We used the 90 degree biaxial weave because the ribbing helps it hold tight to corners.


The pour came out much cleaner than the first attempt, and you can see in these shots how well the corners set up. While there are some air pockets and other imperfections that will be ground out and replaced, most of the corners achieved adhesion with no air bubbles at all.


This also allows our first unobstructed view of our marine plywood and we were happy to see no cracks, fissures, or other signs of stress in either the wood or the fiberglass.
After another round of block sanding Matt applies a hot coat of resin and wraps it in wax paper; using a spatula we can work out the air pockets and create a nearly common level in preparation for the final run with the sander.


One trick is to remove the paper as soon as the resin begins to set because if you leave it too long the paper with shred and get encased in resin, which is a pain to correct and costs time.


Next up we will apply the same technique to these fuel covering boards and the central deck cover, as well as a final pour on the nose and foredeck to bring everything to a factory-perfect level. We’ll see…


’til next time!
![]()
June 18, 2013 – Day 433
The end seems so close, but as the old saying goes: “In a 100 mile race, 90 miles is halfway.”
The true test on a project of this scope is to finish strong and not start cutting corners now due to frustration, hastiness, or laziness.
A perfect example of this challenge is the floor. Easy to take for granted and a nightmare if it goes bad, the removable fuel covers and center section are the last step to complete our new floor.


When Charlie fabricated these sections we had not yet gone ‘fiberglass crazy’ and thought that a simple brushed coat of hot resin would be enough to seal these pieces. Now the paranoia of water intrusion has grown to the point where we need to re-wrap these pieces in fiberglass matte.


In a weird way it probably for the best that we saved this center section for last; it’s 32 three-way right angles is like the final exam for fiberglass corner wrapping…if you can make these pieces stick, there is no stopping you on the fiberglass battlefield.


Meanwhile, Matt went to work finish sanding the fuel deck covers and the main center piece. This arduous process relies heavily on the plane sander (right) and the rotary DA (left); the former creates uniform flat surfaces on the top and bottom while the latter allows for the smooth rolled edges.


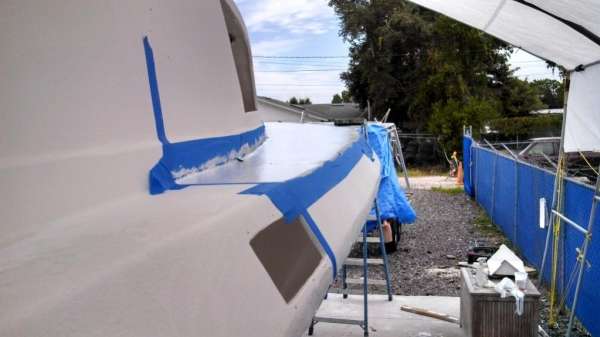
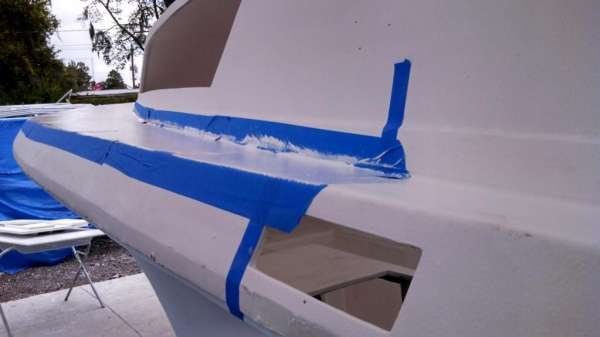
As tempting as it seems to start spraying gelcoat, we need to test fit our hardware so we can properly prepare their holes. First we re-installed the bow rail:


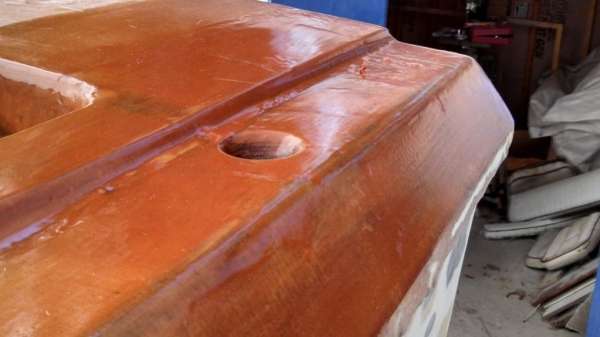
Notice that we used tapping screws here rather than bolts…we will hog out these holes, backfill them with epoxy, and then after the gelcoat will run the bolts through the epoxy plugs; this means that there is a 0% chance of water intrusion around the bolt holes.
We also test fit the side vents and the bow pulpit and anchor guide:


Lastly, we invited our old buddy Carl over to show us his tricky way to install rod holders. It’s a game of angles, with the aft-most holders pointing straight back and then rotating progressively outwards for the foreward rod holders.

(aft-most, straight back)

(forward-most, 30 degree outward angle)
Precise measuring is called for to make sure that both sides match in both their relative distance from the transom and their relational distance to the side gunwales. One inch off either way could be a major problem.


The two forward-most holes are for the fuel fillers so they are drilled straight down, however the rod holder holes have to be beveled to accept the slanted rod holder sleeve. See here how Carl makes use of some simple logic: it sticks up at the same angle it sticks down.

Notice that he is holding the tool to match the rod holder? Seems low-tech but the result is perfection:


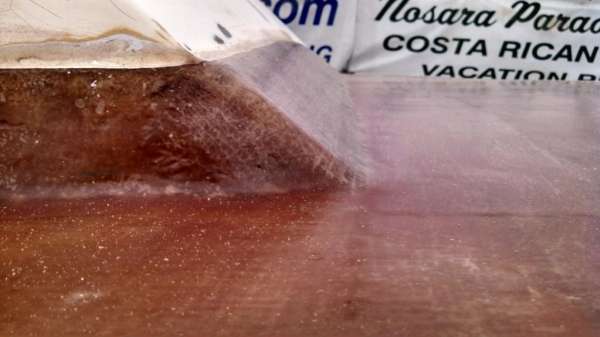
Let’s check out our new holes:


One nice by-product of this cut is that we get to see and detailed view of how our new side gunwales set up via the discharged puck:

Looks like the epoxy (red, just below the wood) and the deck wood adhered to the existing fiberglass (bottom) and our new fiberglass (top). No visible air pockets or fissures gives us nice peace of mind for us moving forwards.
The next steps include wrapping all of the new holes in fiberglass as well as the area around the console…like I said, water intrusion paranoia is at record highs!

I must say that it feels good to get out the tools and start drilling and cutting because this is the kind of boat-building we are used to (rather than all of this sanding and fiberglassing). Alas we still have to finalize our fiberglass work before spraying this thing…once that happens we will be back in our comfort zone and this boat should come together pretty quickly.

Stay tuned!
![]()
July 3, 2013 – Day 448
Things are moving fast as The Discoverer Project reached the final days of prep work and reconstruction. We are already dreaming of the day we arrive at the shop to a freshly painted hull and we can get into what we know (boat building) rather than the exploratory exercise of fiberglass repairs.
Last week we reached a major milestone when we delivered the aluminum top of the Discoverer to the folks down at Showboat Custom Coatings for a shot of their famous SB-230 coating.


It was a tough task to fit the top to the trailer and make it secure enough for a 300 mile ride to South Florida, but the end result will definitely be worth the effort. With the SB-230 applied there is no need for polishing or waxing to keep the metal shining, just a little soap and water.
Before we loaded it up Craig, Jr. gave everything one more pass with the aluminum welder to make sure that all of his seams were super-tight. Once the coating is applied all the tooling marks will be invisible; still the raw welds look great even without the finish.


As we approach the July 4 weekend, we are striving for our independence from a dastardly foe: Fiberglass. We are in the final days of wrapping ourselves up in Tyvek suits and respirator masks as we are running around the boat chasing down all the small repairs and neglected spots from the last 8 months of massive reconstruction.
Here you can see Craig tightening up the console area by injecting thickened epoxy for strength, then applying a protecting layer of fiberglass matte around the seams.


Later Craig went to work on the seams around the fuel covers in the deck, first hand-sanding the divide and injecting epoxy then running a piece of fiberglass tape to keep the repair watertight.


Matt set about leveling the rear deck. This is a little tricky because the all of the different levels in play here. In order for the level sander to do it’s job everything has to be above grade before the sanding process begins.

On this center section we had to cover up all the divots where Charlie screwed in the piece. You can see in the above picture that each cavity was filled with a 1 inch square of chopped strand, then we started adding uniform layers over that relatively level repair.

In the last post we began test fitting all the hardware to make sure that all of our fiberglass work hadn’t disrupted the fit of the pieces. This is also the time to beef up the structures and watertightness of these areas.


The block of wood under the gunwale is designed to add another layer of firmness to the cleats on the rear of the boat, since this is where our crews tie up the panga boats and (in an emergency) tow other boats. It is crucial that this cleat be a rock, so this wood block is 100% marine grade plywood wrapped in two layers of fiberglass. No chance of weakness due to rot on this piece.
Water-intrusion leads to wood rot, and wood rot leads to problems. To combat this issue we plan on using a custom boat trick on the Discoverer called epoxy-sleeved bolts. The concept is simple but the execution is very precise.

On the left is the way most boats are put together. The wood is encased in fiberglass, resin, or epoxy (represented as pink) to keep the water out; however over time the seal around the bolt head, nut, and shaft of the hardware can allow water to seep in. With epoxy sleeving (right) each hole is overdrilled then backfilled with epoxy. Once cured, the epoxy plug is drilled to the proper size leaving behind a “sleeve” for the bolt to pass through.
Here we see the foredeck with all the hardware removed, the holes overdrilled, and the epoxy setting up in place:


We did the same thing on the rear cleats…this is why we put the wood block in place first, so that the epoxy sleeve will stay constant all the way down to the nut.


We also cap the epoxy plugs top and bottom with a layer of fiberglass to keep the whole thing snugly in place and at level with the surround decks.


We also wrapped the deck pipe hole with fiberglass tape to seal it from the elements, finalizing a front deck that is now truly bullet-proof.

The last step is to drill our pilot holes so we don’t lose these plugs once the gelcoat goes on. We feel confident that this approach will keep the internal guts of the Discoverer dry in the immediate future and well into the next few years as this hardware will be removed and re-installed regularly over time.
The last few steps are underway now: finishing the level sanding of the decks, strengthening the fighting chair mount, injecting foam around the gas tanks, and about a half dozen other little items. By this time next week we should be shooting gelcoat.
Almost home!
![]()
July 26, 2013 – Day 471
It’s hard to believe that three weeks have passed since the last post, but know that we have been neck-deep in The Discoverer Project for every second of it and we have some excellent results to report.
In the last post we completed our epoxy sleeves for any bolts through the decks.
We turned our attention to final details and we doggedly approach painting time; first up was filling small fiberglass pit-pockets with a muddy mix of polyester resin and phenolic microballoons:
This stuff finished off so smooth after sanding that we decided to coat the entire deck and floor with the same process:
It’s always the out-of-the-way spots on boats that are the tricky ones, and Craig set about chasing down potential water intrusion spots in every conceivable place.

During this work it was discovered that the sides of the boat in the rear had too much flex in them for our liking, so we added a horizontal fiberglass stabilizer from the lip of the fuel deck to the outer hull.
We patched in a small overlap section in the back so that this repair would be continuous down the whole side of the boat.
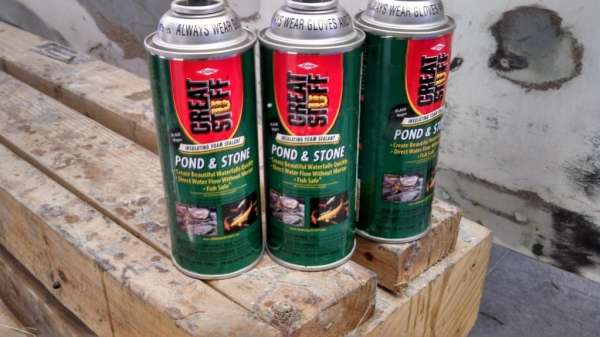
We then backfilled the newly airtight cavity with Great Stuff Pond and Stone which is much more water-resilient than open-cell Great Stuff.


Matt enclosed some raw wood under the console which was so out-of-the-way that an access panel needed to be cut in the bathroom floor:
Craig continued to chase last minute items:
The nose:

The mid-ship access covers (freshly cut and wrapped in fiberglass):
The feet around the fighting chair mount:
Fuel tank rear supports:
Final clean-up and wipedown:
Lastly, we are lifting the level of the footpads about 1/8 of an inch where they bolt to the deck.

Plus it adds that much more strength and resistances to water intrusion in this critical area.
So where was Matt during all this?

Let’s get painting!
![]()
July 27, 2013 – Day 472
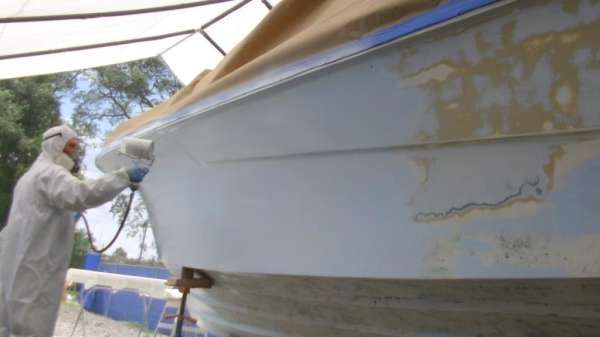
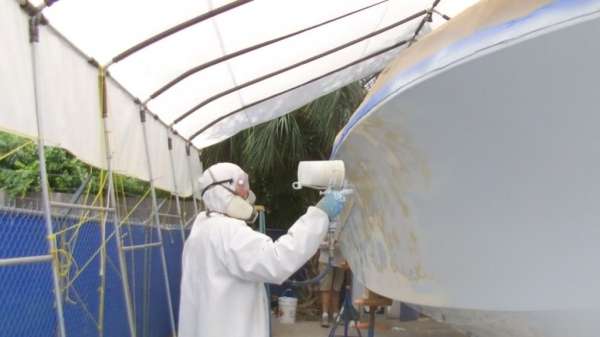
It took a whirlwind day of painting, but we sprayed every drop of gelcoat we had and have a pretty good jump on the paint work for The Discoverer Project.
Our pal Ginno was the trigger-man with Matt backing him up on the mixing station.

We’re pretty pumped that our gelcoat spraying technique worked out and we got two coats on before running out of materials. We are certainly excited for the next 15 gallons to arrive on Thursday so we can finish this thing off!
![]()
August 3, 2013 – Day 480
Ah the misery of logistics! Just when we were getting a head of steam built painting the white part of the boat, The Discoverer Project hit a snag when we ran out of gelcoat, hardener, and paint strainers.
We waited 6 days for our Thursday delivery from FGCI and there is only so much piddling around one can do on a boat that is all ready for paint.
Then on the fateful day to spray, Ginno the painter called off because he had some other projects to do. We decided to proceed with the final paint work ourselves rather than putting the project off any further.

We started by hand brushing gelcoat over any spots in the hull that needed extra material, and as it set-up we sprayed more gelcoat over the top.

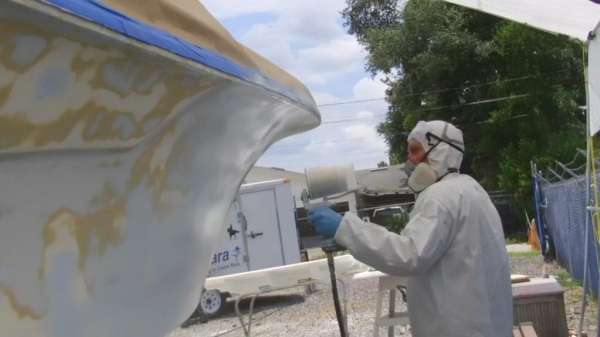

Also, Matt came back around and filled in the couple of square feet where the lack of white gelcoat had hampered our first spray. Check out the rear transom deck, finally completed:
All told we are pumped to have reached this point, but the next challenge is equally murky and daunting: how to best prepare this gelcoat-only paint job to make it look shiny and new.
We are planning on wetsanding the whole thing with P400, P600, P800, and P1000 over the next few weeks. Until then we are proud of this result:


![]()
August 8, 2013 – Day 485
Still rocking and rolling on the paint work for The Discoverer Project. First up we slid the tripod boat stands a few feet so that we could spray in those areas:
Also we discovered that one of the tripods was hiding a dirty little secret: two cavities in the hull that went all the way to the original fiberglass. Here is the repair process:
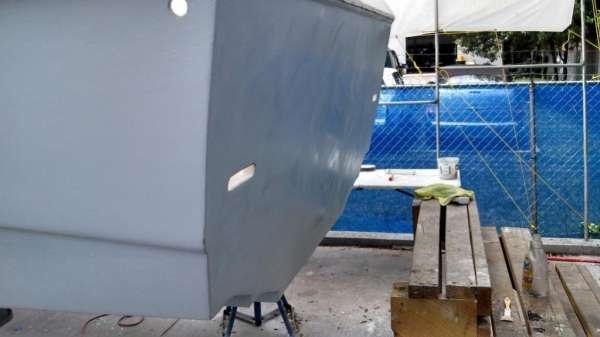
Most recently we rolled, brushed, and sprayed some nice marine grey gelcoat into all the sub-deck areas.


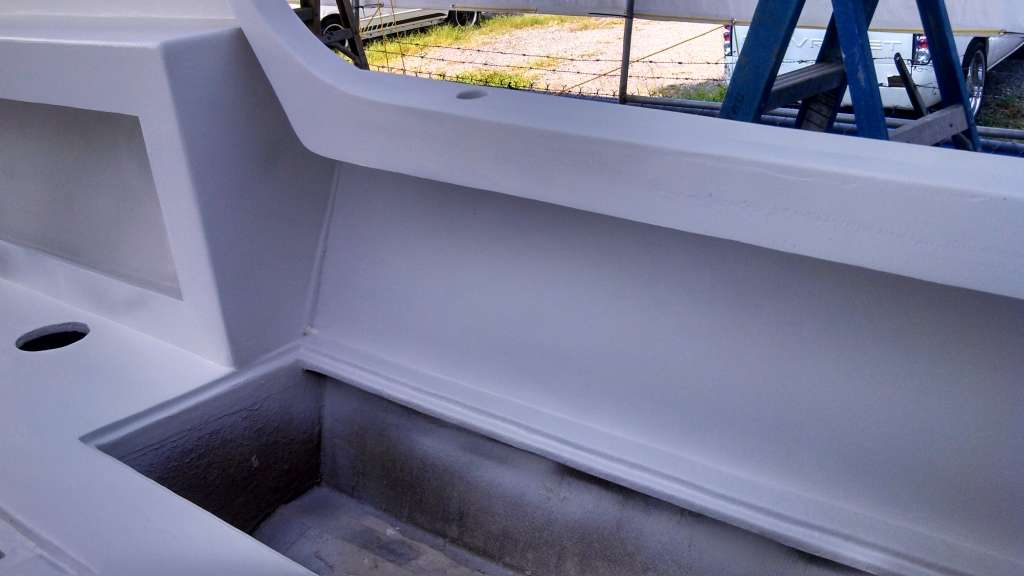
Also we have gone around the new paint job filling in tiny little air pockets…these look rough now but will sand down beautifully.
Feeling good and looking good. Stay tuned!
![]()
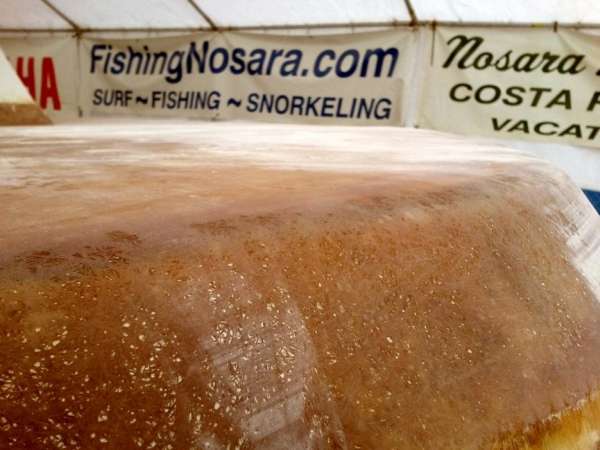
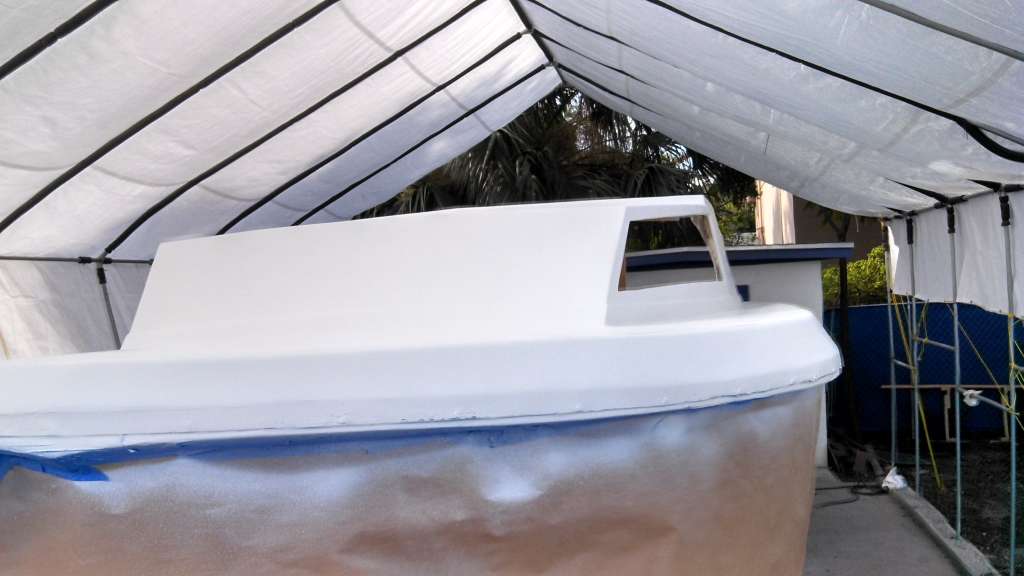
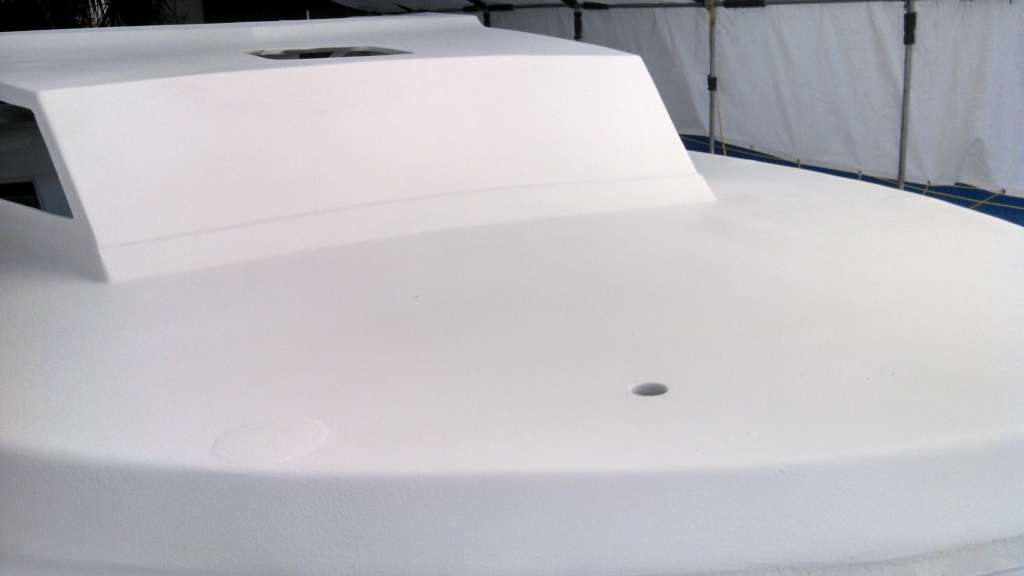
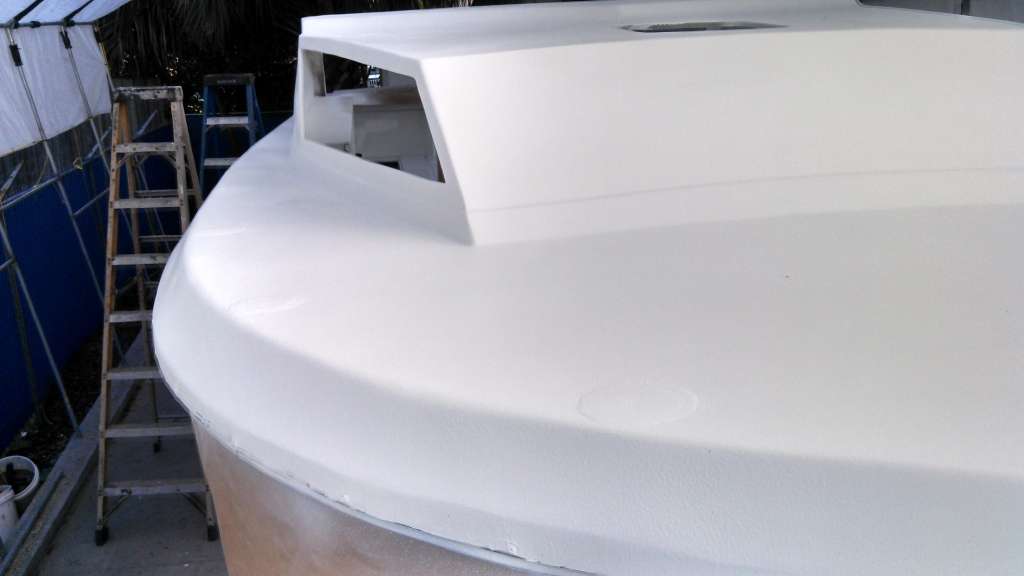
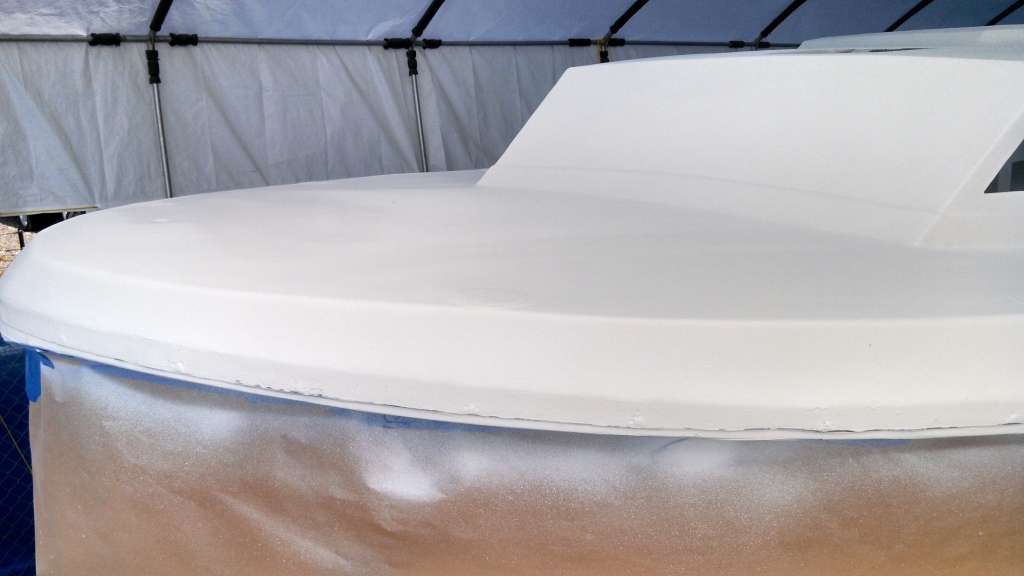
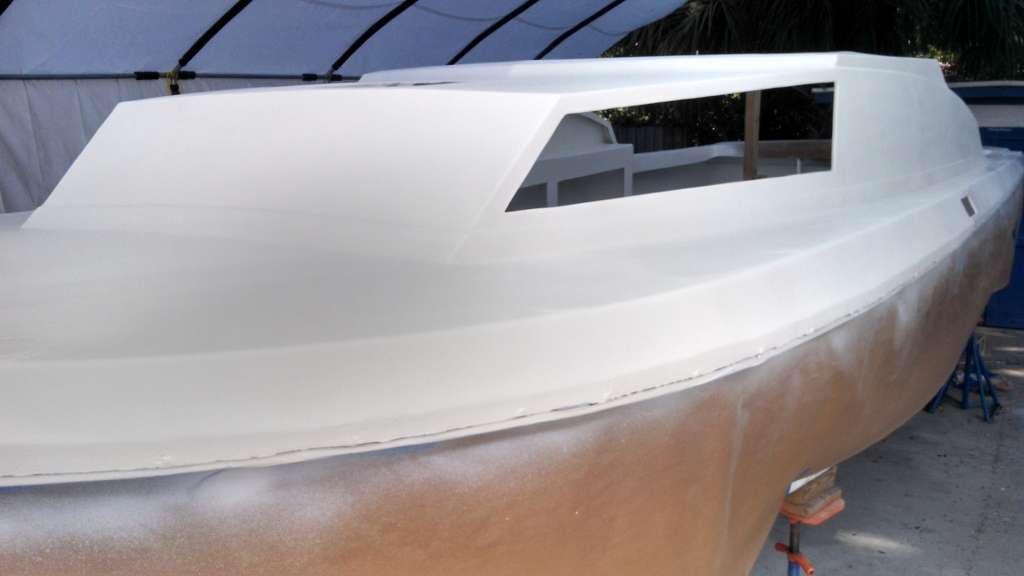
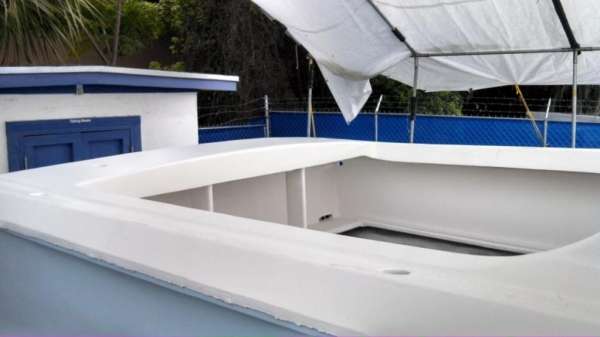
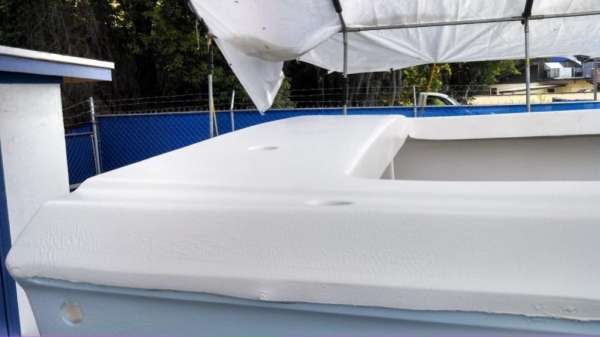
August 19, 2013 – Day 496
Hey everybody!
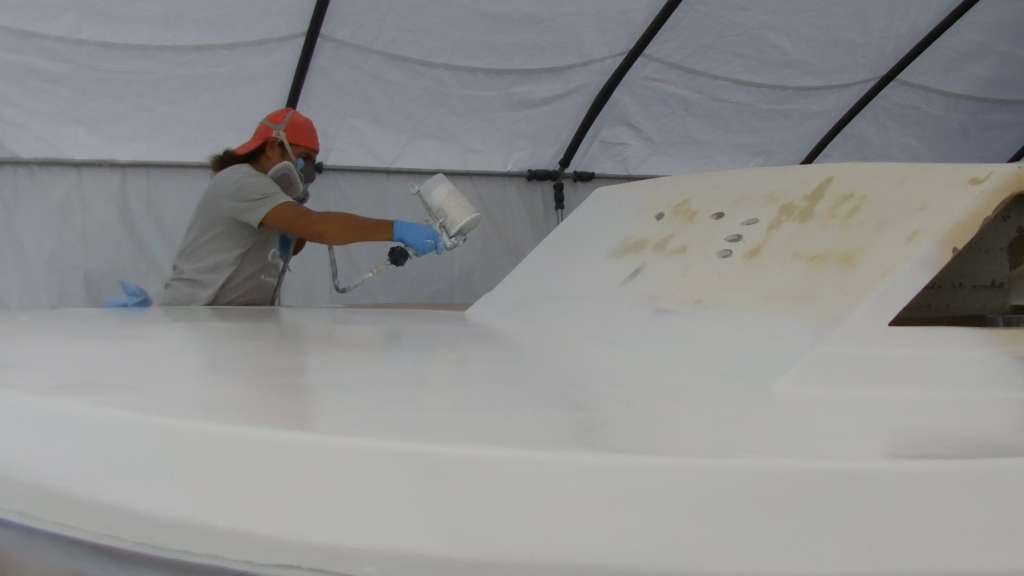
When we left off we were looking at a fully-sprayed but still-unfinished wad of fiberglass and gelcoat; the challenge now is to get this thing looking like a proper boat!
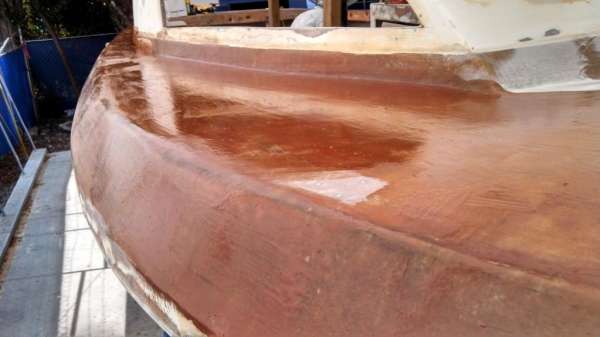
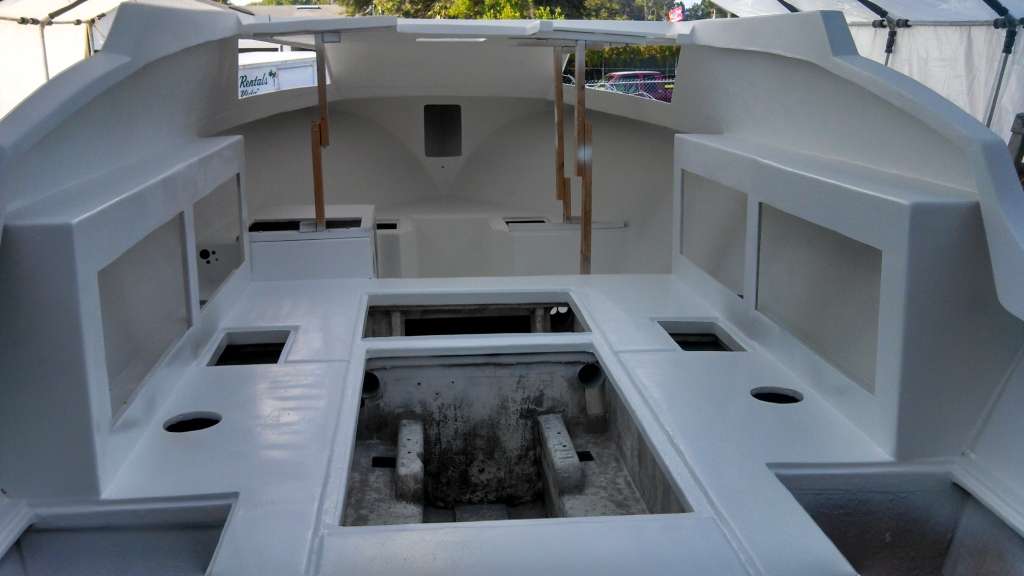
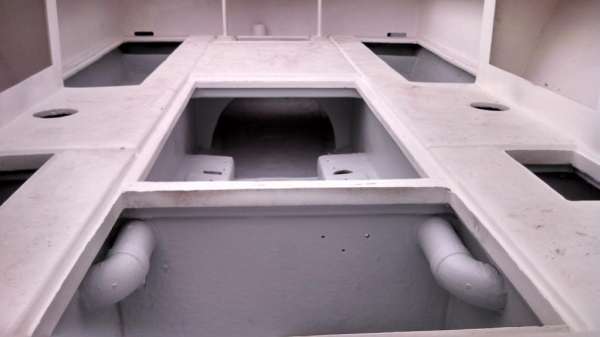
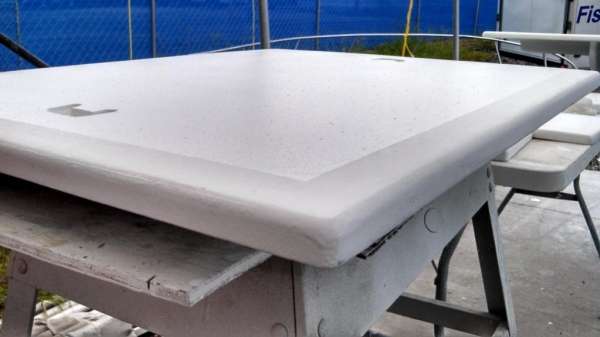
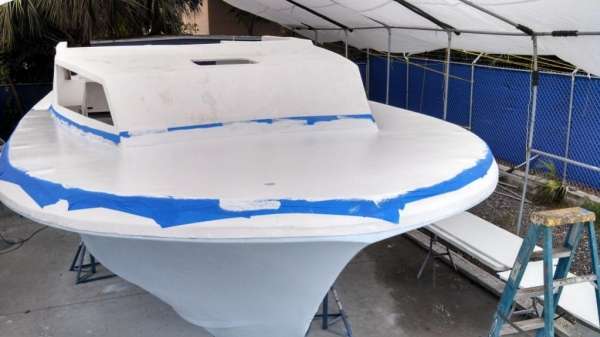
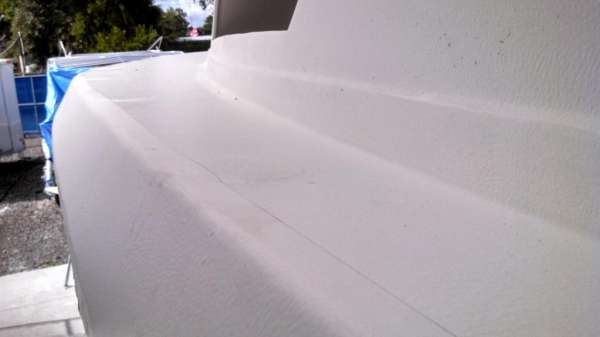
First order of business was to lay down some texture on the floor of the boat. On factory boats the texture is usually built into the mold so the lines are geometrically perfect; since this is a rebuild we have to rely on two-inch masking tape and steady hands to get those perfect lines.
First we sanded down the original surface with 180 grit (wet), then taped it up. After a blow-off and an acetone wipe the new gelcoat would adhere both chemically and mechanically. We brushed on activated gelcoat and quickly rolled the texture with a GlassKoter roller cover; they claim that these leave less lint behind than a standard roller, but the pictures attest that it still left some.
The second coat was required to achieve the proper 30 mil depth that we were after. We’ve been told that as long as you apply your second coat within 12 hours then their is no need to sand or acetone between coats.
We are confident in this approach after completing the floor, so we replicated the procedure with the fuel covering decks before moving on to the foredeck.
The foredeck was a little tricky because of the long continuous front sweep and the long reach required to get to the center; when working with activated gelcoat you have to move fast, so a little foresight goes a long way. We had four ladders set up and a long-handled roller to maximize coverage to the middle of the deck.
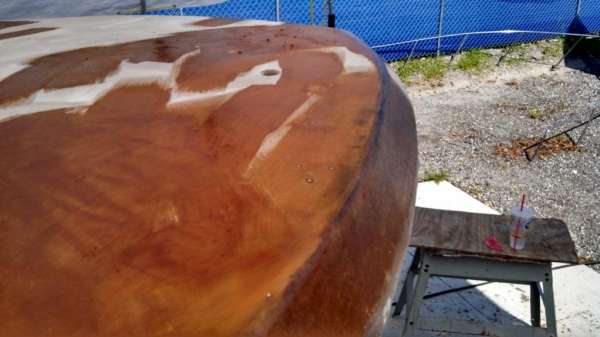
Matty was feeling pretty confident with this texture coating by now, so he tried a little experiment on the foredeck. See that little FishingNosara vinyl sticker in the middle?

Check out the result when removed after the second texture coat:
Meanwhile, Craig and Jamaal have been fixated on the exterior appearance of the Discoverer. Craig picked out a nice pair of teak planks for the side gunwales and is scouring the southeast for two matching-grain planks for the transom.
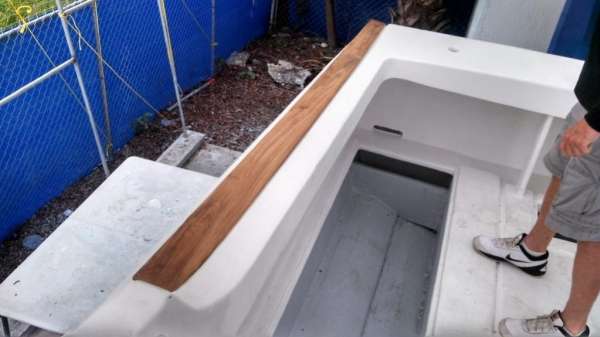
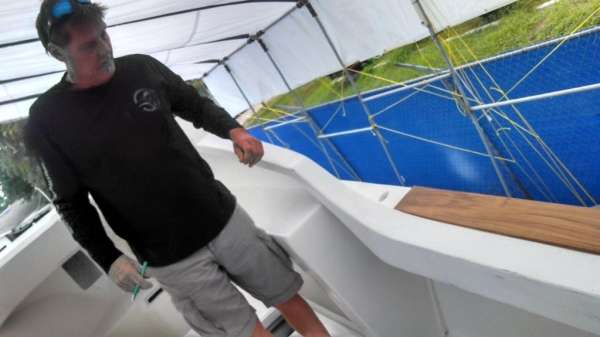
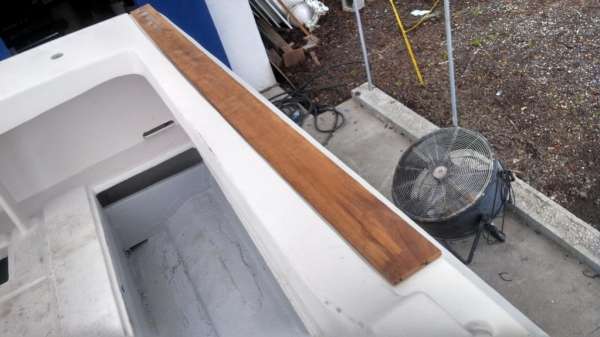
We are aiming to match the look and functionality of the teak covering board on our current T-Craft, the Wanderer.
Also, Craig made the trip down to Showboat Custom Coatings in Pompano Beach to pick up our refitted tower. They hit it with their special SB230 coating which should make this aluminum bulletproof forever. We’ll have a full report on their process and images from their shops soon!
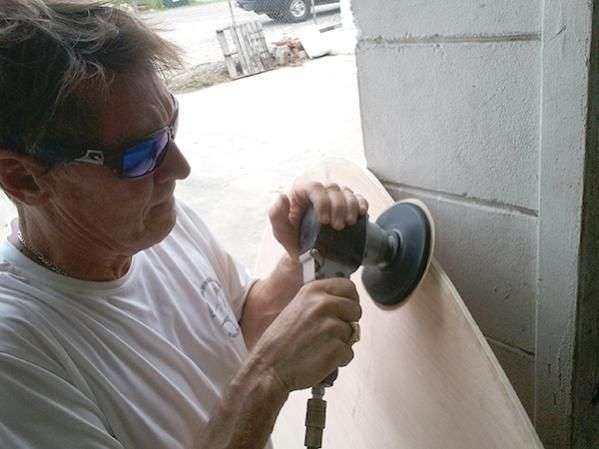
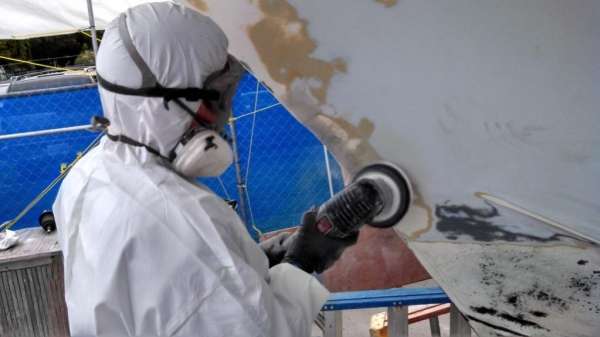
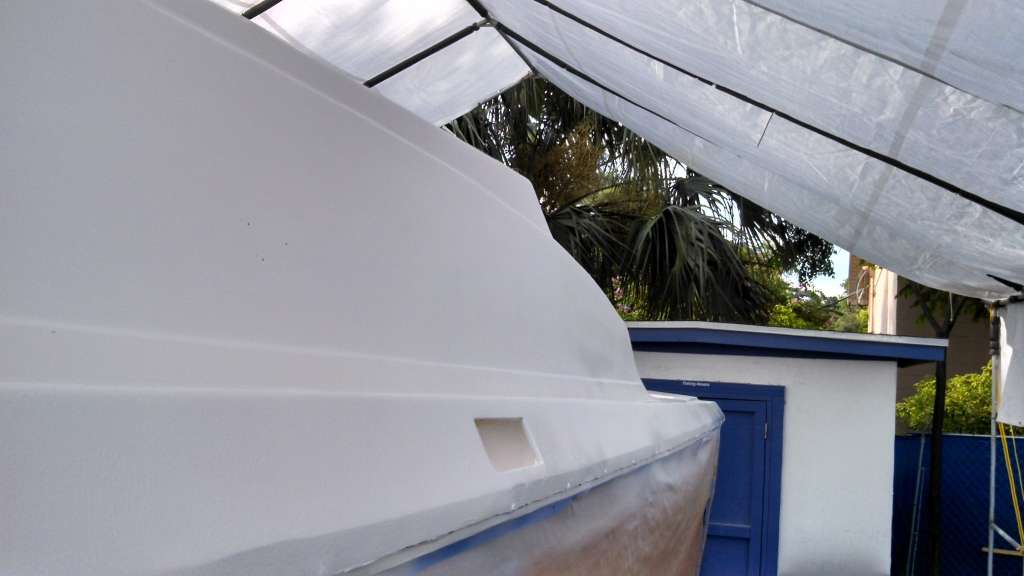
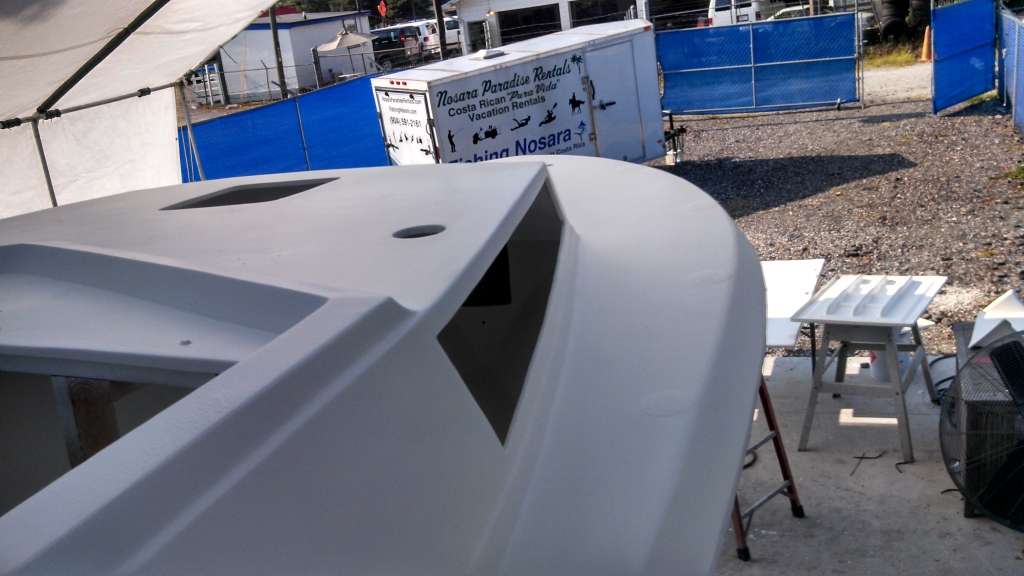
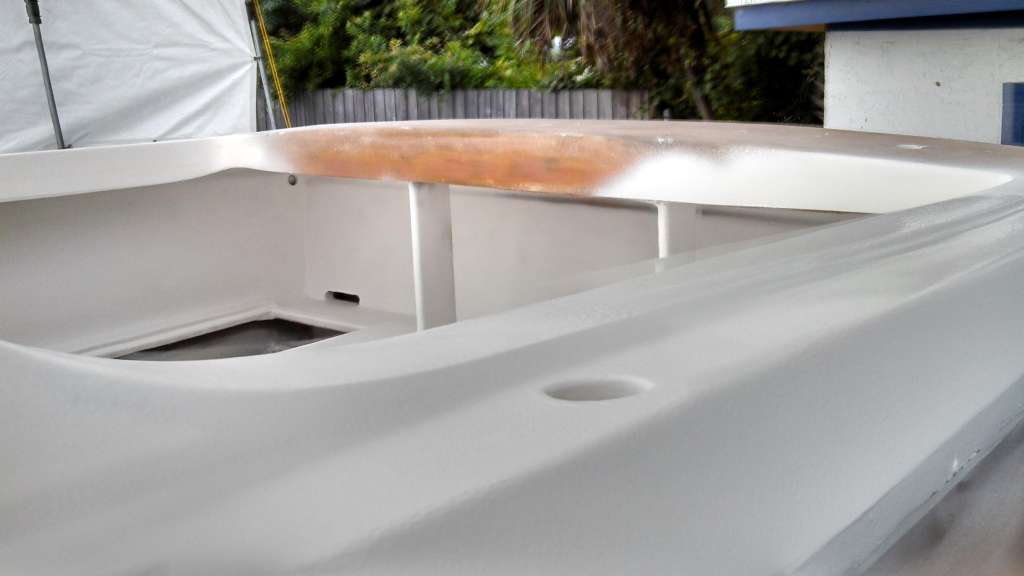
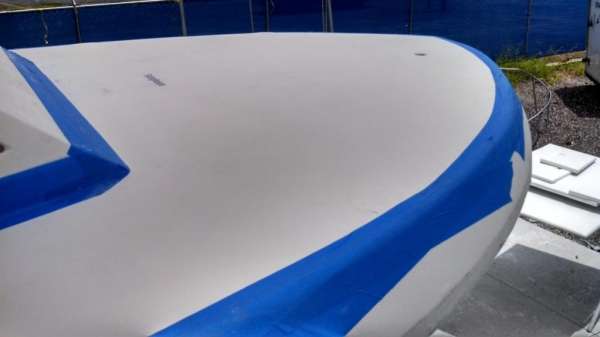
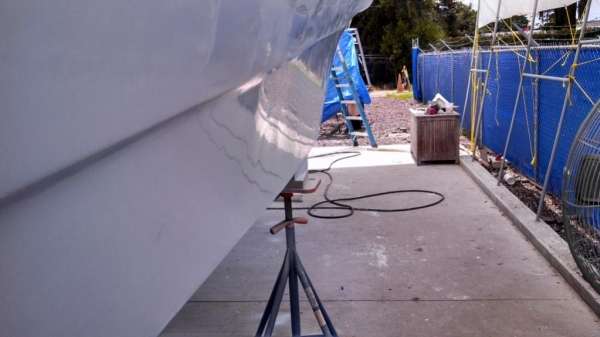
Lastly, our buddy Jamaal has brought his deep experience with finish sanding to bear on the outer hull.
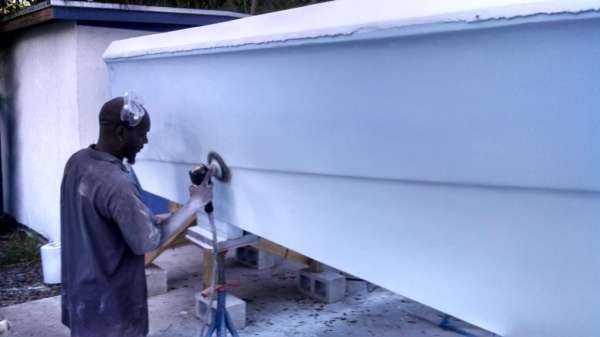
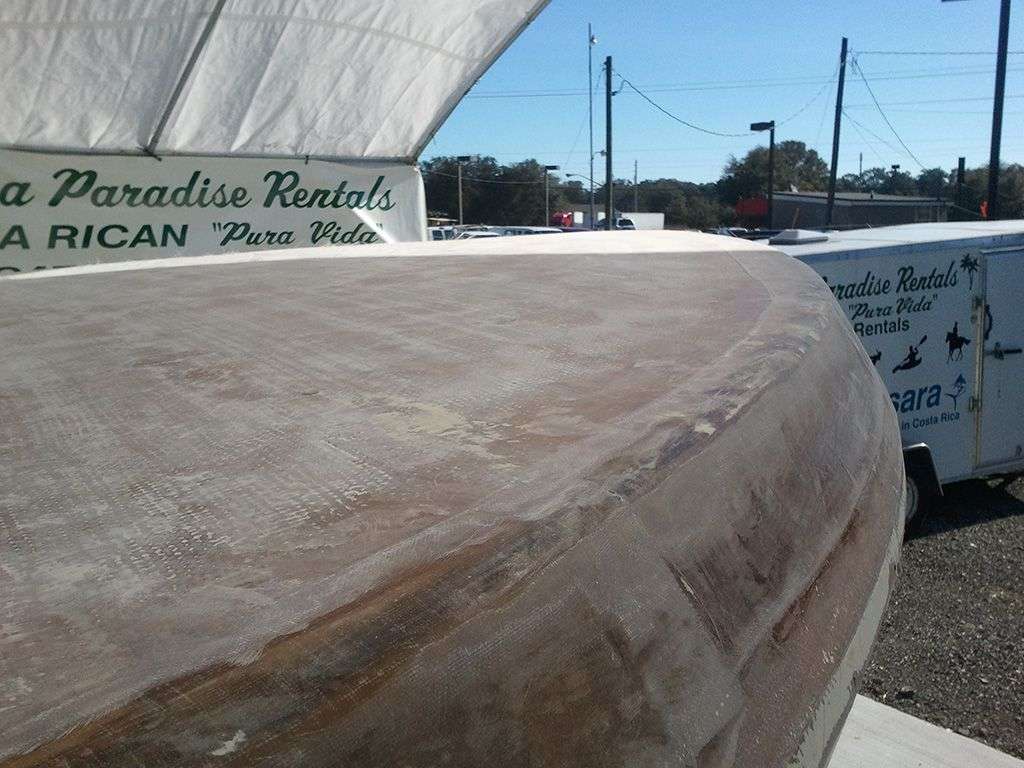
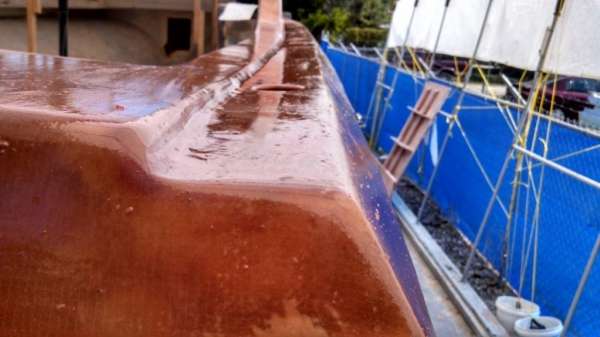
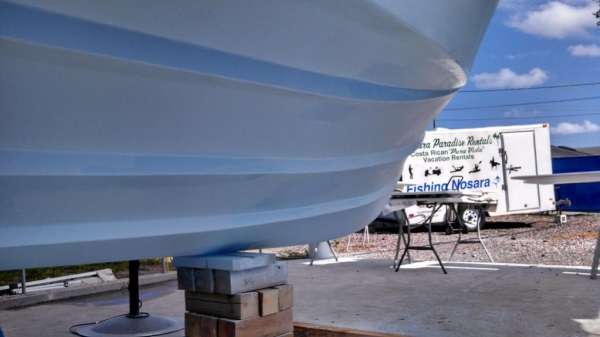
He is wetsanding the entire hull using a 6 inch DA and progressively increasing his grits from P180 up to P1000. Here is where we are now, just after the P600 and before the P800


You can see that it is starting to shine in places, and more importantly there are no spots where the fiberglass is showing through; this means that we have achieved proper depth with the blue gelcoat.


Hopefully we’ll be up the P1000 this weekend, then its on to compound and wax. Meanwhile it’s time to start scheming on re-installing the bow rail, deck hardware, tower, and outrigger mounts.
Stay tuned!
![]()
August 22, 2013 – Day 499
![]()
August 24, 2013 – Day 501
The gelcoat polishing continued this week on The Discoverer Project as Jamaal and Matt have been pouring hours into wetsanding.
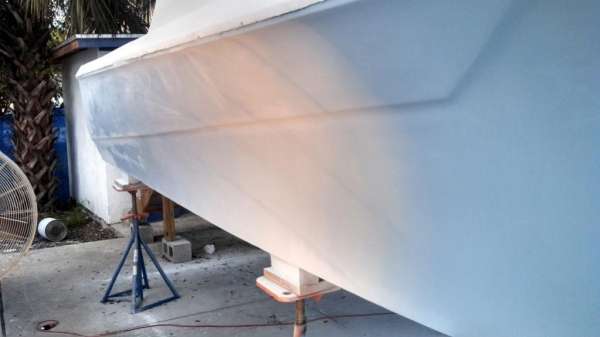
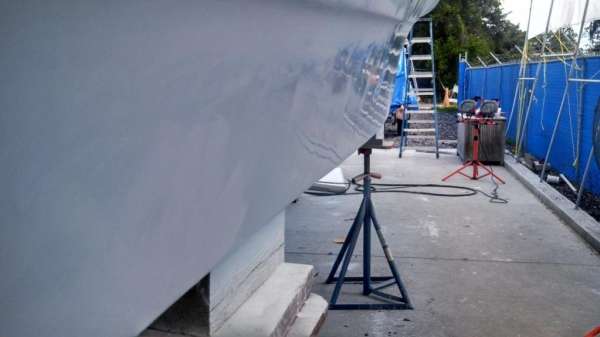
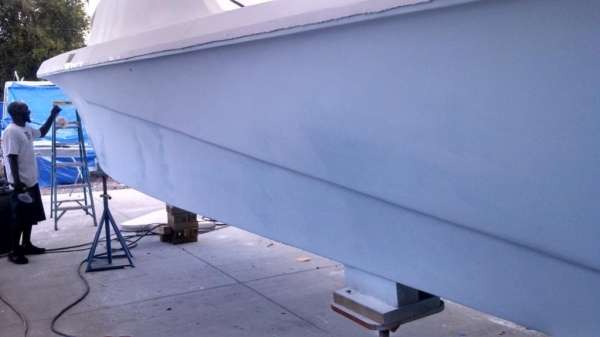
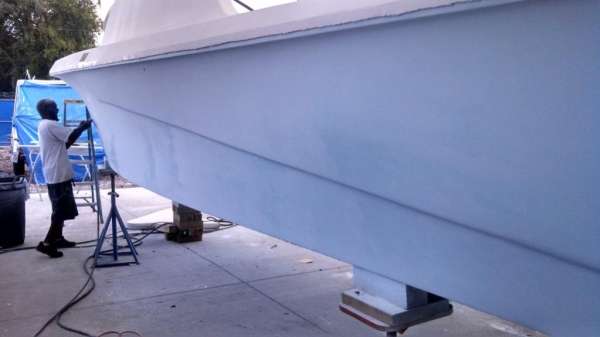

It’s hard to take pictures that properly illustrate the smoothness, but the reflections are beginning to tell the tale.
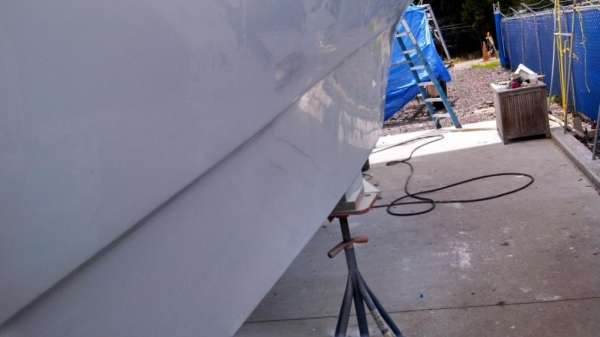


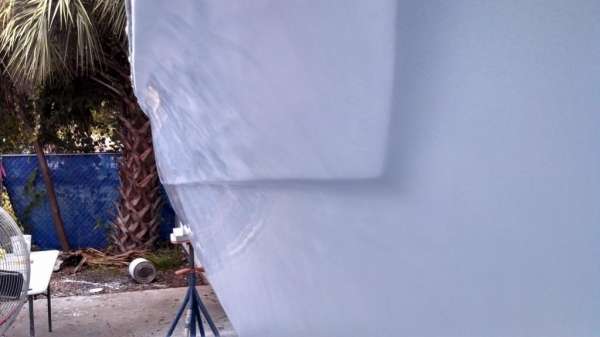
We started with P400 to knock down the high spots, then progressed through P600, P800, and P1000. The function of the high grit is to bring out the shine and eliminate tooling marks from the lower grits.

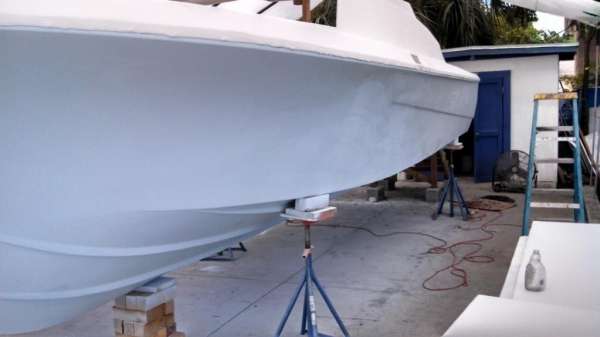
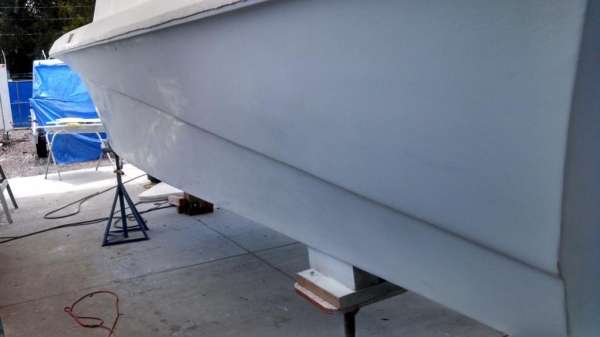
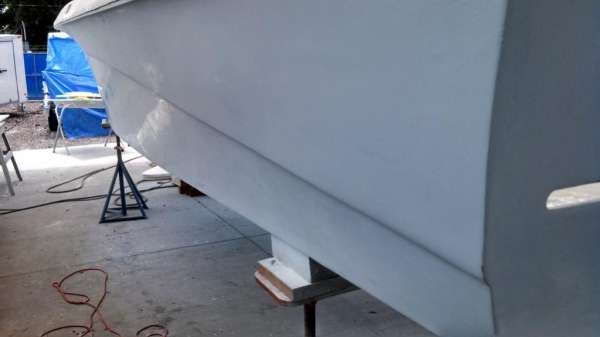

We are also investigating the best way to finish this thing off; we may compound it before wax or we may just wax it.
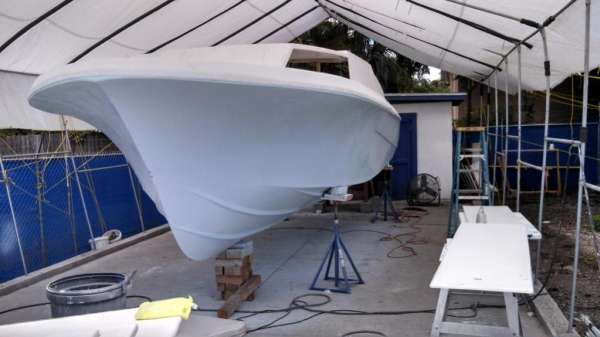
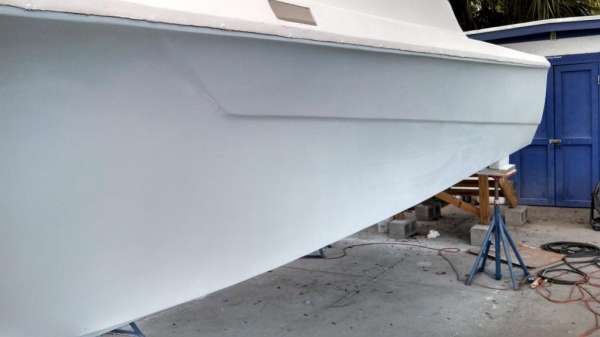
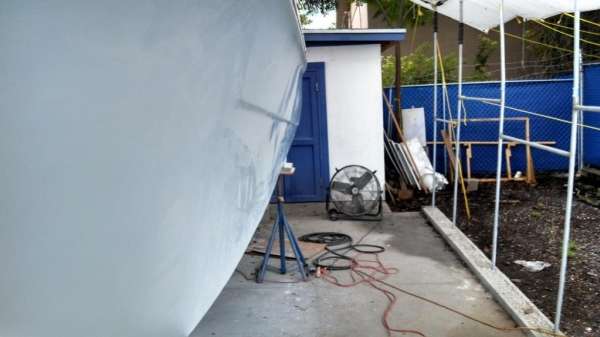
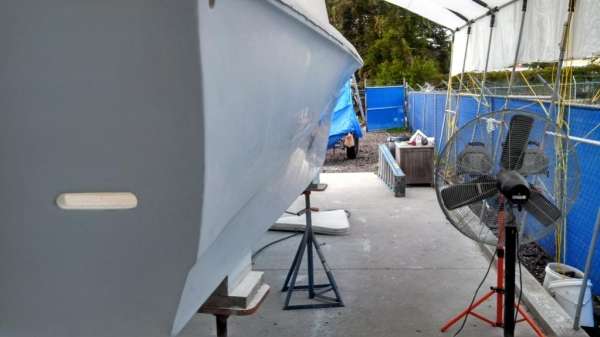
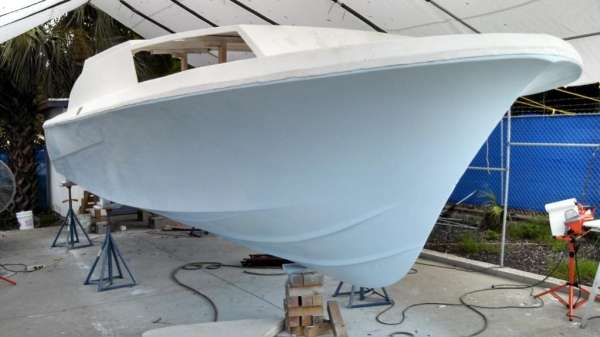
Also we have to figure out the best way to apply the bottom paint, thinking that we may have to prime with a gel-etching primer then apply the best bottom paint we can find.
However we also are finally ready to start putting the boat together in other ways too. Time to swap out the fiberglass grinders for saws and drills; nice to be back in a familiar problem.
![]()
August 26, 2013 – Day 503
Video recap of the last eight months in about eight minutes!
![]()
September 5, 2013 – Day 513
The long weeks of wet sanding the Discoverer are nearing the end, but as we progress we are constantly being set back by our own mistakes. Jamaal has nearly completed the entire blue surface of the hull and it looks fantastic in the spots where the gelcoat set up nice and thick.
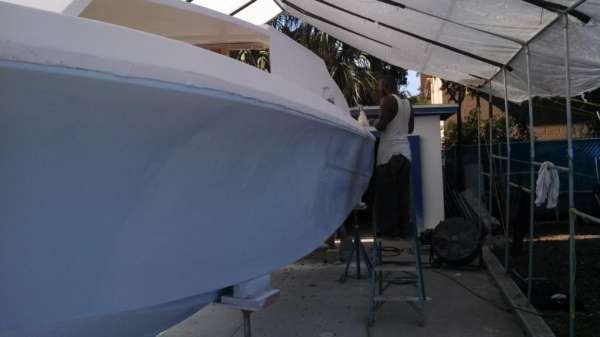
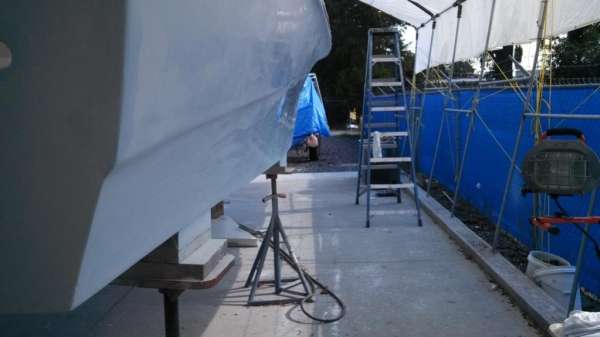
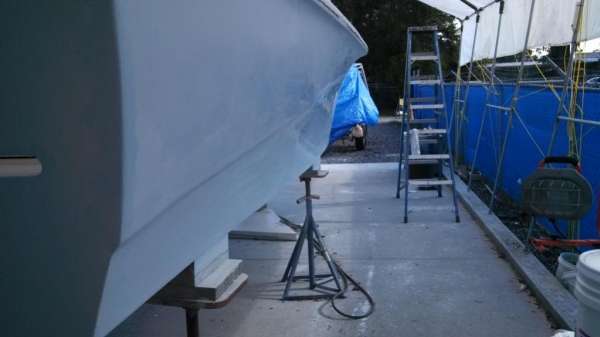
Jamaal has very steady hands when it comes to achieving uniform sanding depth, however when he got to the swoop of the nose bare fiberglass began to show through the blue. This is not his fault; in fact his depth perception was perfect. It’s the gelcoat that was not thick enough in this curve to begin with.

This photo doesn’t show just how thin it is, but in person these brownish spots are evident all over the portside nose section. To solve this we re-sprayed the entire section.
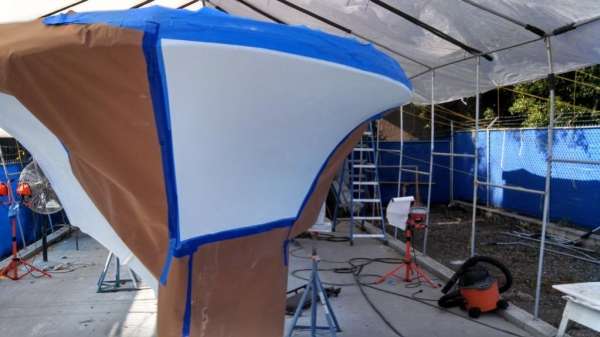
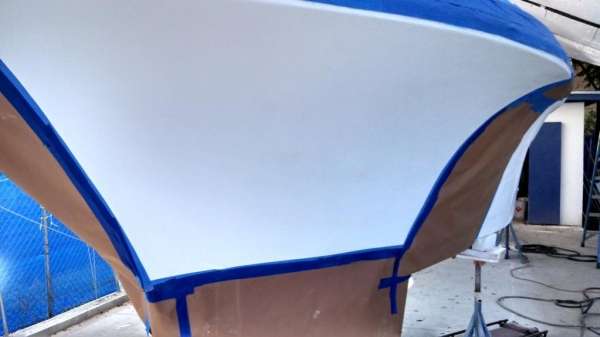
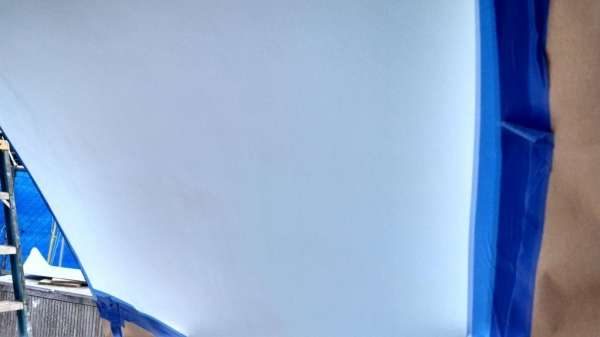
During the initial spray we shot regular thickness gelcoat, but on this touch in we added 4oz. of Patch Booster to the quart to improve adhesion. The drawback is that thinned gelcoat flys out of the cup gun like a fox from a forest fire. Check out Matt dumping a full quart in 68 seconds:
Notice that he uses a open-faced wand stroke to prevent gelcoat from piling up near the nose. Check out :33 of the video how Matt uses his feet to maintain proper spray depth rather than reaching in with his arm.
When spraying a surface with depth (rather than a flat plane) it is better to move your feet then to reach with your arm.
The finished product came out very smooth, and with some careful sanding around the edge this section should blend seamlessly.
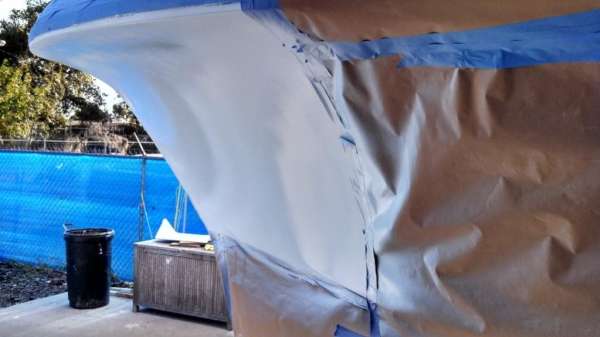

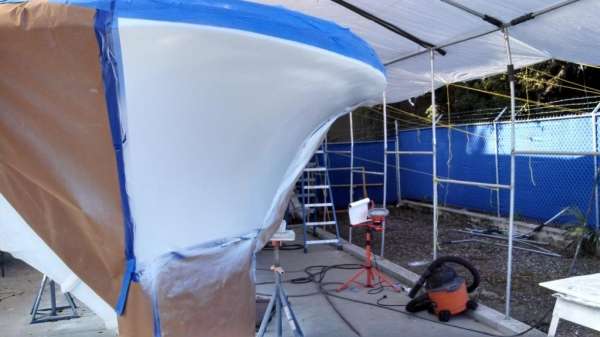
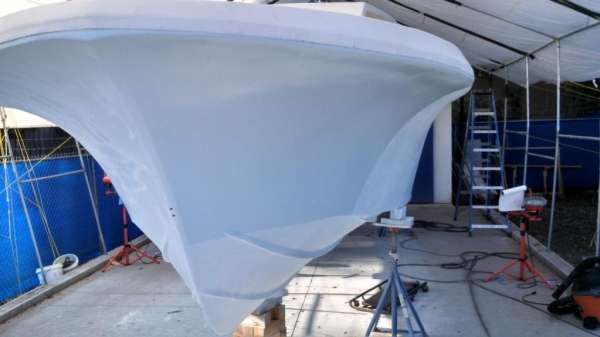
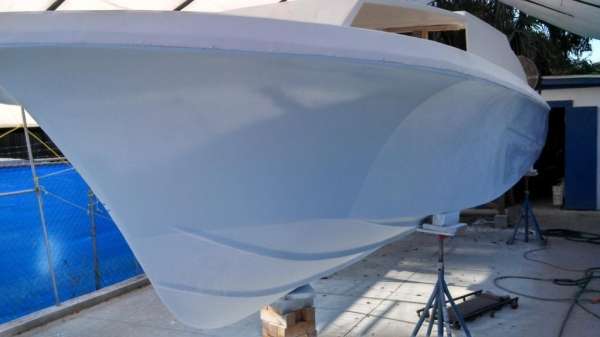
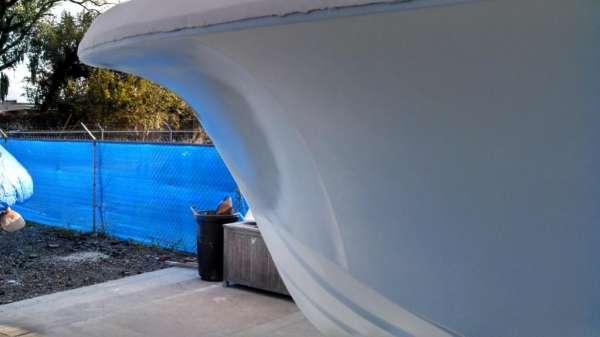
We ran into the same problem on the top cap of the cabin. Because of its position relative to the boat the centerline of the cabin did not get sprayed thick enough on the initial pass. Check out the reach needed to hit the middle:

Even though some material covered to the center, it is not nearly thick enough as evidenced once sanded:
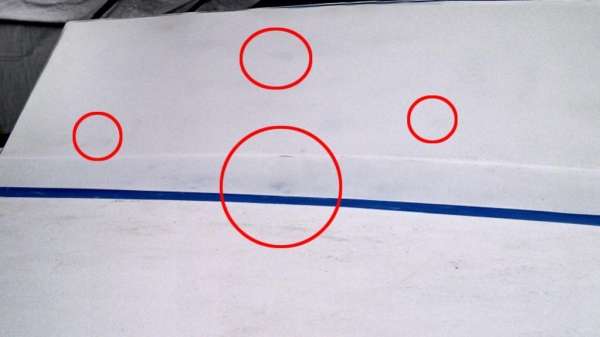
Once again we taped off the entire section, but this time used the roller to apply a double thick texture coat, just like on the foredeck and cockpit floors. This way we know that the gelcoat is plenty thick!
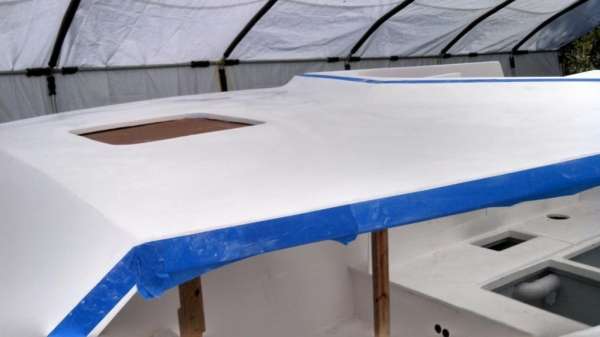

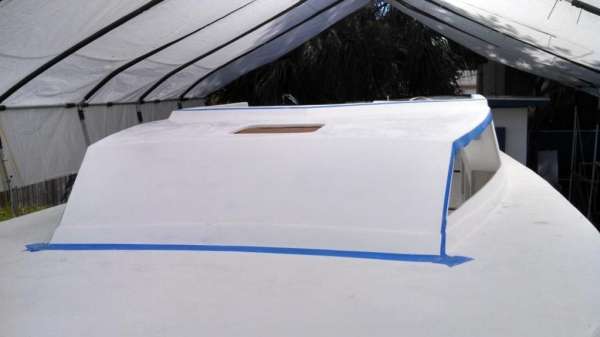
As an added hurtle, it’s lovebug season here in Jacksonville and these little a-holes kept landing on the wet gelcoat…something about the smell of instant chemical death must be appealing to these, the dumbest of the insect kingdom.
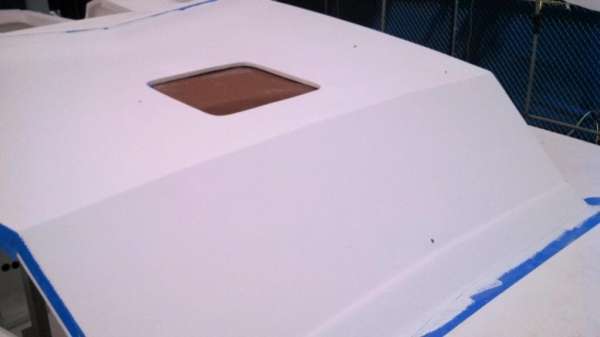
Still we carry on and it turns out that lovebug wings and feet don’t stand up to a DA sander. After curing and a quick lap with P1000 grit we are confidant that this area is finished.
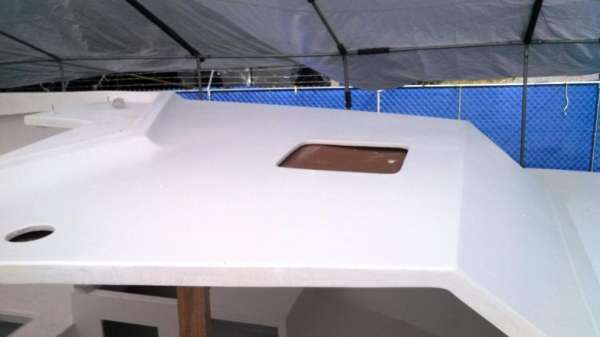
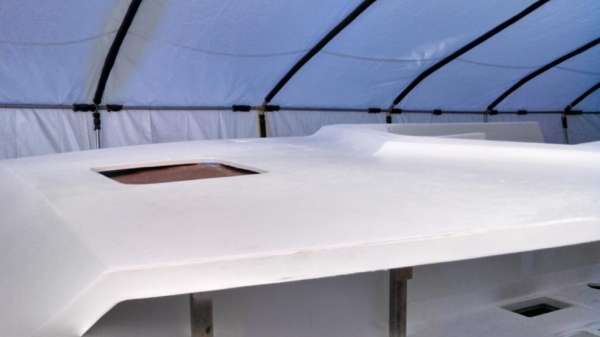
We are continuing to fill pinholes around the hull and Craig is almost finished touching up the interior…We hope to move on to compound and wax this week with the goal of beginning to re-assemble the boat next weekend. Wish us luck!

![]()
September 21, 2013 – Day 529
Howdy all!
The Discoverer Project endured a setback this week as we unearthed a horrible secret about our hull: the gelcoat is just too thin.
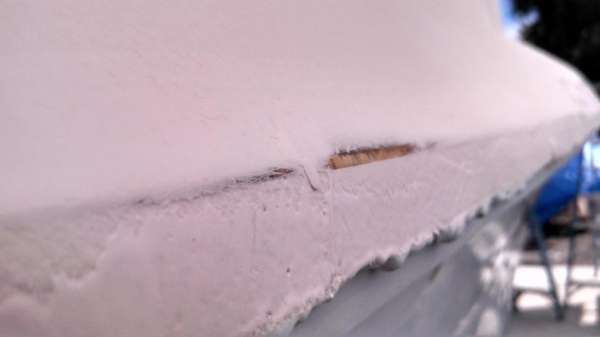
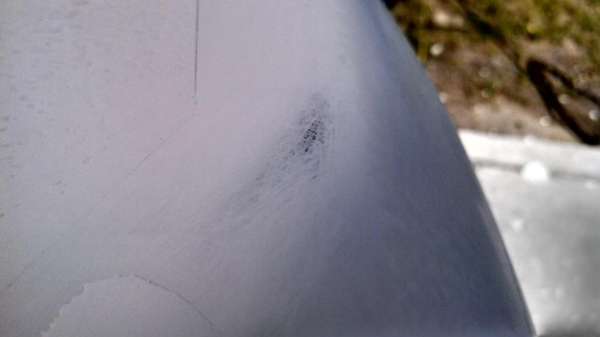
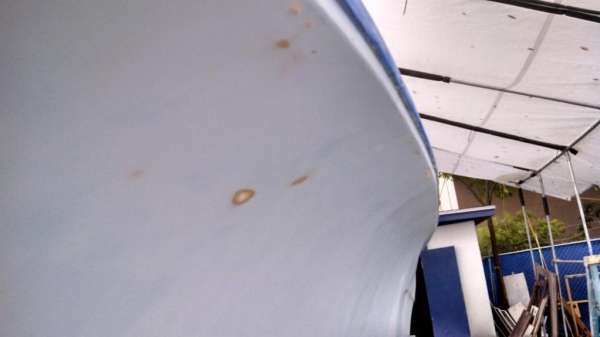
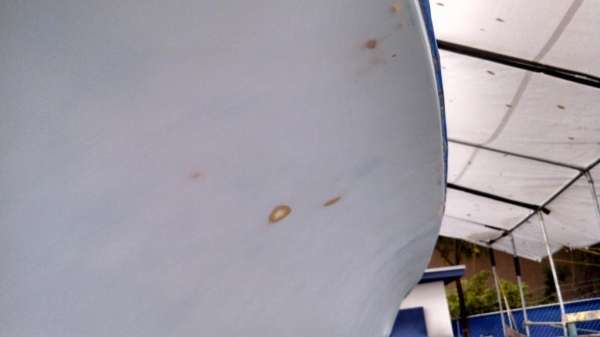
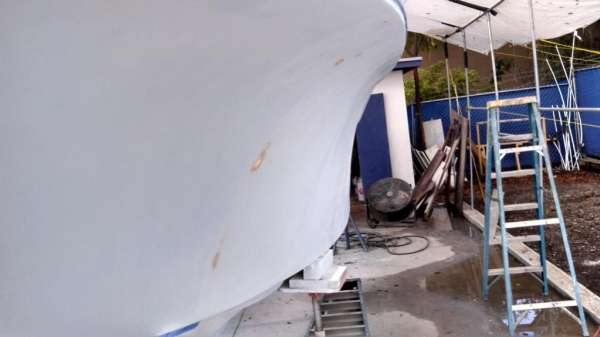
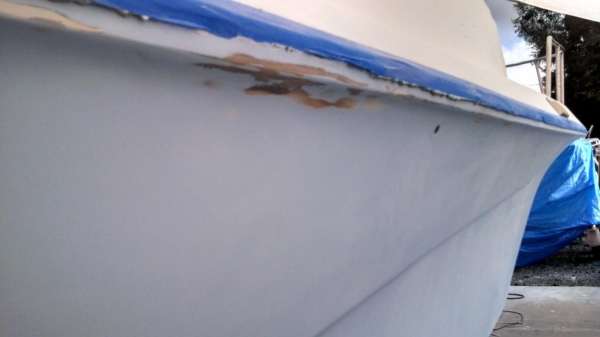
In the last post you can see where we tried to patch over some of the thin spots with more blue gelcoat, but we ran into problems matching the color and getting the new patches to blend seamlessly. The white areas were also a bit thin in spots, but white blends with white pretty easily so we simply brushed on additional layers until the coat was properly thick.
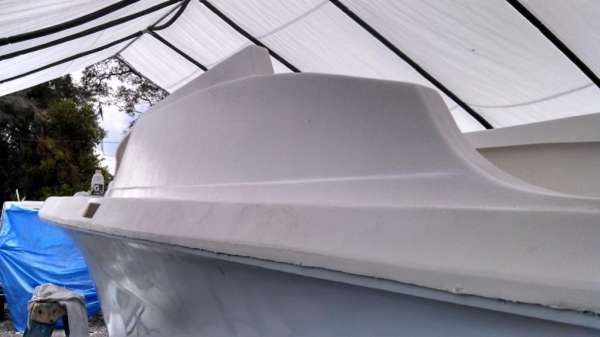
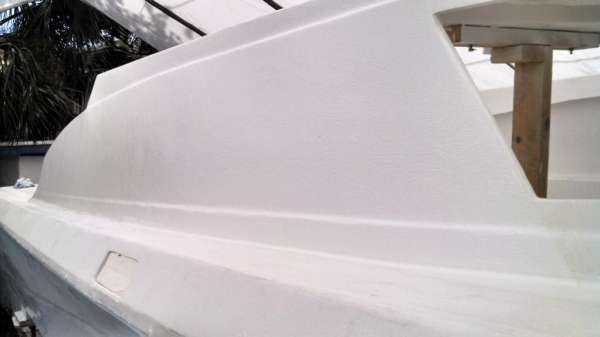
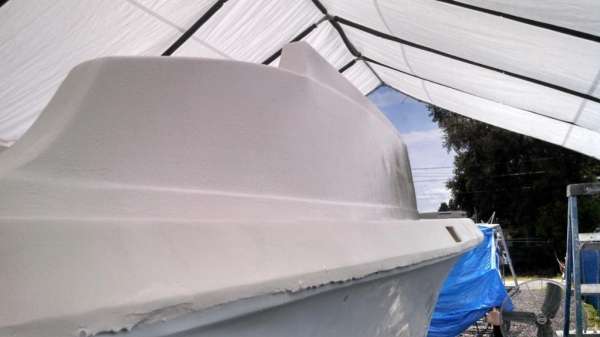
Also most of the white is texture coated anyways, so it doesn’t really hurt to slap on some extra material.
The blue is a whole different affair.
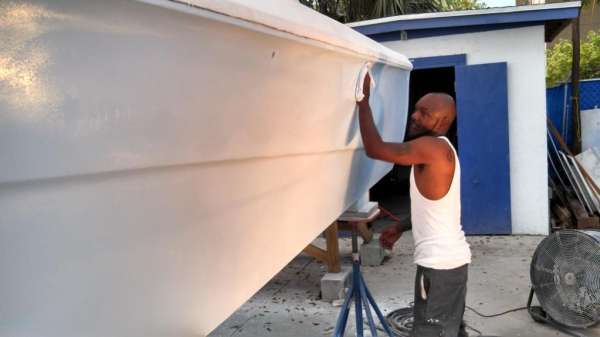
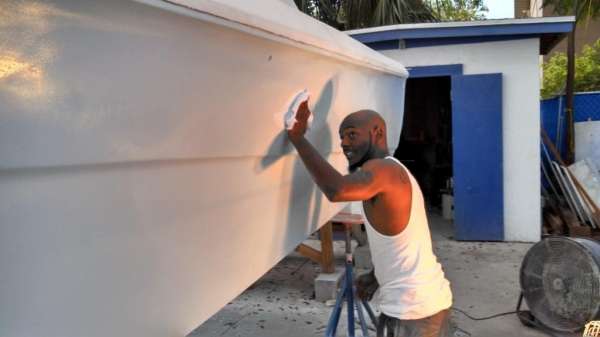
Jamaal did excellent work to get 98% of the hull shined up to showboat standards, but even the best compound and wax job can’t thicken up thin paint.


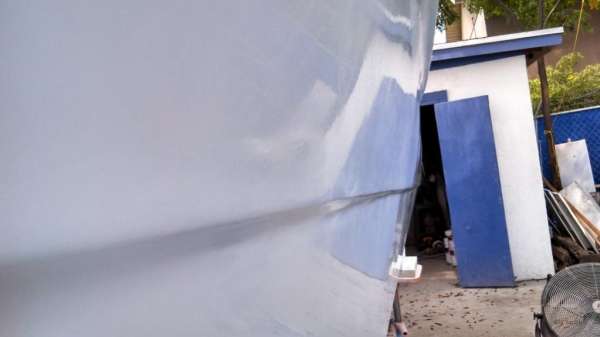
The only part that came out nice and thick was the rear transom, but that’s because we sprayed three coats plus an extra coat of gelcoat thinned with patch booster to fill up the low spots.
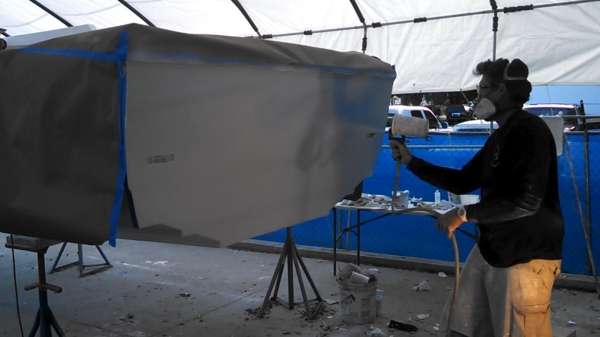
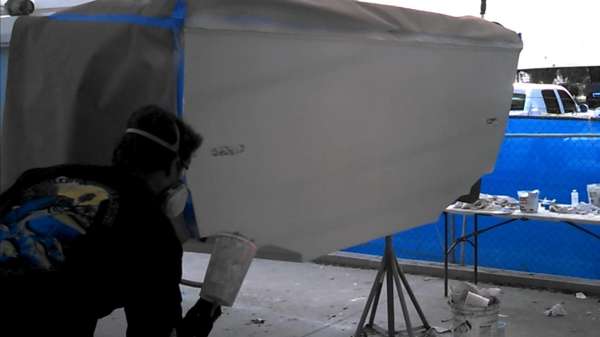
Six weeks of sanding went down the drain as we scuffed the entire hull with 80-grit and removed all the compound and wax that Jamaal had meticulously applied.
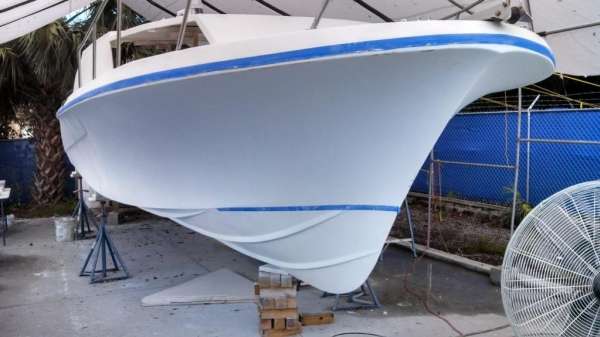
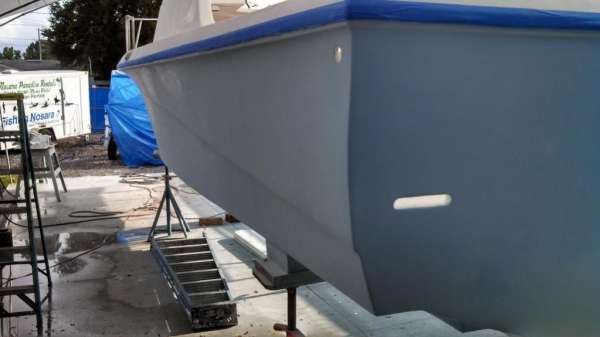
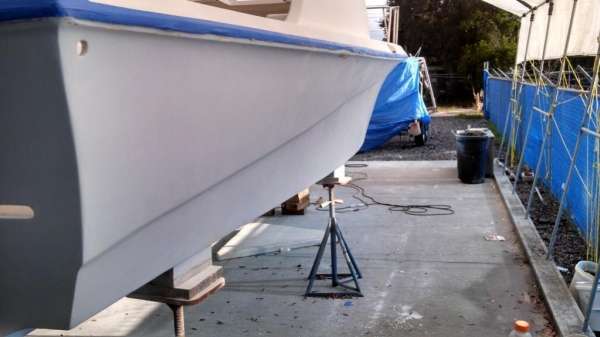
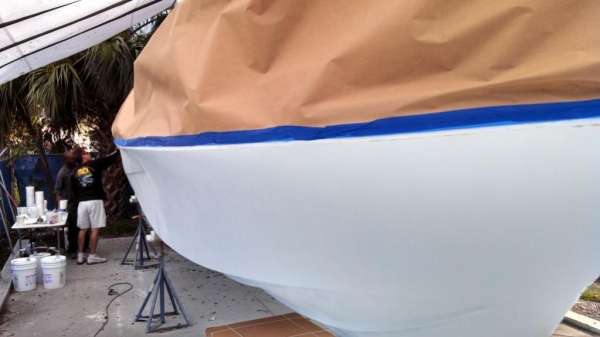
Second time is a charm, right? This time we planned ahead and aimed to replicate the thickness of the rear transom.
Knowing that the job would require between 4 and 6 gallons of gelcoat, we bought 10 gallons of gelcoat and tinted it all to the same shade of blue…this way the boys in Costa will have ample amounts of color-matched material for touch up work in the future.
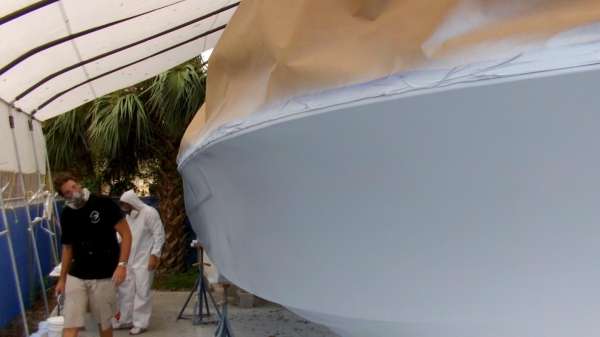
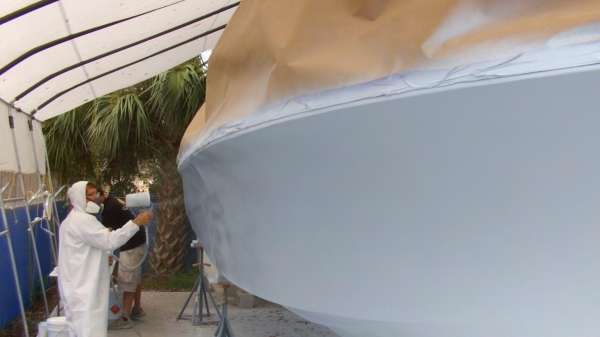

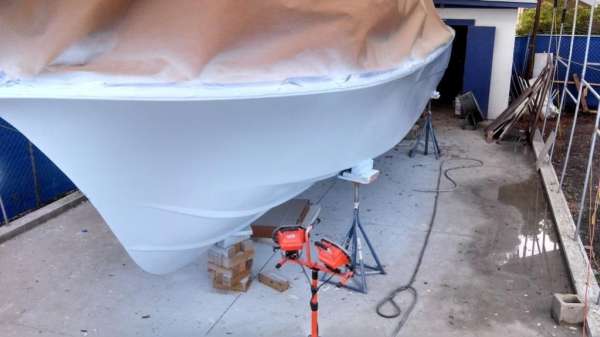
The second spray was a 6 hour ordeal that put us in conflict with brutal heat, high humidity, scattered thunderstorms, and the dreaded scourge of North Florida the Lovebug. We also had the trigger mechanism from the cup gun fail midway through the second coat, but fortunately we had spare parts robbed off of another gun whose nozzle had failed.
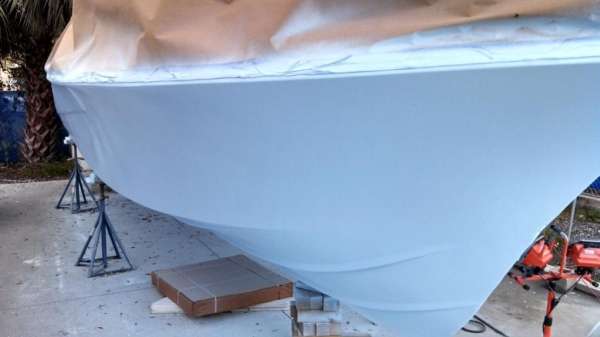

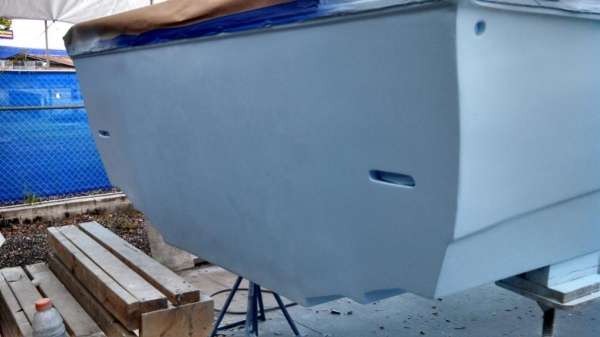

Although this was a heartbreaking ordeal, clearly this was the right thing to do. The gelcoat set up beautifully and should require a fraction of the sanding time to regain the nice shine.
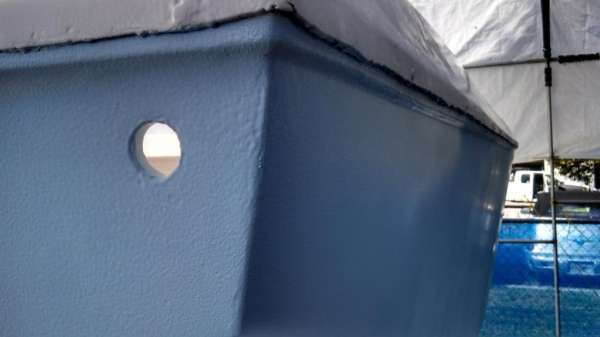
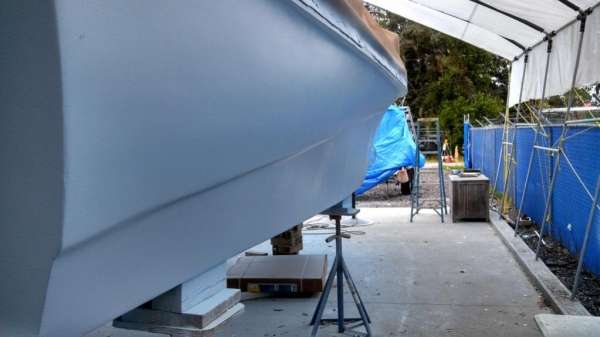

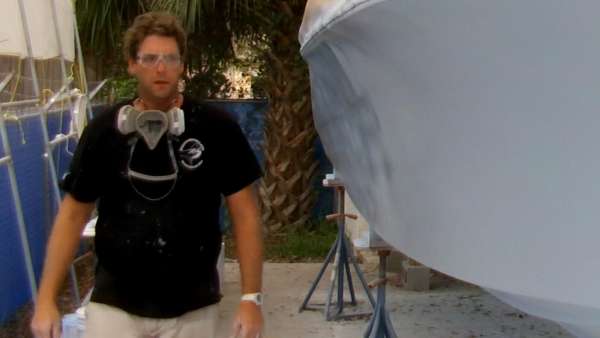
Since it takes a few days to properly cure and harden, the team has already moved on with assembly on the topside.
A few posts back we explained the concept of epoxy sleeving, but now is when we find out if we were precise in our measurements or if we just wasted a bunch of time and money.
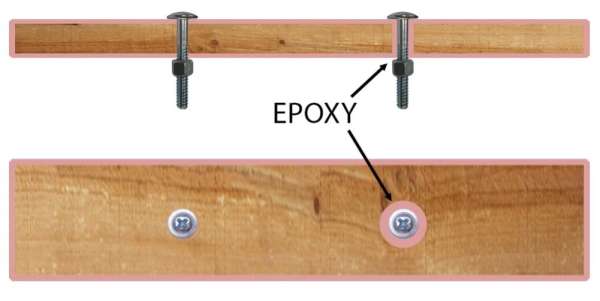
When we drill the holes for the bow rail and nose hardware, the sawdust from the hole should be pure epoxy and not a grain of wood:
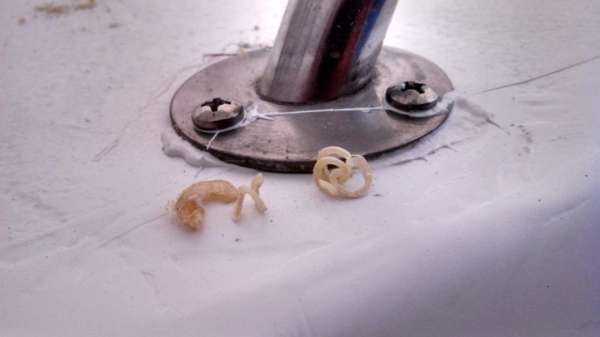
Nailed it!
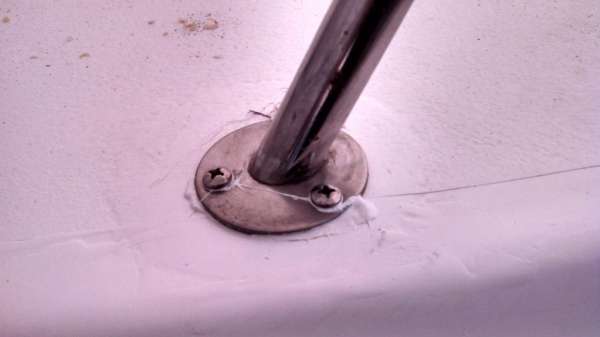
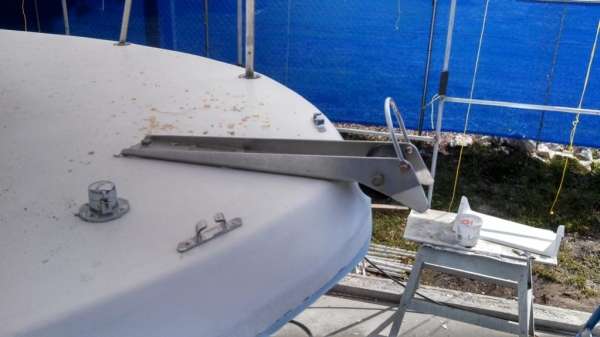
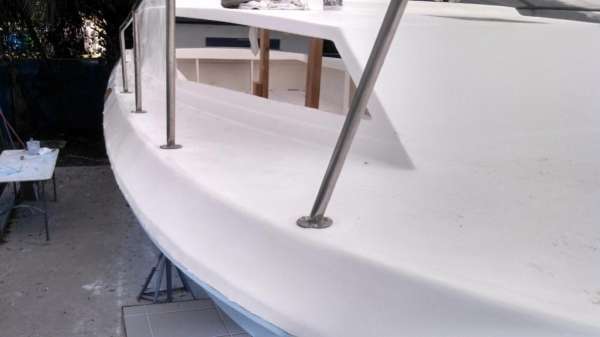
The bow rail and all the nose hardware is now in place with the proper amount of 5200 marine sealant to keep the holes watertight. On the backside of the bolts we use only cap nuts (sometimes called acorn nuts)
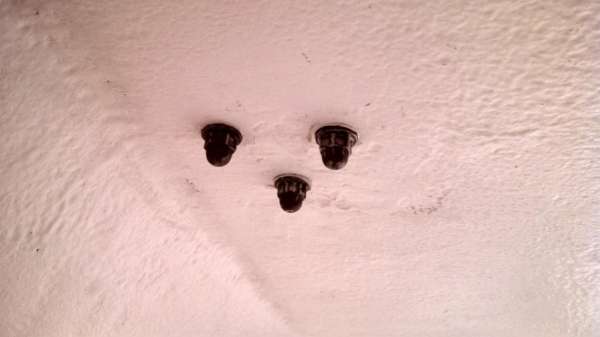
If you’ve seen any of our other boat builds, you already know that we are some cap nuttin’ fools!
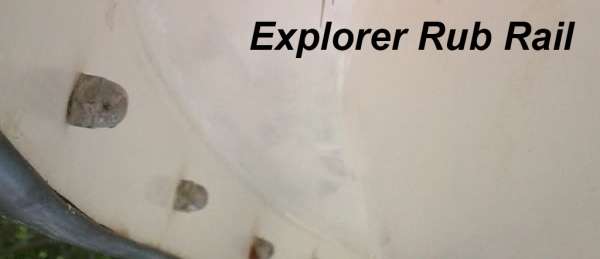

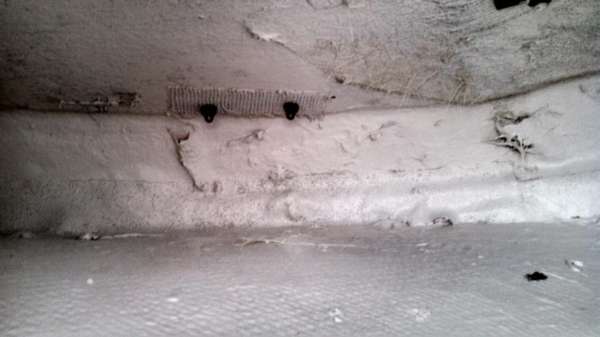
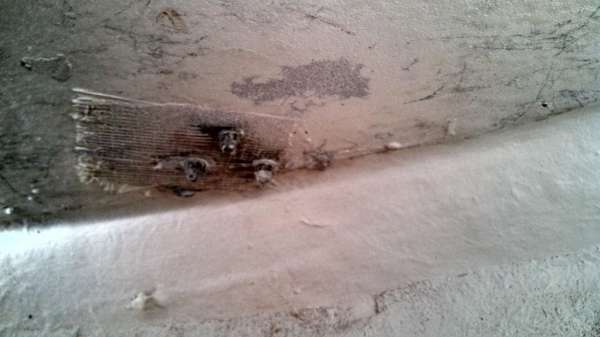
It is much easier to use standard open ended nuts because then the length of the bolt doesn’t really factor in; you could theoretically use multiple length of bolt on a single installation. However the finished look of precisely deep bolts and snug cap nuts is stunning, plus it eliminates the chance of injury at sea.

This week we will begin sanding the blue hull once again and will re-establish the high shine that we achieved before this re-spray. Also the Discoverer will take a field trip to our pals over at Oasis Boatyards in St. Augustine to be fitted for her transom motor bracket. We also still need to mount the fuel tanks and install the rub rail and tower, but after that we are nearing the home stretch.
Stay tuned as the next few weeks should unfold very rapidly.
![]()
September 28, 2013 – Day 536
The Discoverer Project is back on the good foot as the new triple-thick gelcoat has set up beautifully and the team continues to plow forward on the topside assembly.

Jamaal has completed his first two laps around the blue hull with P400 and P600 grit wet sandpaper, and the shine he has acheived is already breathtaking. He will advance to P800 and P1000 before adding compound and wax to the finish.
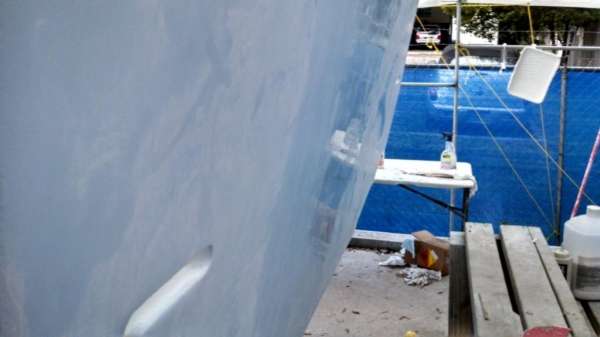
It’s worth noting that his progress has been accelerated by the thickness of the gelcoat; he is really able to dig in and grind since he isn’t ‘walking on eggshells’ regarding the thickness.
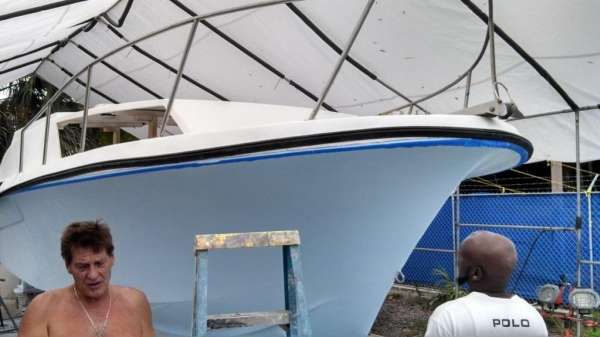
Meanwhile Craig and Matt installed a Taco flexible vinyl rubrail. We have attached one of these to three other boats, but this time we tried a very unique approach: we read the directions!
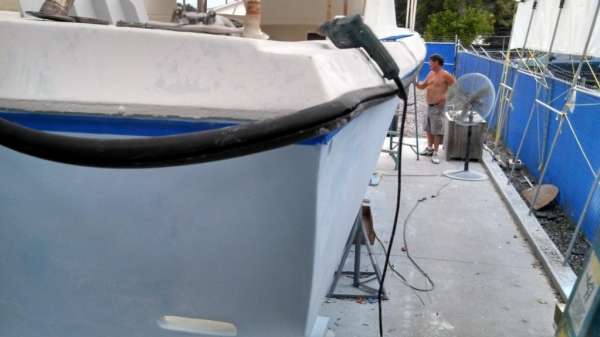
The correct process is to attach the rail to the nose, then ‘pre-stretch’ the whole thing, pulling back as hard as possible. This way once you come around and put in the screws you don’t have to constantly be stretching.
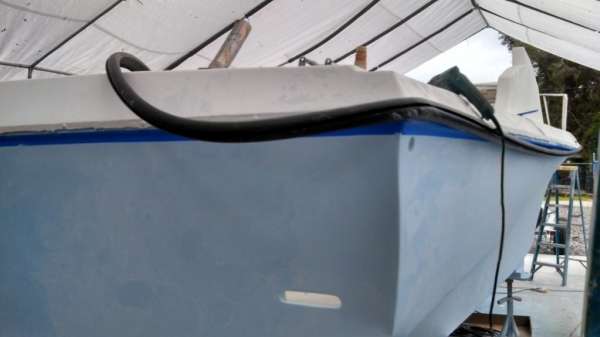
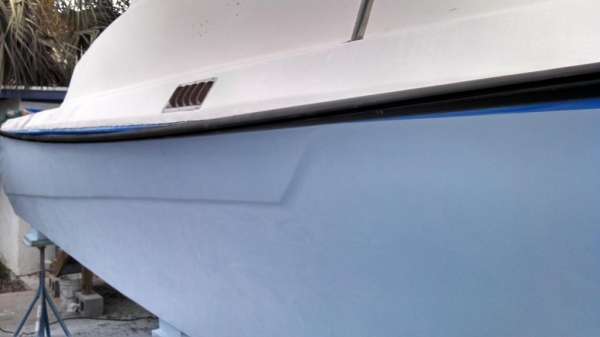
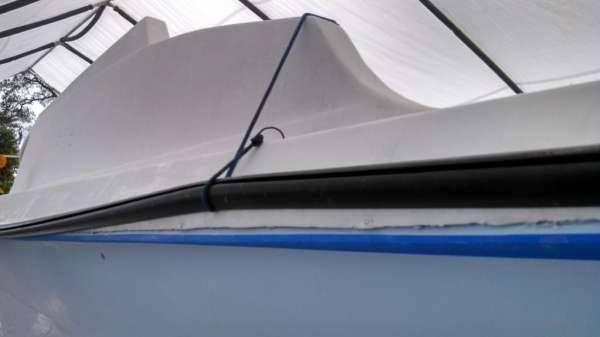
On the Wanderer we stretched the rubrail as we went, and you can see from this picture that it has a lot of wobble in it:

Clearly the new rail on the Discoverer is proper:
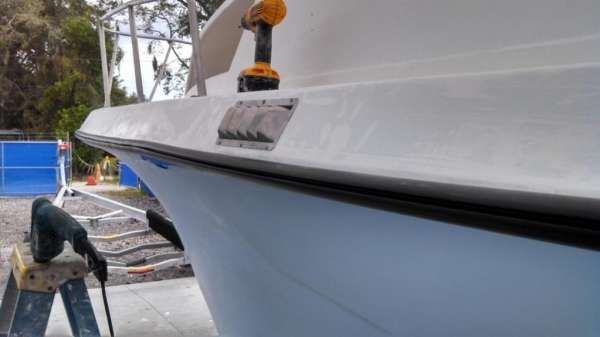

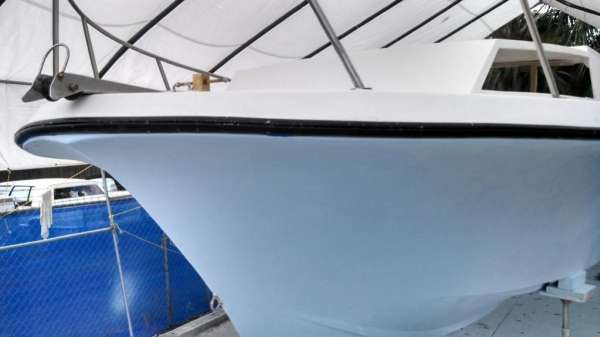
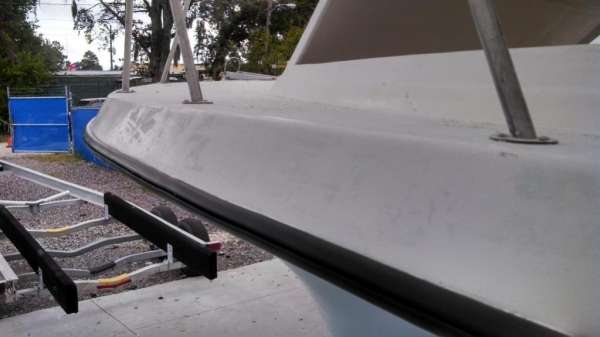
You want to attach the screws every 4 inches, working in four foot sections with ample 5200 laid in behind the rub rail. We used a tape line to maintain accuracy in the depth of the rail.
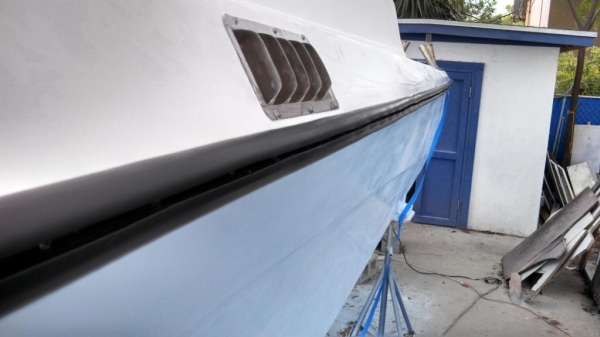
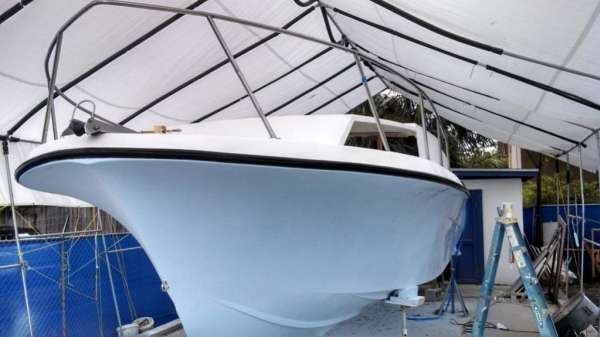
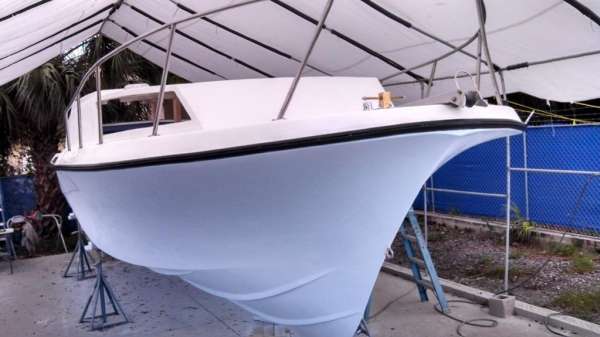
We were relieved to find that we had just enough rail to meet in the rear; this was sold as a 70 foot rail and our boat is 31 feet long with a 9 foot beam…do the math: 31+31+9 = 71 feet. That’s not including any lost length due to the flair of the bow.
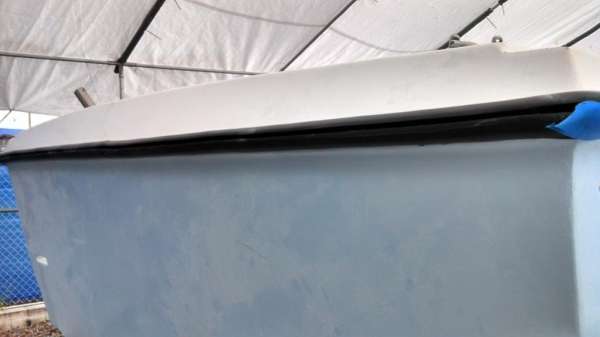
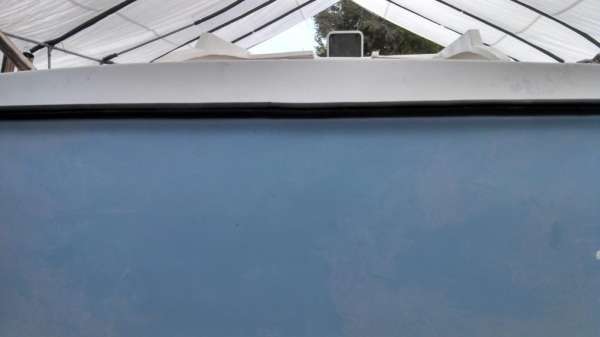
Clearly the pre-stretch isn’t just for looks; it is a crucial step as it created the extra couple of feet required to make it around the boat.
Big thanks to this video of an ancient episode of Ship Shape TV for the insights:
Check out 7:35 for the stretch.
Here is another useful video for installing a rub rail:
It’s newer (higher def) and little easier to watch, especially because it features funky music and a cute chick saying things like “Larger than the shaft of your rivet”. But I digress….
We continued on hardware installation with the nose lifting eye:
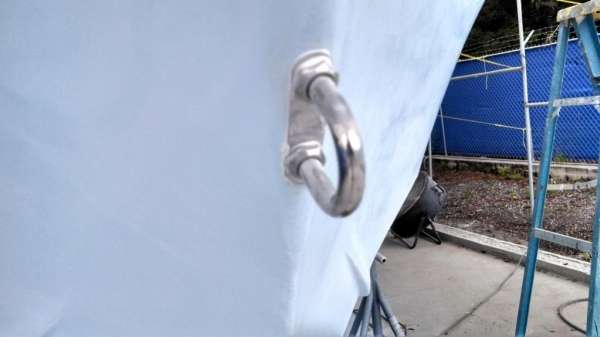
We then moved on to the Bomar hatch. On the Wanderer we never serviced this unit, and we paid the price a few seasons later when the handles and rod needed replacement. This was a pain because it is difficult to tap new threads into aluminum while the unit is on the boat.
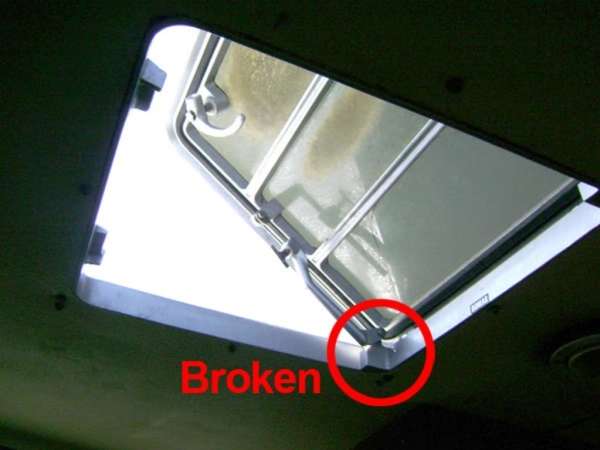
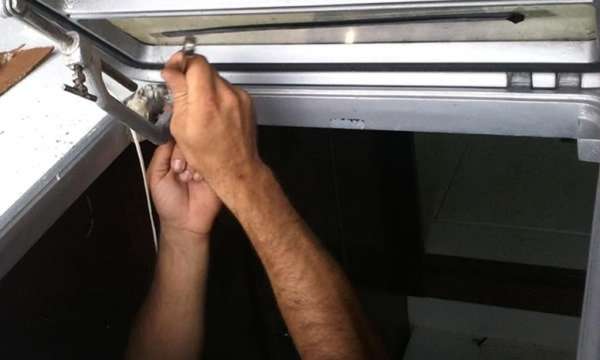
This time we bought new handles and a new rod as a preventative measure for repairs down the road. I think that these spare parts are the best hundred bucks we have spent on this project to date…I’d rather spend $100 now than replace the unit (for $600) or living with a crappy hatch (not an option)
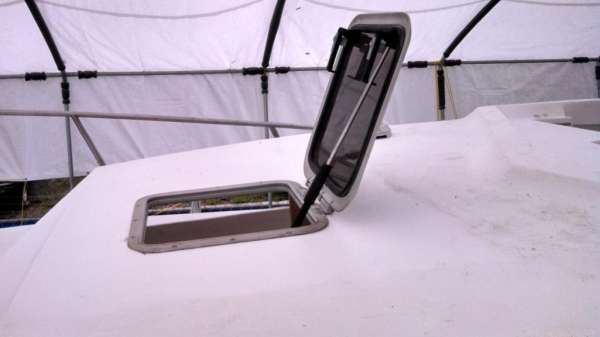
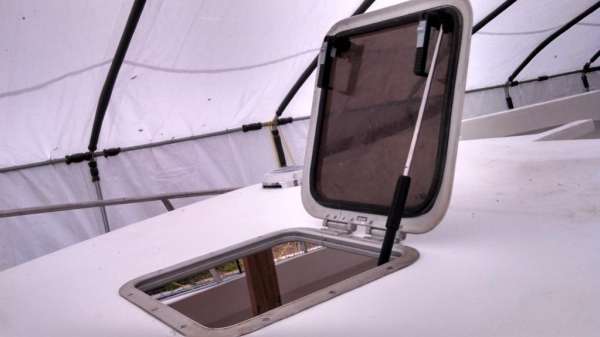
Or as Craig likes to say regarding cost vs. value: “The best thing about good hardware is you only have to buy it once.”
We also finalized the front deck by cleaning and re-installing the mooring bitt, rope pipe, rope guides, and solar fan. Check out the before and after:
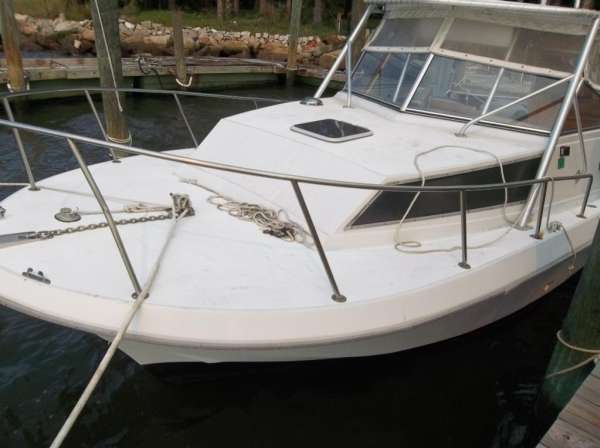
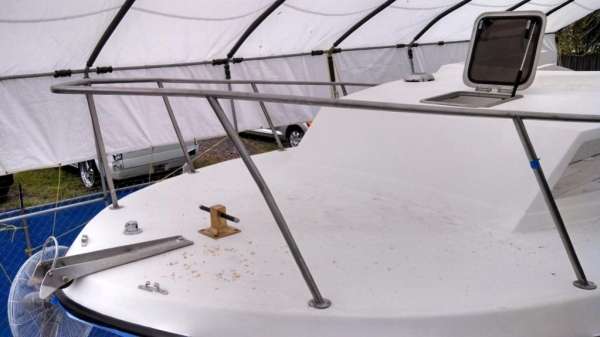
Unlike the original installation, we are using bolts and nuts with lots of 5200 rather than pointed screws with lots of laziness.
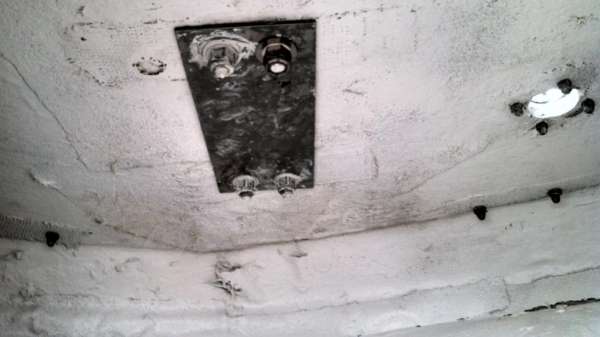
This week the Discoverer will take a trip to St. Augustine’s Oasis Boatyard for installation of the transom bracket, while here in the Jacksonville shop we will convert the boat shop over to a wood shop for replication of the old beat up cabin wood.
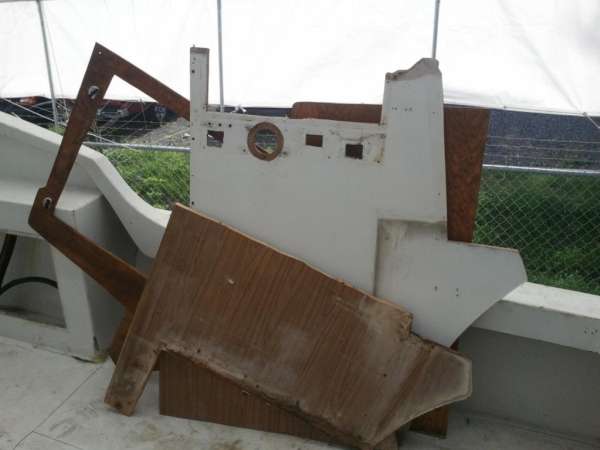
Ideally when the boat gets back after a few days we will be ready to build out the cabin.
![]()
October 1, 2013 – Day 540
![]()
October 18, 2013 – Day 558
Howdy everybody!
It’s been a little weird looking out into the boat shop and seeing this:
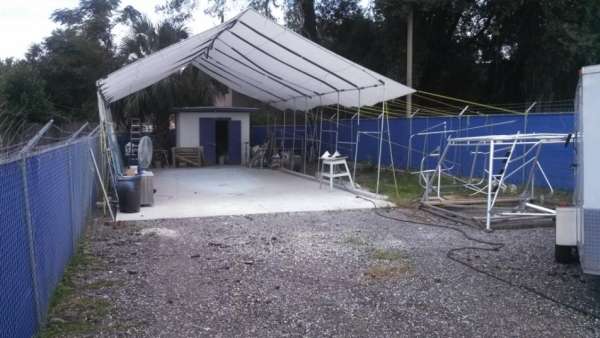
We took this opportunity to get the shop straightened up and to pressure wash the last 18 months worth of fiberglass dust and gelcoat residue off of the tent and bodega.
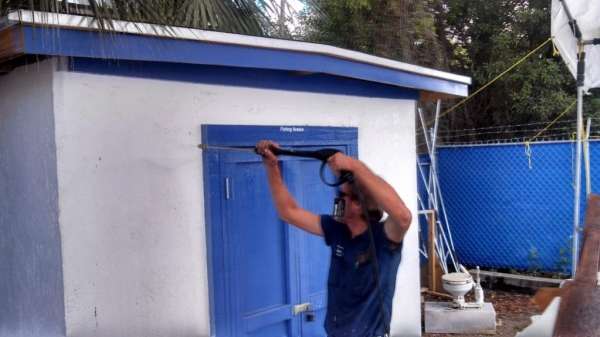
Meanwhile Craig and Matt took a trip to St. Augustine to check on the progress at Oasis. We set up a simple bilge pump system to keep rainwater out of the boat; keep in mind this is the first time she’s been out of the tent since we started.
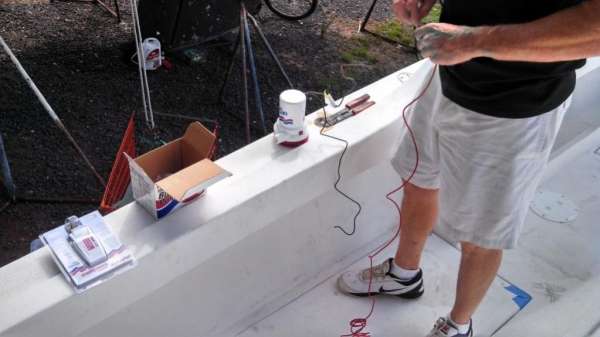
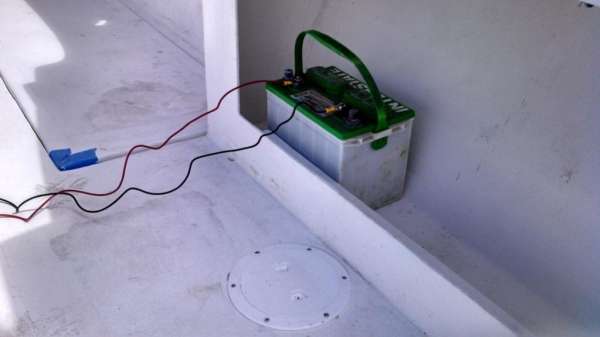
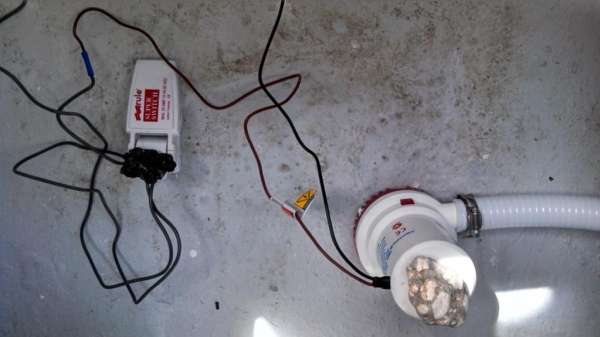
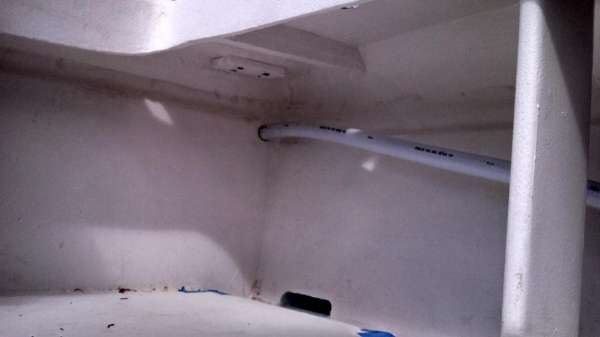

Once we arrived at Oasis we were blown away by how their shops compared to our humble little hovel. We’ve grown used to scraping together enough extension cords and air hoses just to get by, so it’s a real shock to see how the pros operate:
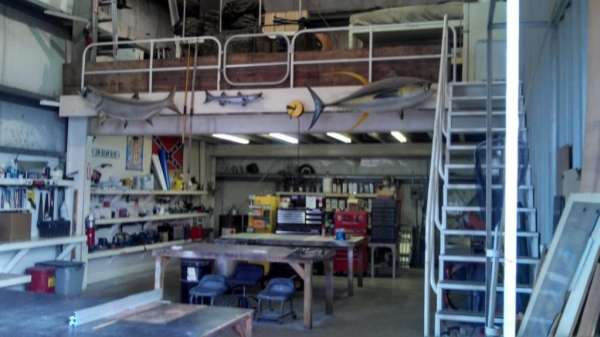
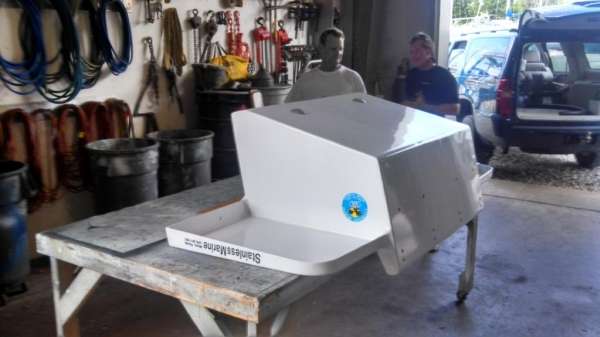
We learned a lot from our trip to Oasis Boatyard in St. Augustine. We enlisted John and his crew to hang our new Stainless Marine Transom bracket, and we also benefited from a few minutes of time drawing on his expertise.
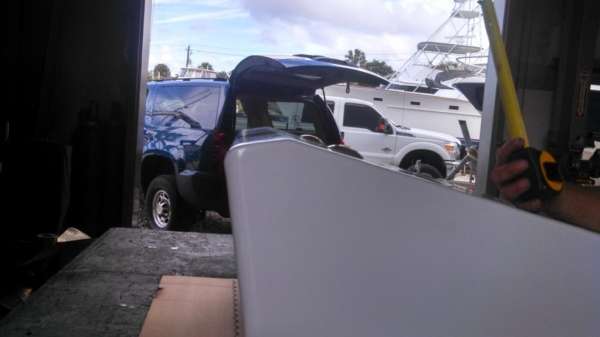

The challenge here is one of geometry. The Discoverer is a very flat in the bottom rear of the hull which means that the leading edge of the transom has to be perfectly level with the bottom of the boat or else the handling will be all screwy.
Without the motors on hand we needed careful measurements from a known good boat. Fortunately the Wanderer handles like a dream so we made a quick call to the boys in Costa and had them measure the transom on the Discoverer‘s big sister.

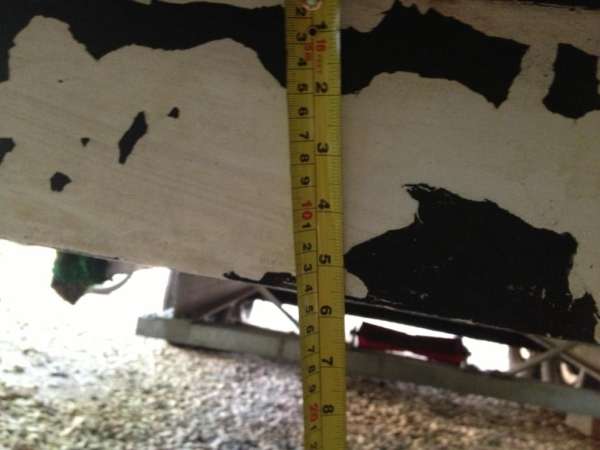
John made a smart decision while were were running around getting these measurements together: Call Stainless Marine, get the template, and mount the damn thing!
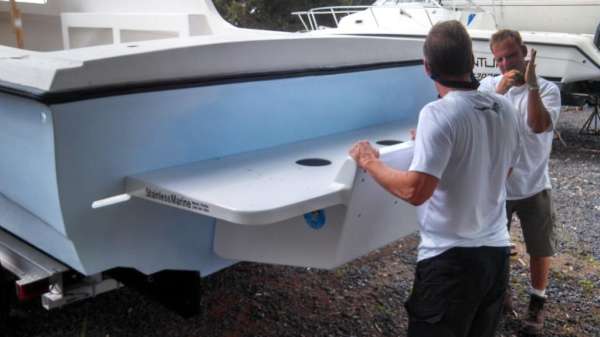
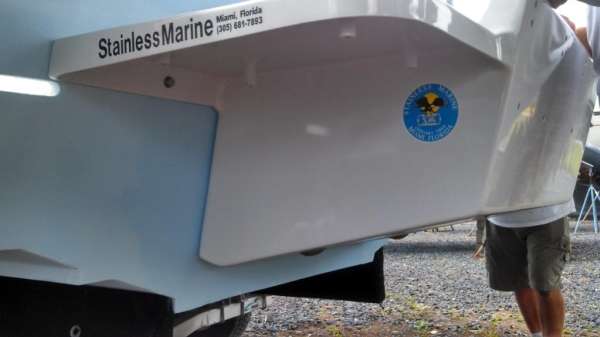
Which he did brilliantly! We only asked him to drill the holes and tighten up four bolts for the ride back to Jacksonville. This arched his eyebrows a little, but we are certain that of all the bolt holes on this boat, these need to be epoxy sleeved the most.
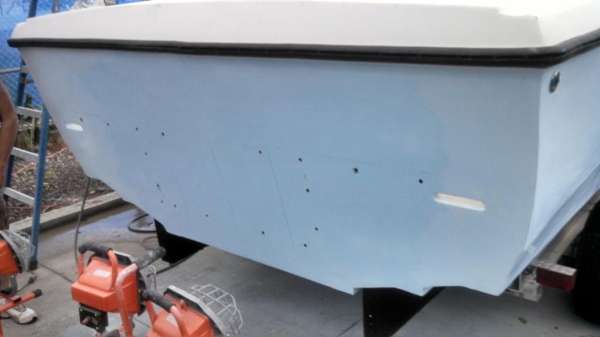
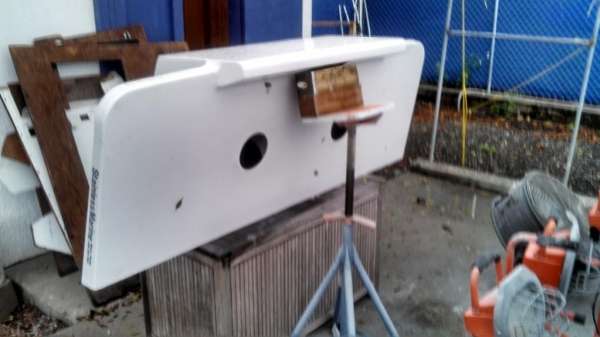
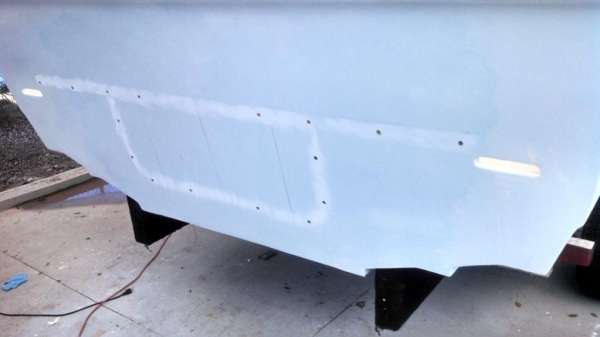
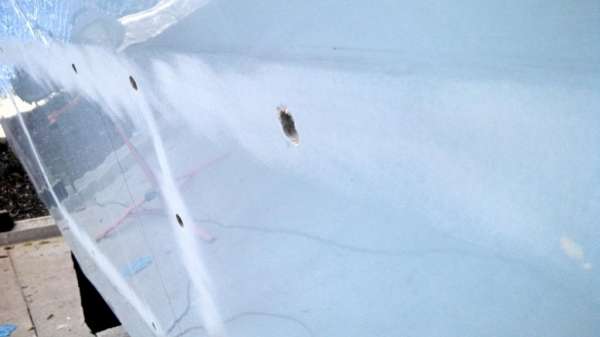
We took this opportunity to let the transom air out and thoroughly dry. At night we used the heat lamps to keep the evaporation on schedule.
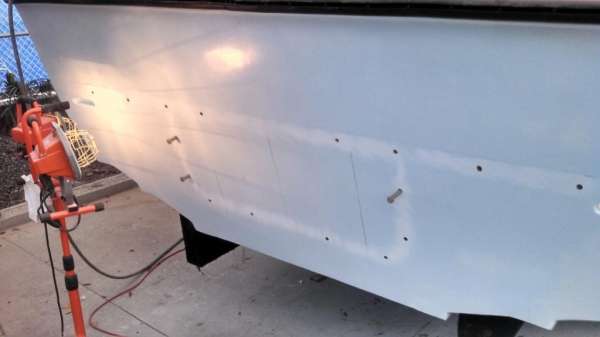
Then we overdrilled the holes:
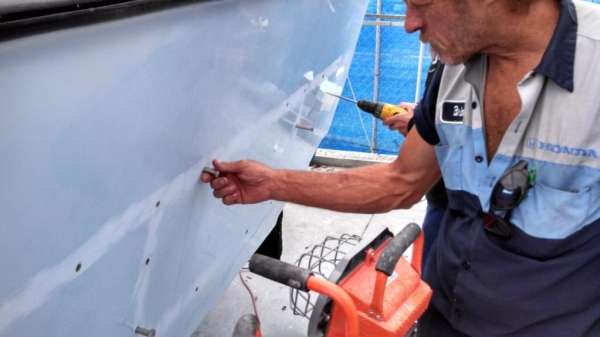
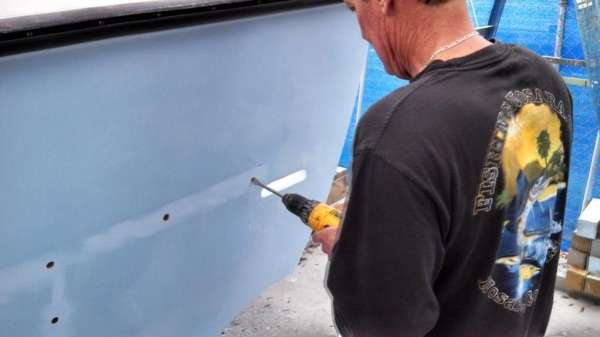
And then taped off the inside and inserted the 610 Thickened Epoxy:
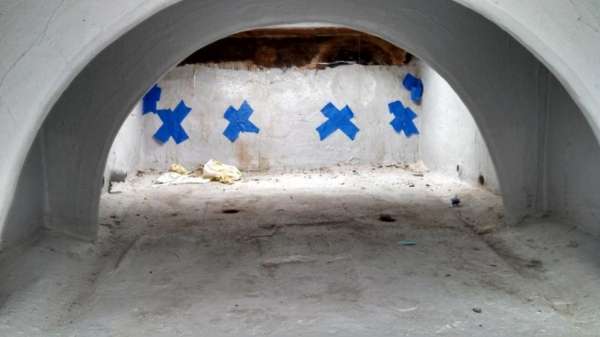
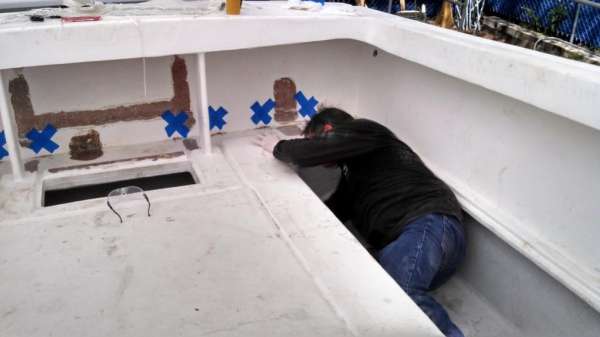
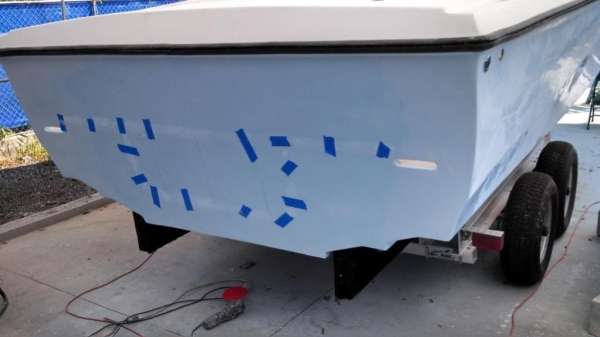
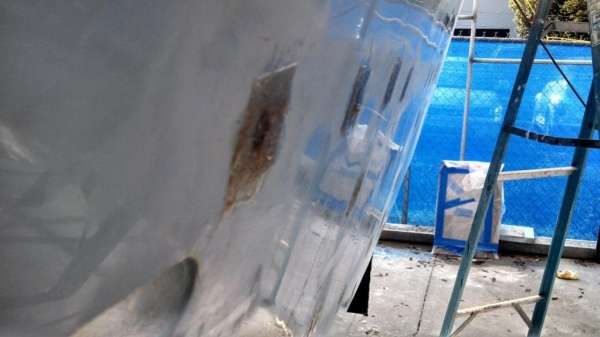
After a day to cure, we fixed the epoxy sleeve into place with a thin (and I mean THIN) layer of fiberglass matte.

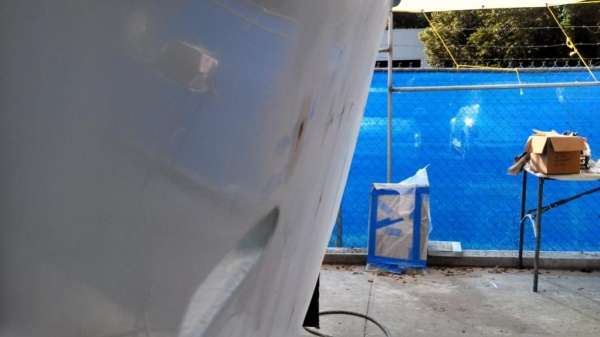
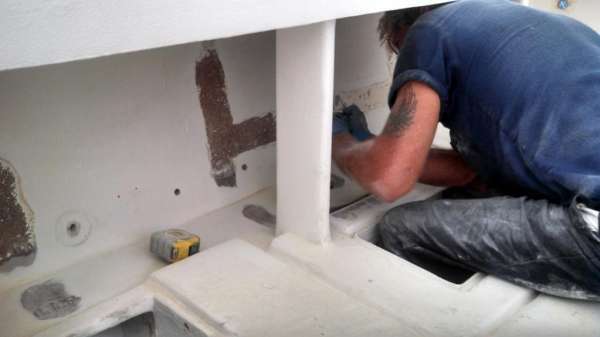
On the inside of the transom there was also a huge amount of work going into the Discoverer.
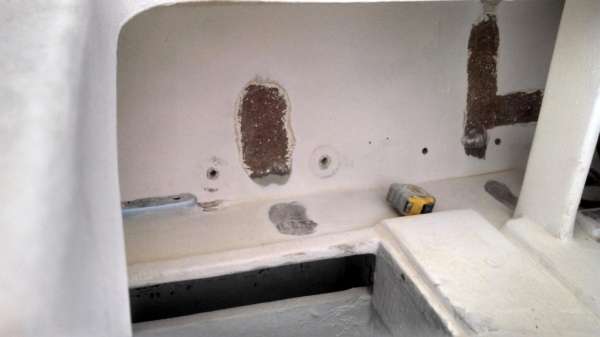
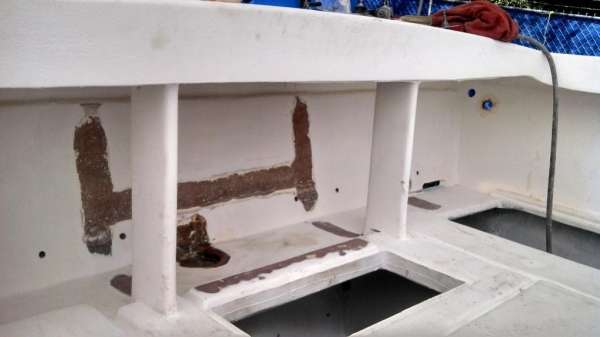
Brian has sanded away all the spots on the transom where we plan on building our new livewell. Notice the bare spots on the left and right of the livewell; this is where we will install elbows in the corner to add strength to the floor-transom connection.
This connection is a concern on the underside as well, so upon John’s advice we laid up an additional 5 layers of Woven Roven to really make this area strong.
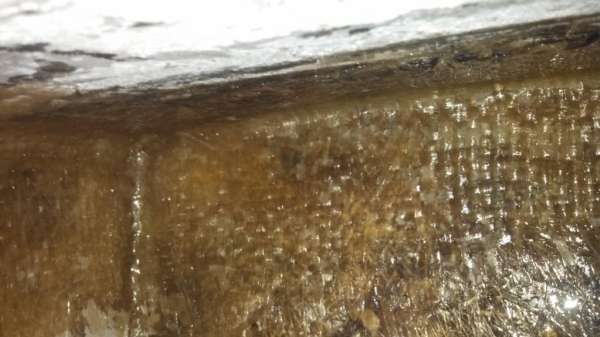
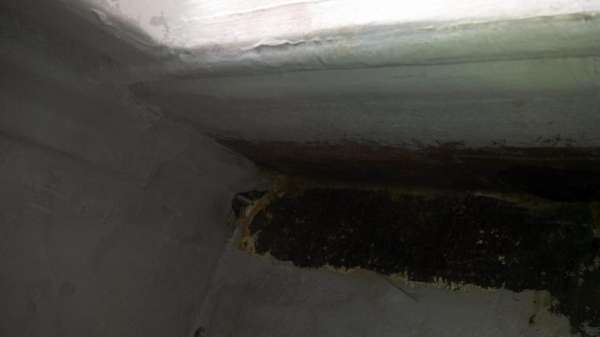

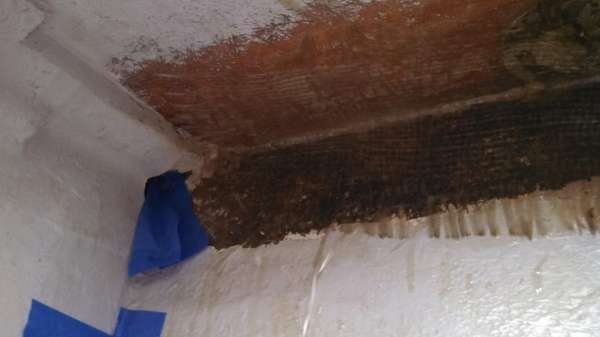
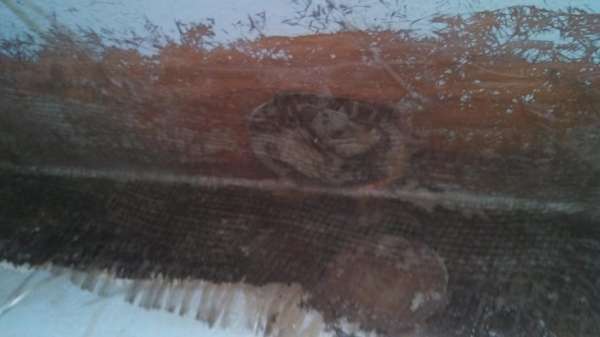
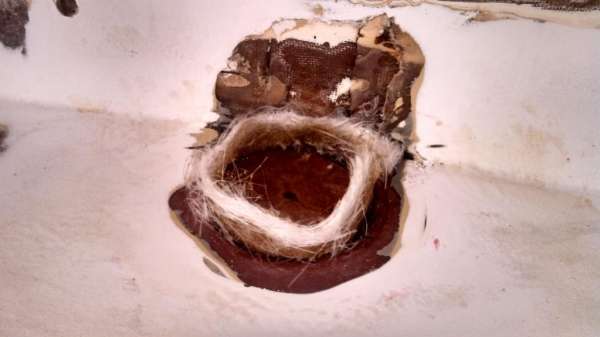
Here you can see the initial phase of removing the center access tube. We will install a dual tube set up once the livewell is in place, but for now we simply want to fill this gaping hole in the floor.
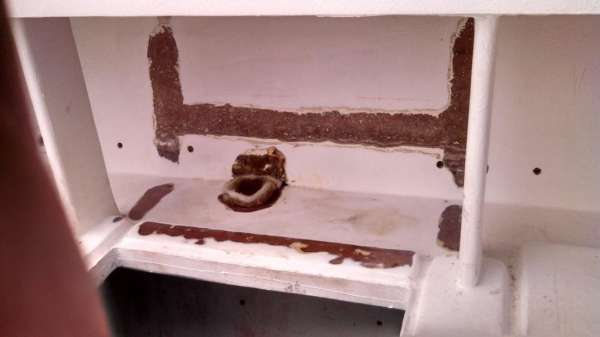
As we sit now the transom is just about ready to install, even down to the custom fitted backing plates. These two freaks will fit in the areas where the bolts go right into the stringers.
As new hardware gets installed, new holes get drilled in the boat. This means that we have been constantly wrapping these new holes in fiberglass to keep out water intrusion. This also gives us a chance to build up any areas where the gelcoat got thin during the sanding process.
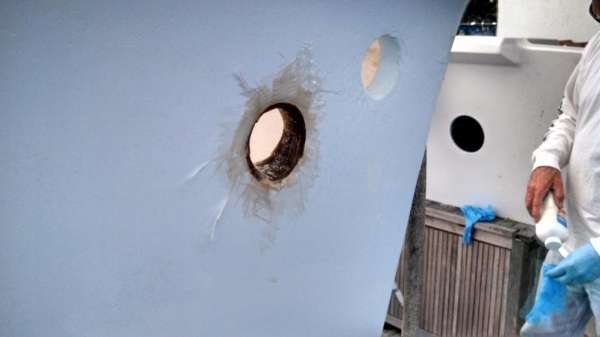
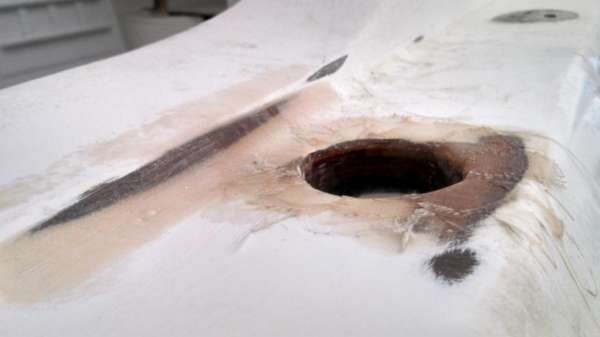
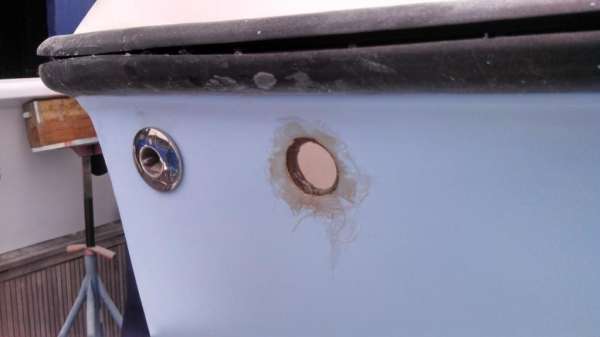
Recently we received our custom fuel tanks from Sunshine Marine. How custom can a fuel tank be, you ask? The model name is ‘Craig Sutton’.
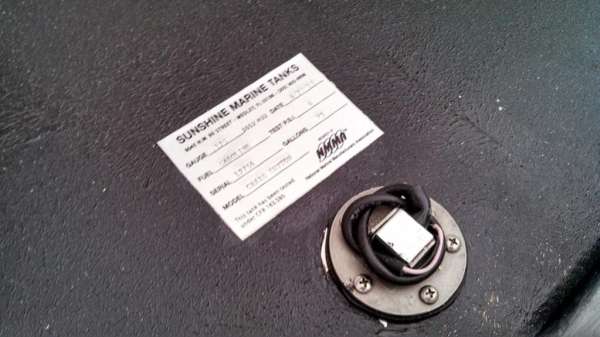


We got some 4lb. Pour Foam from our pals at Fiberglass Coatings and it is a hoot to work with. Once mixed you have about 20 seconds before your cup overflows like a volcano…we have some good video of this install and will post it soon.
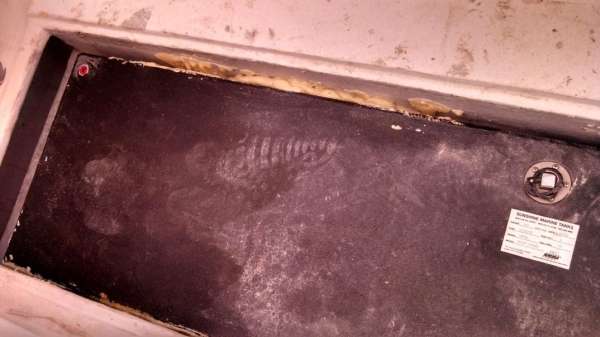
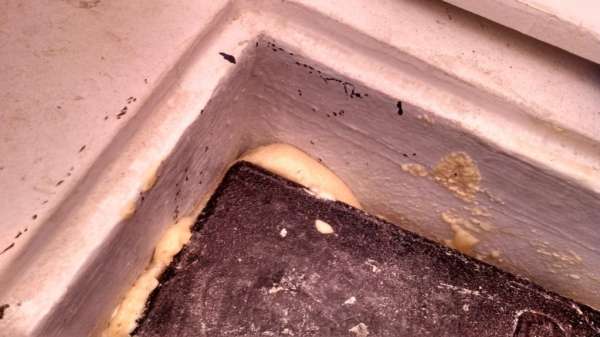
Soon we will be ready to hang the bracket for real and install the tower. The ‘to-do’ list is now officially shorter than the ‘done’ list and we are stoked to be in the home stretch on The Discoverer Project.
![]()
October 18, 2013 – Day 564
The Discoverer is really starting to look like a boat!
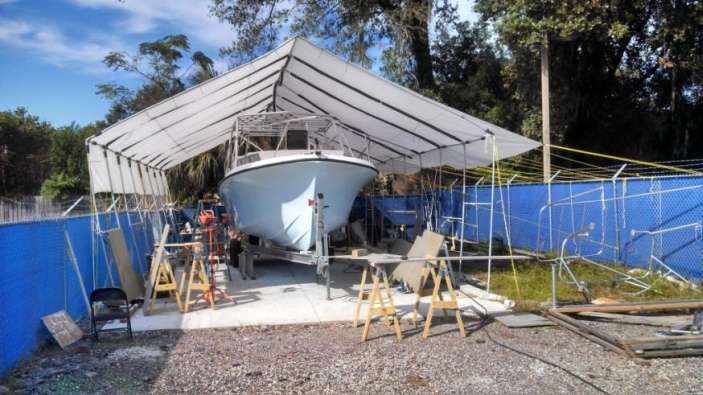
Once we removed the transom and set those holes up with epoxy (see previous post), we turned our attention to the tower. Showboat Custom Coating already got this old tower shined up to like-new condition so we had to be extra careful not to ding this shiny aluminum.
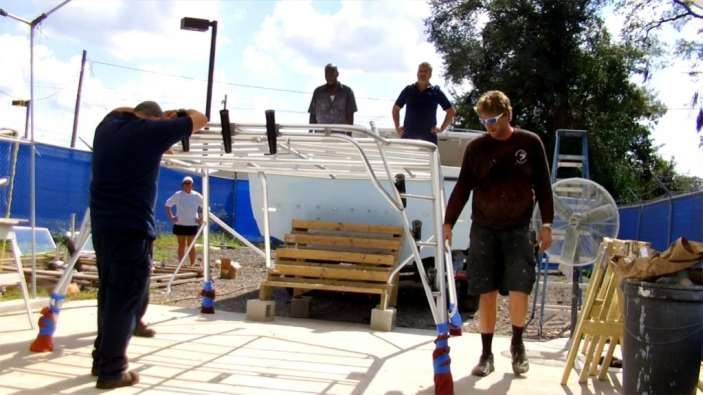
We enlisted a few guys from the auto garage next door to have some extra hands on the lift; the tower is not really heavy as it is awkward.
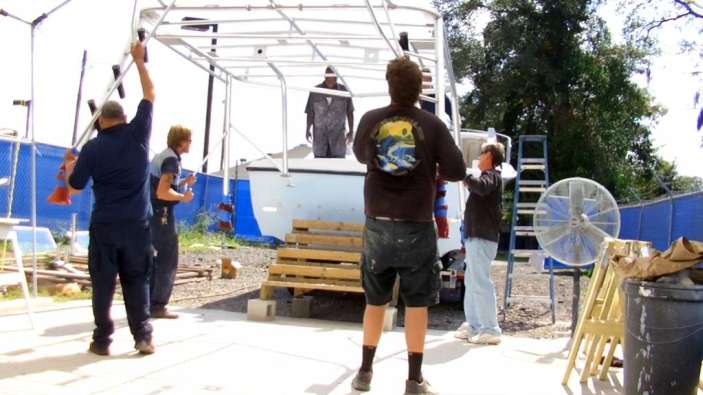
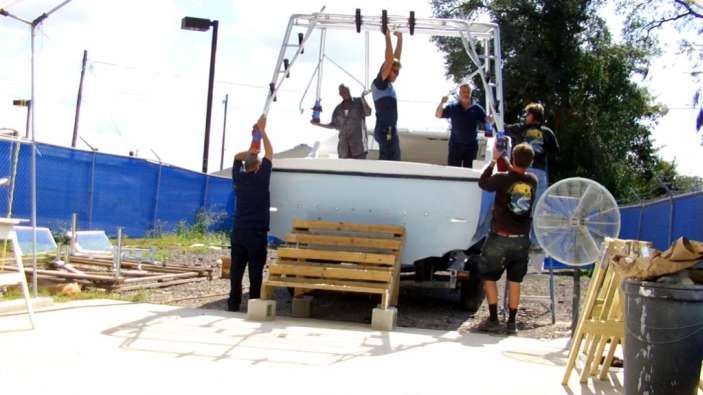

Everyone breathed a little easier once the bolt holes lined up and the tower was secure.
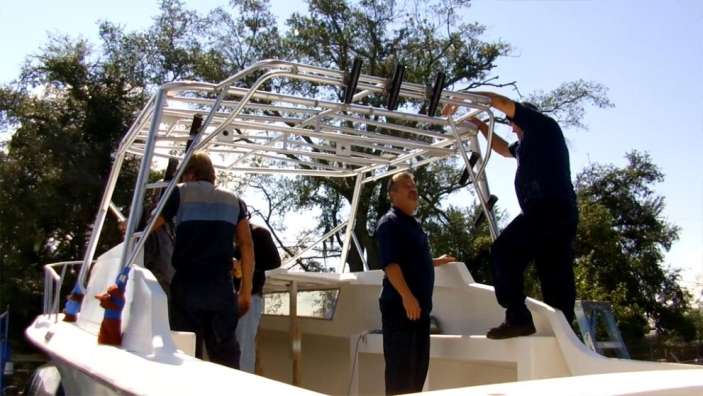
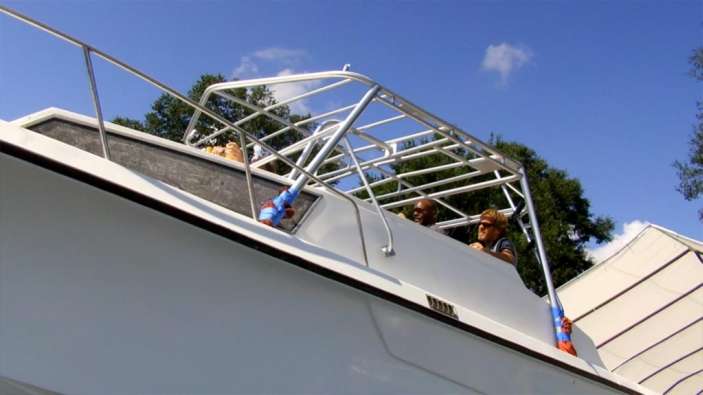
We still have to make backing plates for the bolt, but for now we are leaving the tower in place as we continue work around the interior.
We moved forward with assembly of the windows and window frames; the aluminum frames were in nice shape once we sanded off all the old paint, so all we had to fabricate was some new window ‘glass’ from lexan plastic.
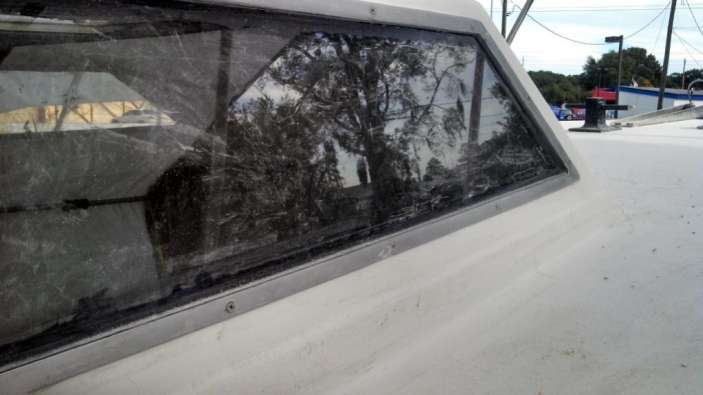

The fit is nice and once we clean off the sanding dust and errant 5200 these windows should shine like dimes.
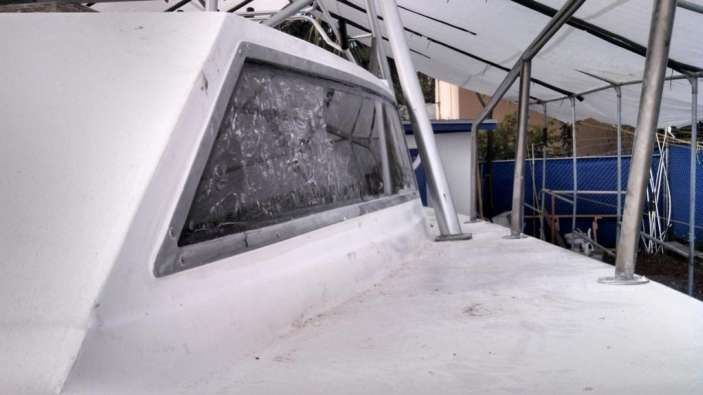
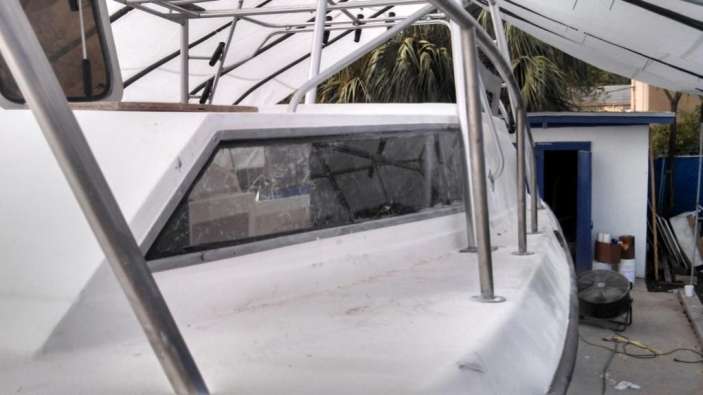
In the last post we secured the fuel tanks with pour foam, but it didn’t expand quite as much as we thought it would (or feared it would, depending on your point of view). Here you can see where we added a bit more to really fill the cavity.
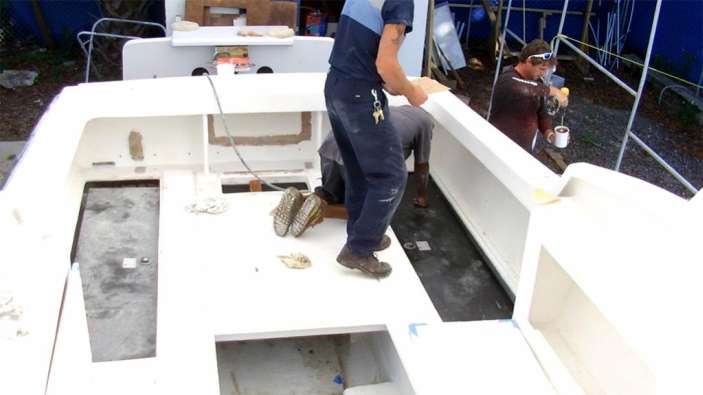
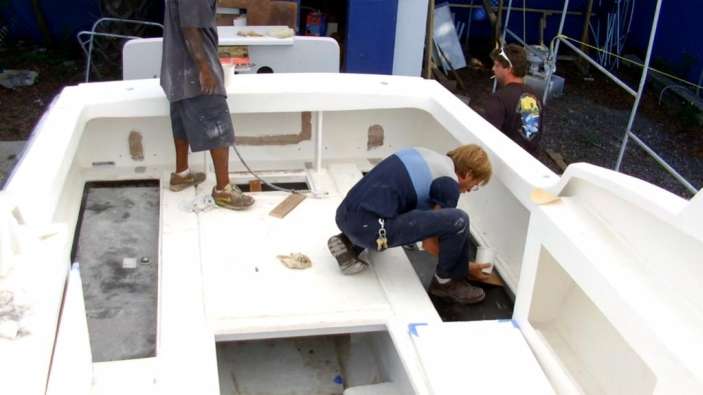
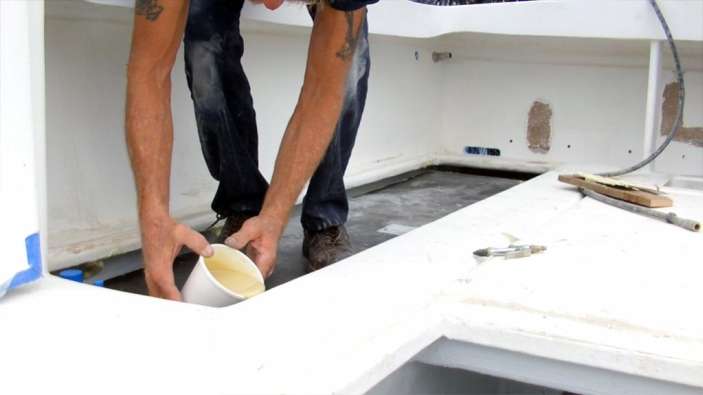
Craig and Bryan are full-steam-ahead on the cabin build. Recall that the cabin wood we removed from this boat was rotten and horrible, meaning that we would be fabricating the pieces whole. The only use of the old wood was for patterns.

However John at Oasis Boatyards turned us on to a sweet product called Coosa Wood which is a lightweight fiberglass board that is fun as heck to work with since it sands and cuts easy.


They began by replicating the four main walls of the cabin.
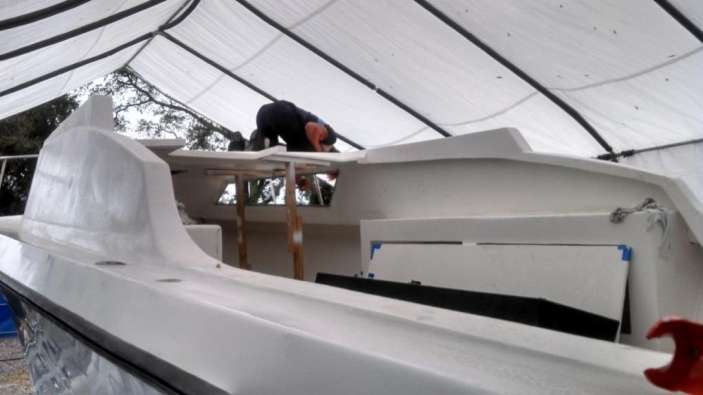
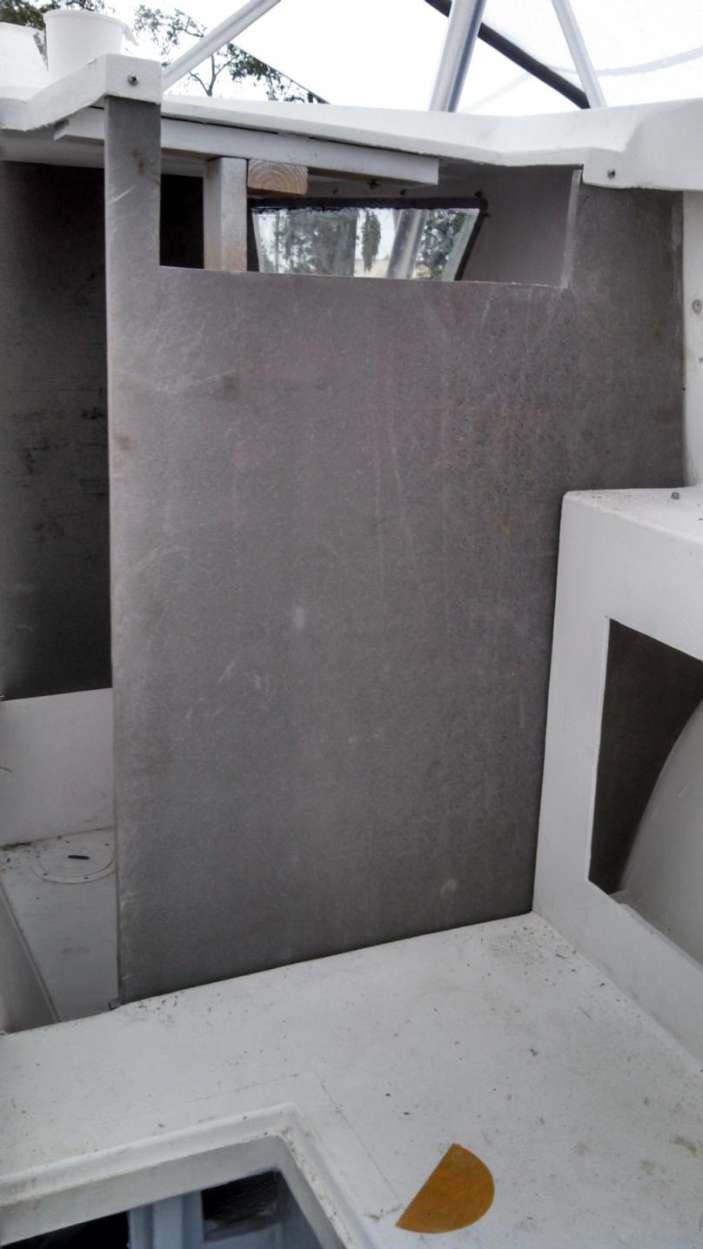
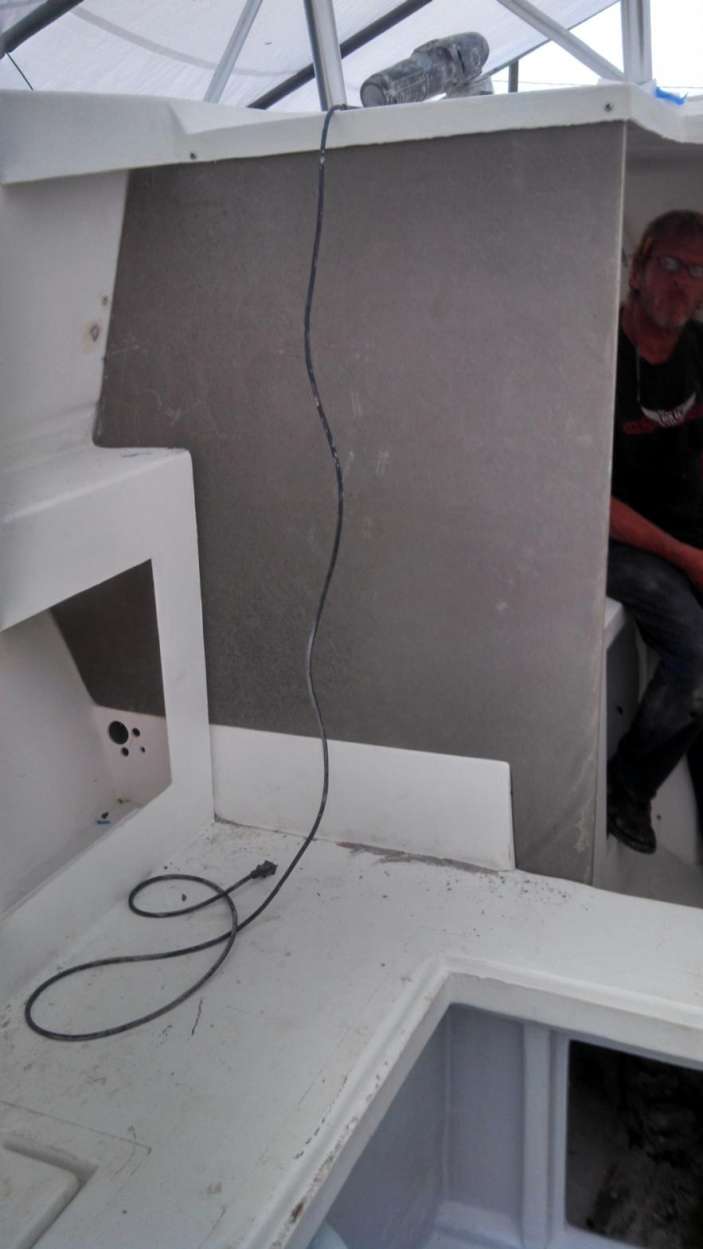
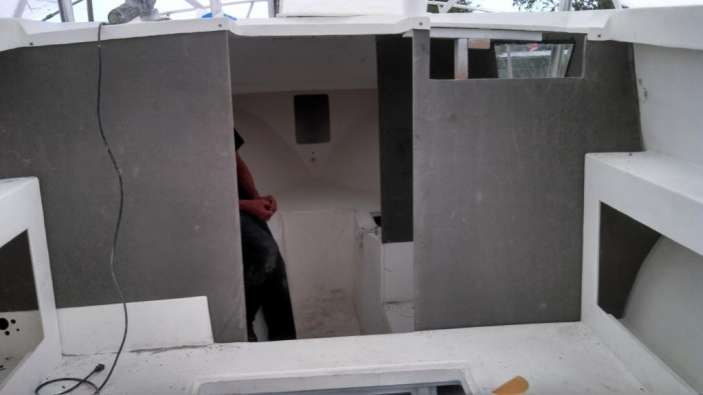

They used a specially-ordered 60″ wide piece to form the bathroom doorway.
Lastly they built this false wall behind the controls. This is where we will install all of our electronics and controls.
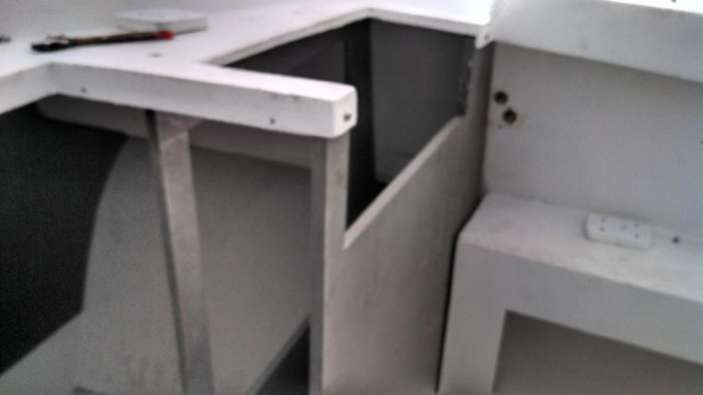
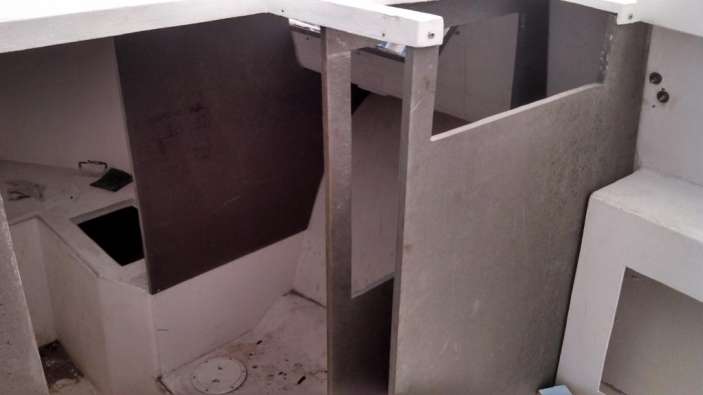
Finally Craig came up with a nifty way to cut the vent in the bathroom door. We were going to try the old outhouse crescent moon, but instead settled on a shape a little closer to the heart:

The Coosa wood has been such a godsend that we have decided to use it on the transom elbows and live well. Look forward to those results in the next post.


This week we hope to remount the transom and finish tightening down the tower. After that we will wrap the Coosa wood in fiberglass and spray it with a fresh coat of bright white gelcoat.
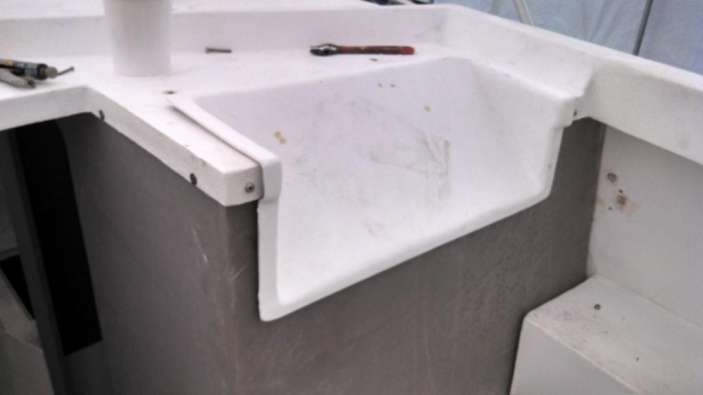
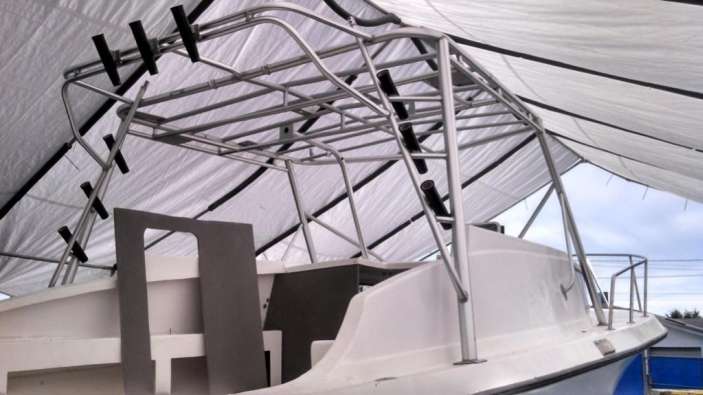
Once the cabin is installed and the livewell is built it we will be finished with principal construction and assembly; at that point it’s down to final rigging!
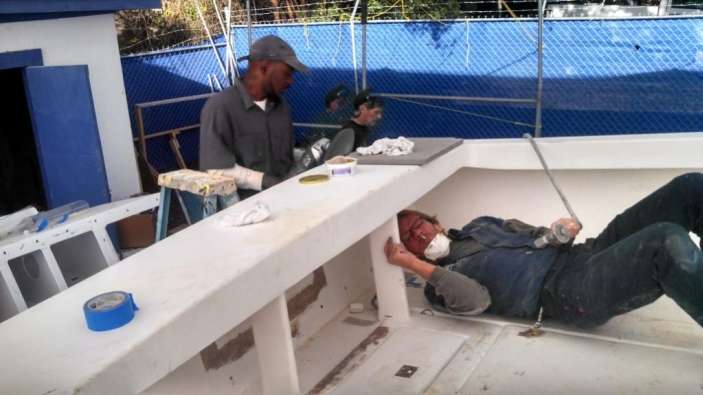
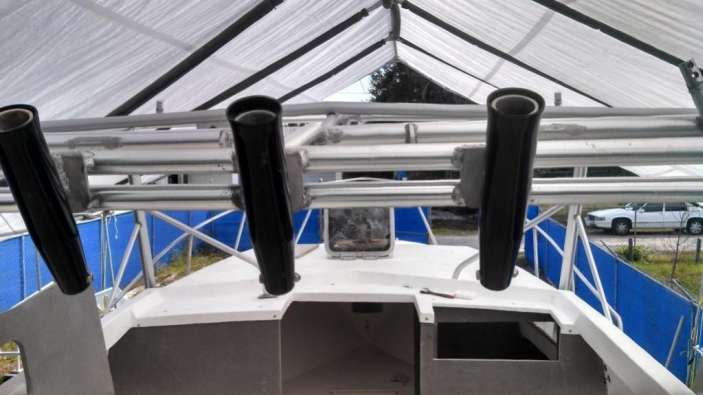
Feels good to be this far but there is still plenty that can go wrong and set us back. Stay tuned as we close in on the finish line for The Discoverer Project.
![]()
November 15, 2013 – Day 592
Howdy everybody!
Crazy how fast 20 days can go by, but rest assured the big work is getting done on The Discoverer Project.
When we left off the entire cabin had been fabricated from Coosa wood and we were just starting the time intensive process of wrapping all the pieces in fiberglass matte.
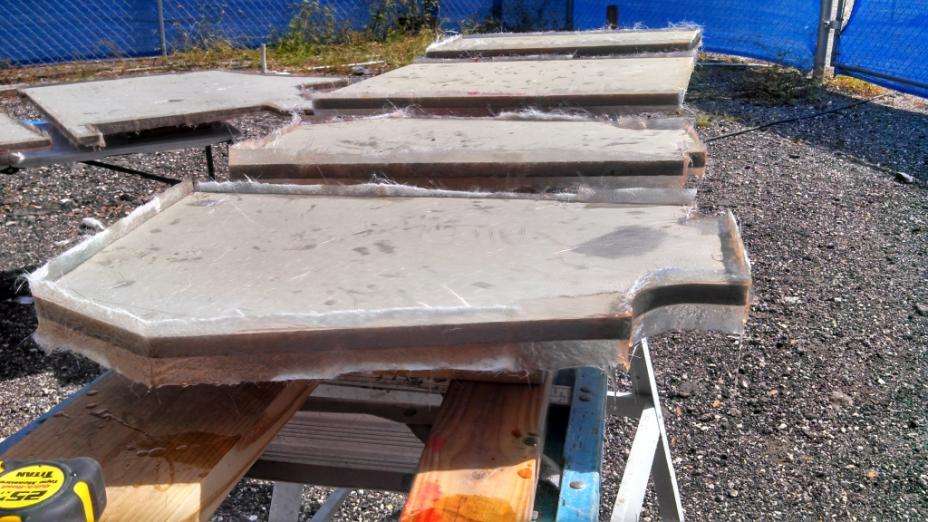
Although the resin-based Coosa is inherently waterproof, we are concerned that it needs more strength to stand-up to the punishment of a full-time charter boat

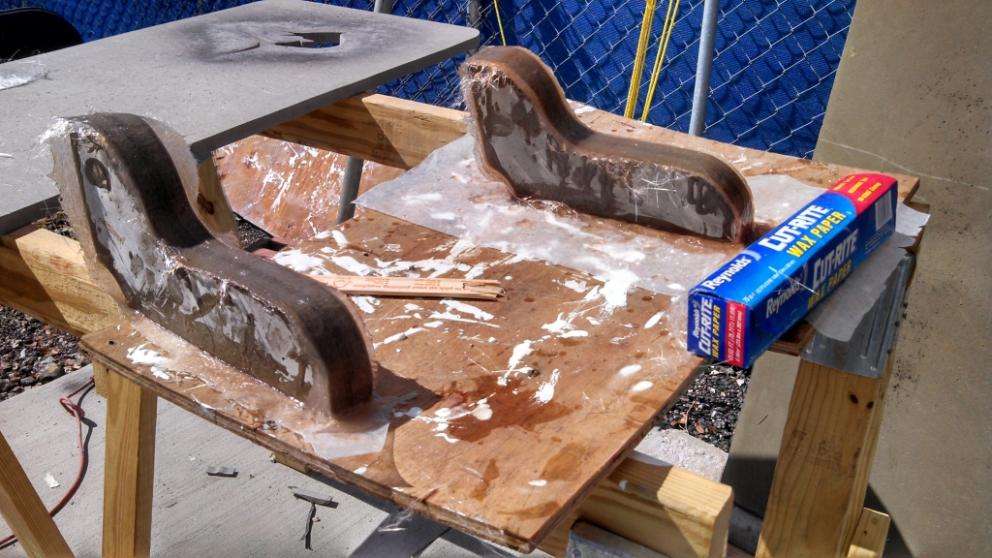
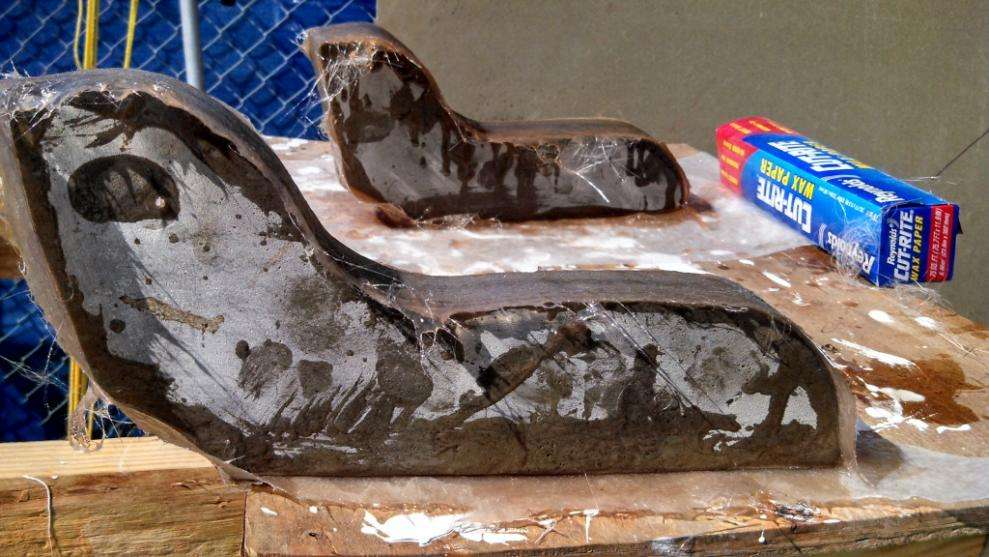
We started small with the elbows, then worked up to the bigger pieces.
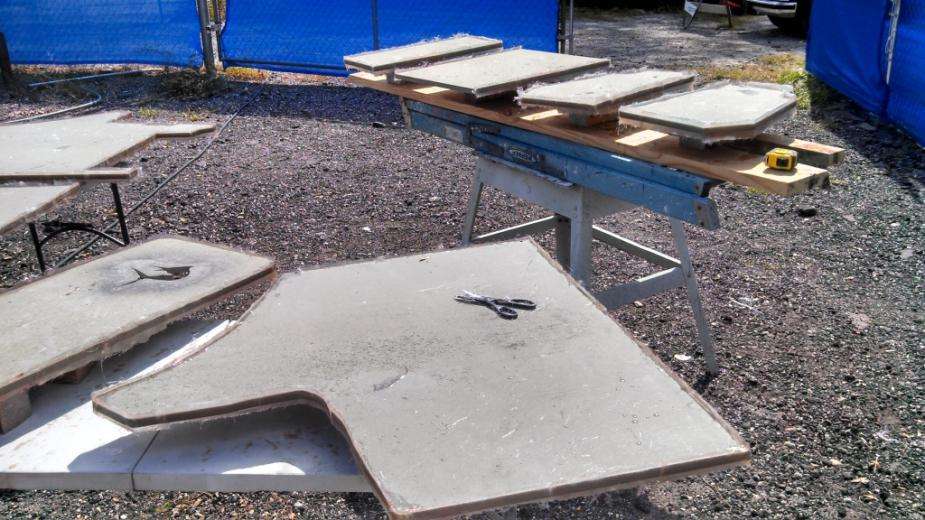
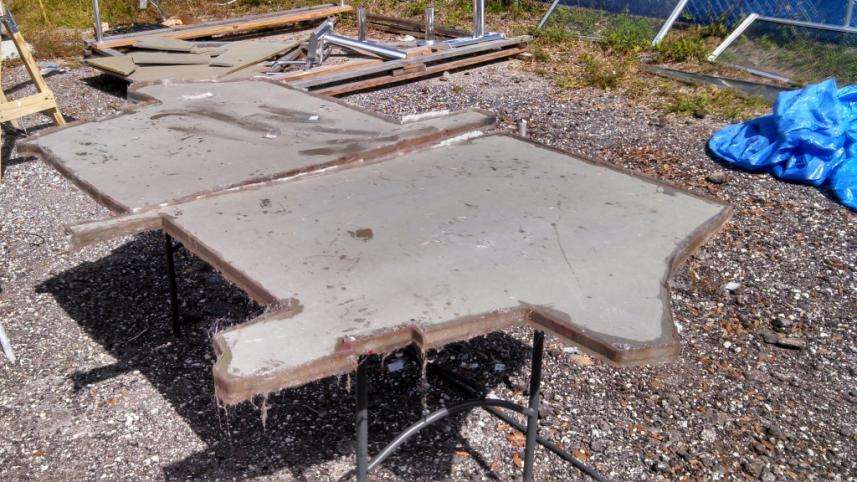
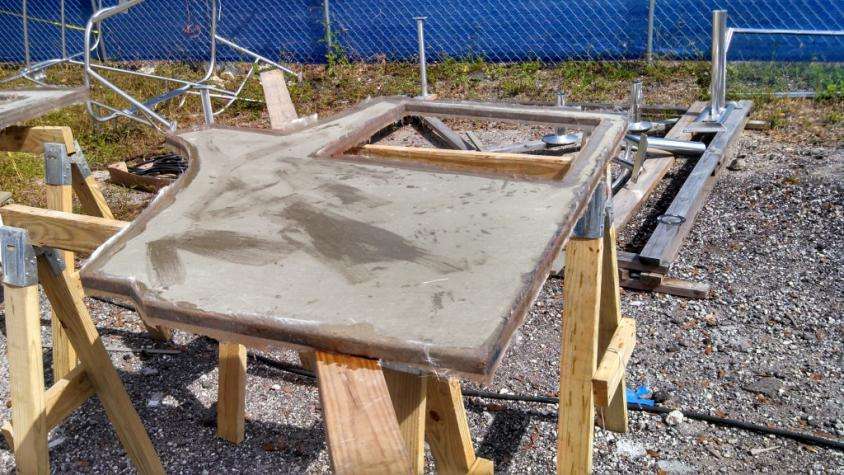
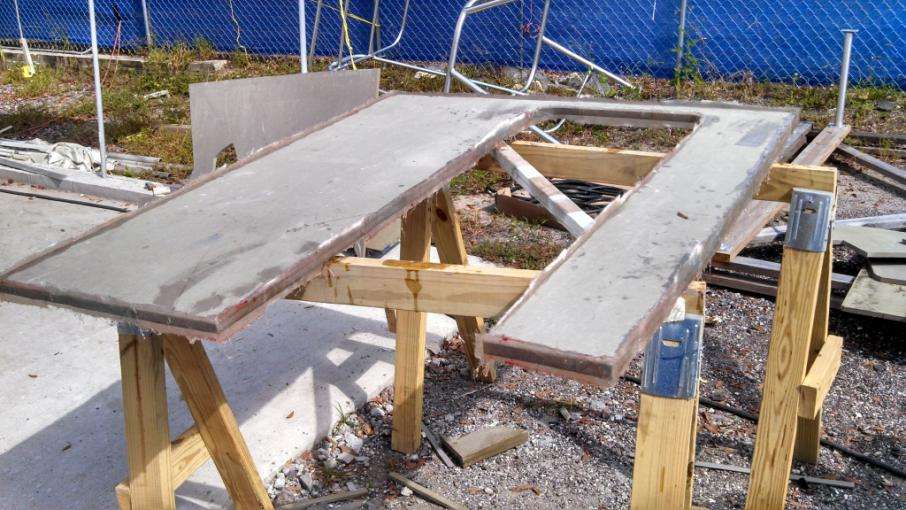
It’s easiest to wrap all the edges first, then sand them flush to the faces. This ensures good adhesion and a nice flat finished product.
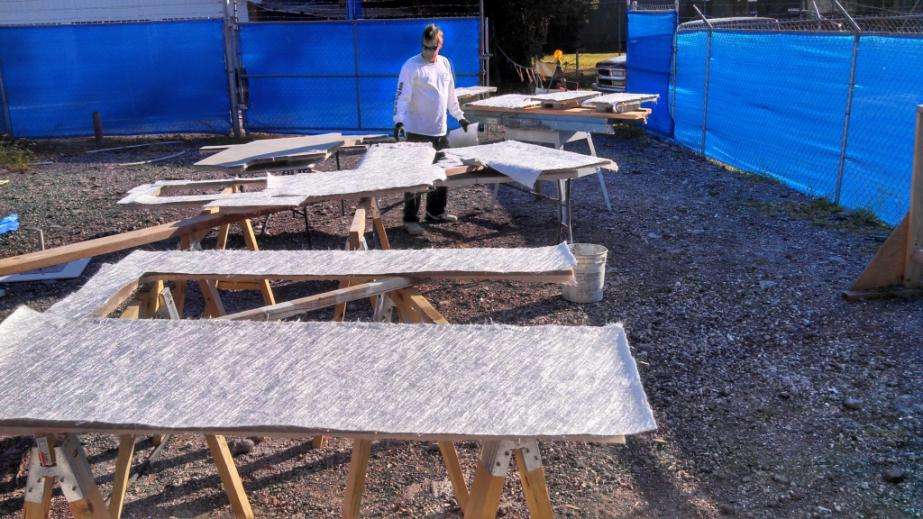
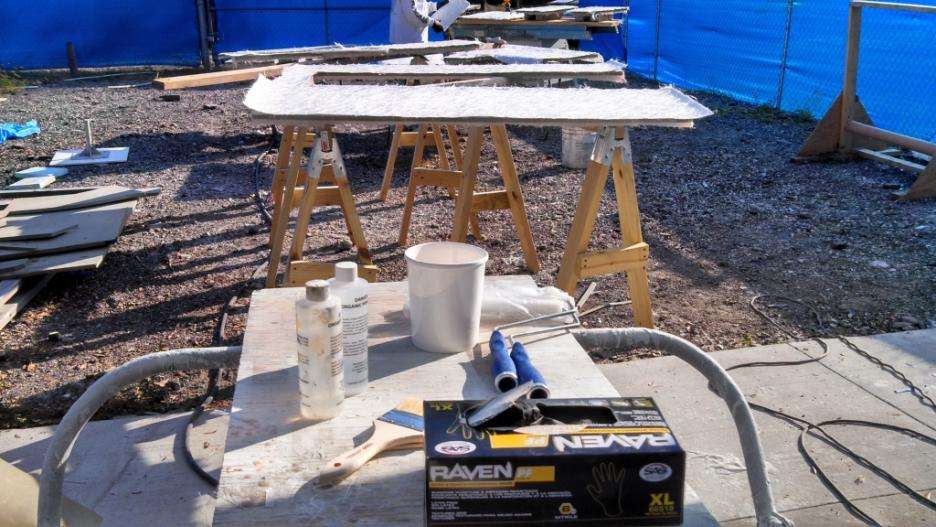
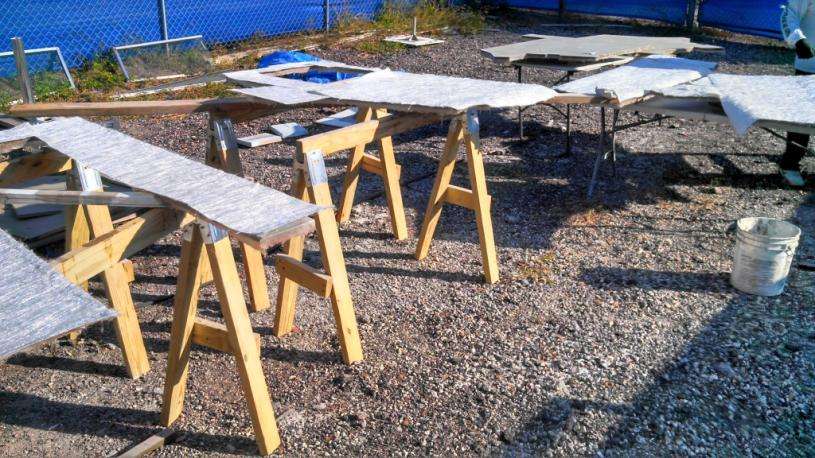
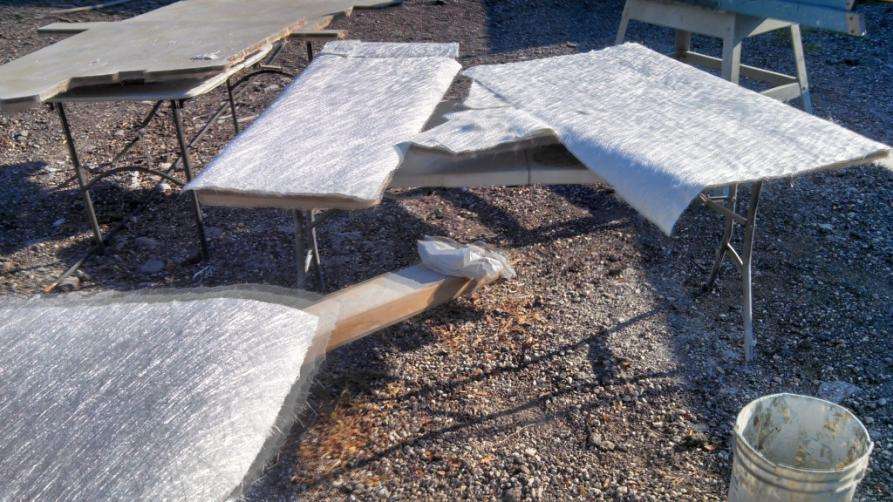


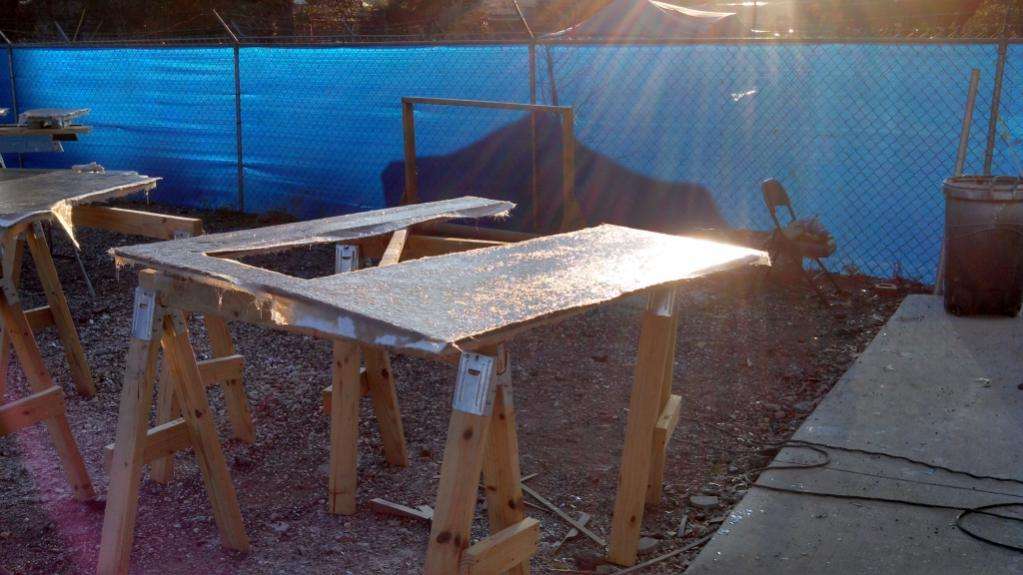
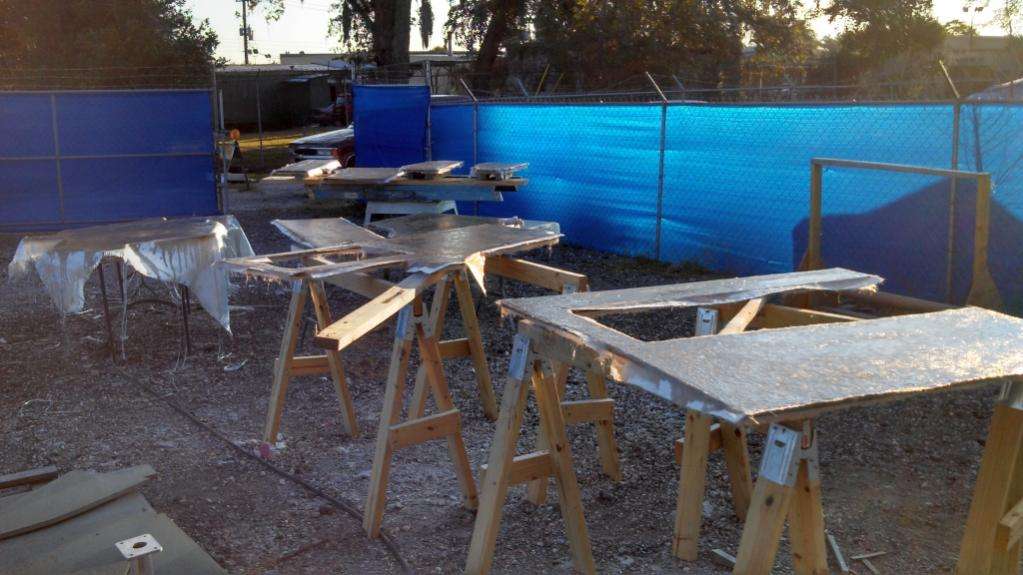
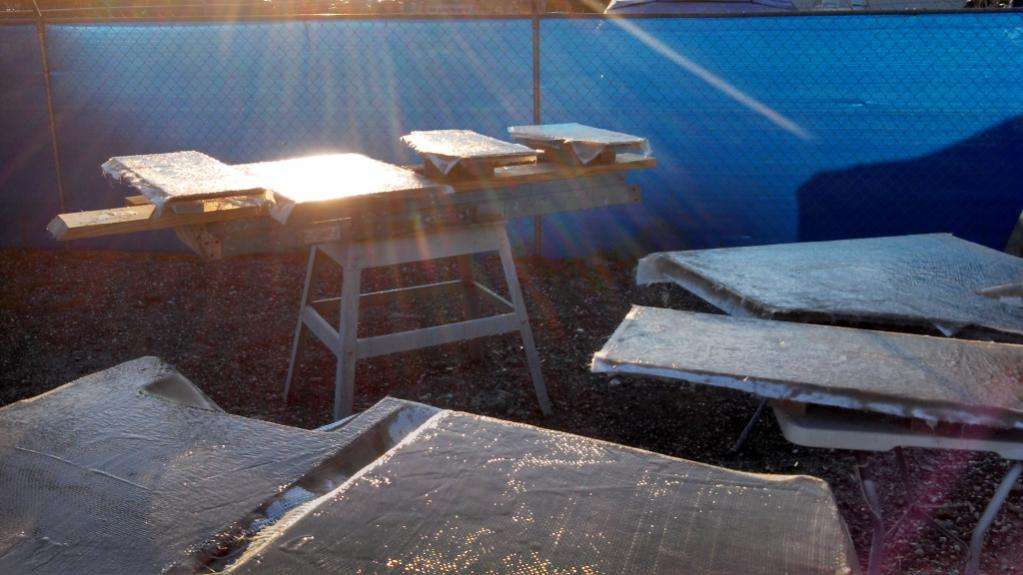
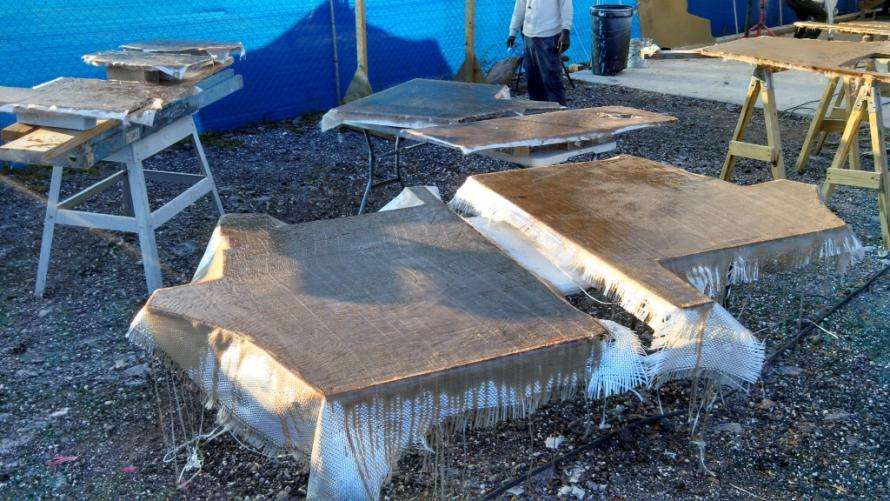
The gelcoat should be first applied to the edges (just like the fiberglass). This keeps the mess under control by preventing material from clumping up on the edges when we spray the faces next week.
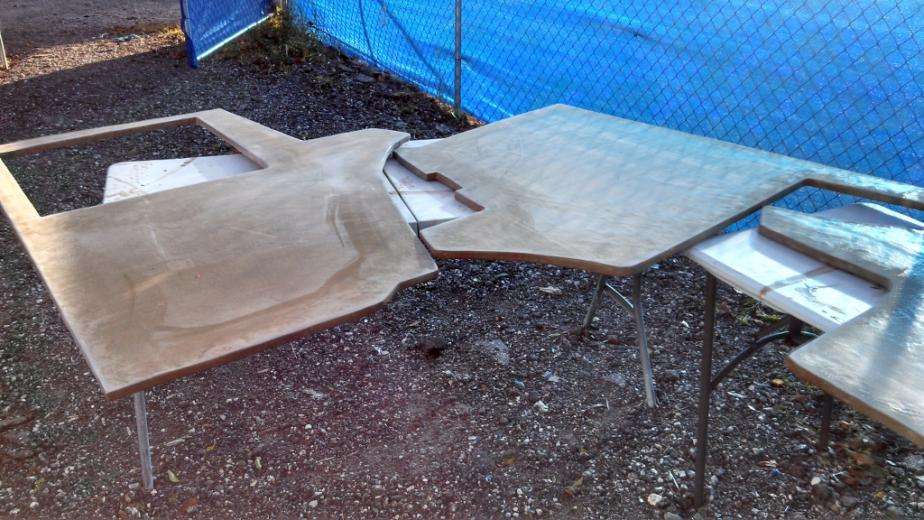
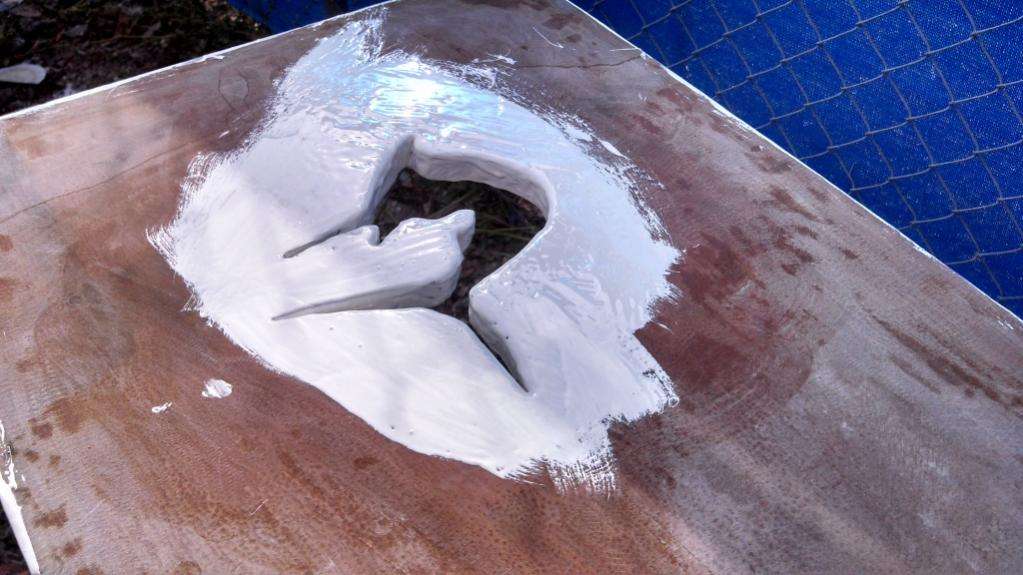
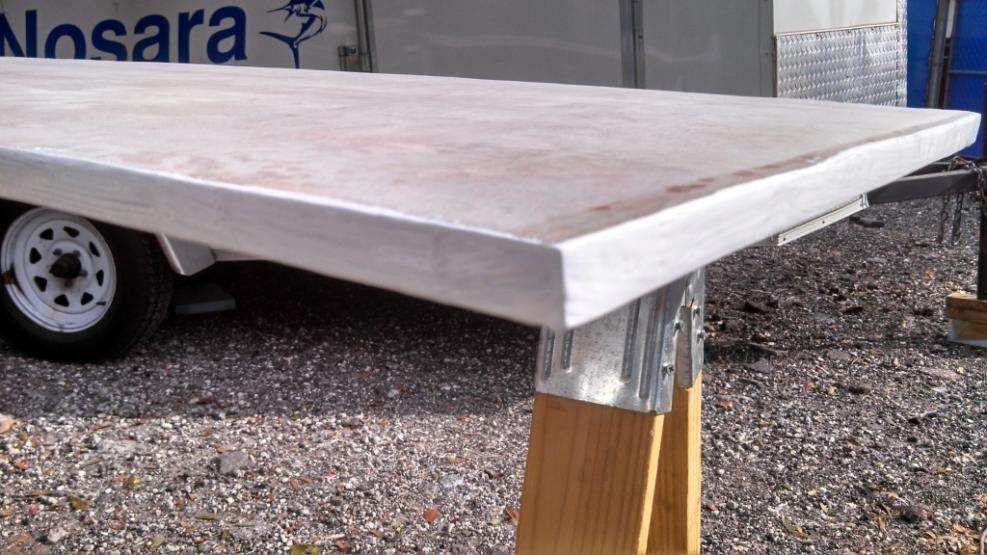
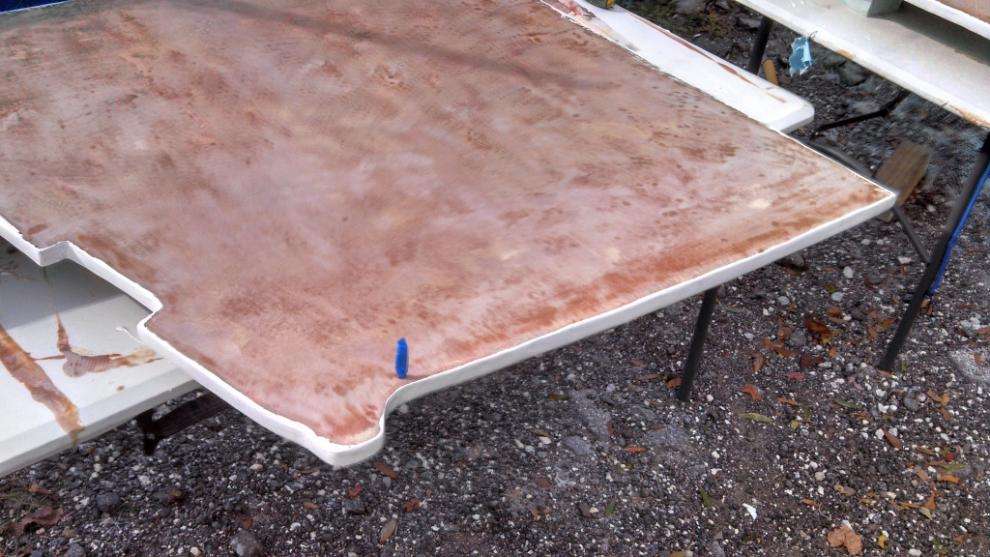
Among these pieces are the rough shaped for the livewell, so while Matty worked on the cabin walls, Craig and Brian proceeded on the final installation of the Discoverer‘s livewell.
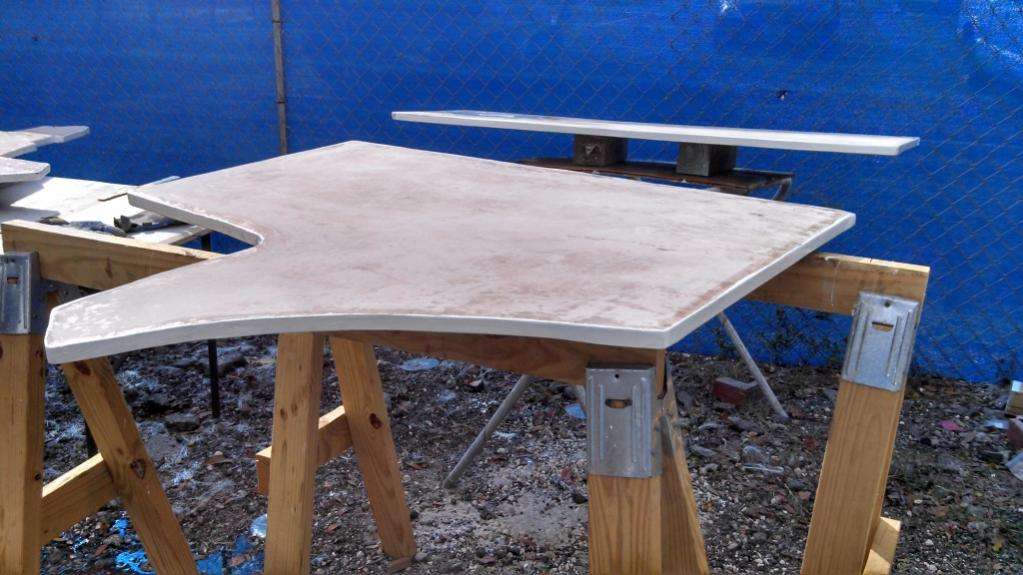
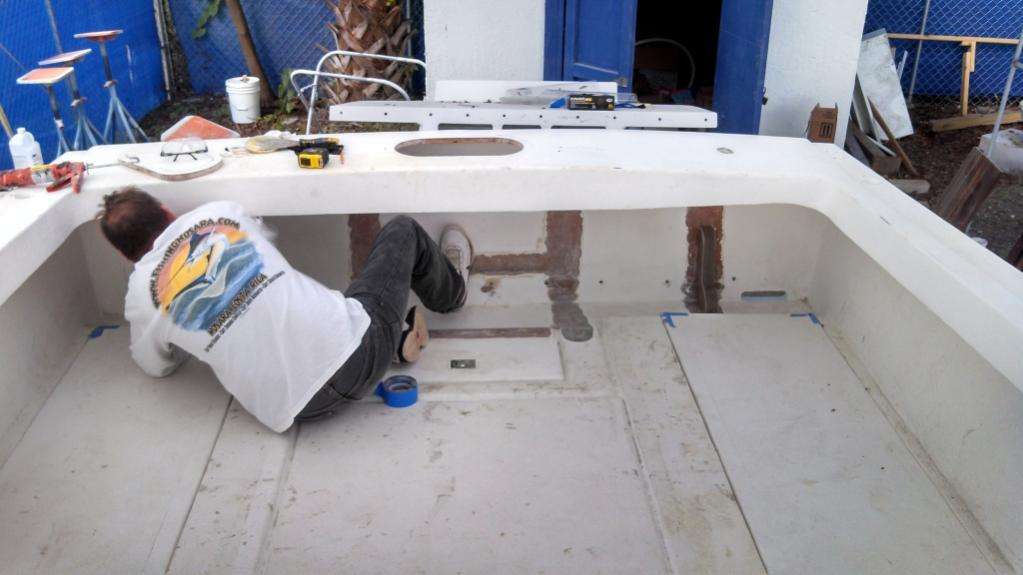
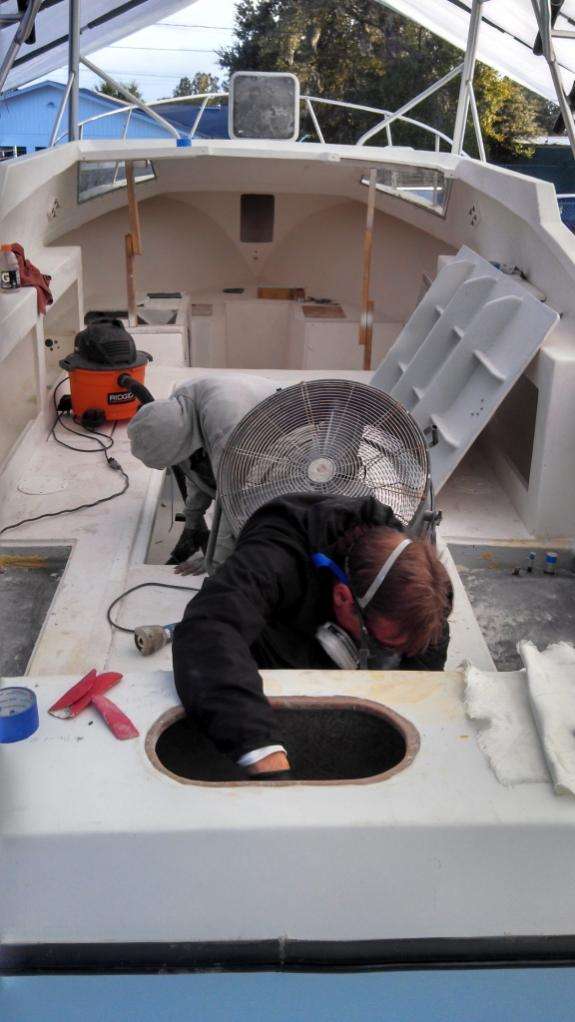
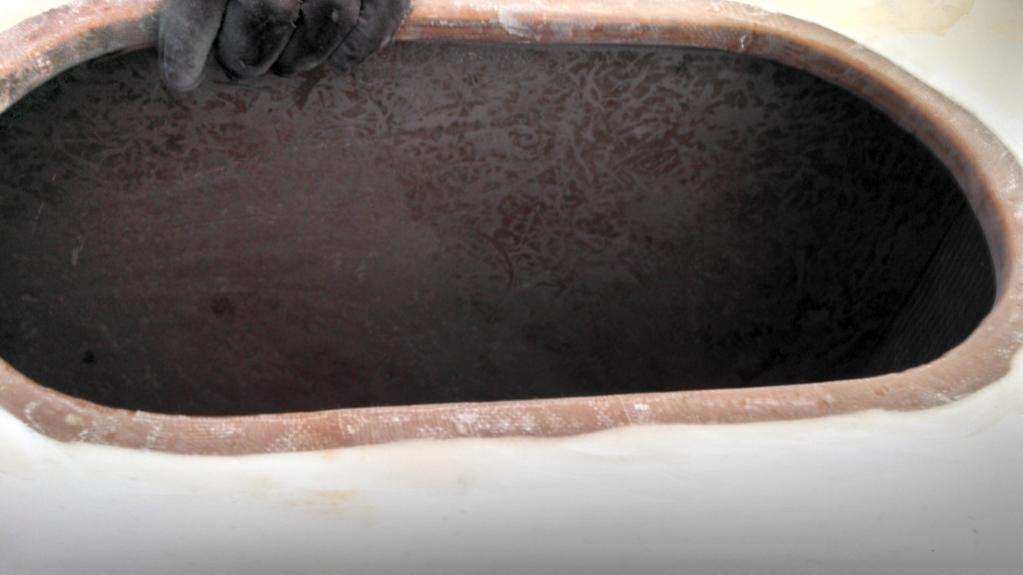
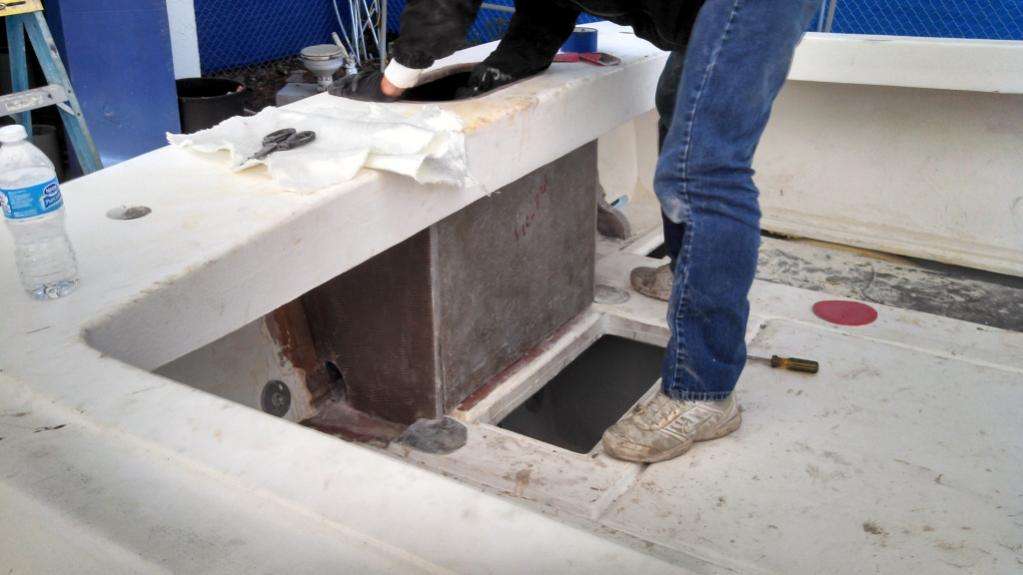
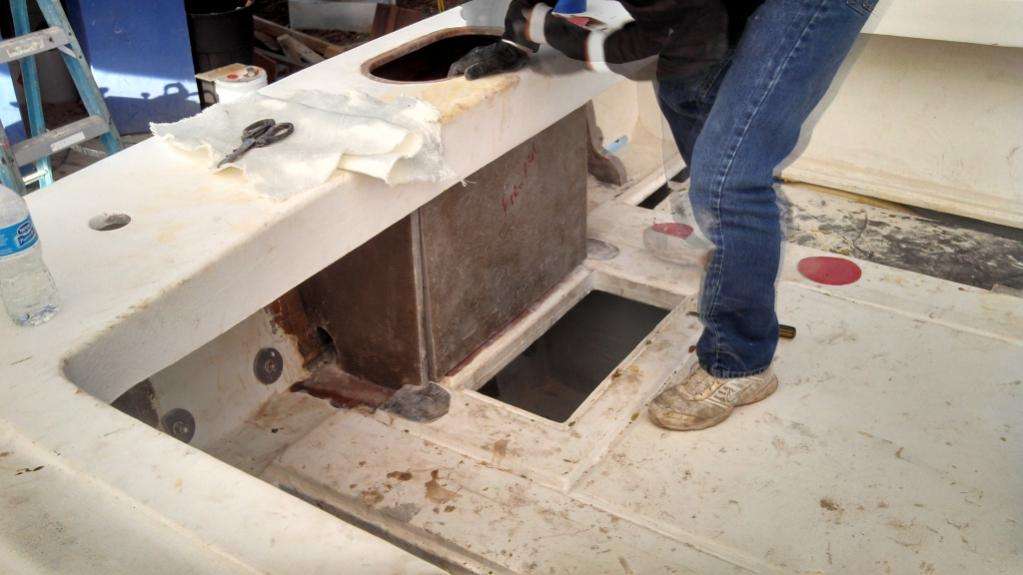
Also lots of small elements are coming into focus, such as fitting the fuel filler necks to the deck covers and waterproofing the holes with fiberglass.
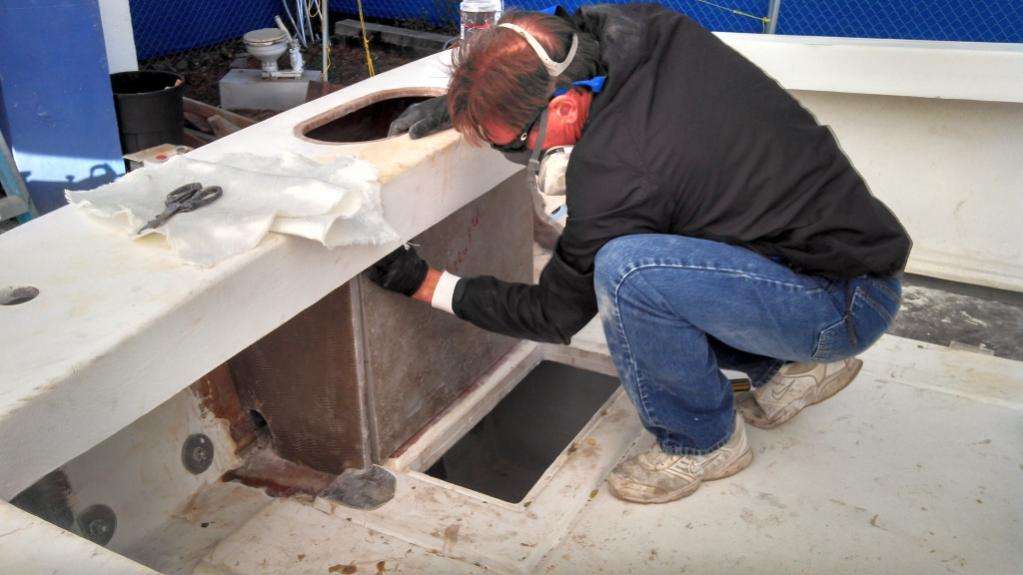
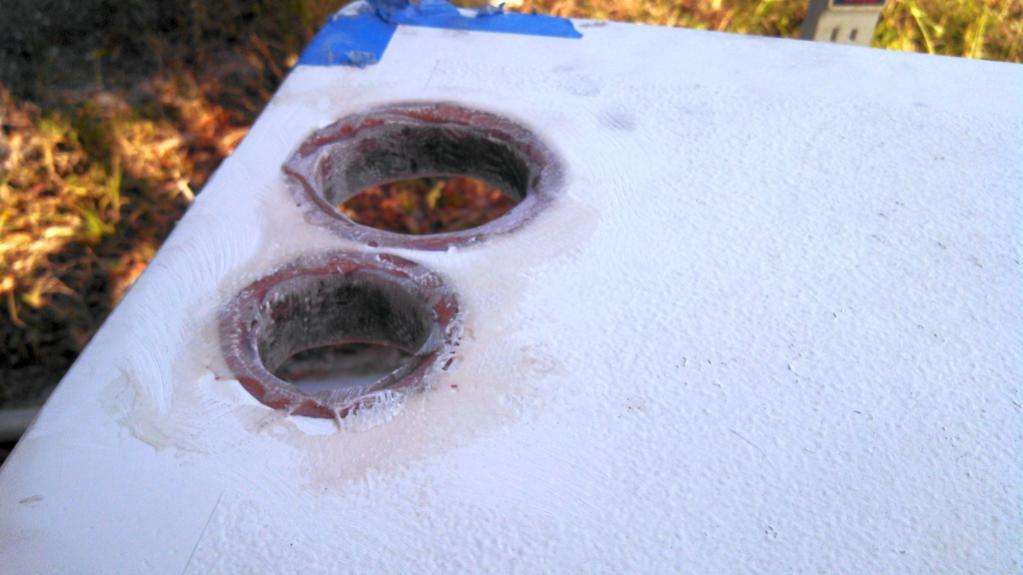
The support elbows were epoxied into place and then coated with layer of fiberglass mat to mate it to the floor and transom.
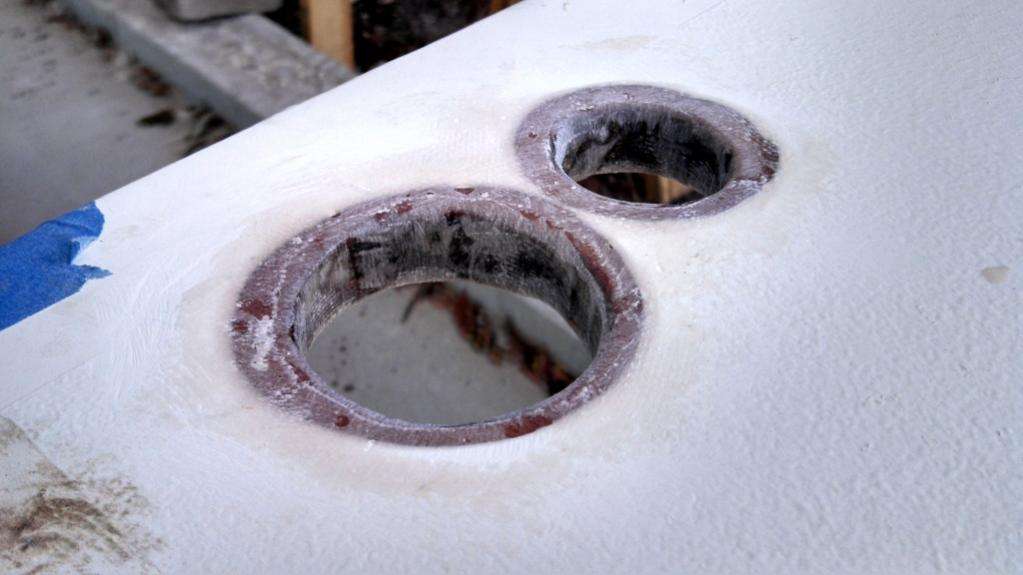
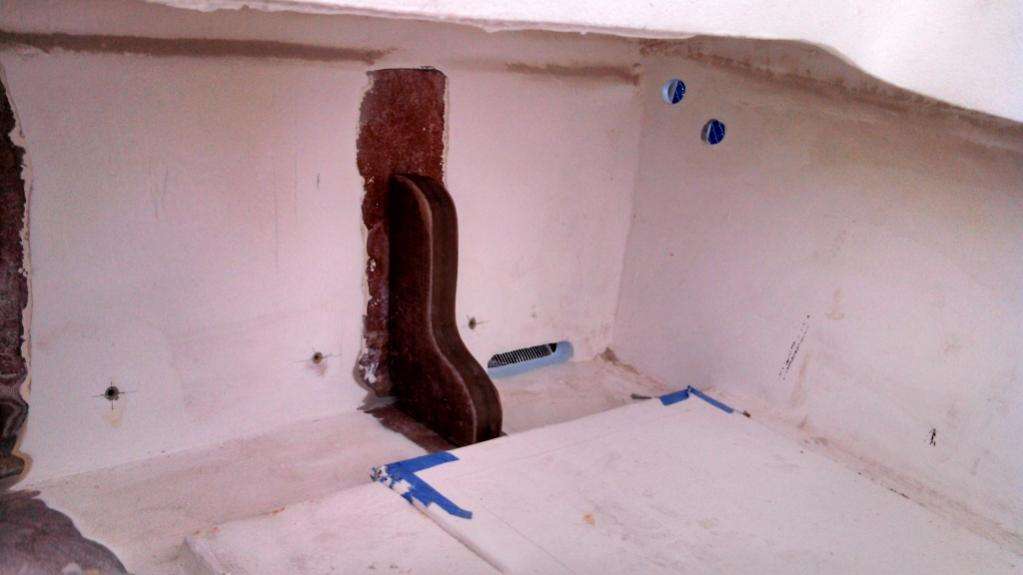
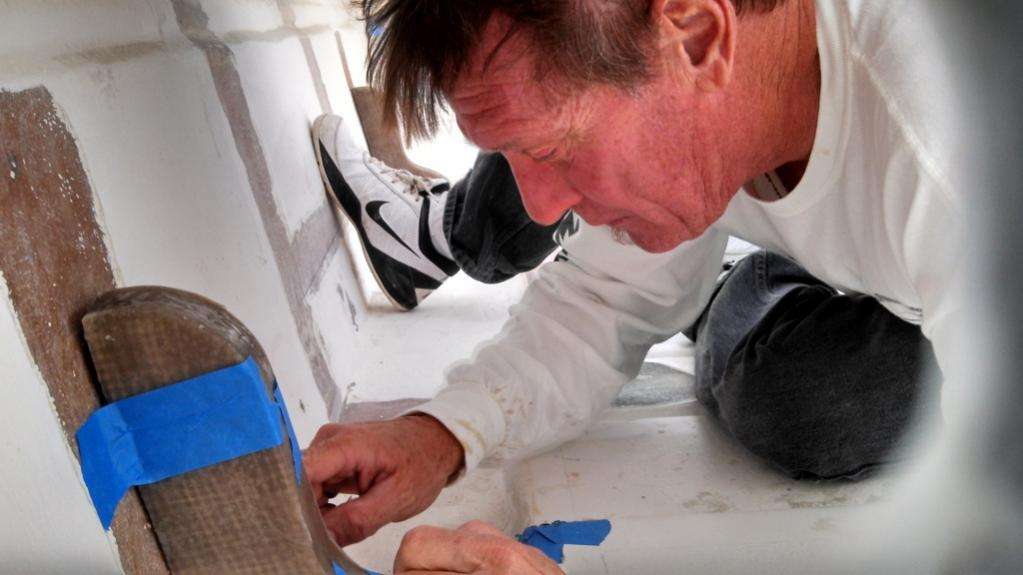
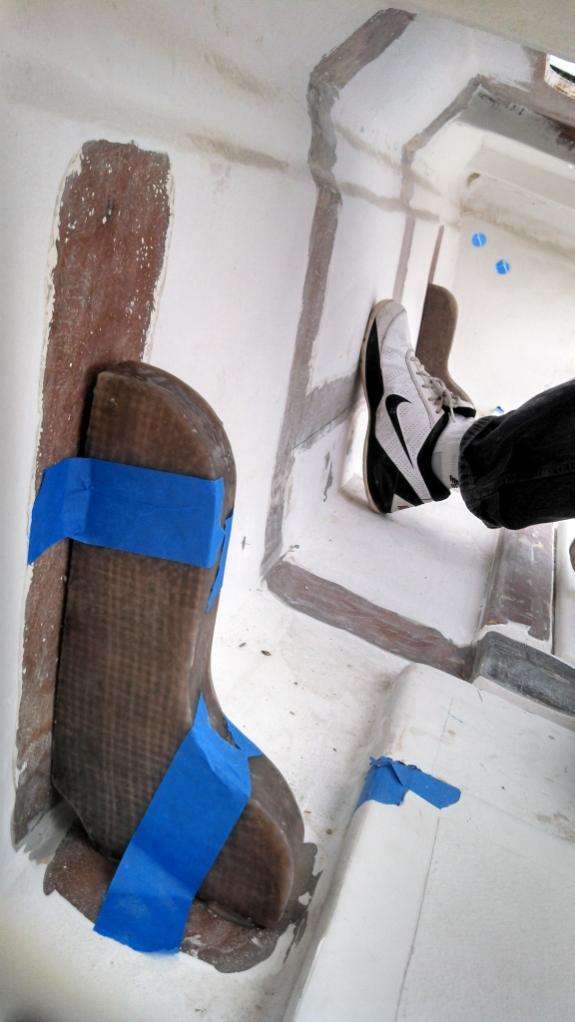
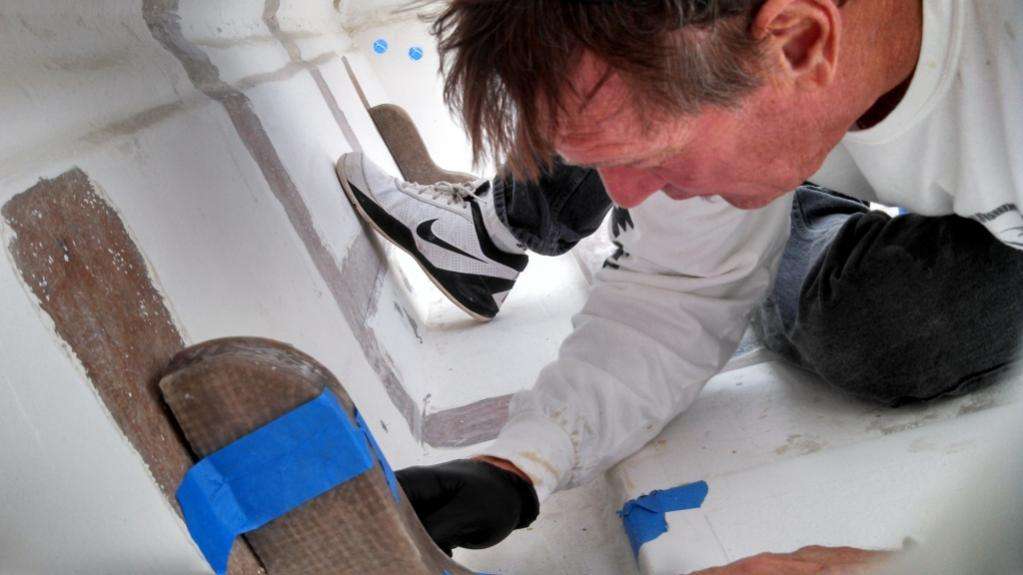
Jamaal has put in countless hours with the progressive sanding and buffing of the all-gelcoat hull and right now he is applying the first of many coats of wax. This thing looks like high-dollar paint!
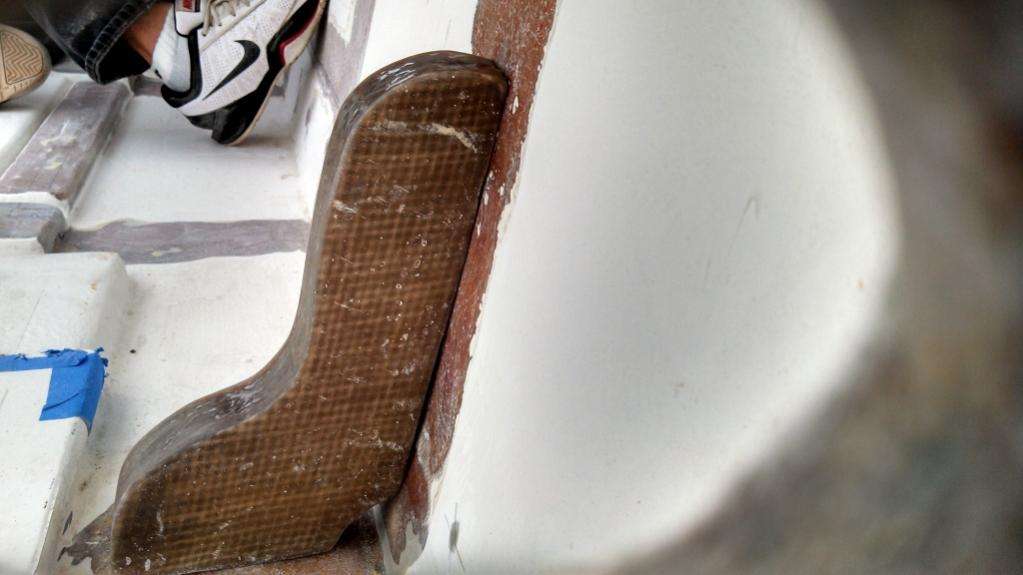
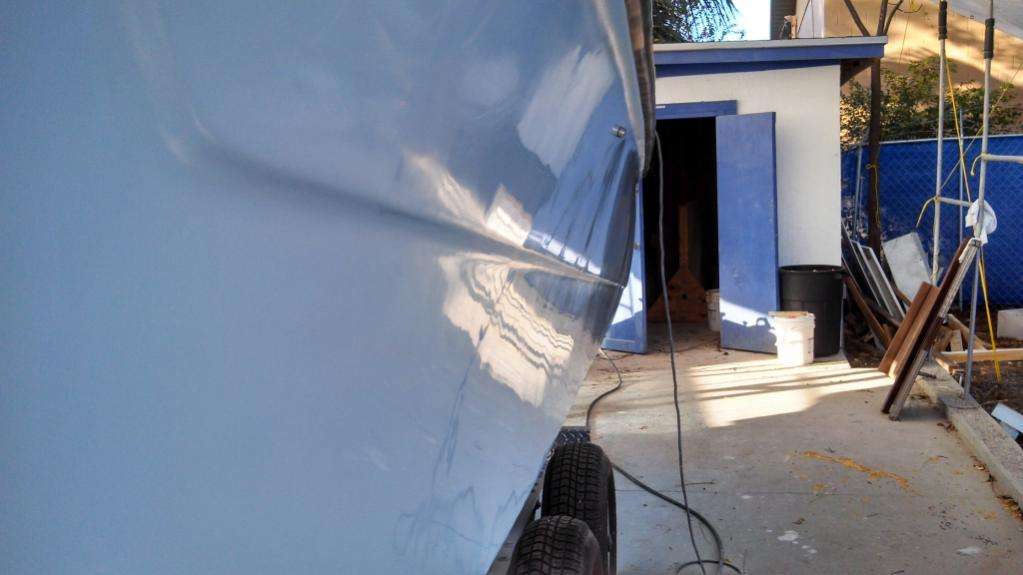
Lastly, we finally bolted up the transom bracket after successfully sleeving all the holes with epoxy.
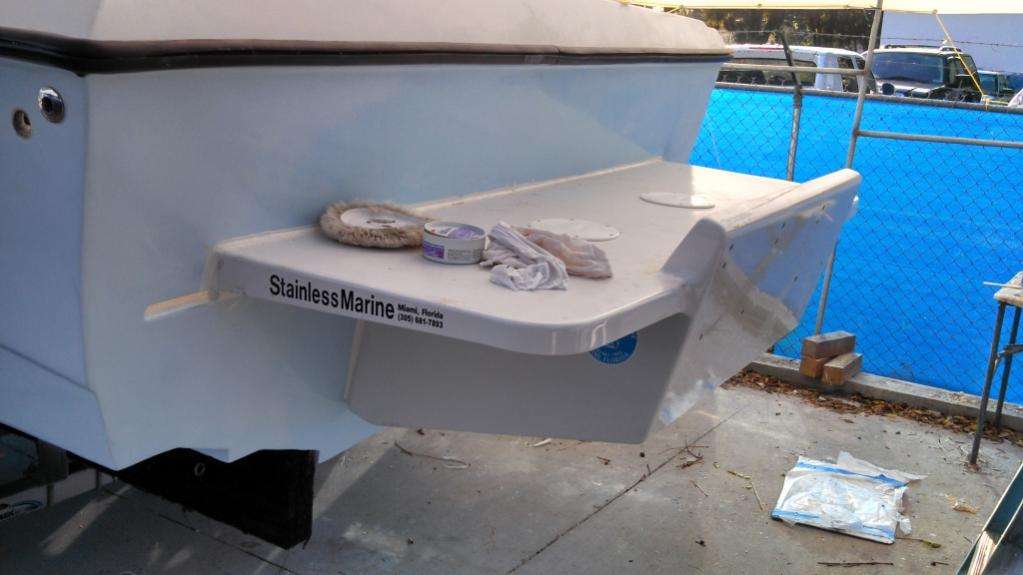
It took a few ‘do-overs’ on some of the holes to match the 11 degree slant of the transom, but with perseverance managed to get all 18 holes perfectly sleeved in epoxy.
This week we will spray all the cabin pieces with gelcoat as well as the new construction in the rear of the cockpit. We are getting close to running electrical wires and control cables as we strive that much closer to getting the Discoverer in the water.
![]()
November 27, 2013 – Day 604
The Discoverer Project is barreling down the tracks full steam ahead! While Craig is off in Nosara getting the team prepped for the 2014 fishing season, Matt and Brian have been assembling the next great Costa Rica fish-fighting weapon.
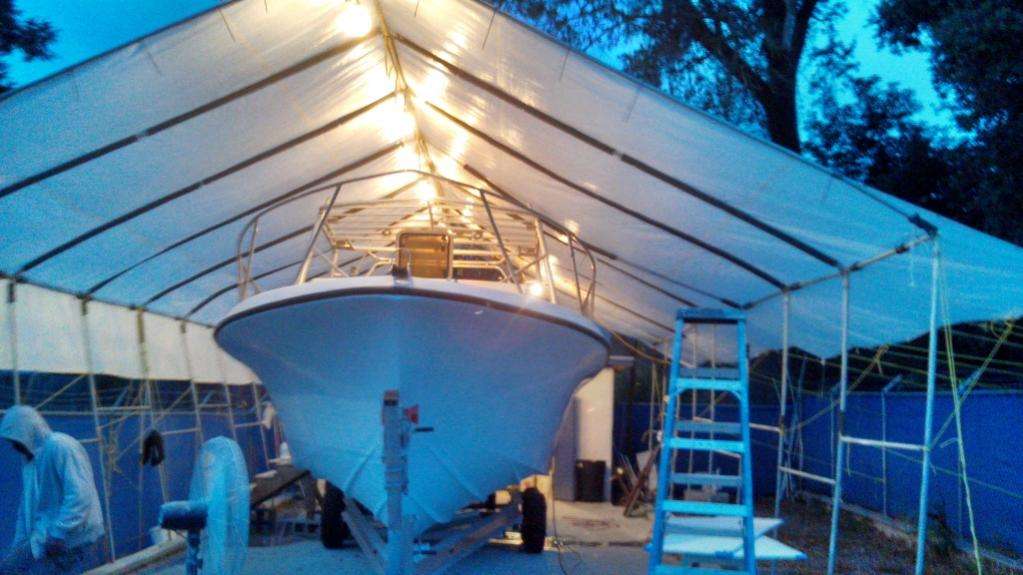
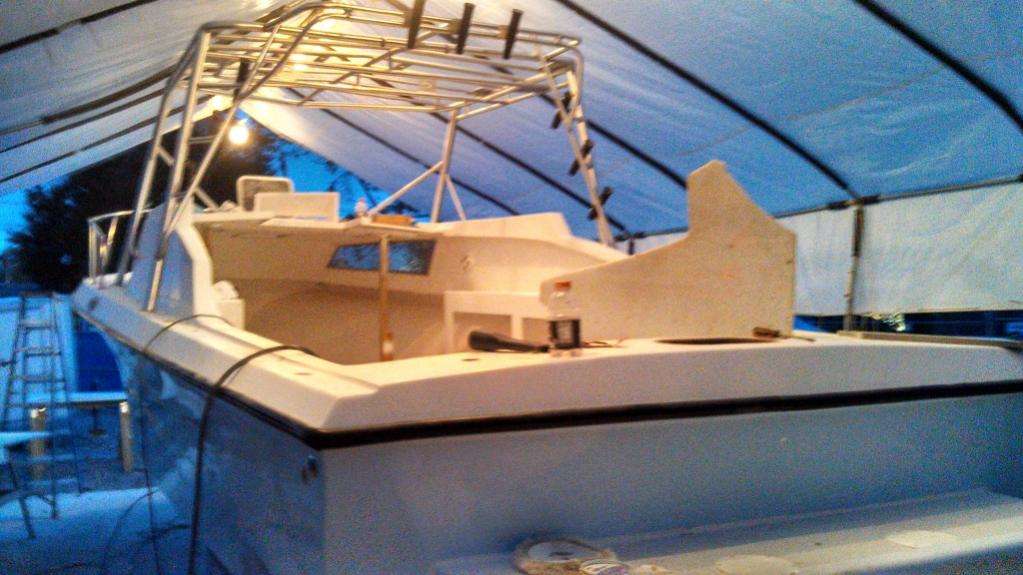
The livewell installation is a slow and precise process. In the prior post we cut the individual pieces and wrapped them in fiberglass. Now we have epoxied three of the walls and the floor into place.
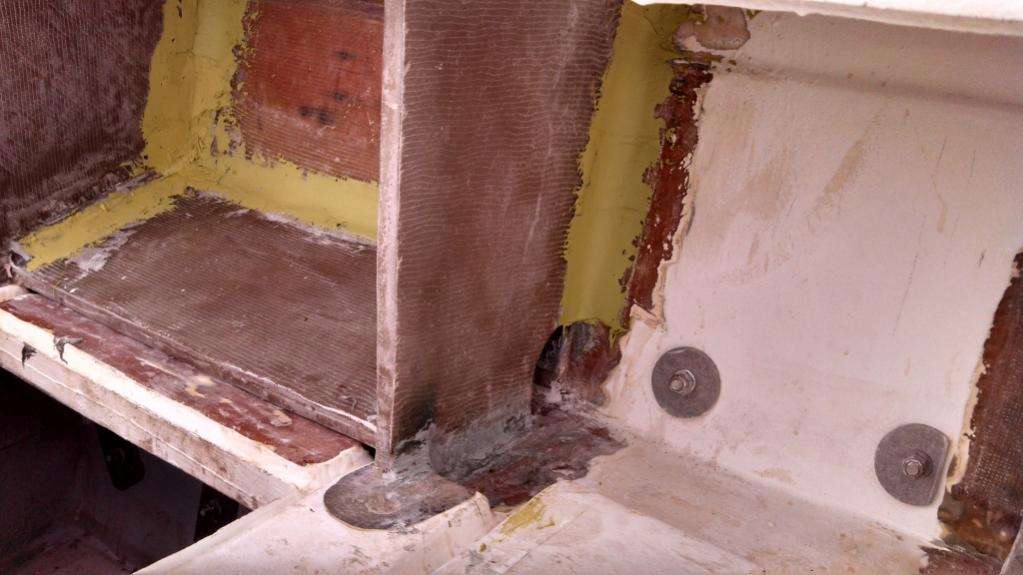
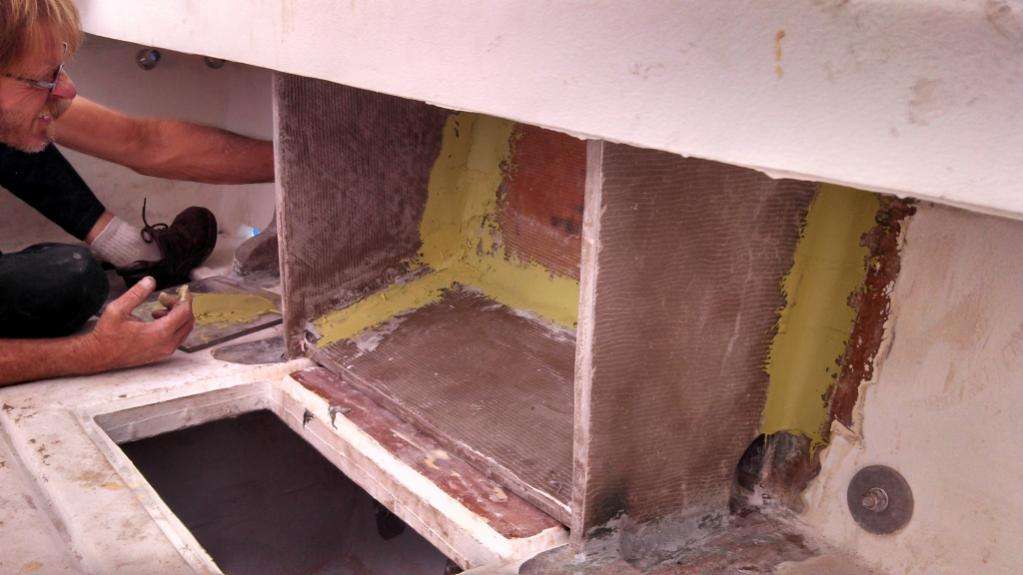
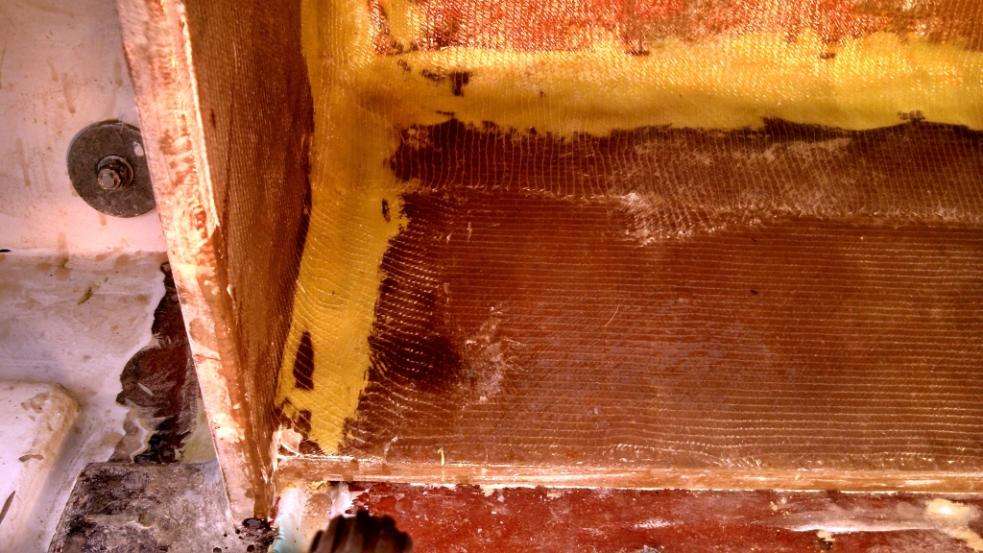

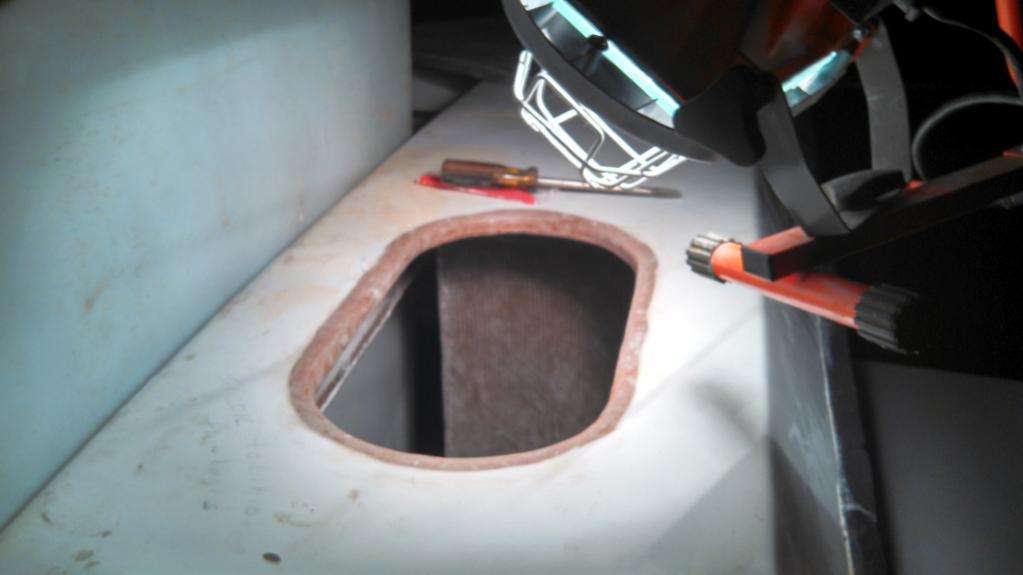

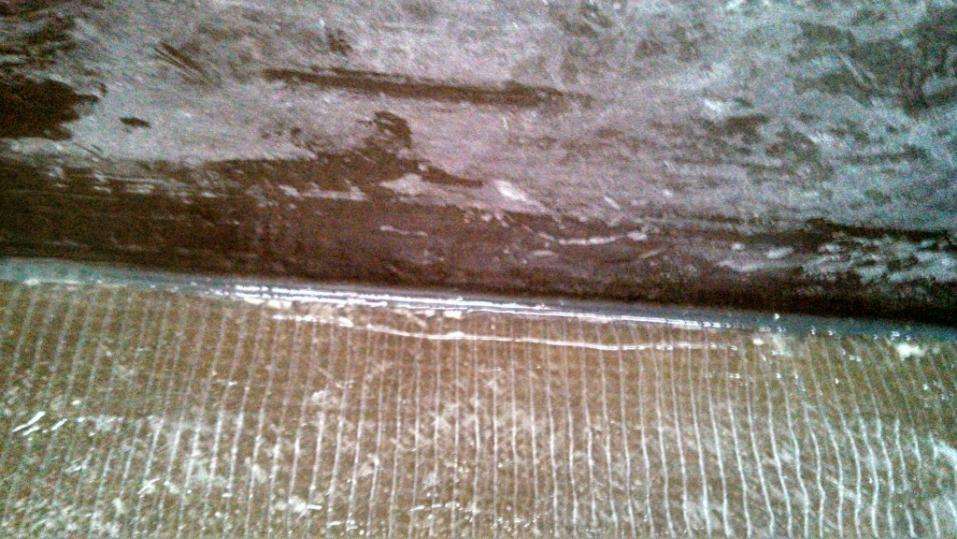
Before the front piece goes on, the interior edges had to be wrapped in multiple layers of fiberglass.

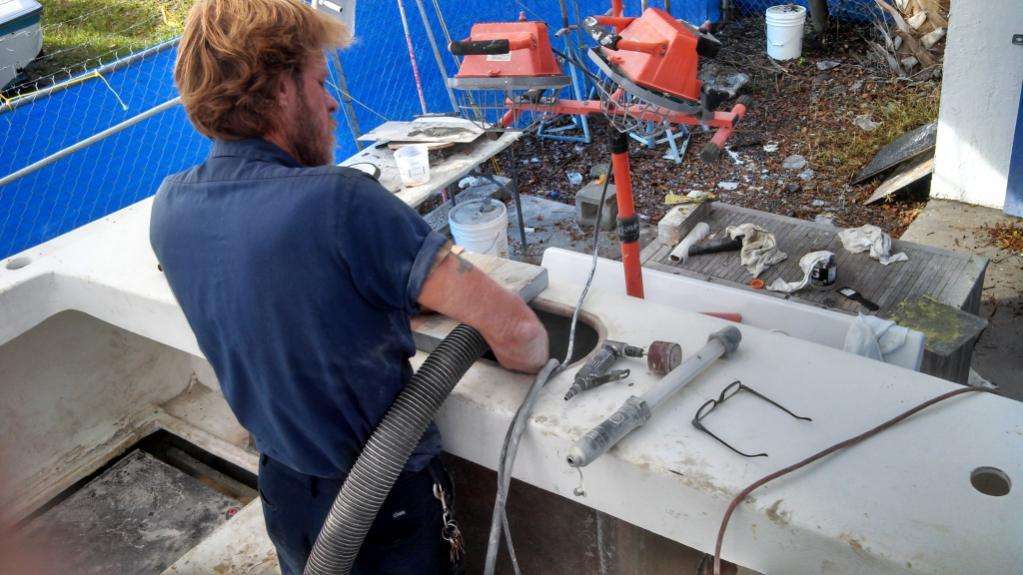
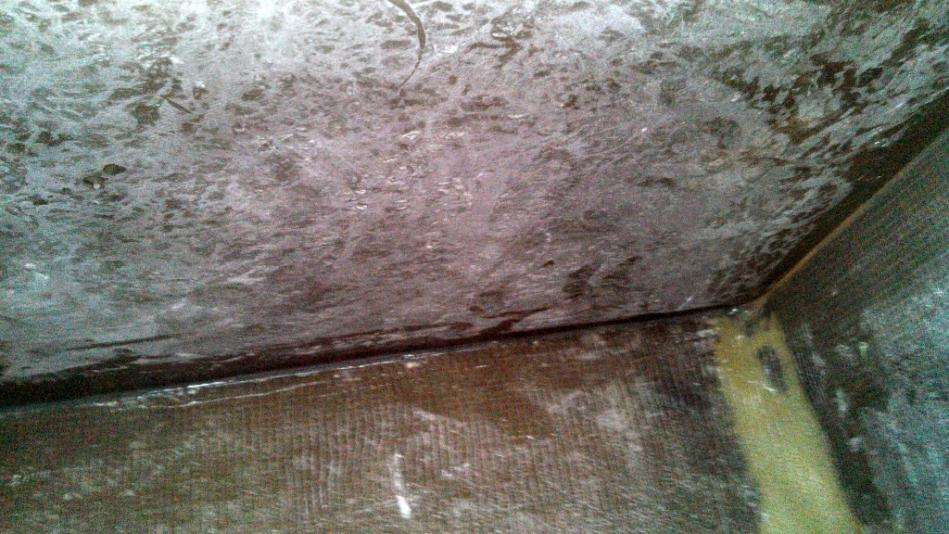
Basically we are in the most tender area of the boat; the transom area is where the floor, the motor bracket, and the livewell (which is full of heavy sea water) all come together…this amount of weight produces a lot of physics that can literally shake the boat apart. That’s why we are over-fiberglassing and epoxying this part.
Once the interior of the livewell was strong, we installed the front wall and repeated the multiple layers of glass.
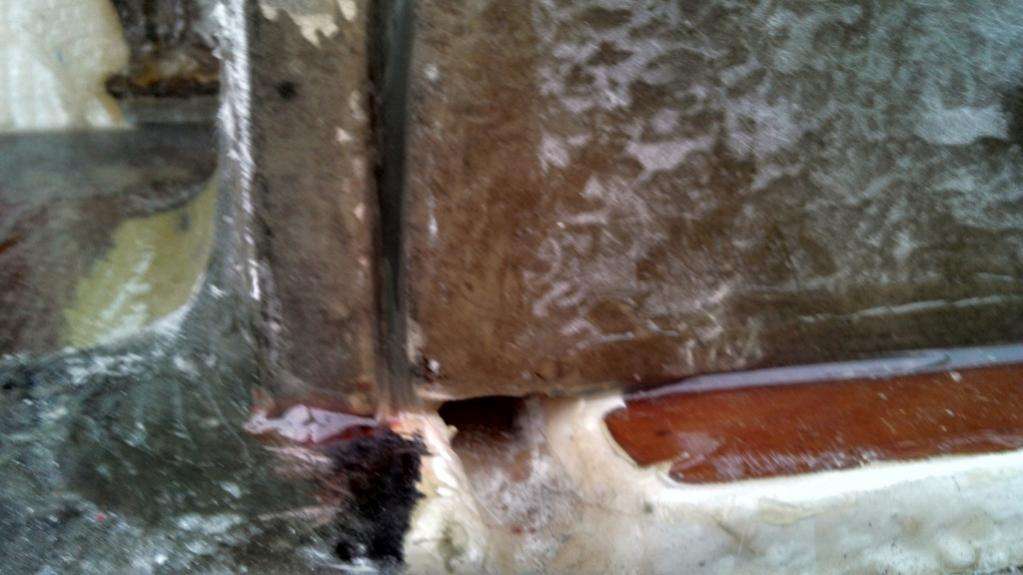
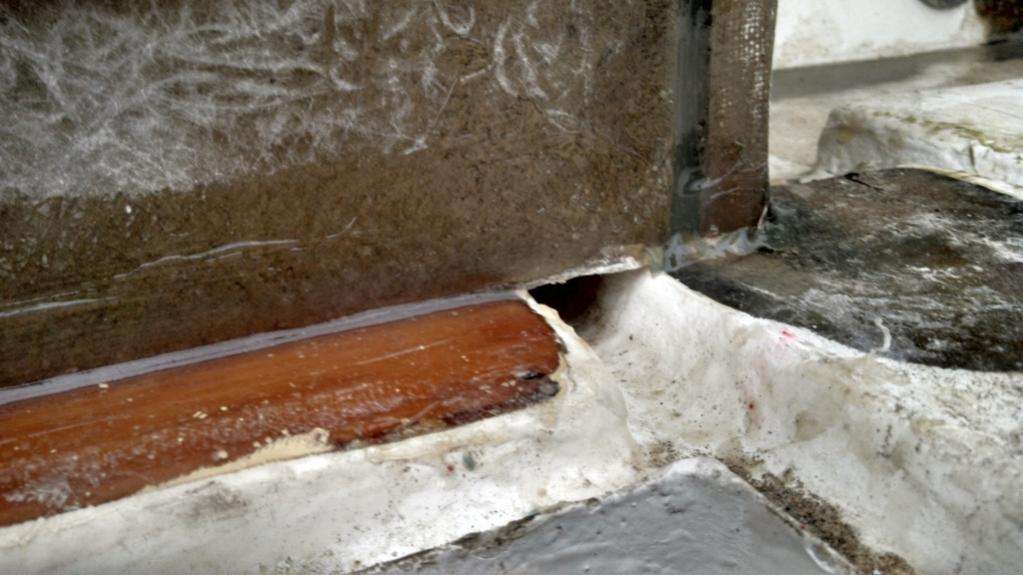
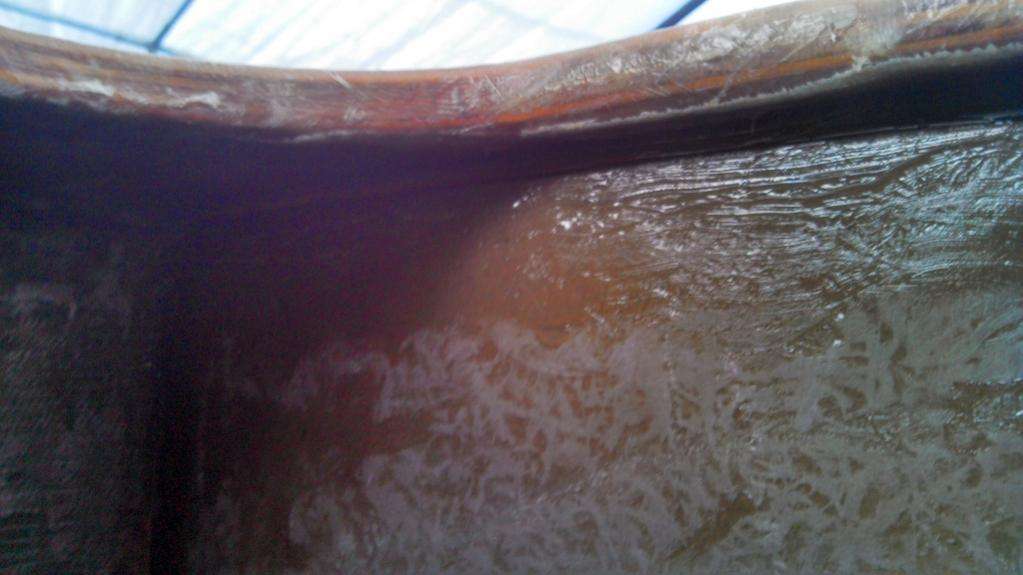
Meanwhile the shaping of the cabin walls was completed and Matt proceeded to spray three layers of gelcoat. Once the paint set-up we progressively sanded it down from P400 to P1000 then applied compound and wax.
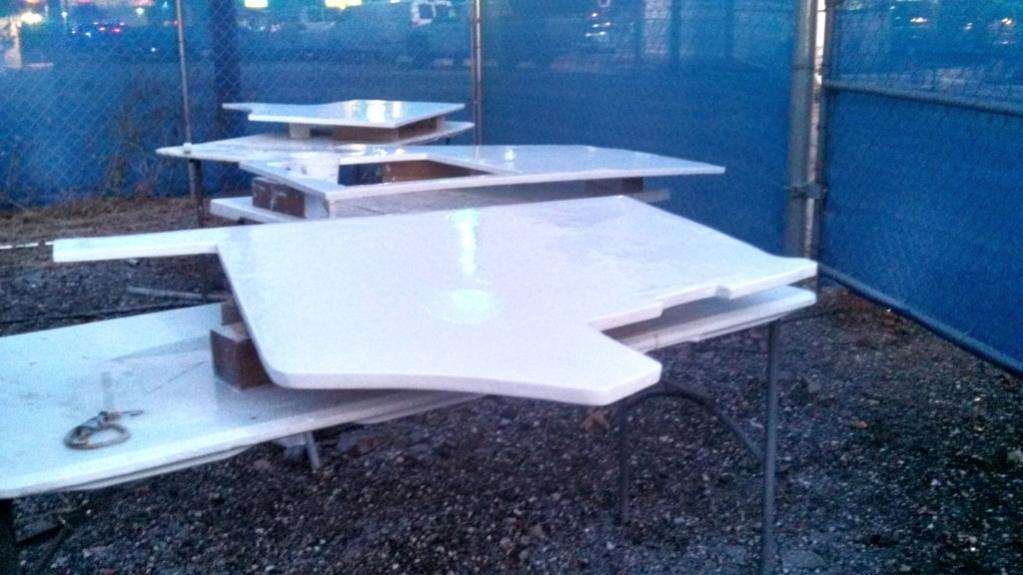
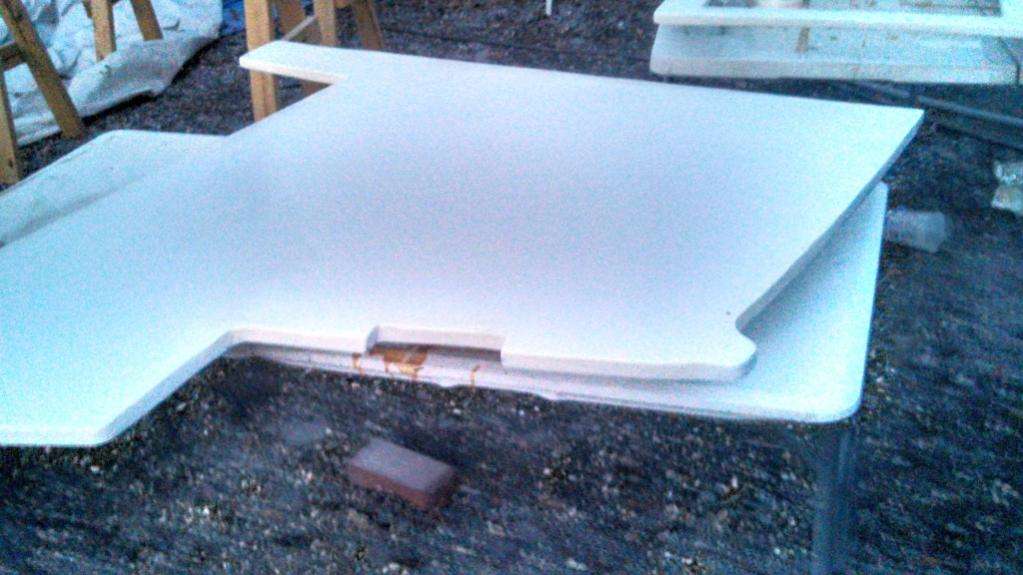
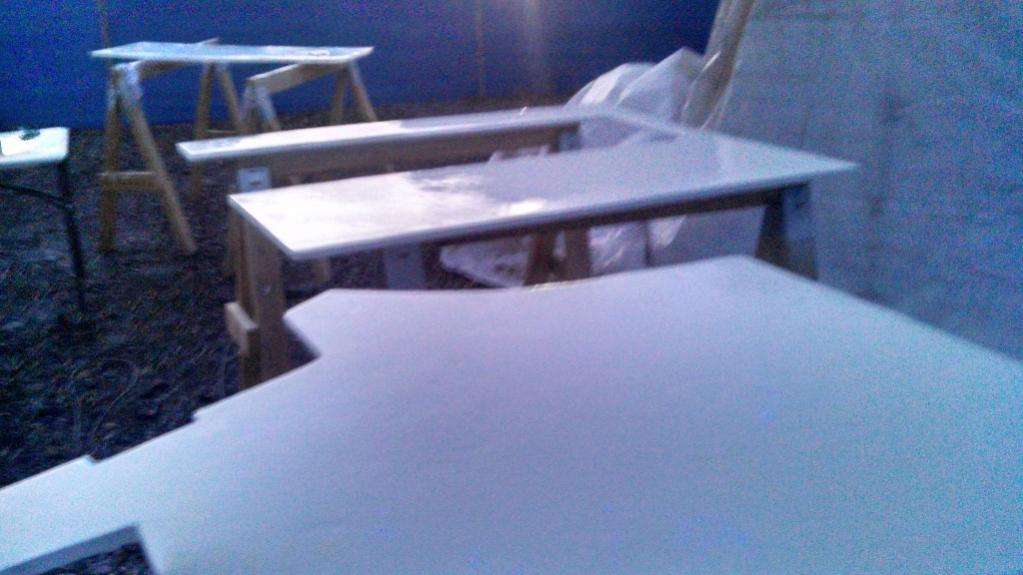
Fresh and shiny, Matt and Brian put the pieces into place. We had a two quick setbacks: The first was that in our haste to get the cabin built, we forgot to address the areas that were inaccessible with the plywood supports in the cabin.
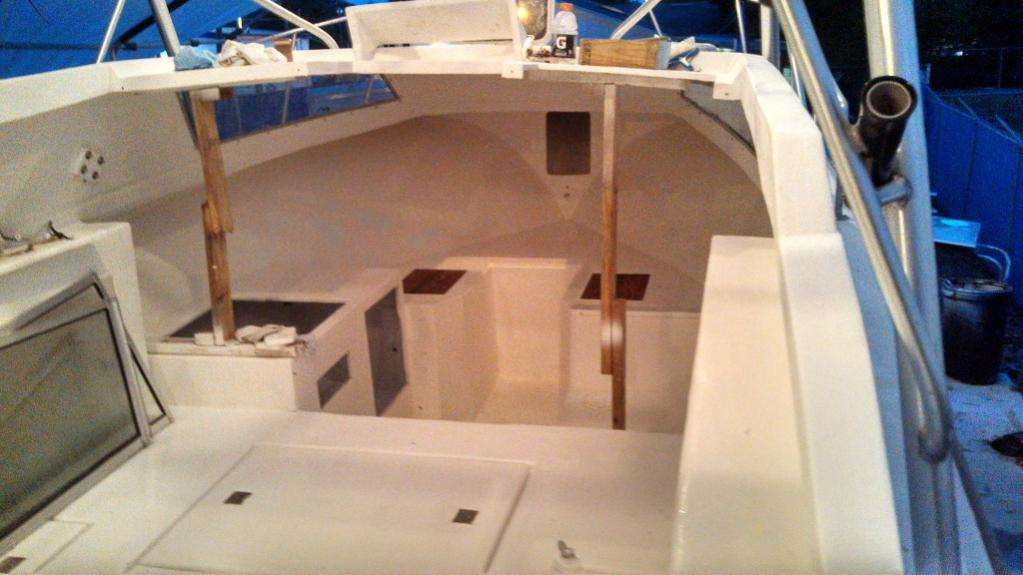

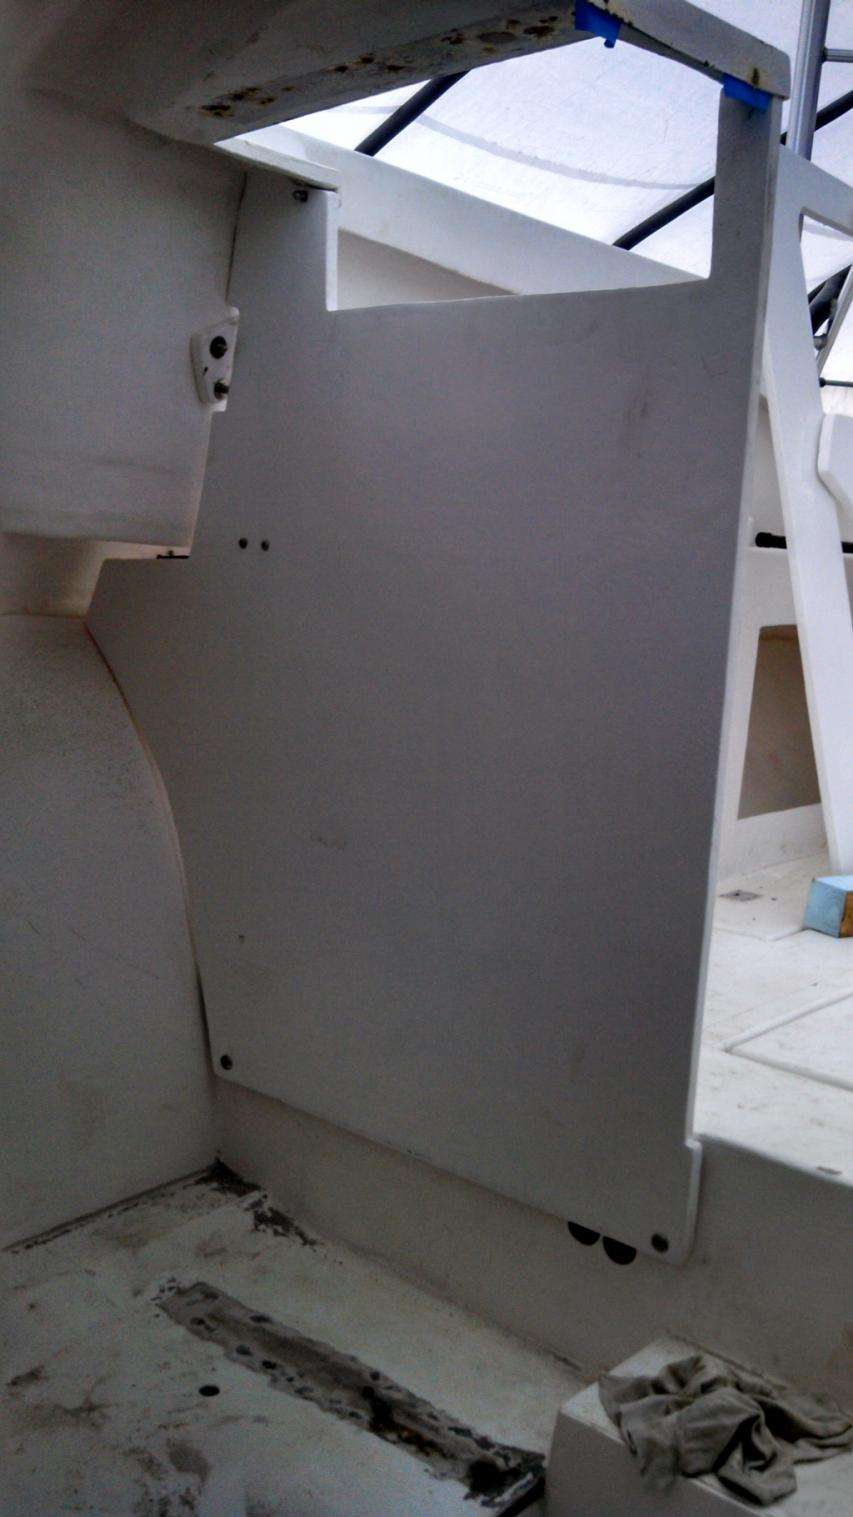
Matt epoxied these and after and overnight cure finished these ancient areas with new gelcoat. The second setback reared its head when we put the pieces into place; it was apparent that the wall wouldn’t fit flush without cutting away a few small notches to allow for hardware clearance.

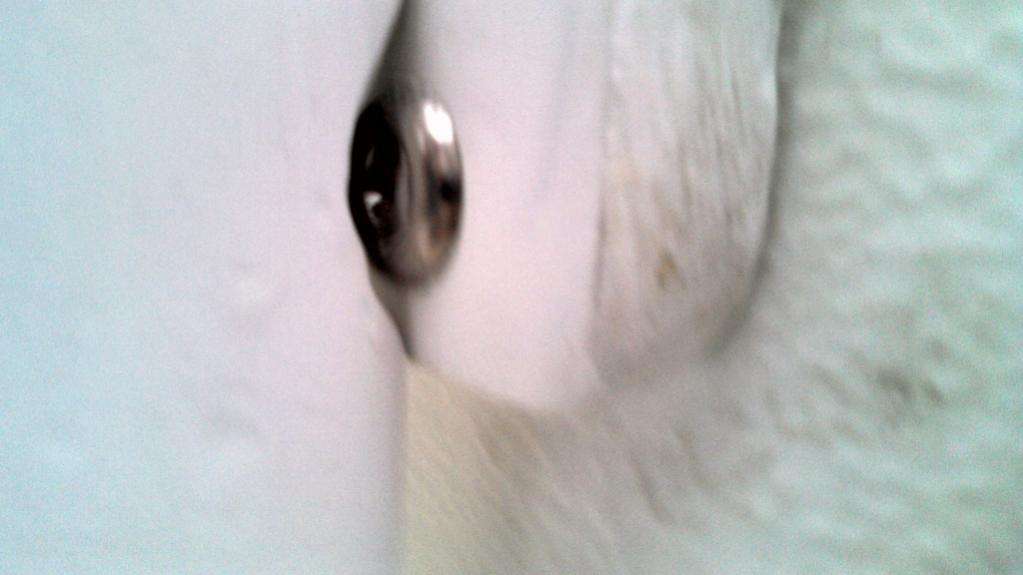
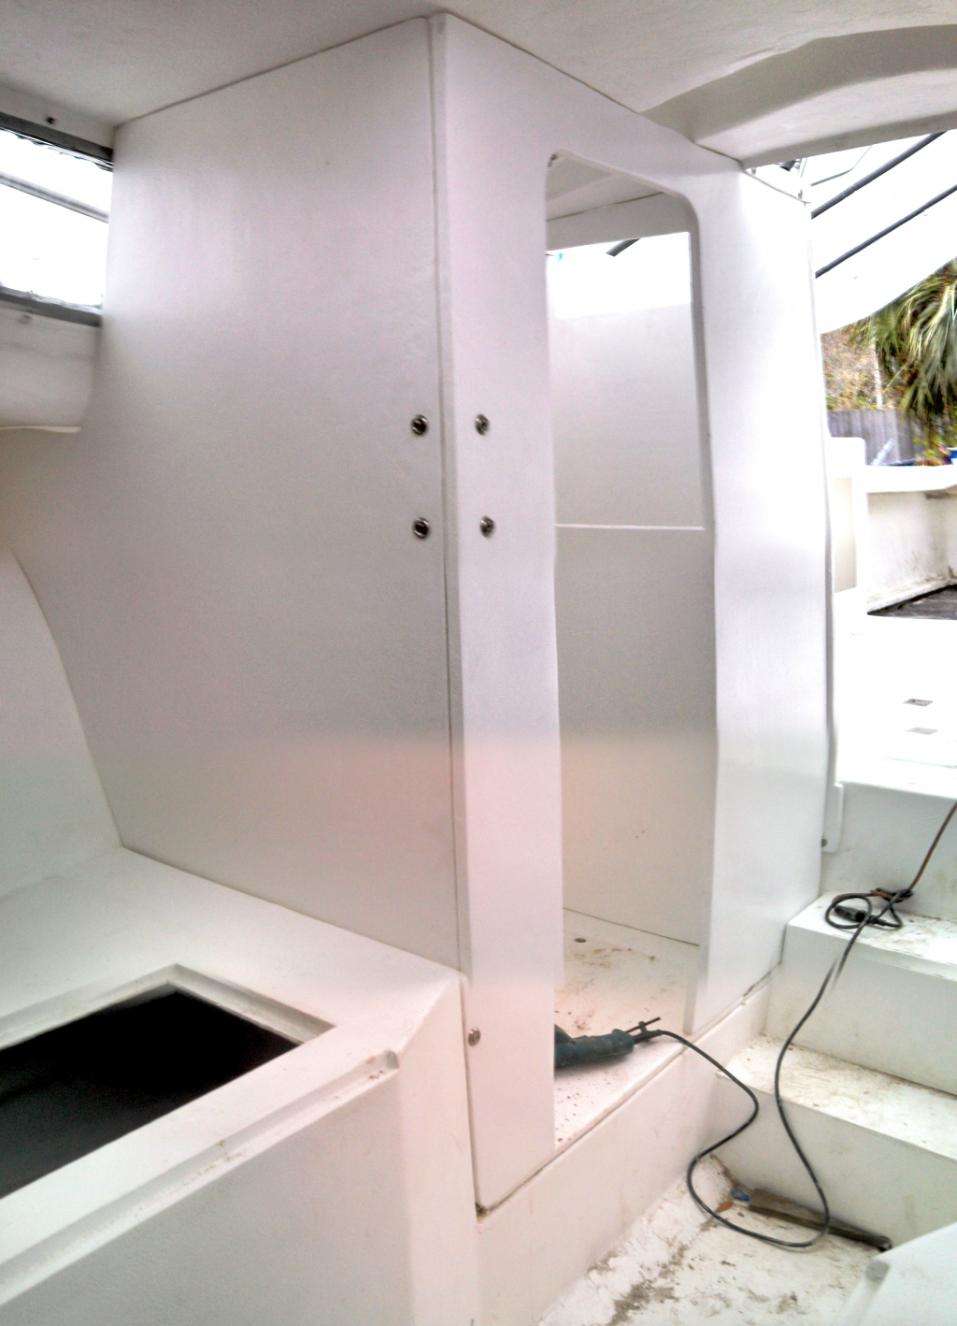
Little mis-steps like this are to be expected, but it really sucks to put the install on hold while waiting for a postage-stamp sized swath of gelcoat to dry.
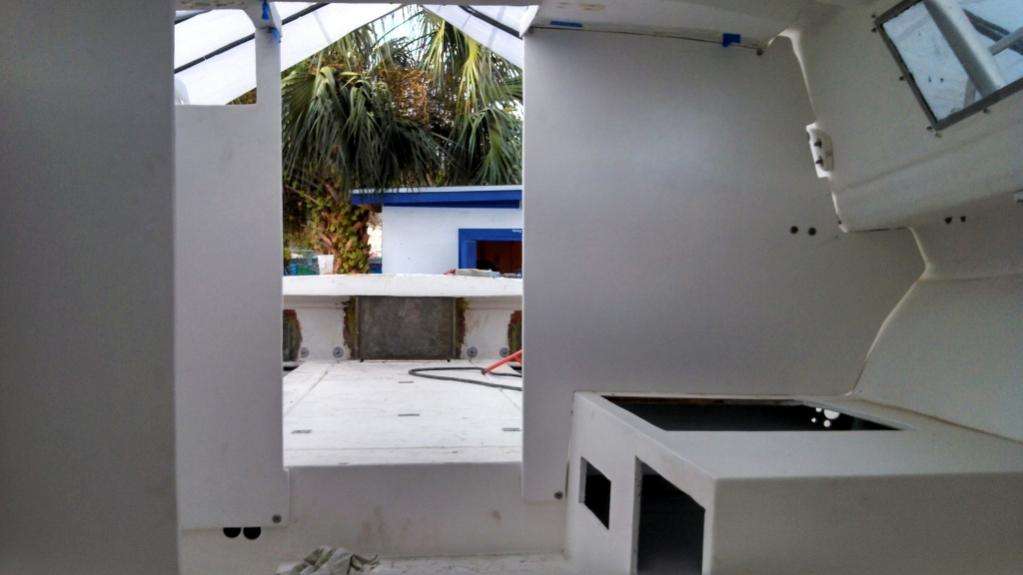
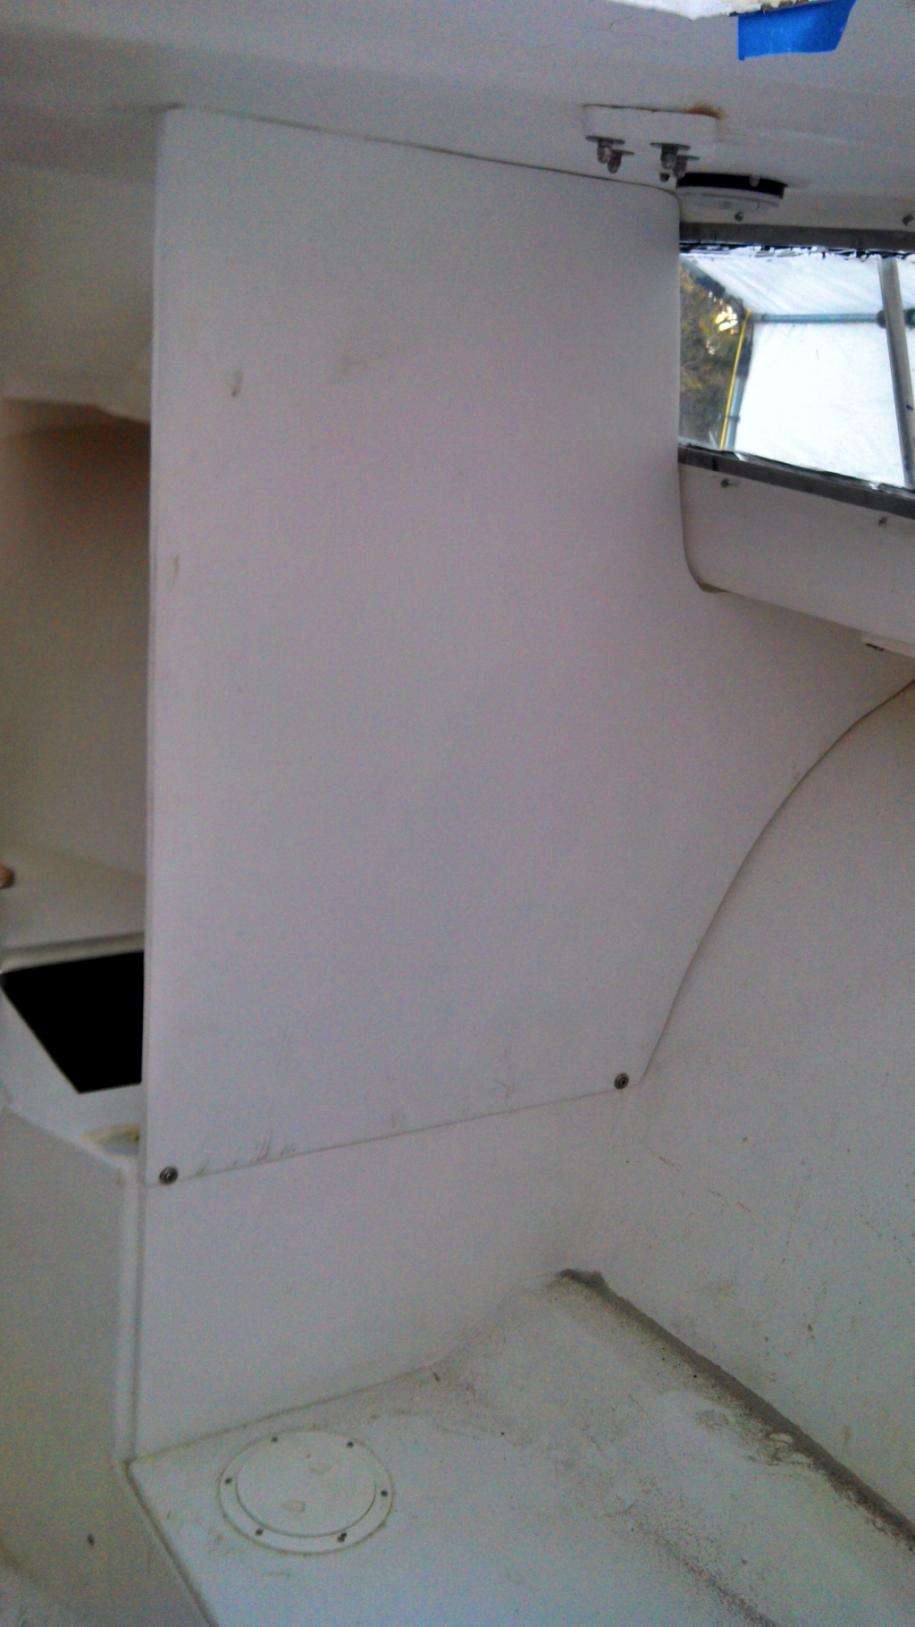
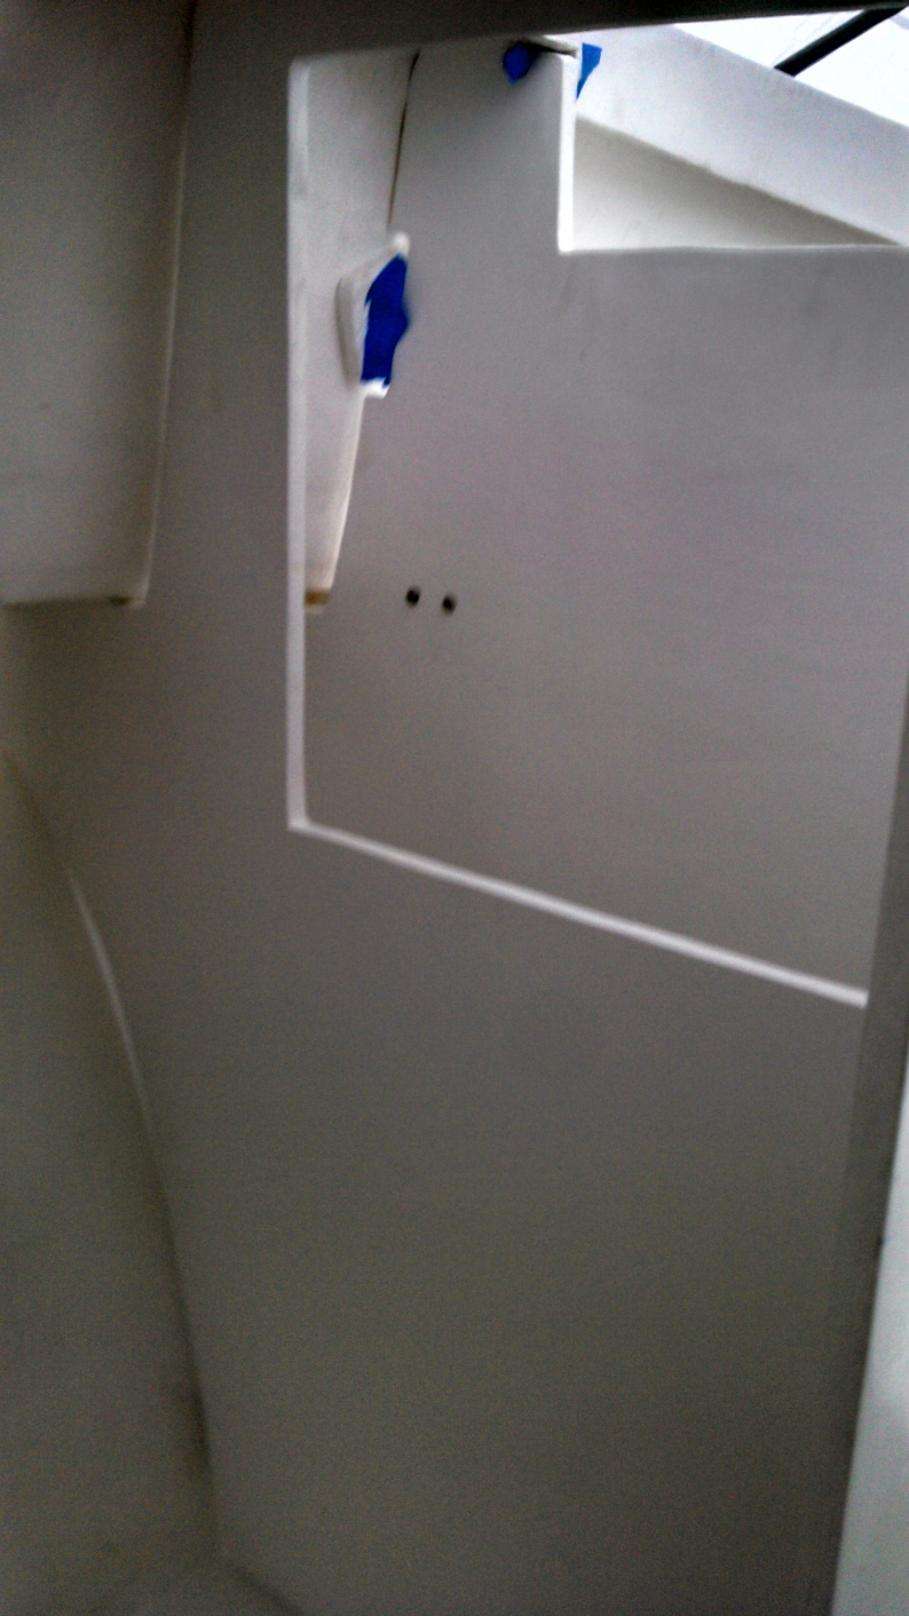
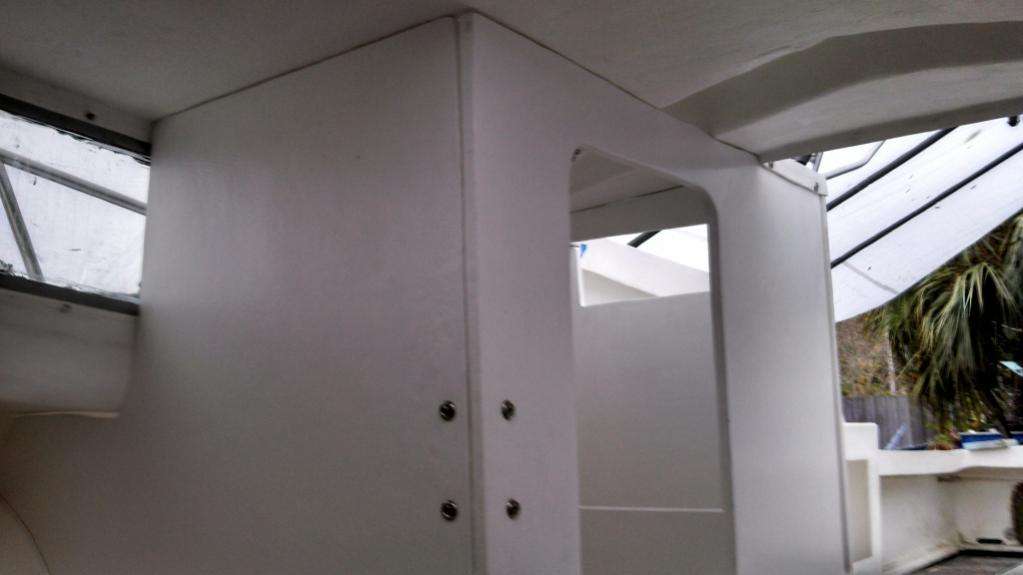
The cabin installation is all but finished; we are holding off on installing the control room wall until we have some of the basic wiring in place; no need to create a cramped space until we have to, right?
By this time next week we should be painting the livewell and transom elbows, then moving on to install the teak wood and rod holders. Also the wiring and plumbing should be underway by then.
Stay tuned!
![]()
December 9, 2013 – Day 617
Been jamming out as we progress on The Discoverer Project! Brian and Matt finished off the livewell with four layers of fiberglass and then three layers of gelcoat:
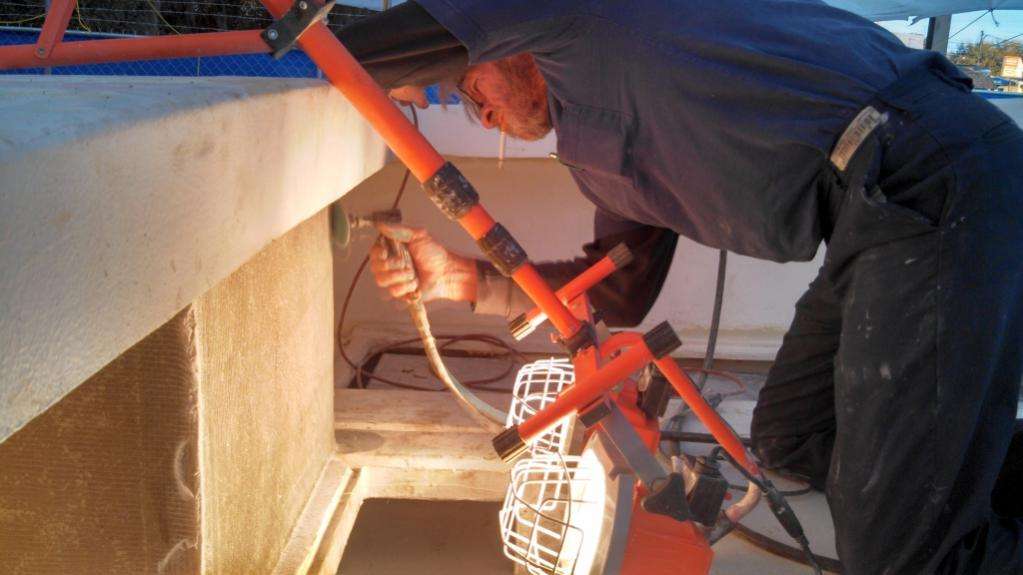

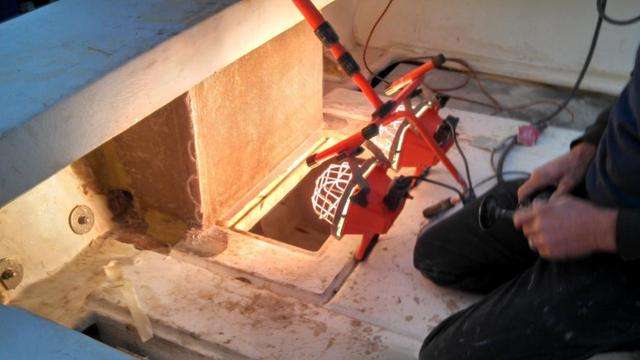
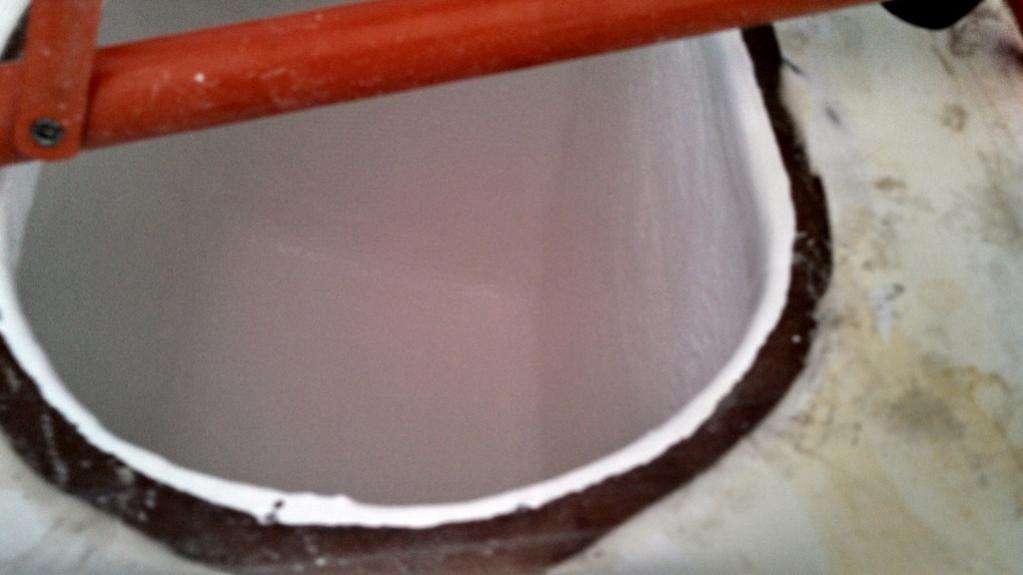
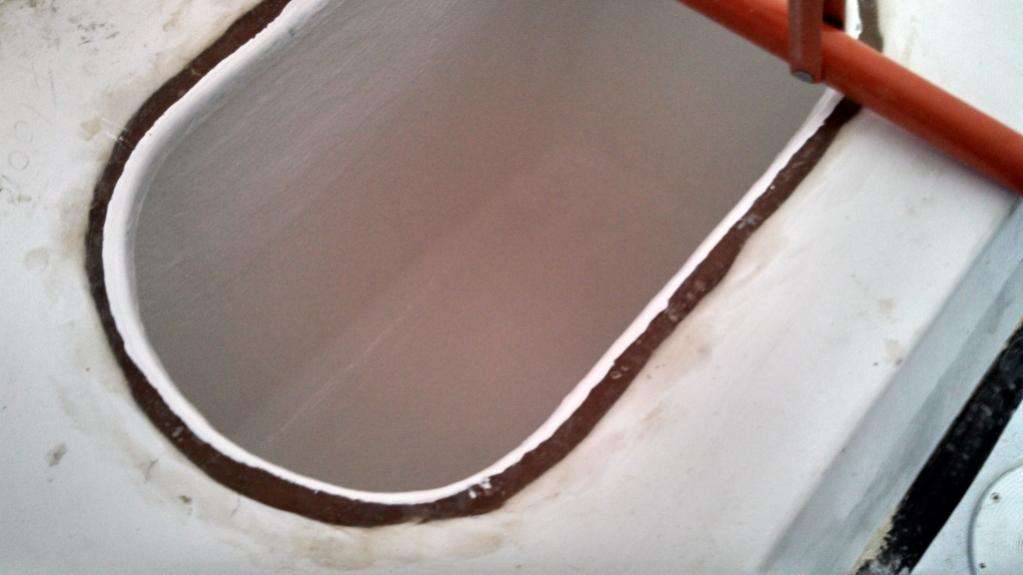
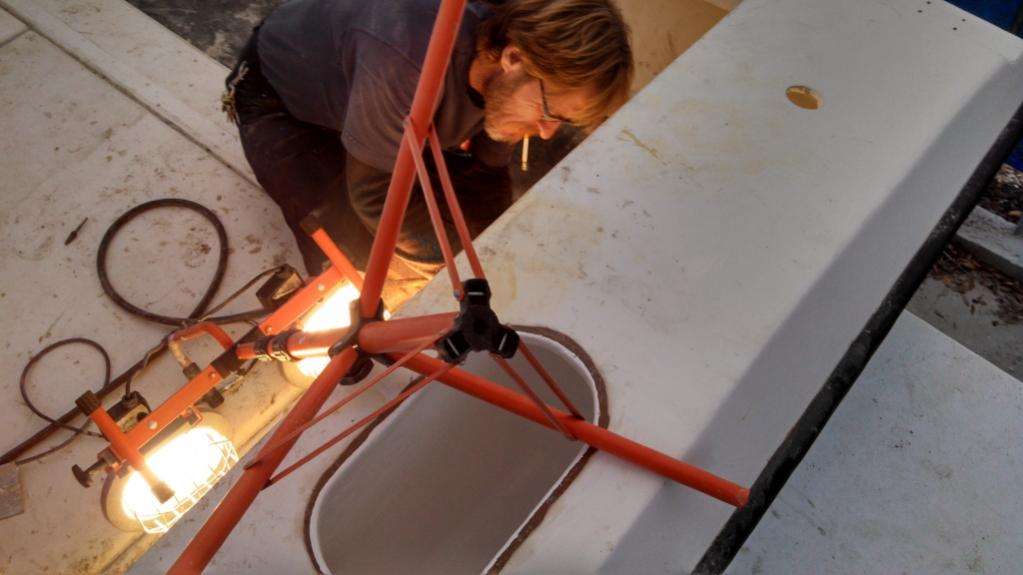
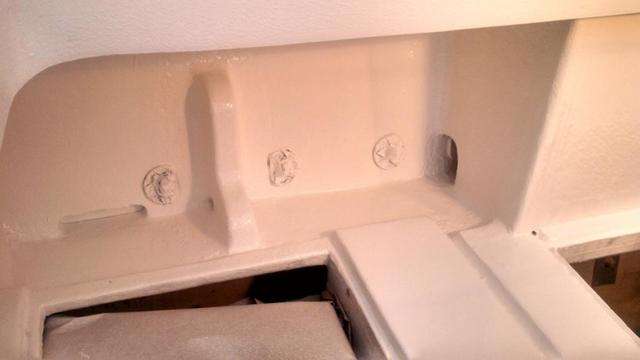
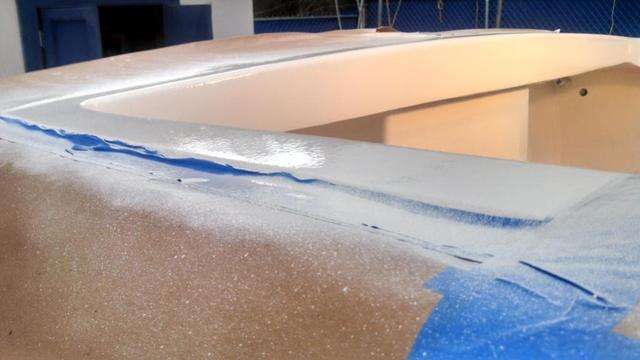
While we had the gelcoat sprayer was out we figured it was a good chance to fix up some details around the edges of some of the external pieces.

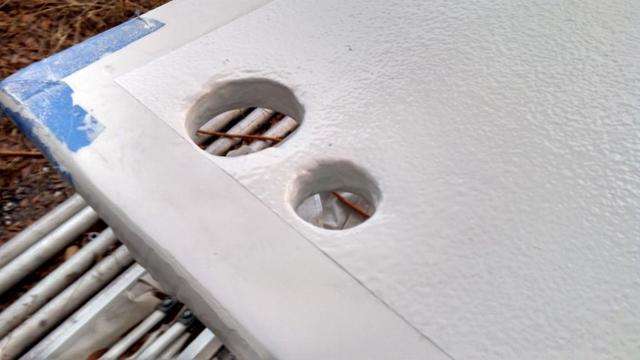
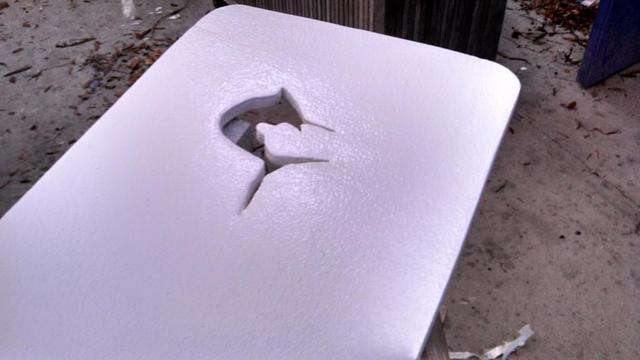

Also we prepped the bottom for bottom paint using a clay and citrus dewaxer.

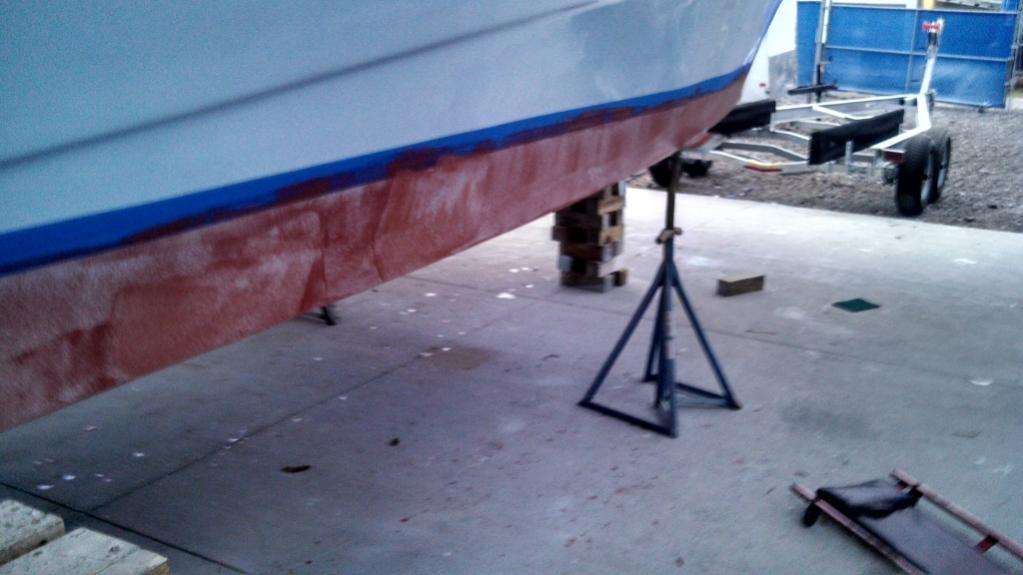
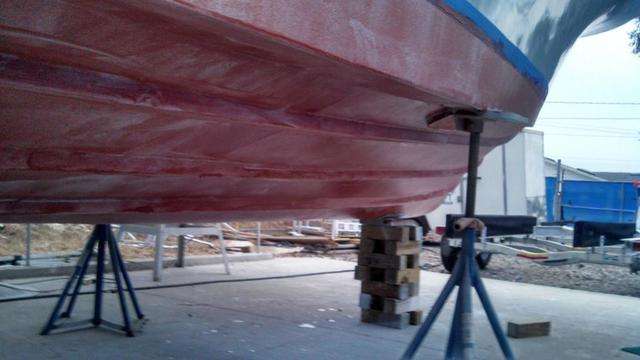
Then Jamaal rolled two layers of gray primer and a final coat of black bottom paint.
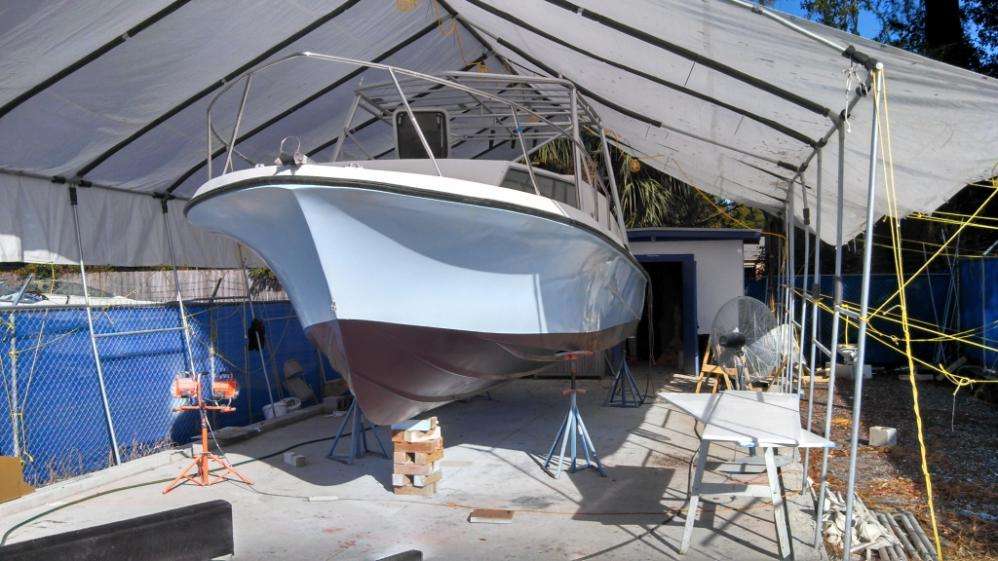
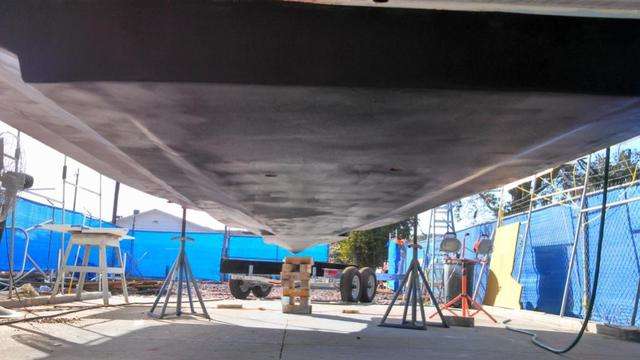
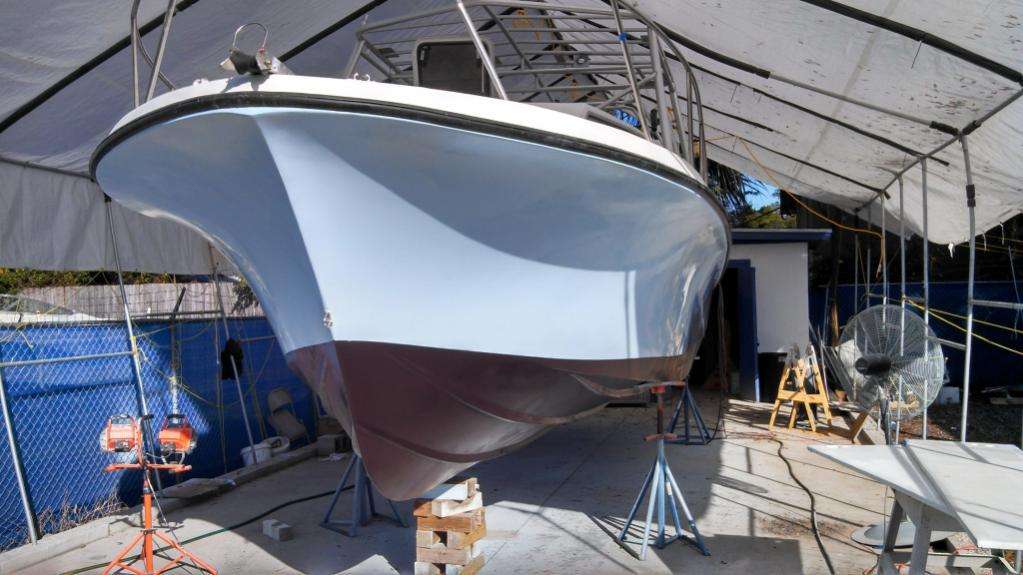
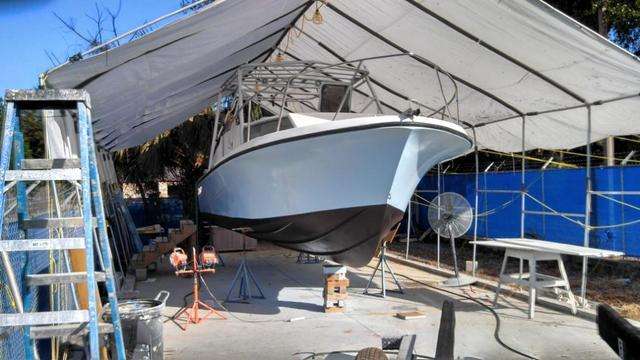
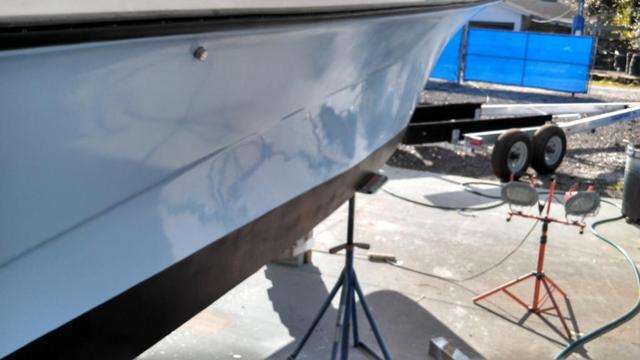
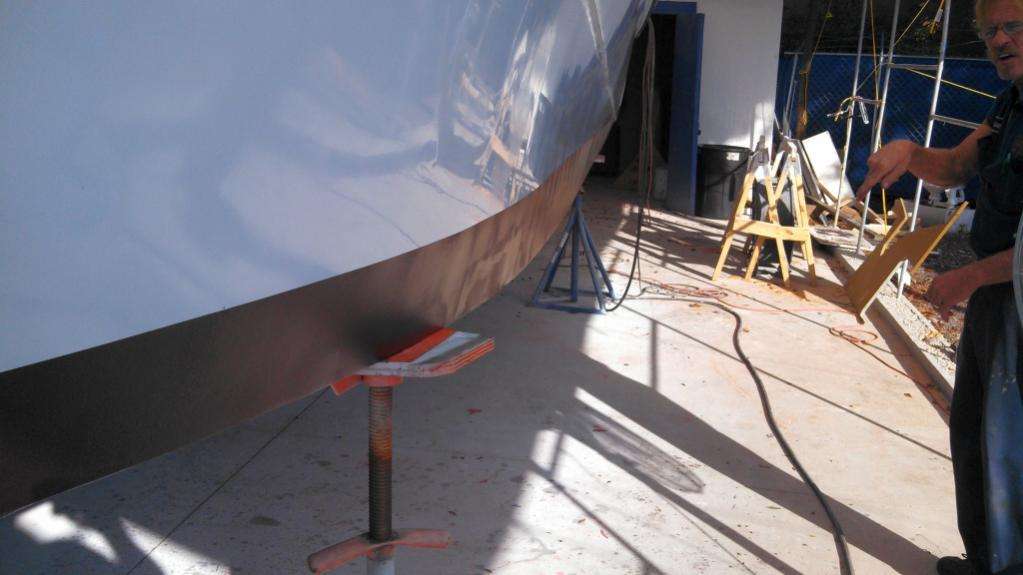
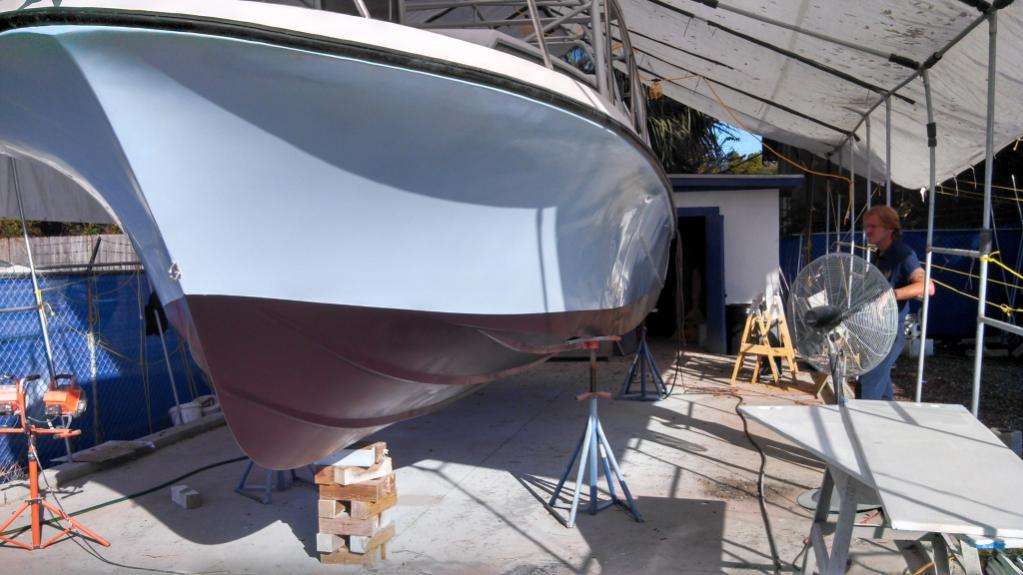
Now we are plowing ahead turning this hull into a boat; the console is in place and the access tubes are cut for the steering and controls. Also Brian and Craig have taken the proper steps to ensure that water drains into the bilge from all the external compartments, including the fuel tank holes.
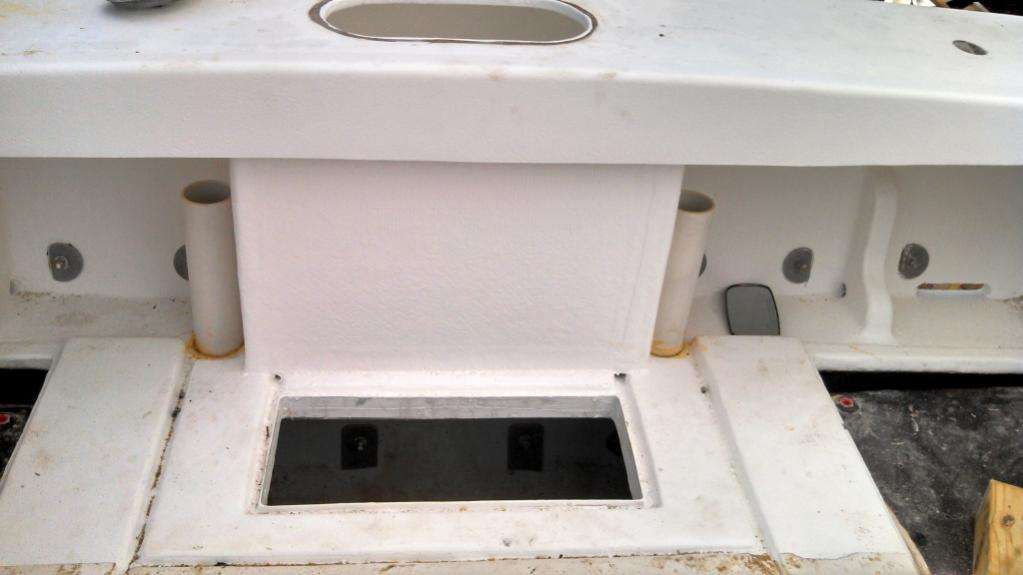
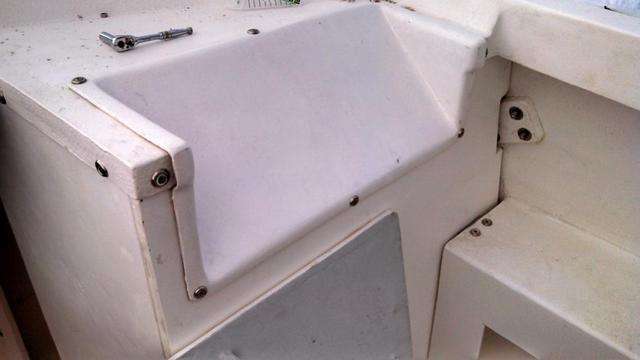

Stay Tuned!
![]()
December 16, 2013 – Day 624
Is that Christmas snow here in our Jacksonville, FL shop?

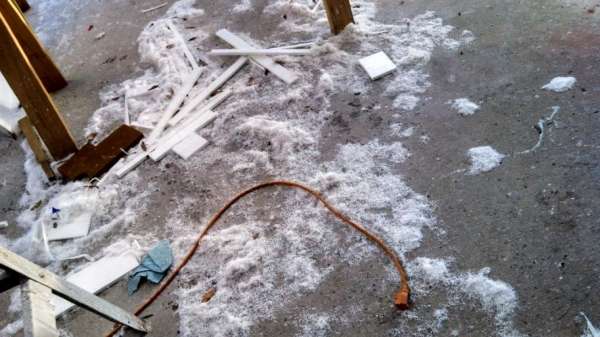
Nope, but it is proof that we’ve become some hardcore carpenters as The Discoverer Project nears it’s conclusion.

Brian has made excellent progress on the tackle drawers for the cabin utilizing marine starboard for the material.
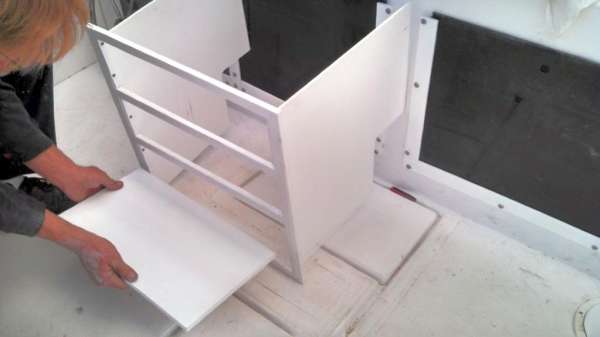

We are using notched drawers so there won’t be any steel rollers or other hardware…no hardware means no chance of hardware failure.
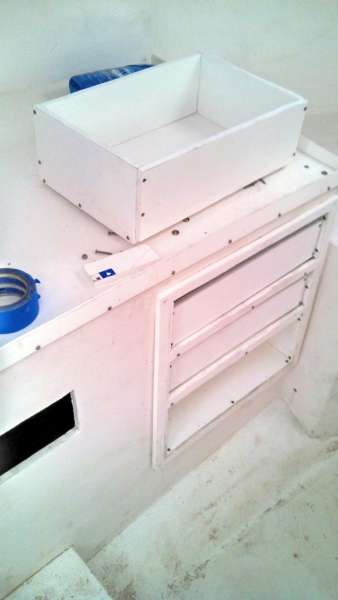
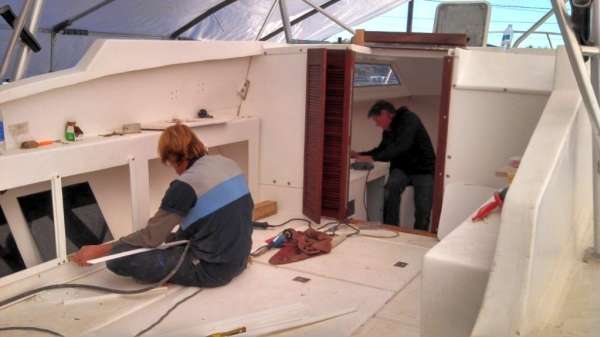
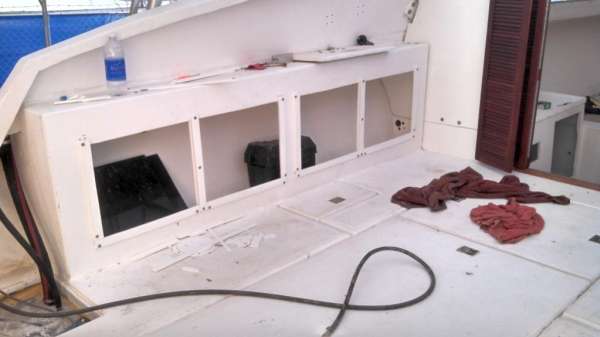
Brian kept the carpentry rolling by building new covers for the cabinets.
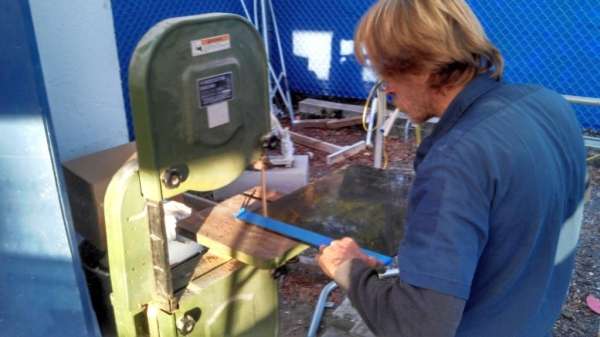
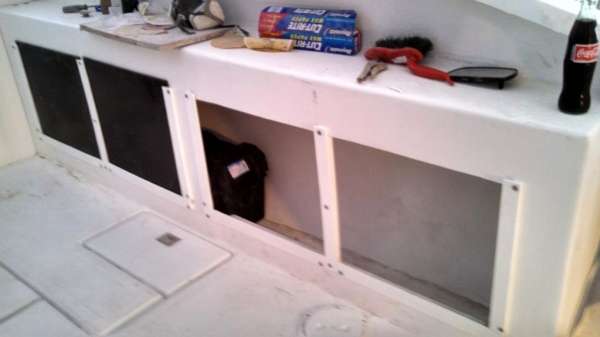
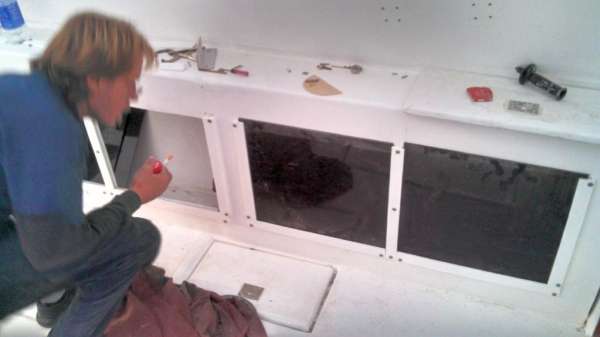
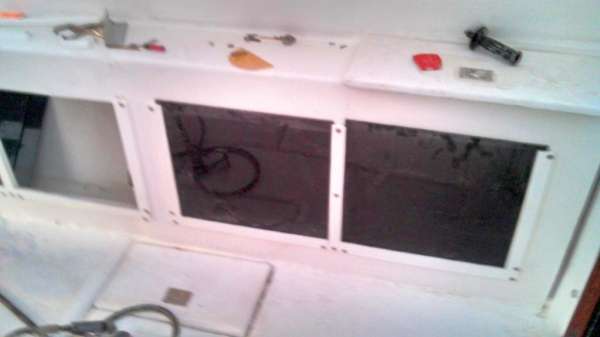
Craig has stayed in the cabin working on the rigging table and installing a hatch in the foreward of the cabin.
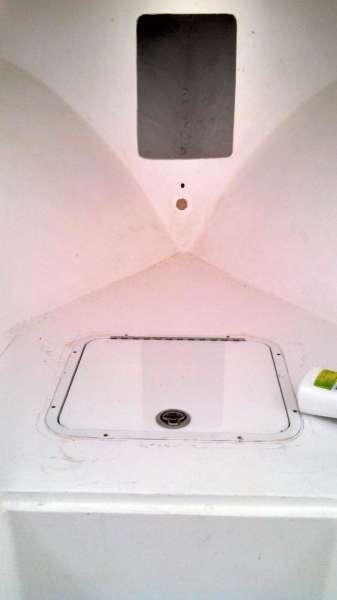
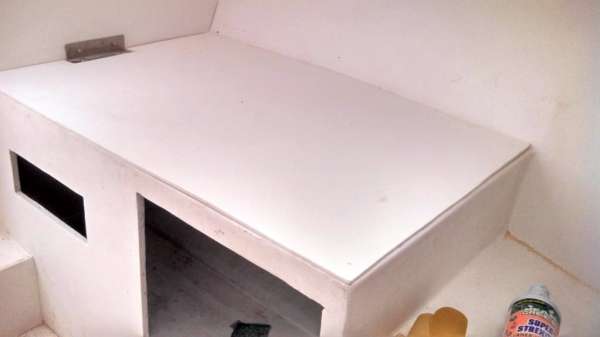
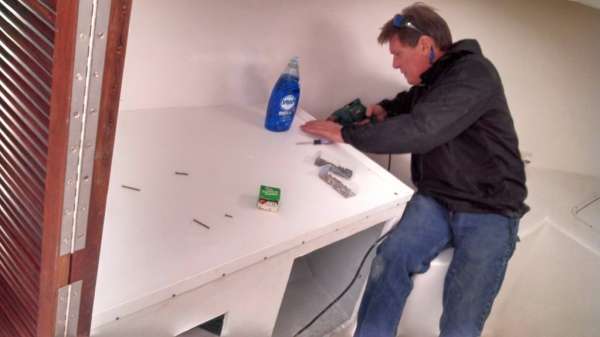
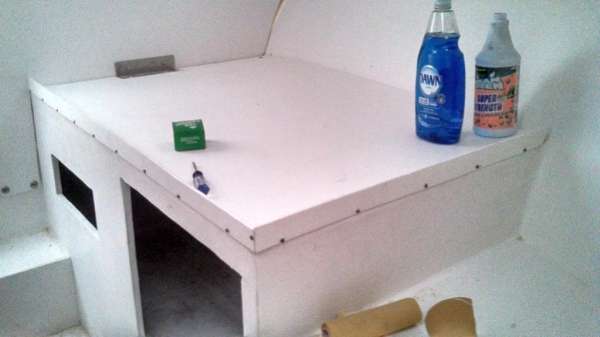
Jamaal has focused on the trim wood and the cabin door…looking sharp!
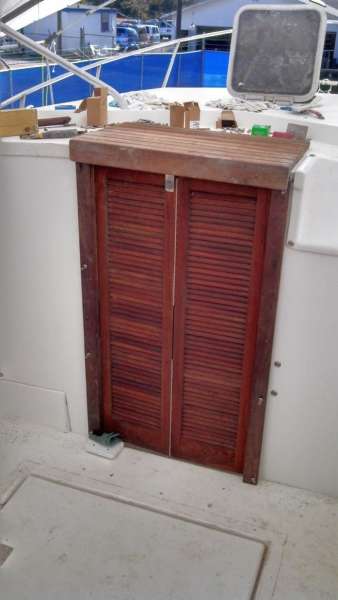
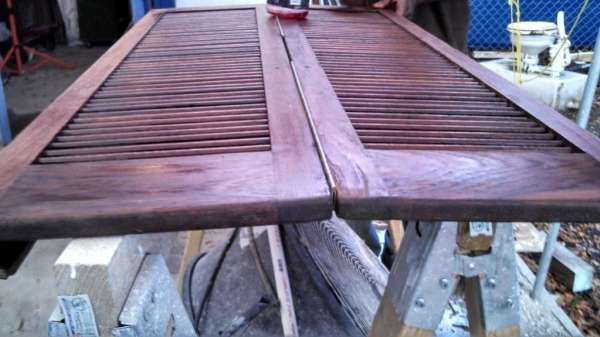
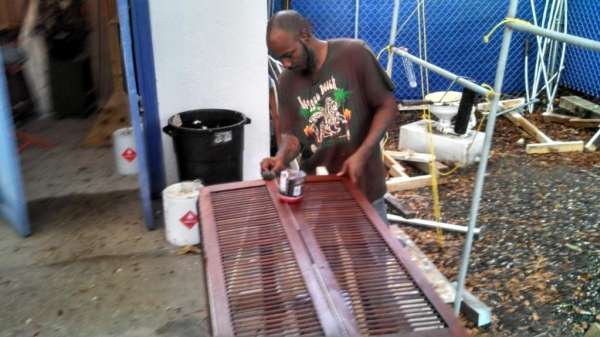
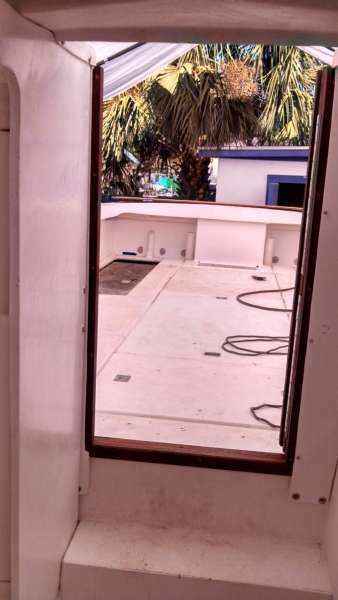
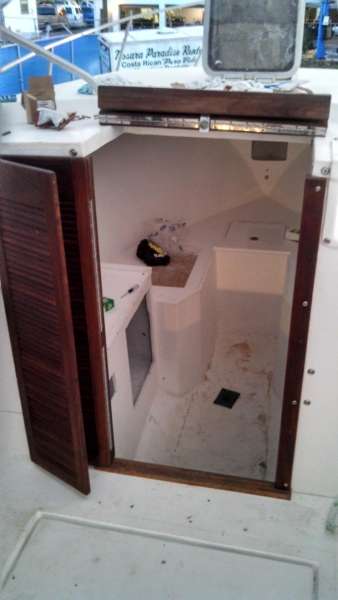
We also got the tuna tubes mounted. As usual we epoxy-sleeved the bolts, and notice the piece of holding wood we added to accommodate a shorter screw.
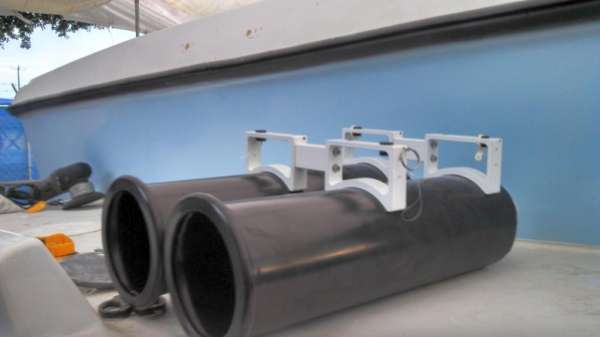
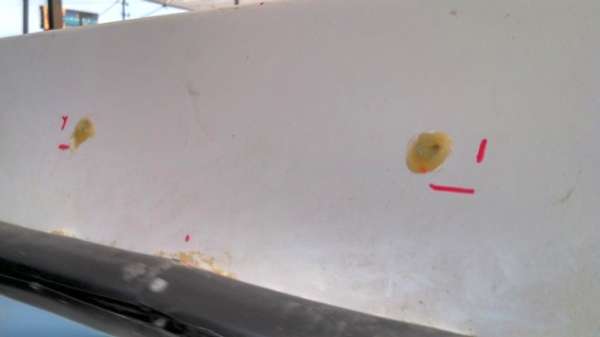
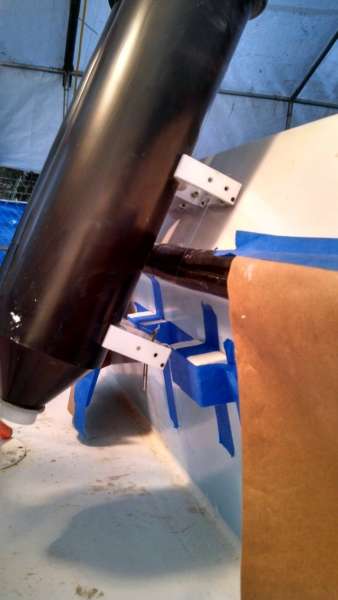
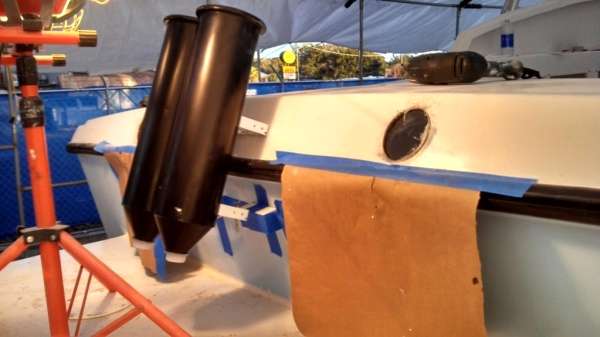
Matt has finished the reassembly of the outrigger mounts.
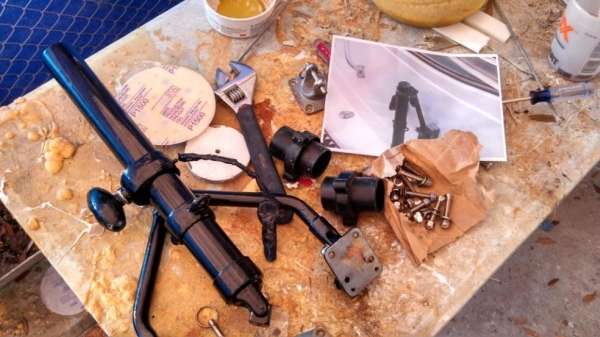
Notice the photograph used for reference…it’s been a long 19 months since we took this unit apart, so the older posts are really coming in handy as we put everything back together.
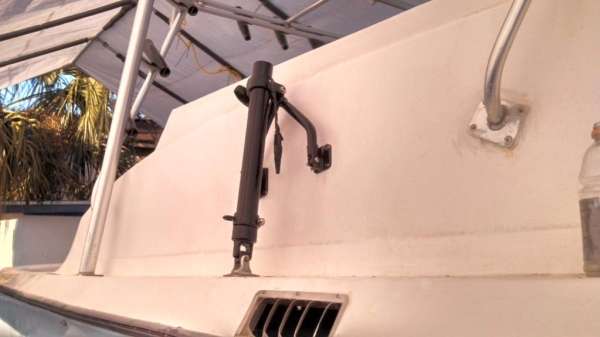
Most recently we rolled a coat of bilge paint into the center to help beef up the gelcoat. This should keep the bilge protected for many seasons.
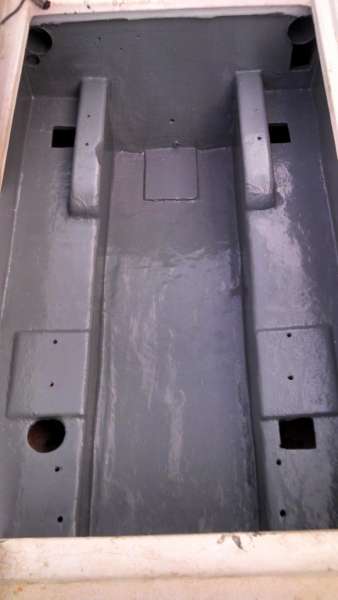
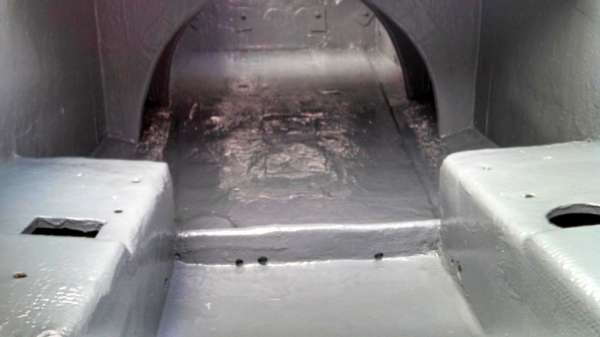
We are progressing at a rapid speed and look to report more good news as we roll ahead on The Discoverer Project.

![]()
January 4, 2014 – Day 644
The Discoverer Project is at full sail as we are finished with construction and are down to final rigging. We can’t lose focus just yet though as these final touches are the margin between a good boat and a great boat.
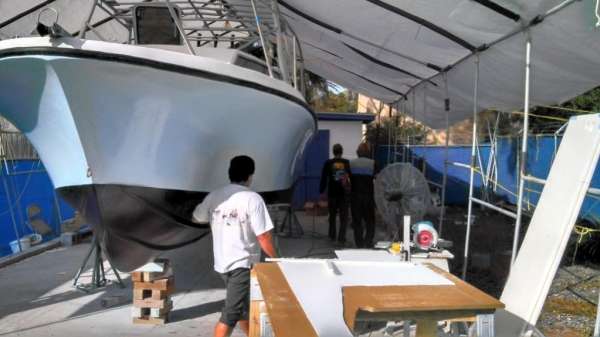

The early stages of Brian’s tackle lockers were detailed in the prior post, but the finished product is really exciting.
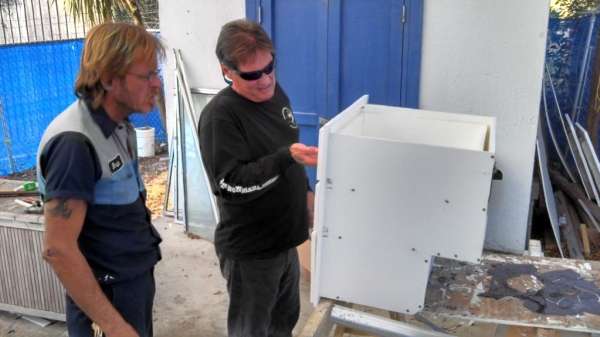
In addition to the four drawers, he built a system of cubby holes to hold loose items like fishing tackle, drink cups, camera cases, etc. While he was at it he also built a slick paper towel holder mounted on an open top box for even more storage

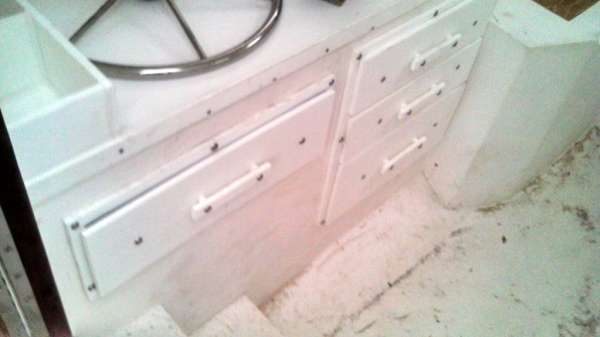
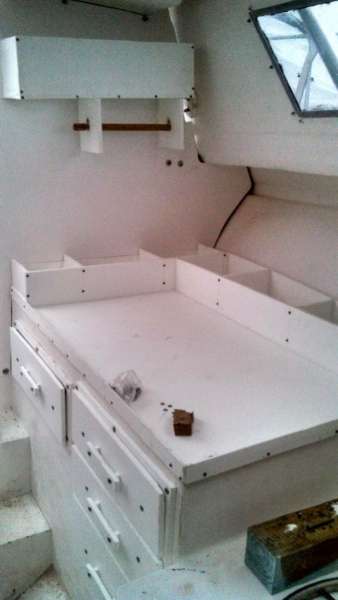
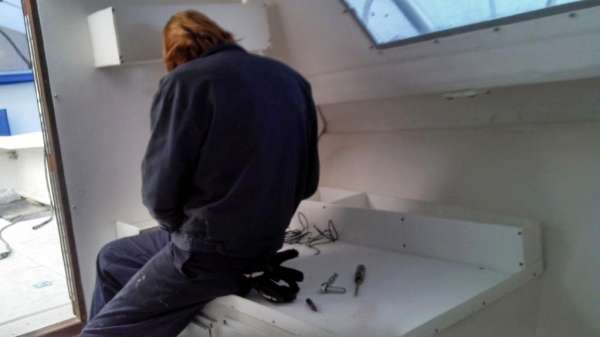
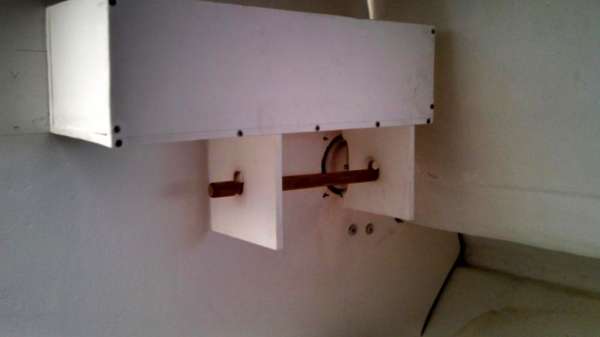
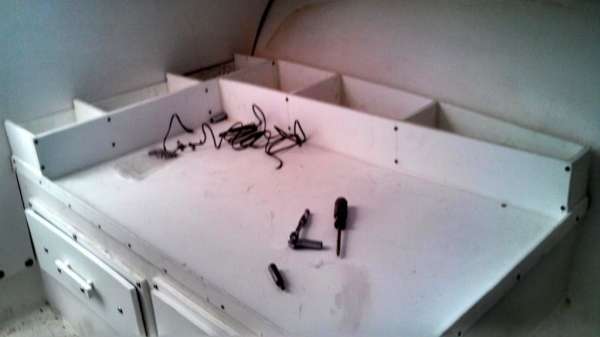
Another big accomplishment this week was the re-installation of the windshield and side windows. Recall how easily they broke during the tear-down (skip to 6:05 for the break):
So clearly we were very careful with the new windows. A thick bead of black 5200 and several #8 screws and bolts did the trick on this install.

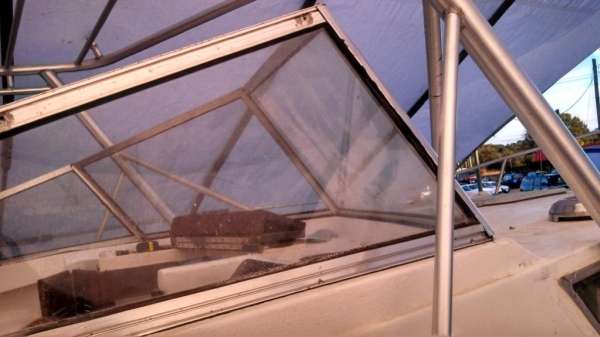
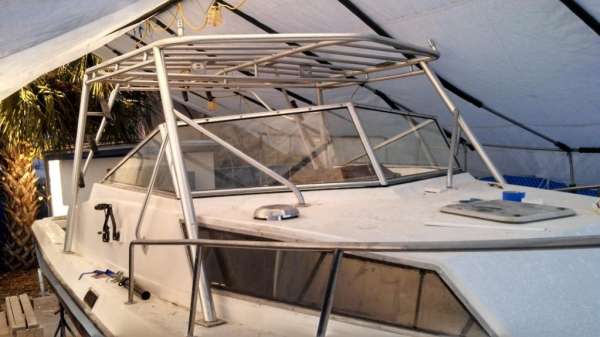
Safety first! This boat is being rigged to USCG standards so a Kidde Marine Fire Extinguisher was the first thing to get mounted.
Brian has moved ahead and prepared the main console with a piece of black lexan. He then cut out a hole for the compass.
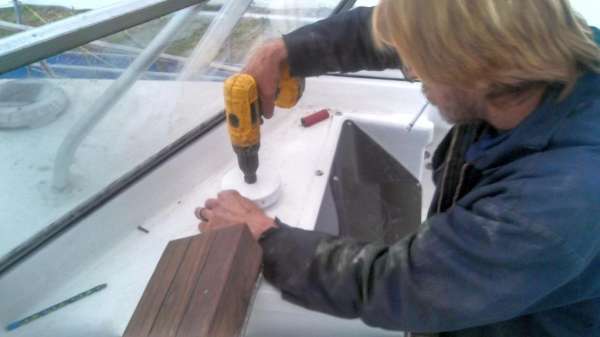
He finished his preparation for wiring by mounting the stereo speakers for the AM/FM/CD unit.
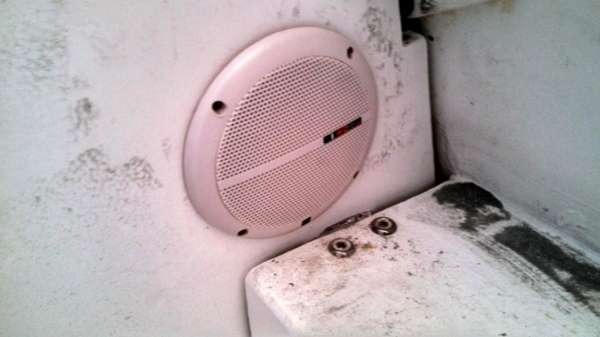
Matt built a pair of coosa wood backing boards to add strength to the outrigger mounts, and is in the process of epoxy sleeving all the thru-deck holes for the mounts.

Also we are clearing up a snag with the two legs of the tower that pass the control lines…they were never welded into place when the tower was installed, so instead of welding on the boat (a dangerous and messy proposition) we are welding the pieces on the ground and then will mount them plate-to-plate.
Before:
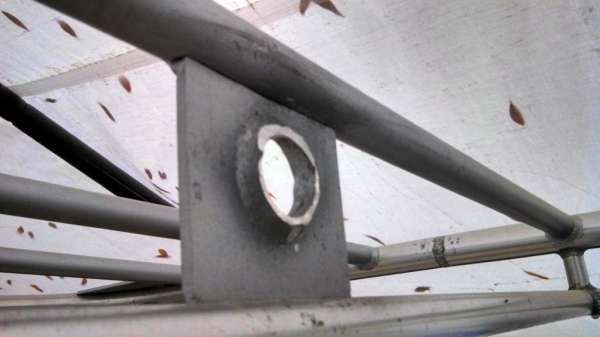

After:

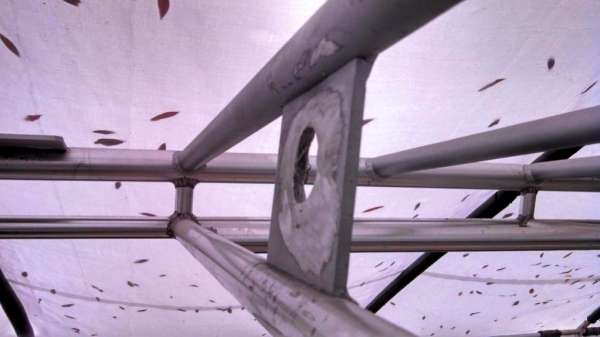
Matt ground the existing material down to a smooth finish so it is now ready to accept the new pipe. While we wait on the welding shop, Brian finished the upper control station.

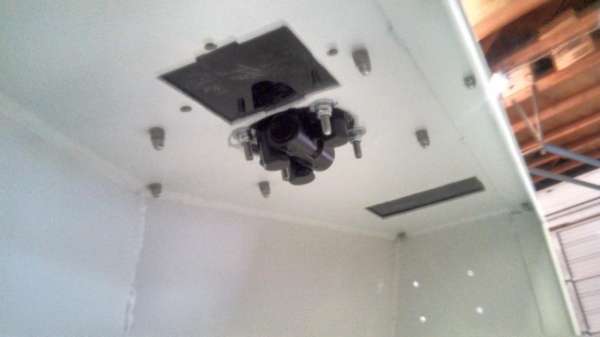
We plan on using our hand-held GPS units on at the upper station, so we have taken the precaution of mounting a 12V cigarette lighter charging receptacle.

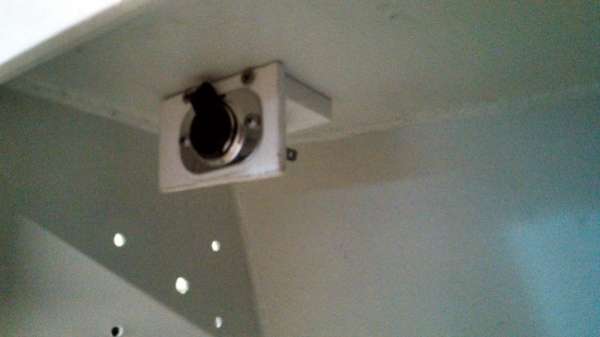
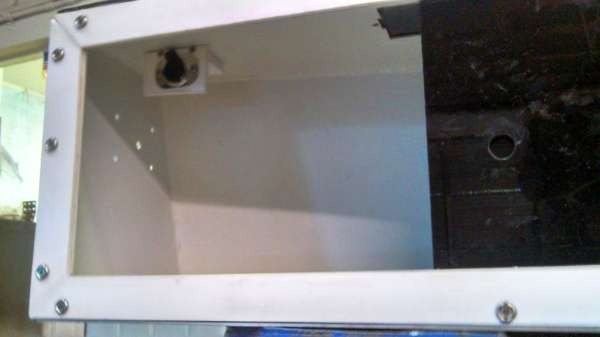
The plan is to pull the boat from under the cover by next week and start building the tower. We’ll then be ready to run pumps, hoses, electrical lines, and hydraulic lines.
Once that’s done all that’s left is clean her up, hang the motors, fill her up with gas, kick the tires and light the fires!
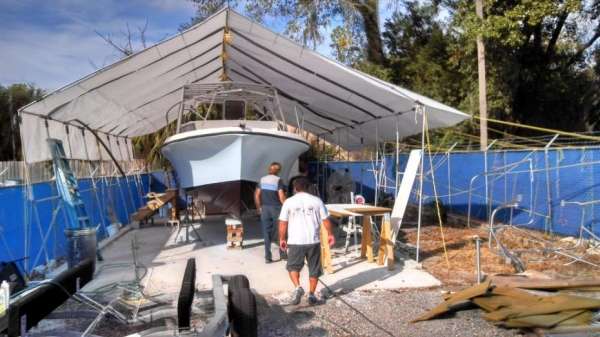
Stay Tuned!
![]()
January 7, 2014 – Day 647
![]()
January 10, 2014 – Day 650
We’ve kept up the good sledding on The Discoverer Project, even though the 20 degree temps have put the kibash on fiberglass or gelcoat work.
Cold temps don’t affect aluminum so Brian and Matt finished the installation of the control tubes on the tower. Here is how we left it in the last post:
Before:

After:

We decided to have a collar welded onto the existing pipe on the ground rather than try to weld aluminum up on the boat. The result is not only simple, but also allows for easy removal of these arms should the need arise down the road.
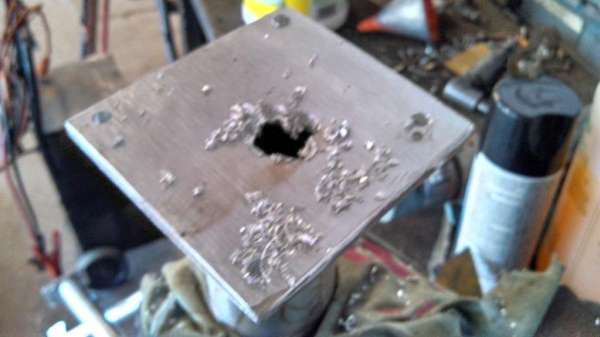

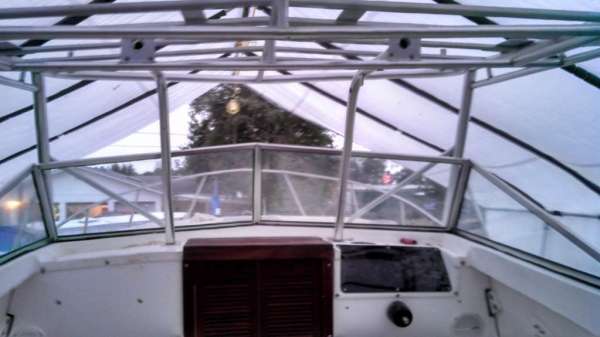
These pipes will carry the steering lines, throttle cables, and electrical to the tower-mounted station, plus the add strength to the tower in general.
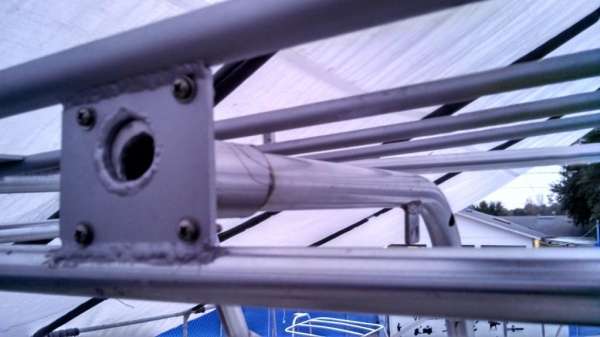
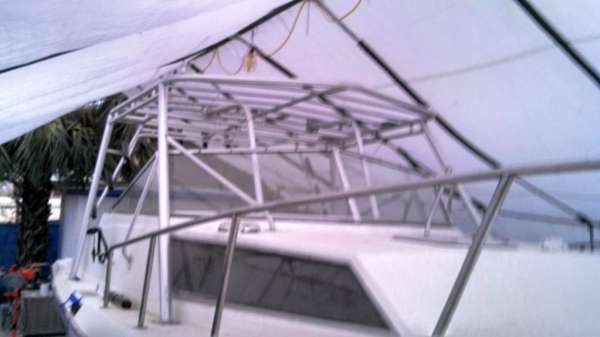
On Friday the weather finally broke and Matt was able to finish the epoxy sleeving for the outrigger mounts.
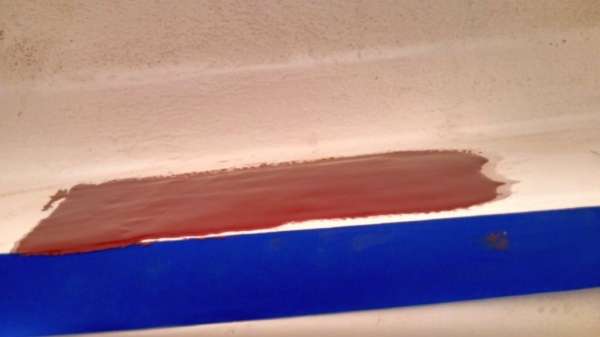
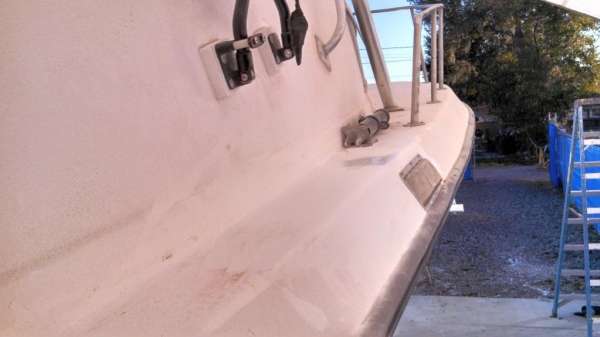
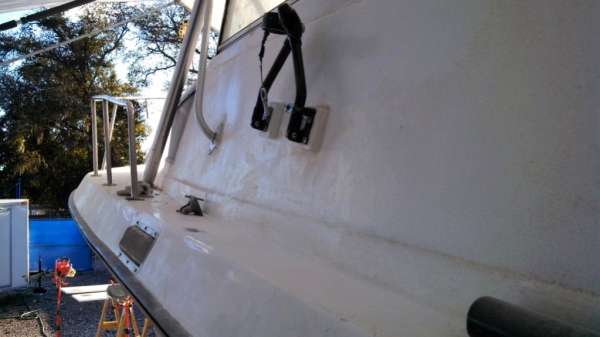
Also, he is beginning to finalize the deck panels by adding a 10-inch access hatch for the fuel valve and putting an additional layer of textured gelcoat to the topsides.
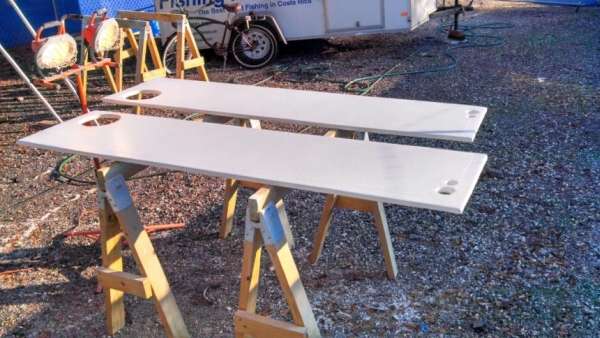
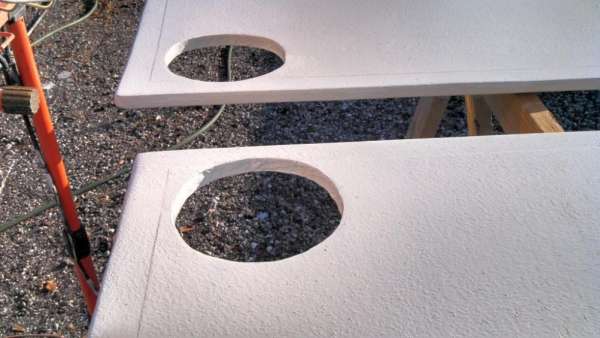
Behind the scenes we finally have most all of the pieces we need to finish this boat…bilge pumps, the radio box, lots of electronic gizmos, wiring, and plumbing are all in the shop and ready to install.
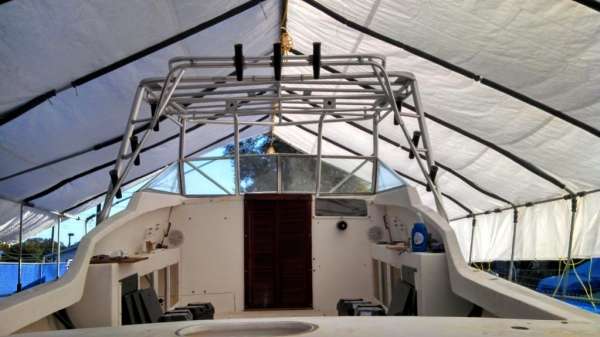
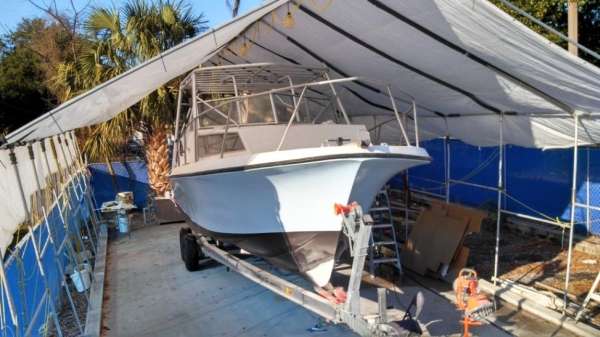
Let’s hope we get the most precious commodity (time) next week so we can really leap ahead on The Discoverer Project.
![]()
January 14, 2014 – Day 654
Closing time on The Discoverer Project! Despite the freezing temps outside we are cooking with gas in the boat shop as the final details are starting to come together.
In the last post we had tightened the bolts on the tower control legs, leading to the next step which was to install the roof.
 border=”0″ />
The original boat had an half-cloth / half-aluminum top. We’ll be fabricating new cloth, but the metal section was actually in good shape despite negligent care.
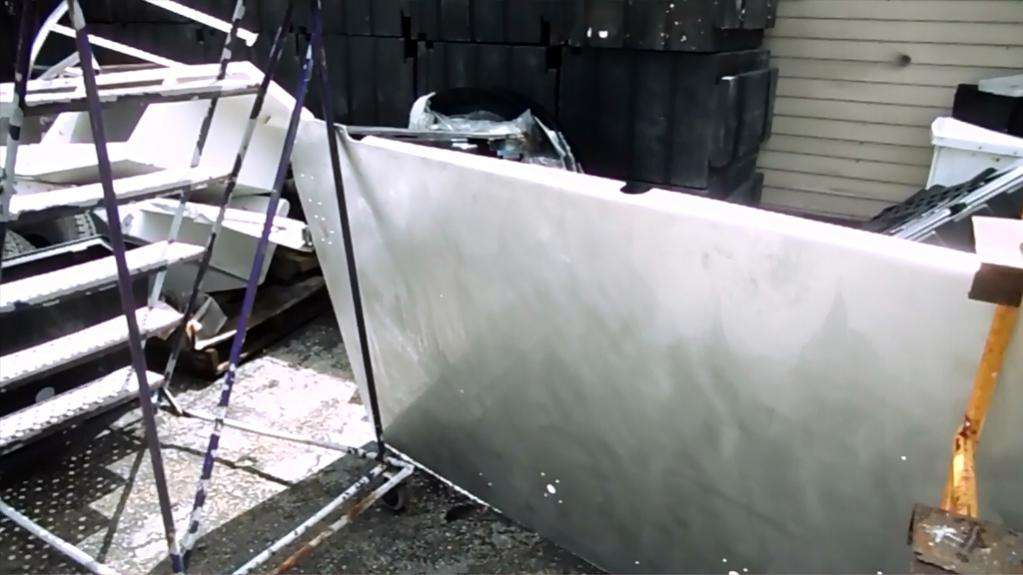
Our pals at Showboat Custom Coating did the tough work of stripping this piece prior to applying their incredible SB 305 Silver coating.
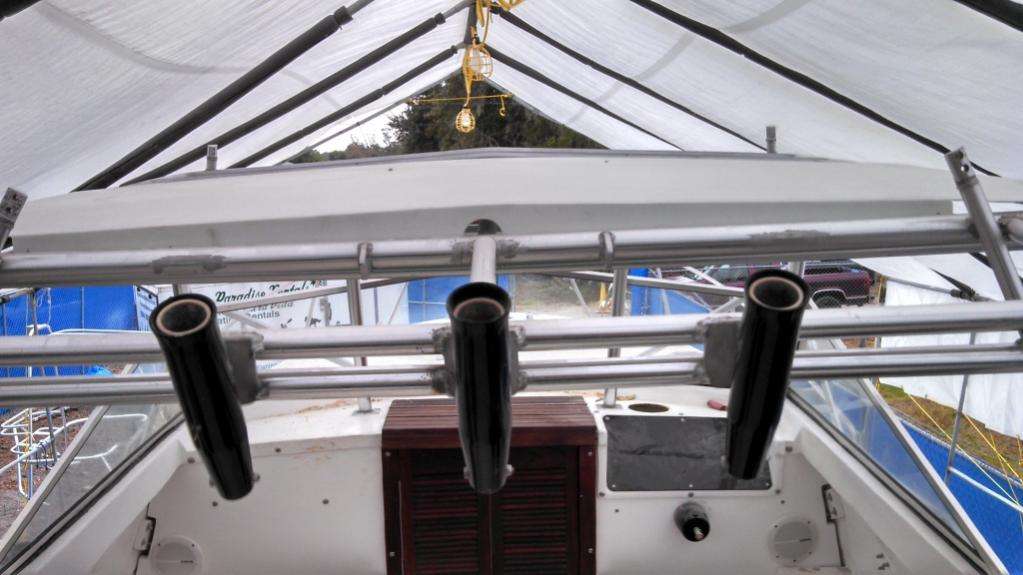
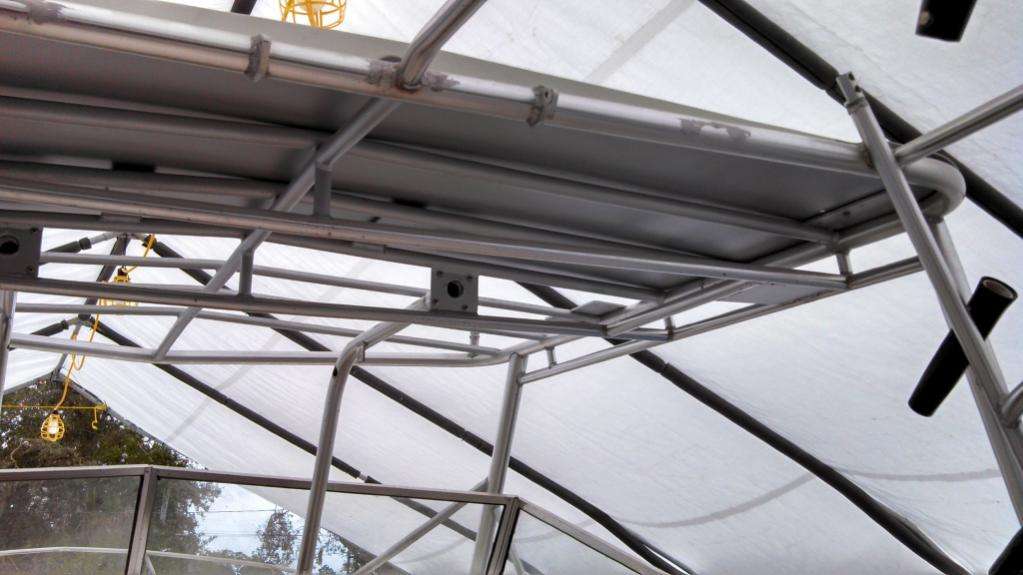
It was up to us to rivet ‘er into place, and Brian and Matt knocked that out with the help of some big wrenches and clamps plus in a pinch 285lbs. of ballast (Matt)
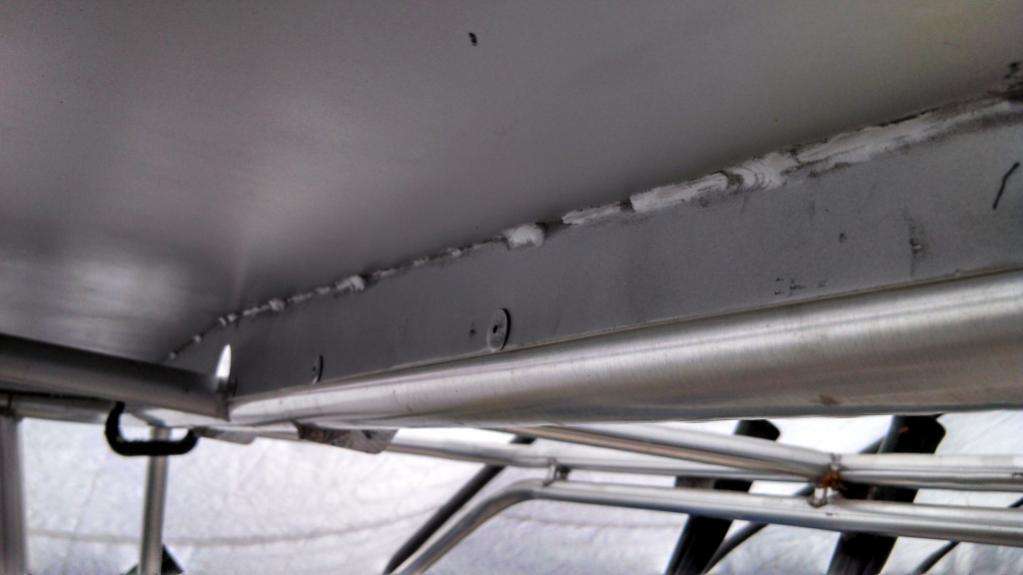
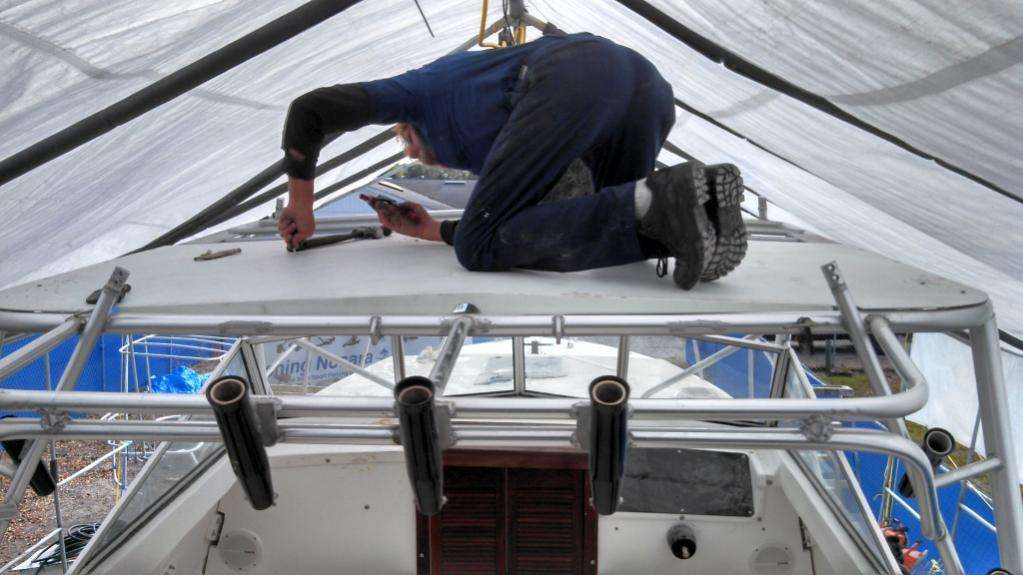
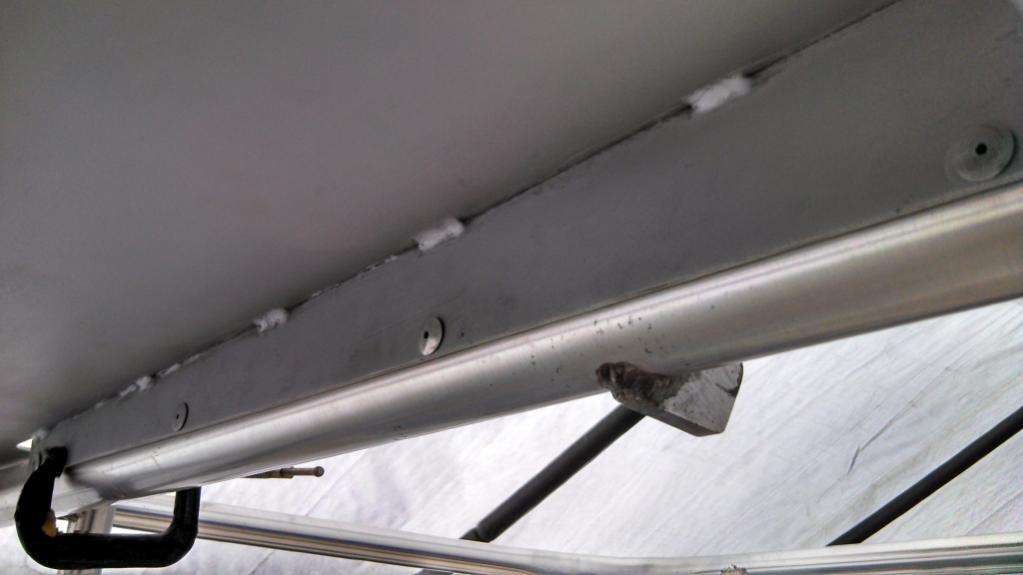
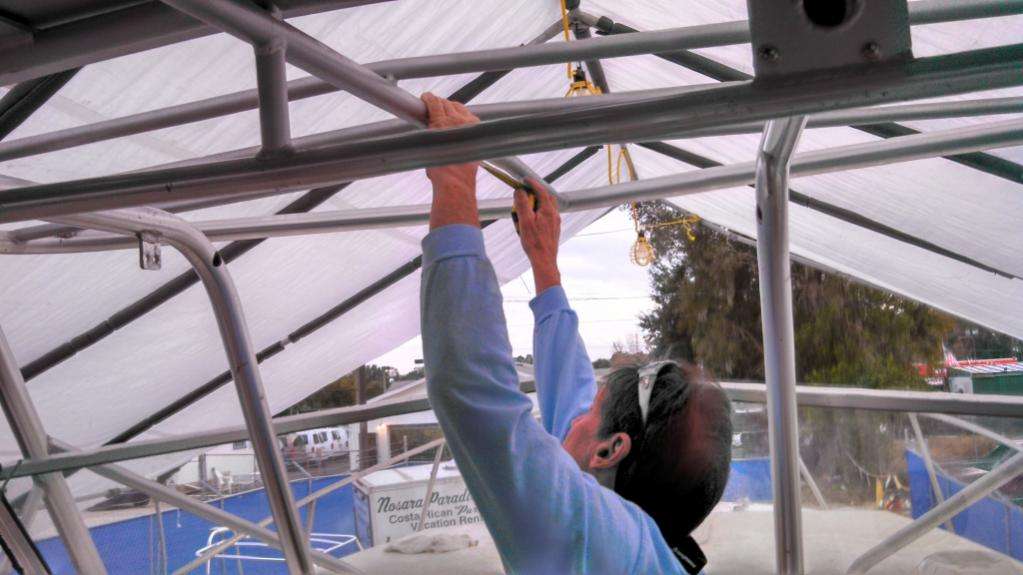
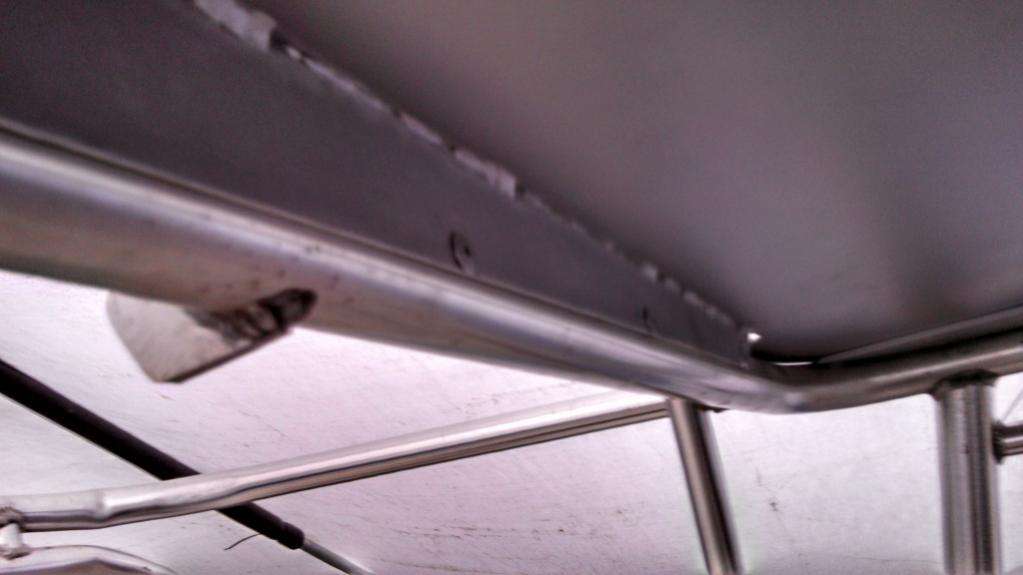
We then moved on to the final install of the outrigger mounts. This Lee’s Tackle design is strong as a brick and well-proven, however you have to get the angles just right for them to lay flat without binding.
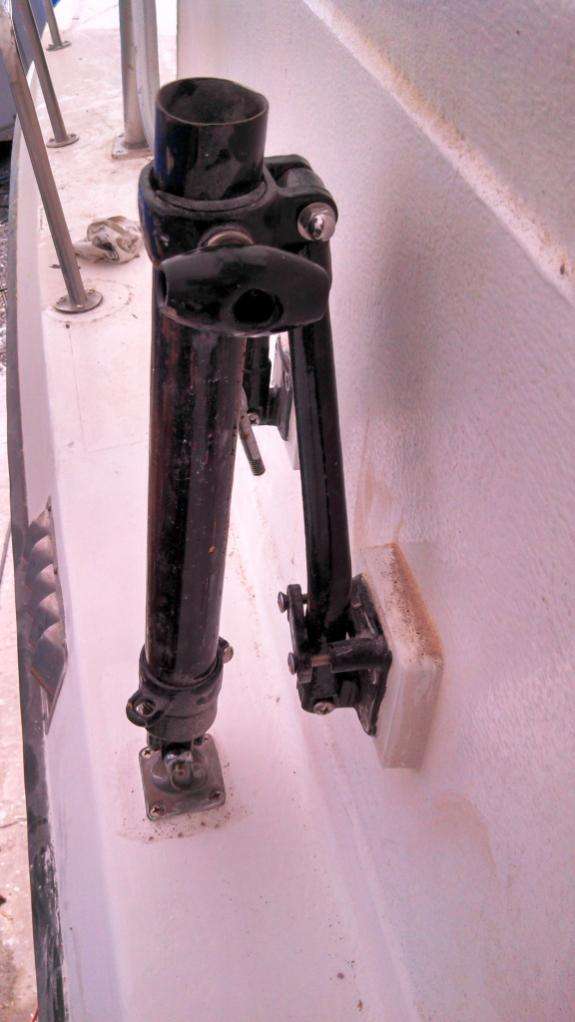
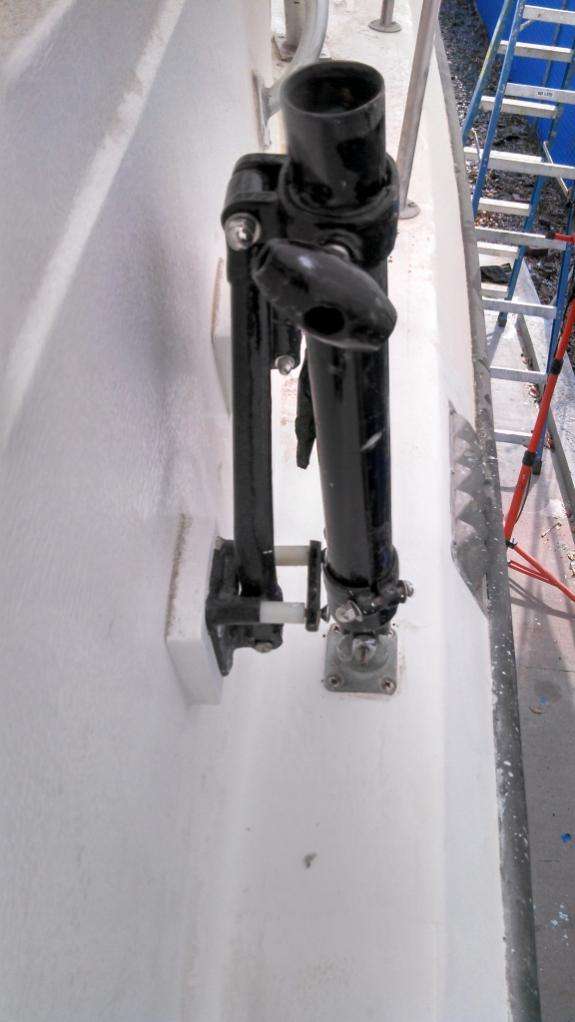
In the last post we epoxy sleeved the holes, and now we have secured them permanently.
Recall two posts ago we glued and screwed the windshield back into place. They are in there super-strong, but the look was a little ragged.
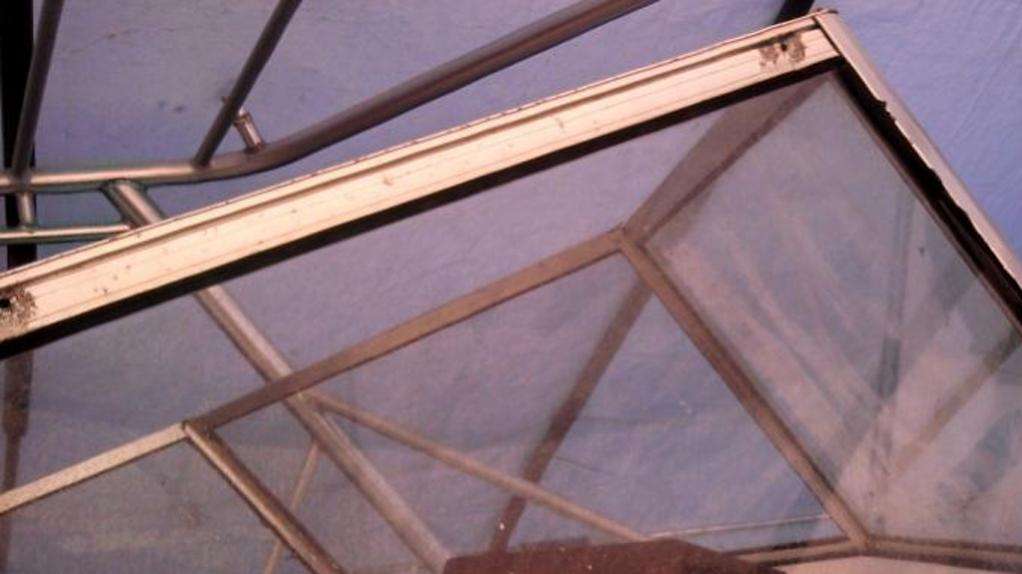
Previously this boat had vinyl curtains that snapped into the window rail, but now Brian has fashioned this slick black lexan trim pieces.
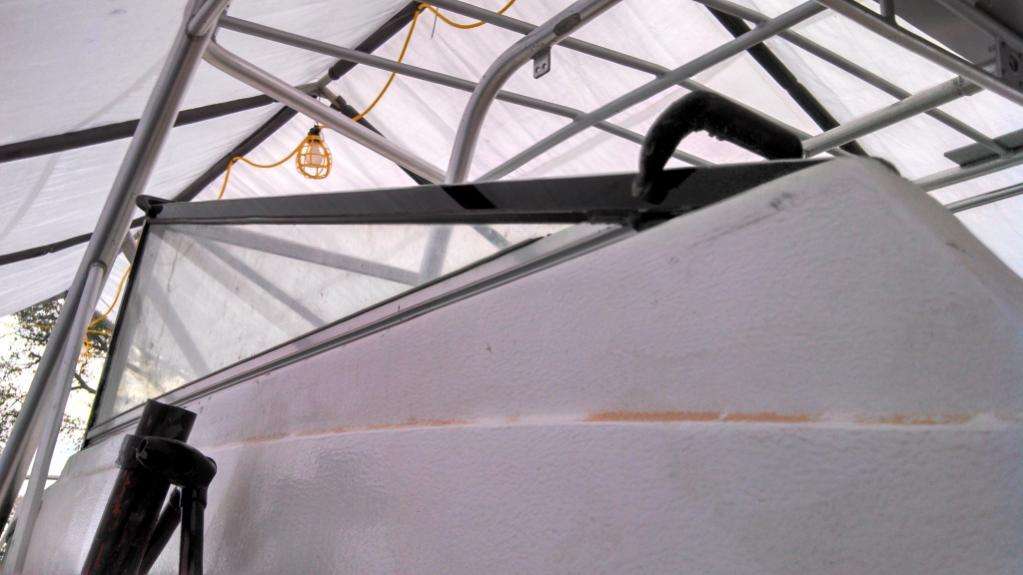

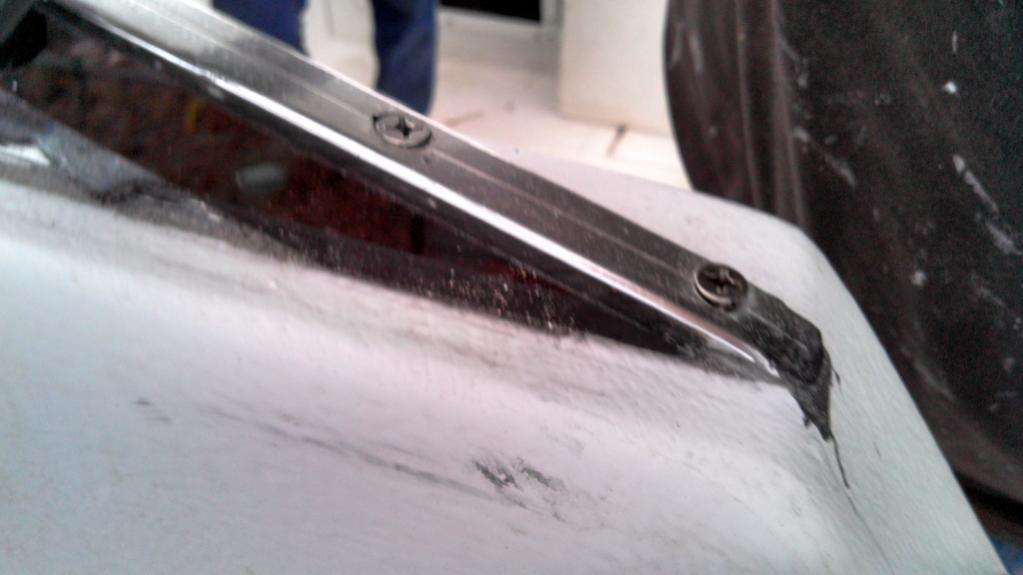
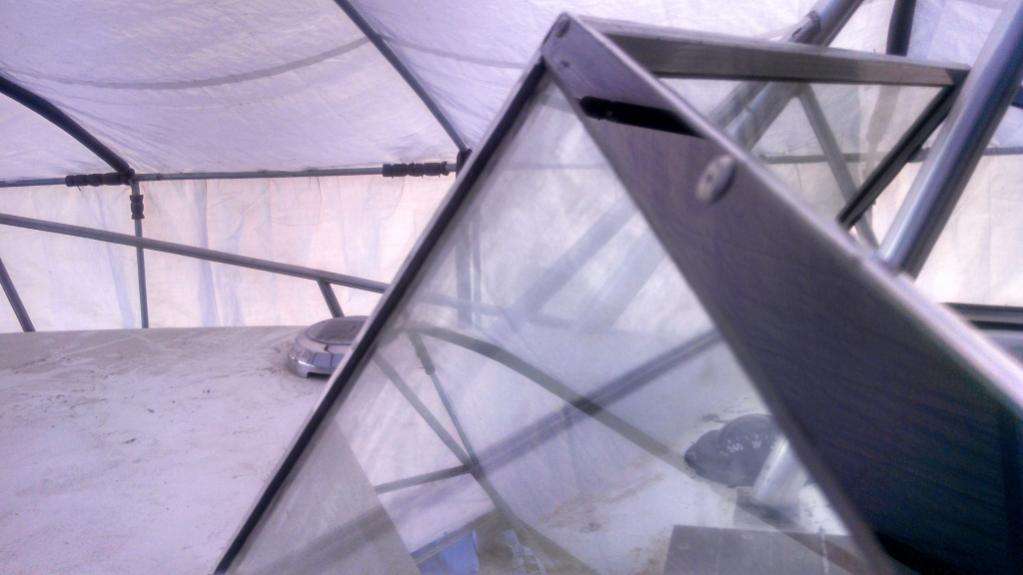
We’ve detailed how the closed Craig ever comes to blueprinting something is a post-it note sketch:
or a magic marker:
But this takes the cake. Check out his detailed instructions for the dashboard, marked out in fiberglass dust.

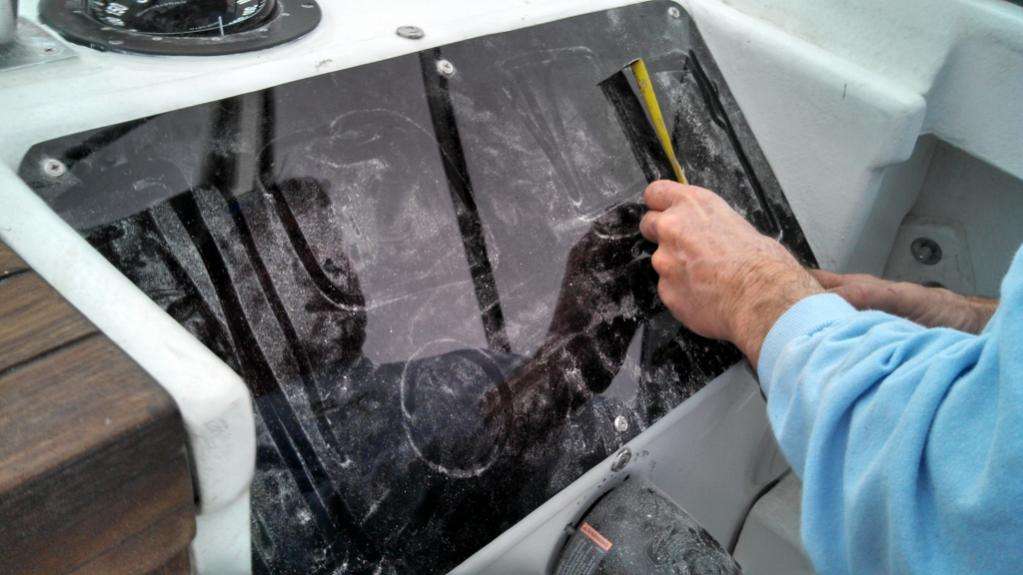
It works though! Check out the first wave of dashboard installation.
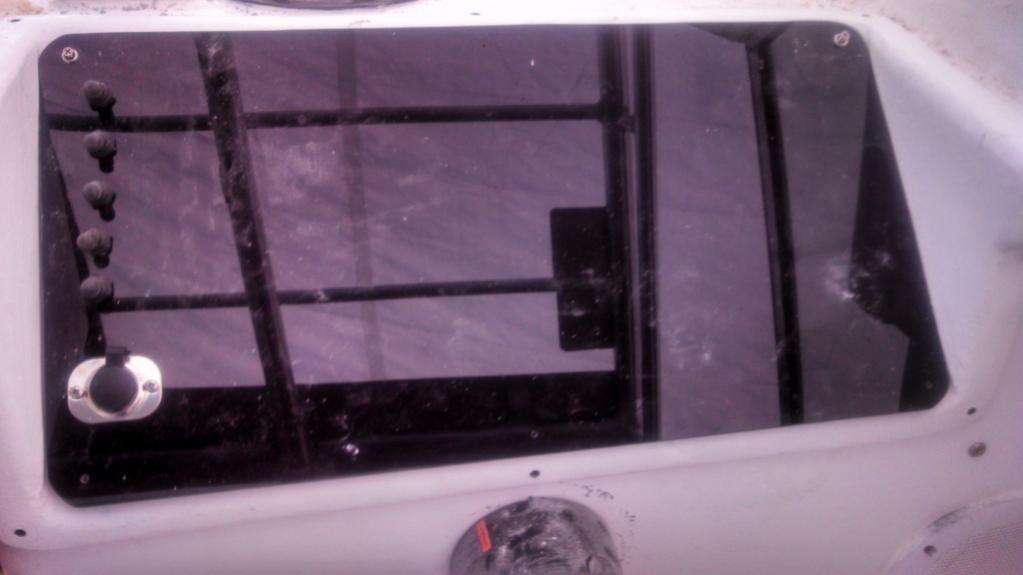
Below decks Craig installed the first three pumps and seated a pair of scuppers on the bottom; these will feed the livewell and tuna tubes.
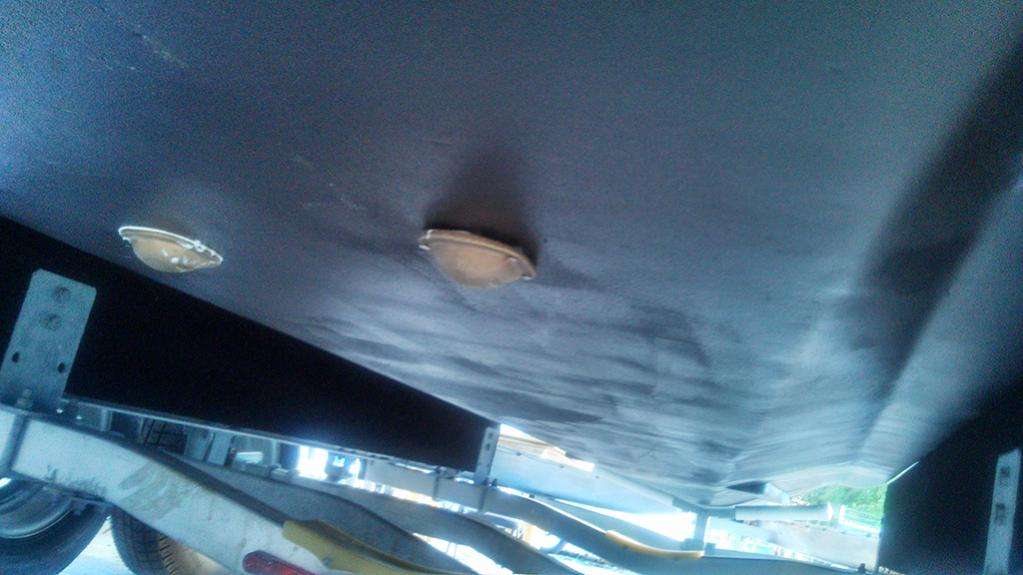
The last exterior detail was the installation of the rubrail rope. The only old wives tale to make this easy is to get the rubrail in the sun and soak the rope in soapy water.
With sub-30 degree temps, we were not about to do either. Instead the three of us rotated between holding the rope (easy), spreading the rail (medium-hard), and hammering the rope into place (hardest).
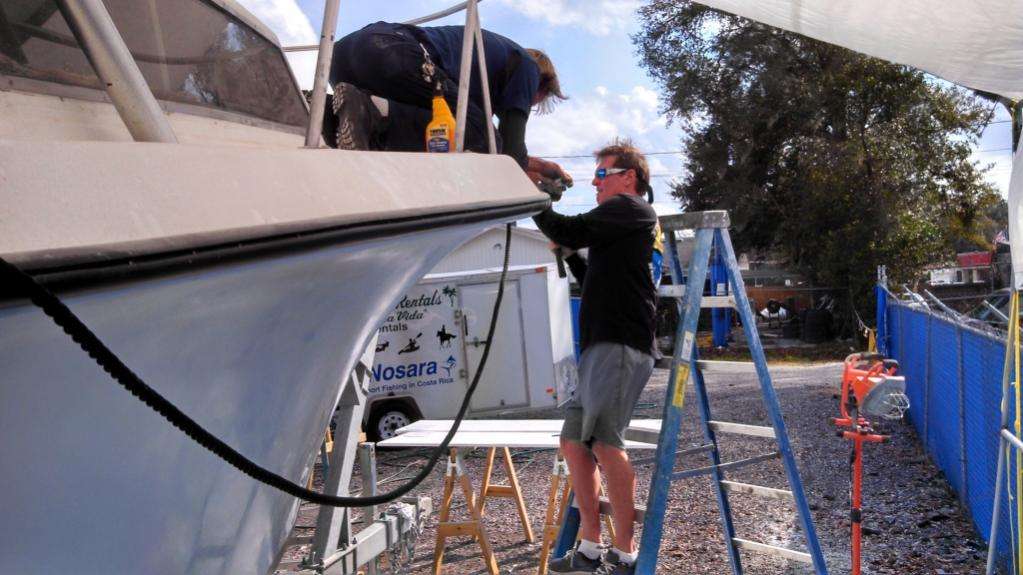
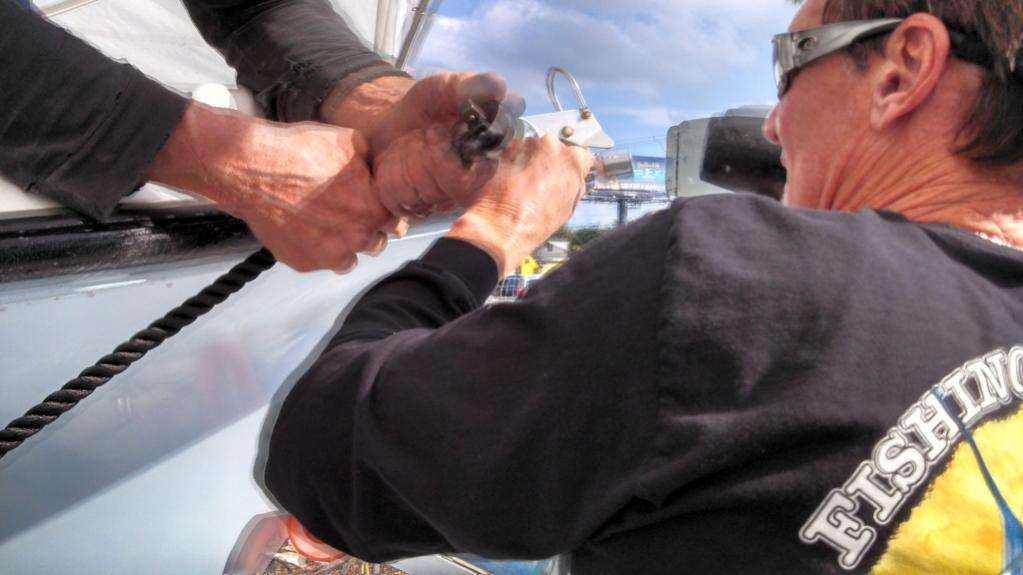
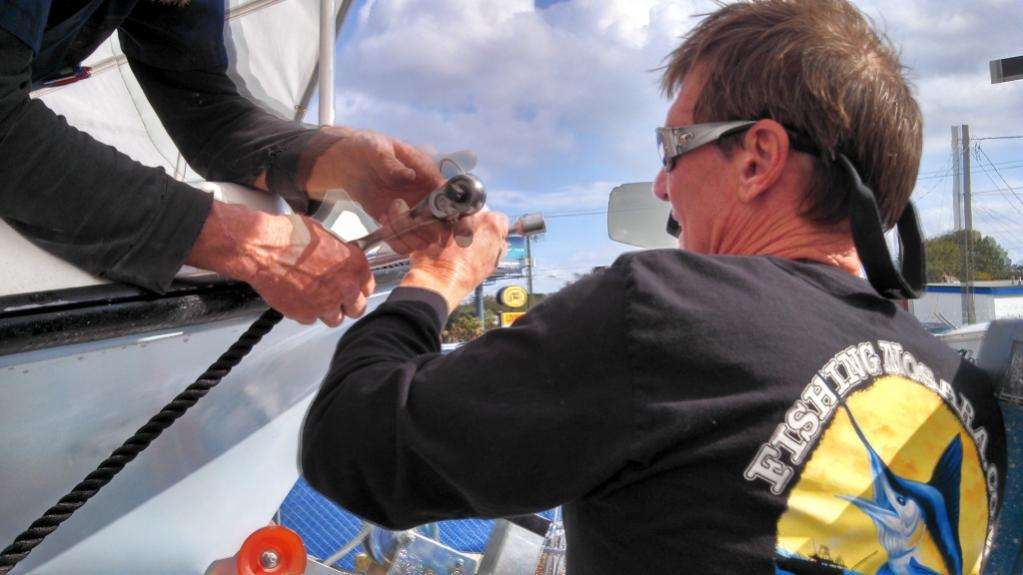
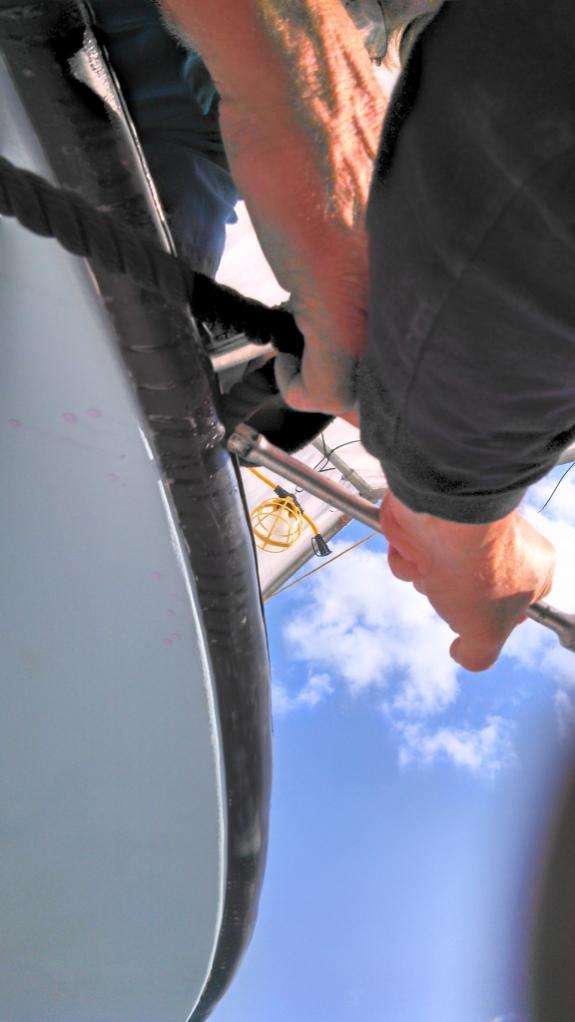

The toughest part is that it is all over-head work, meaning that eventually your arms turn to jelly.
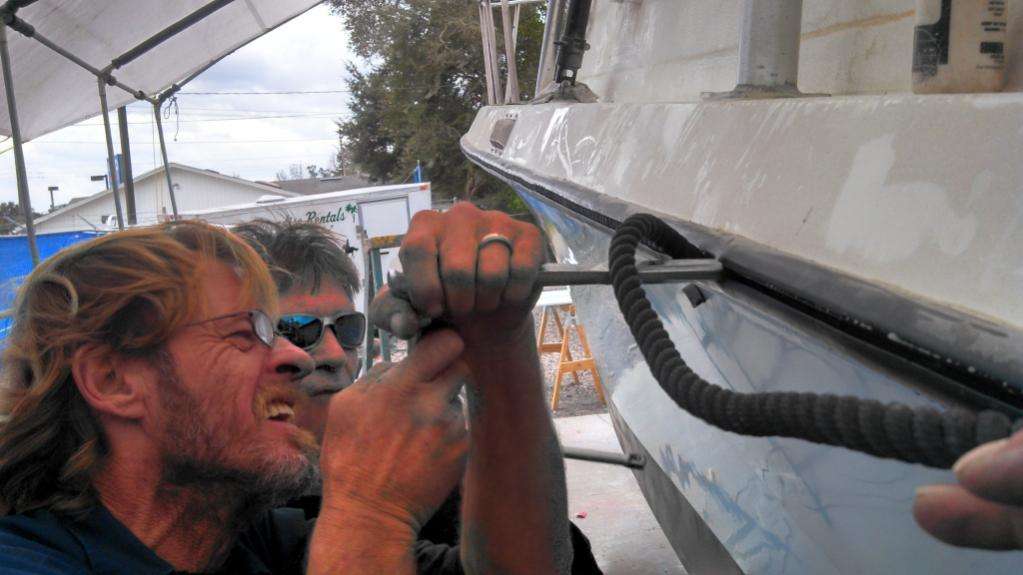
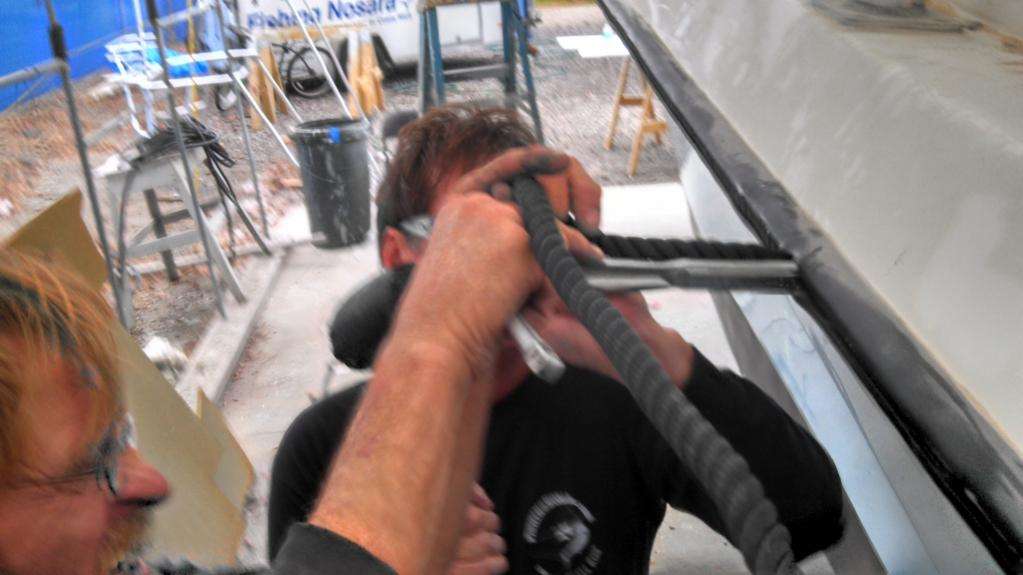
It took about three hours, but we are stoked with the result.
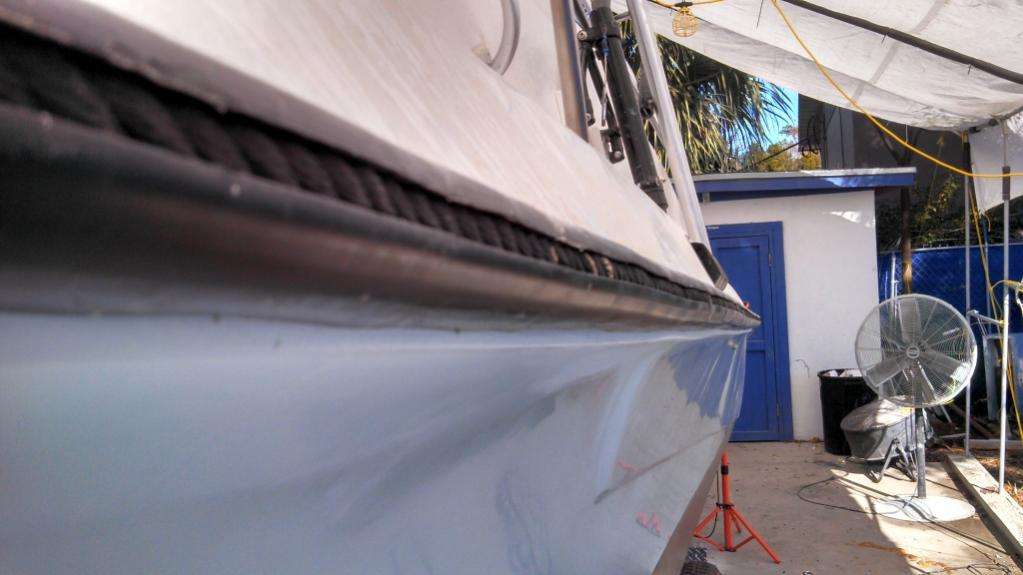
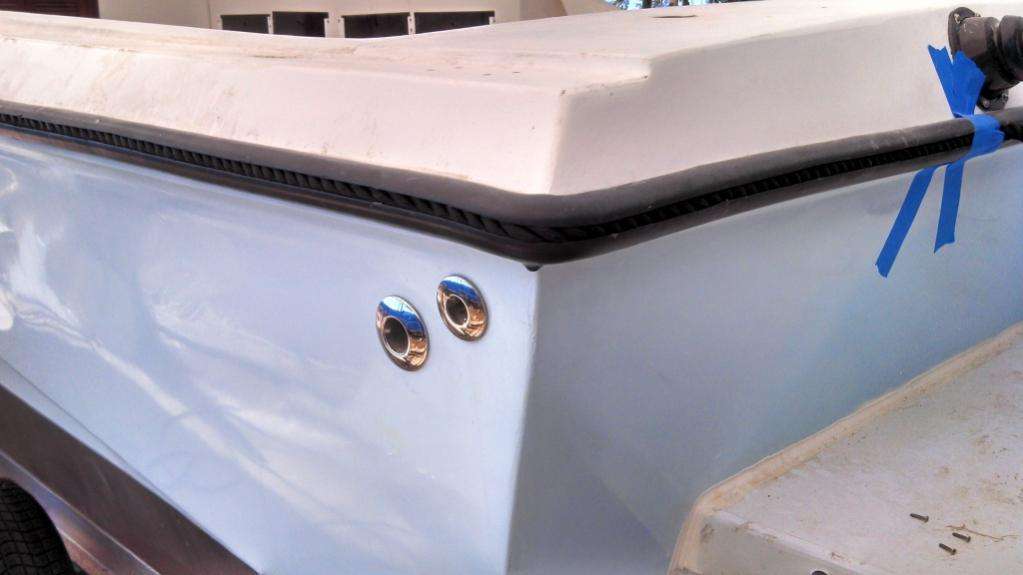
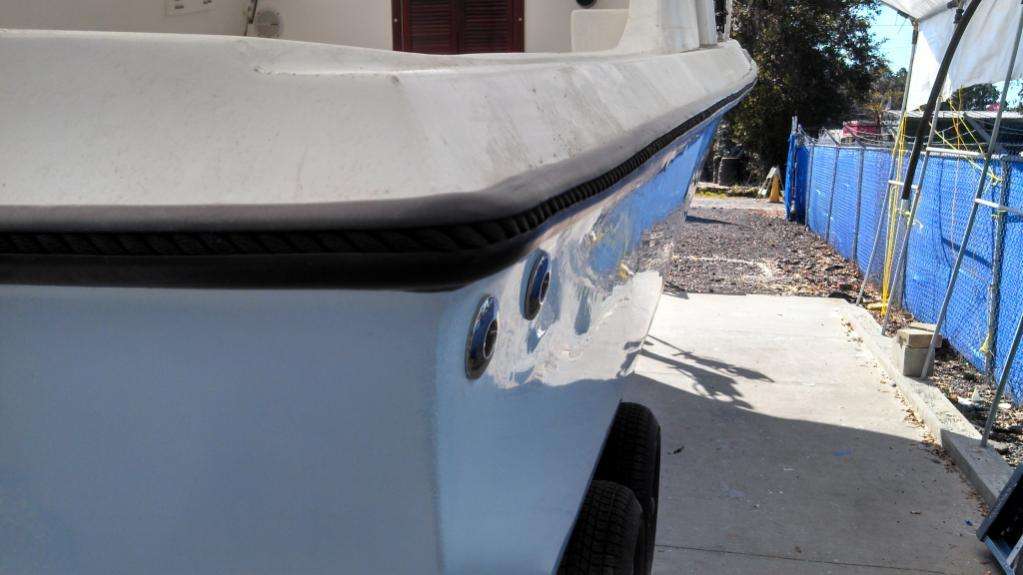
Most recently Matt rolled a few fresh layers of gelcoat on the interior.
We have nicked up the floor so bad that the entire surface will be repainted by the time we are finished, however these two areas were bumped to the top of the to-do list.
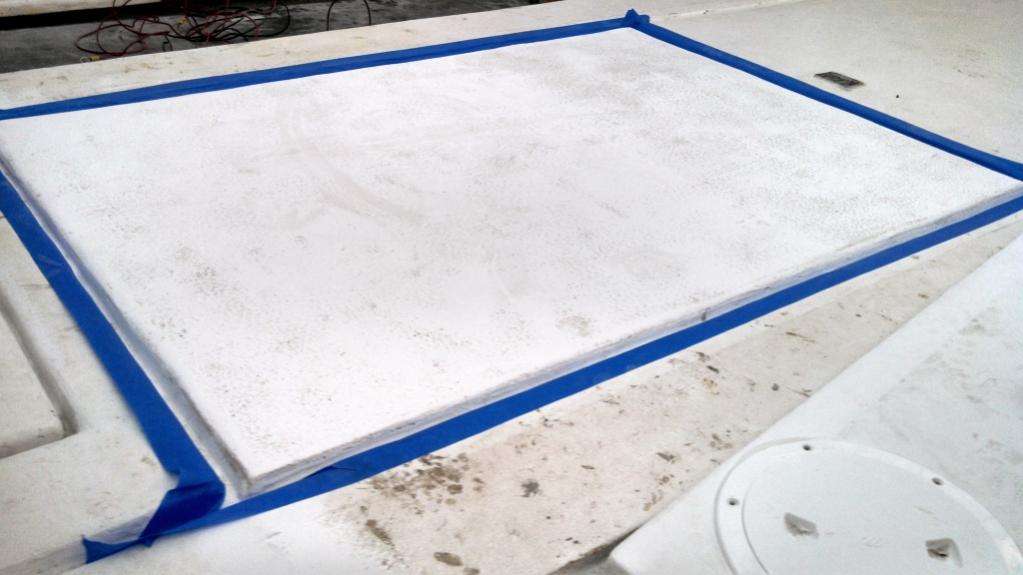

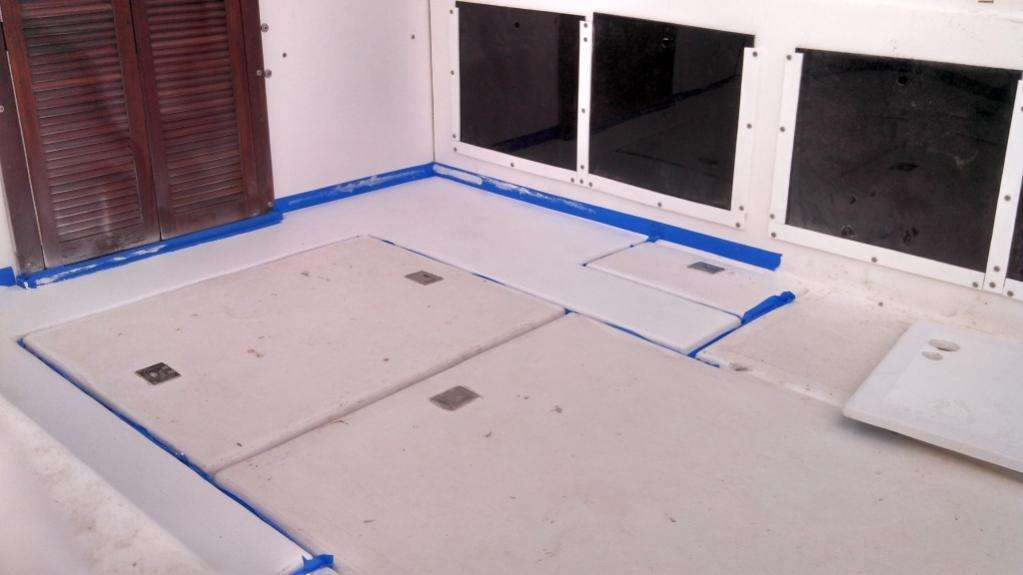
This is because we need to install the captain’s chairs and fighting chair, and don’t want to screw around with tape lines.

We are getting there, but as the old saying goes “In a hundred mile race, 90 miles is halfway.”
![]()
January 20, 2014 – Day 661
The accomplishments are coming in bunches on The Discoverer Project. We have completed a large portion of the electrical wiring and plumbing.
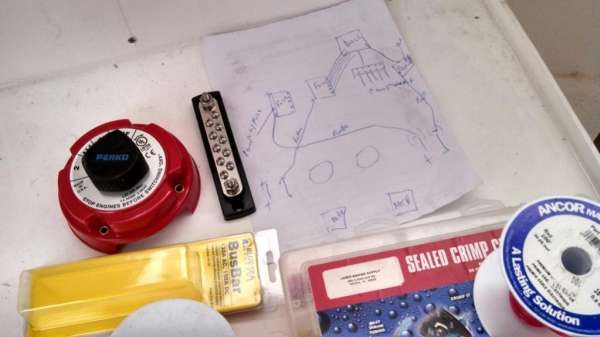
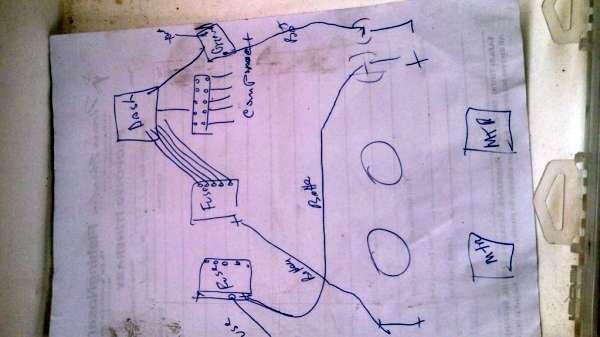
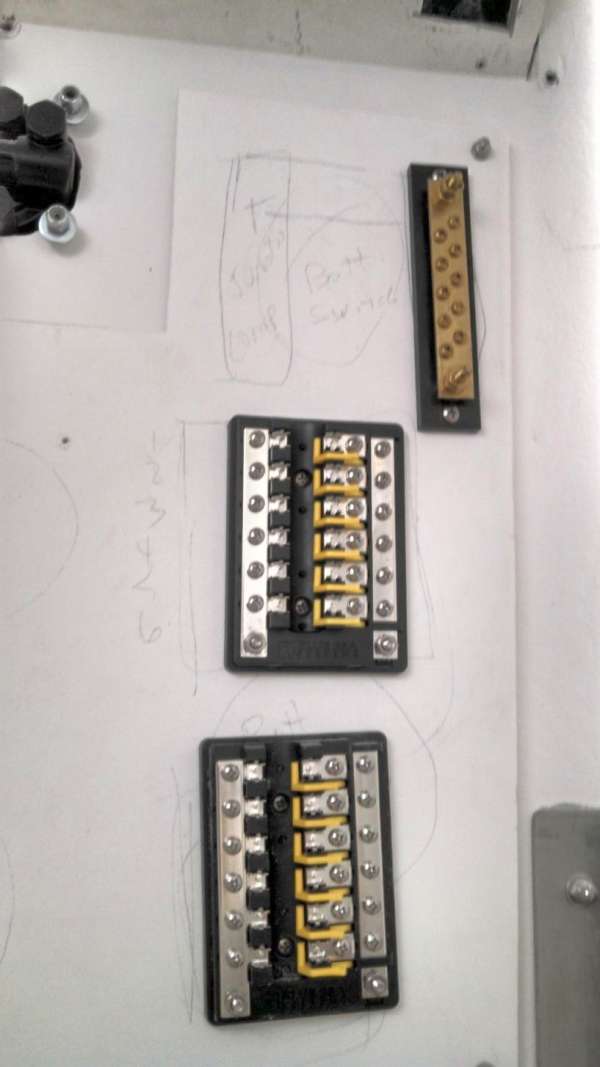
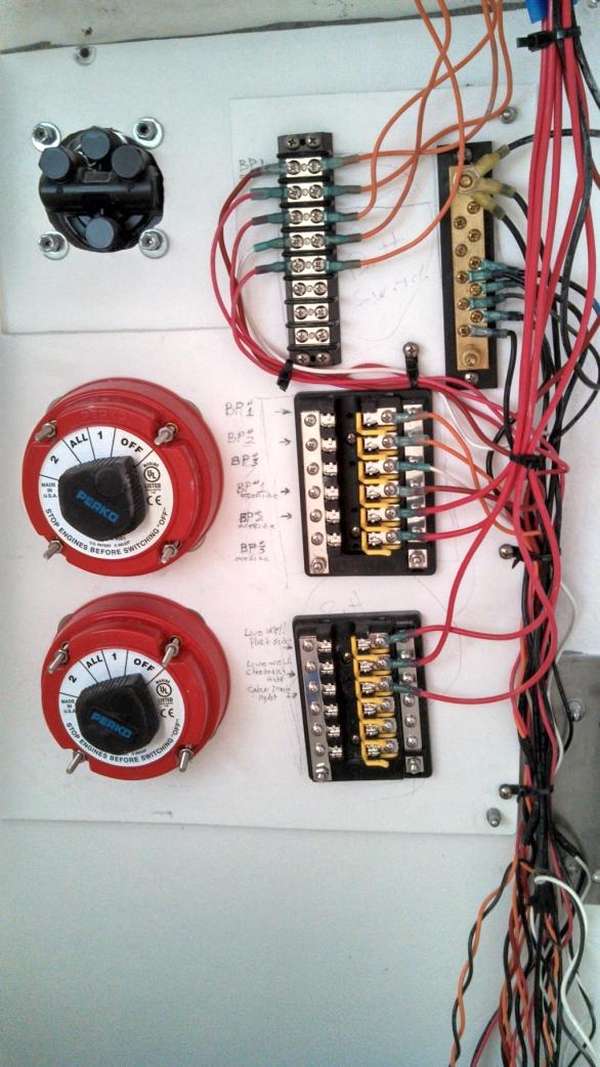

We did not want to hamstring ourselves, so we have held off on installing the wall to the electrical closet until the wiring is complete.
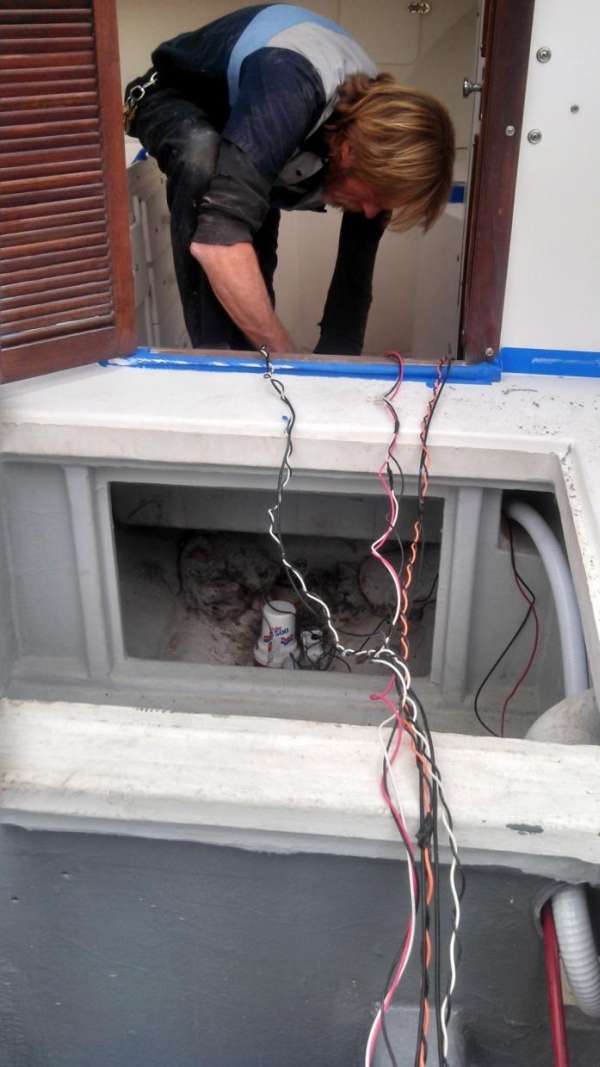
Clearances are tight so we are trying to plan ahead as much as possible.
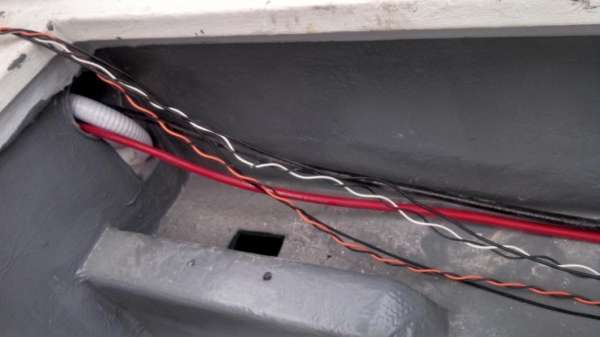
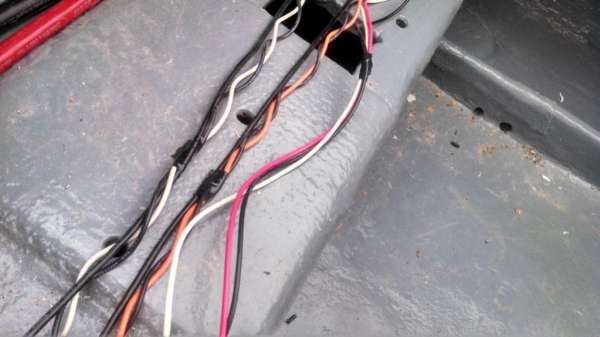
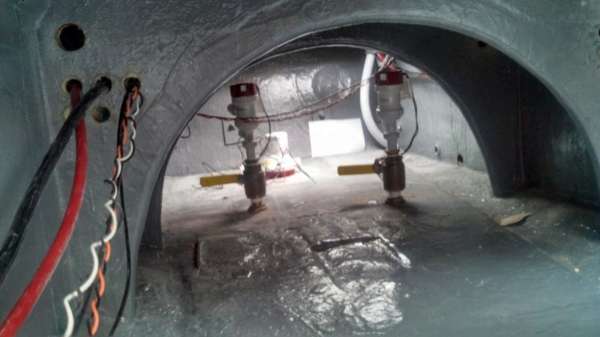
Oddly enough, the bilge outflow hoses won’t fit through the control tubes under the transom because of all the battery cables and control lines.
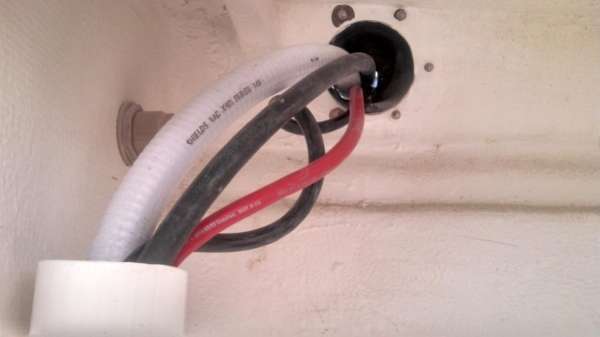
Therefore we are running them to the middle of the boat and then run out under the gunwales. It requires a lot more hose but cleans up the clutter in the bilge.
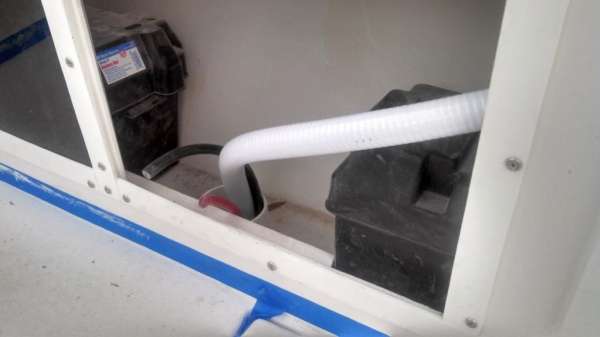
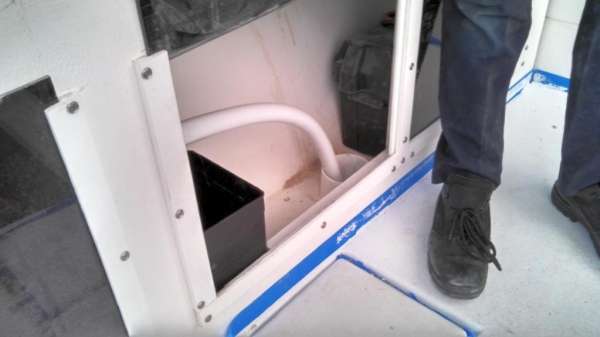

We also received our new seat covers and cushions and installed the pads for the upper station.
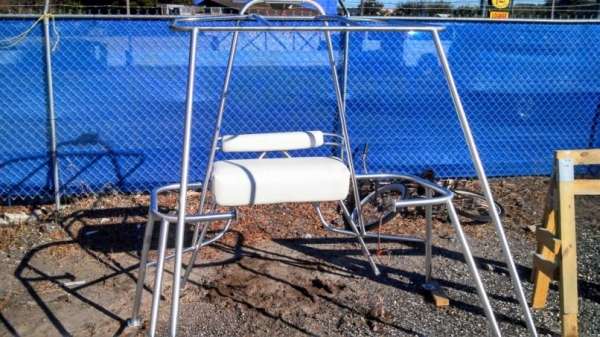
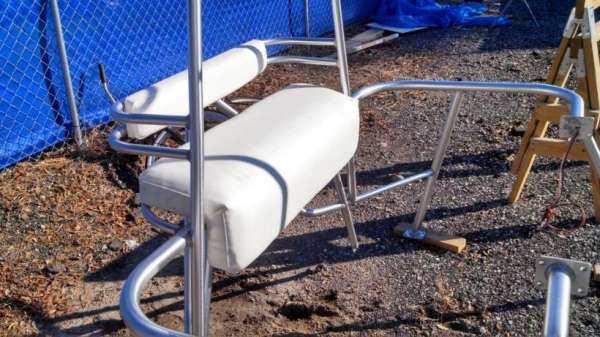
Also Craig and Brian finished fitting the fuel deck covers after installing the shut-off valves.

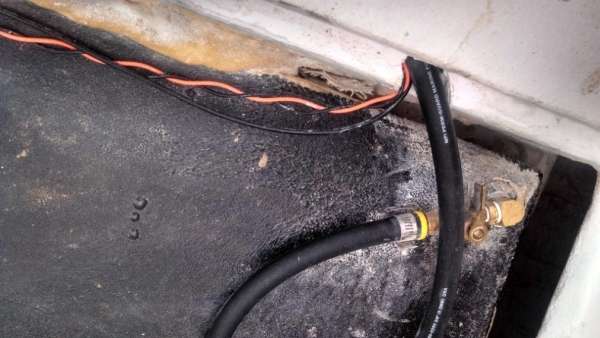
A rouge hailstorm and 50+ mph winds cause a little damage to the tent, but a quick morning of repairs got us back in business.
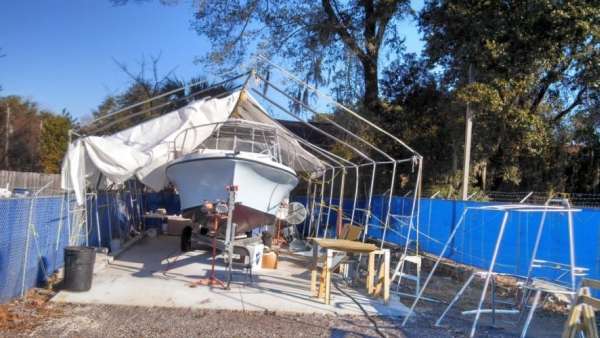

Anyways, we won’t need the tent for much longer as we have finally hit a major milestone: installing the full tower.
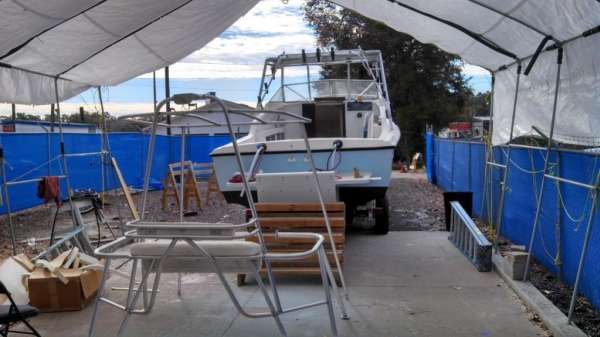
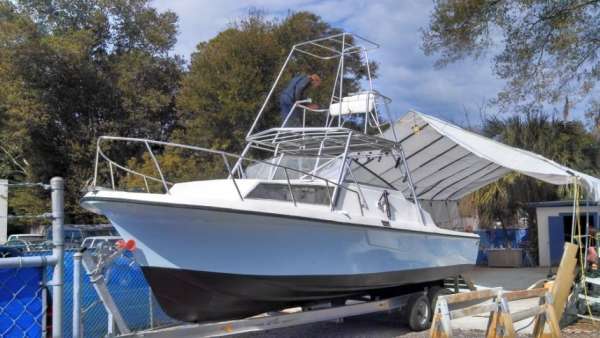
The tower presents more routing issues, but in the next week or so we should have all the lines and cables run for the throttles, steering, and power for the upper station.
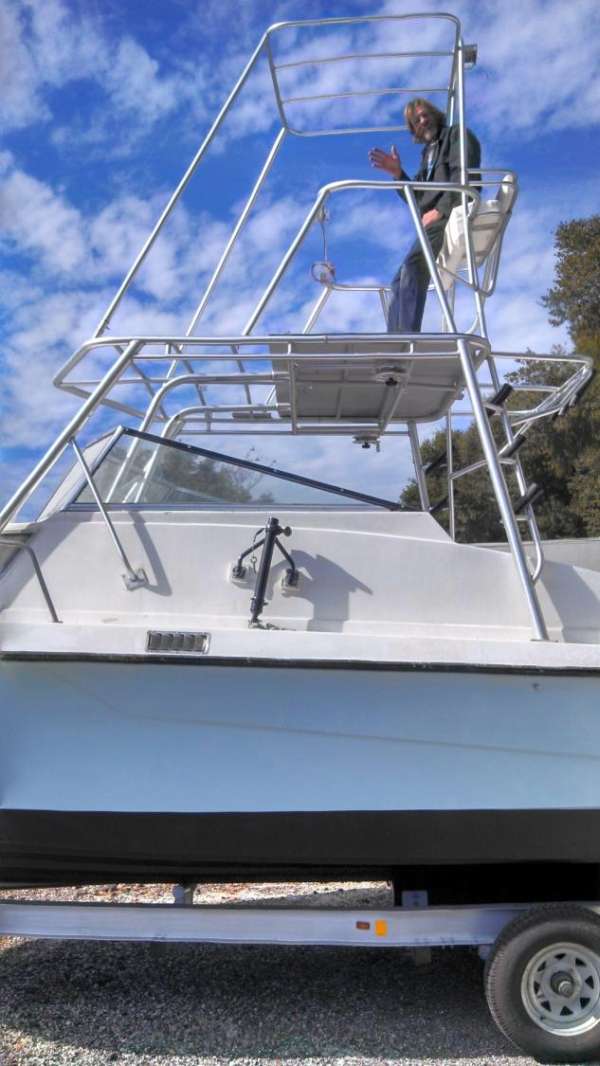
We look forward to completing the final repaint of the inner hull and tacking on final accessories like the bottom machine / transducer, chairs, and of course twin outboards.
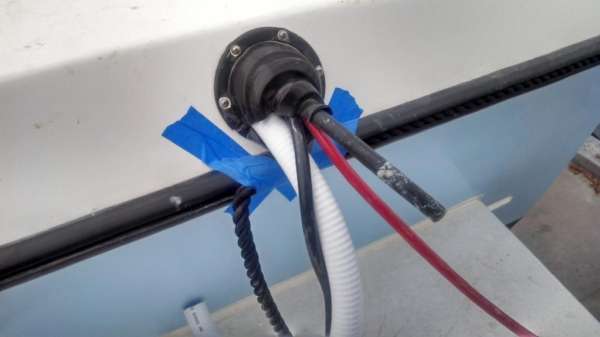

![]()
February 7, 2014 – Day 679
What a fantastic week of accelerated progress on The Discoverer Project!
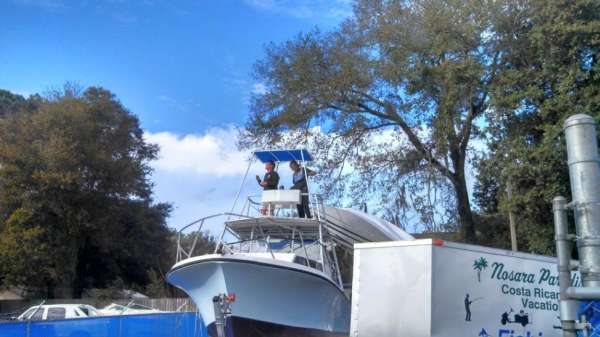
With the tower in place Matt and Brian plowed ahead with the tricky task of routing a wad of control lines and hydraulic tubes up to the flying bridge.
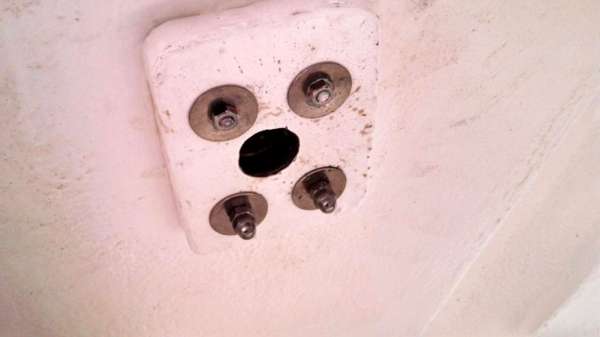
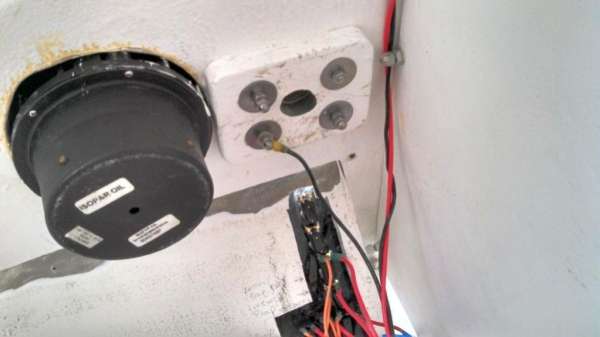
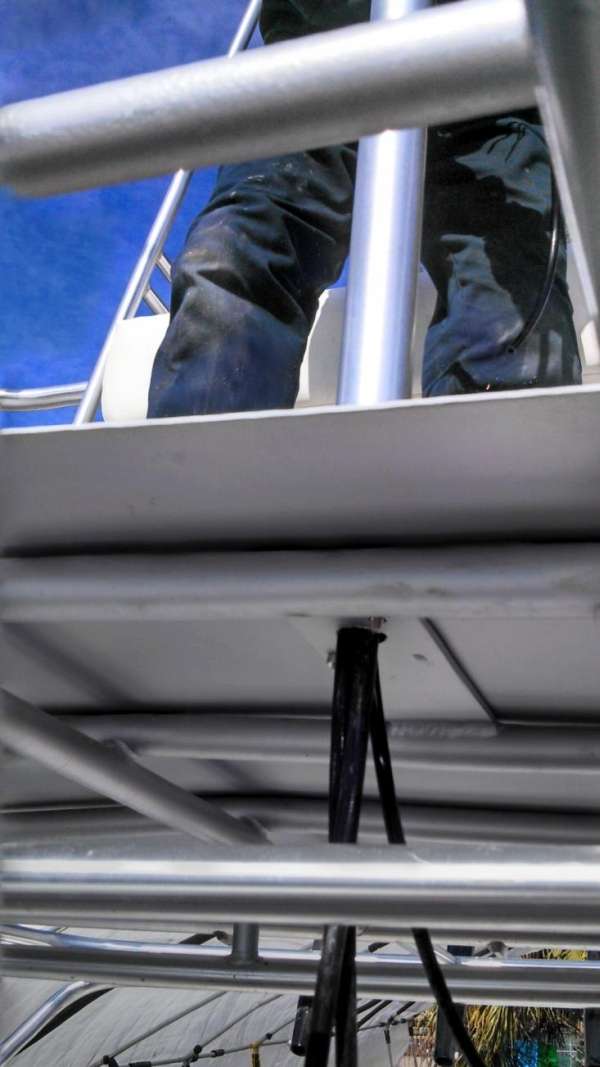

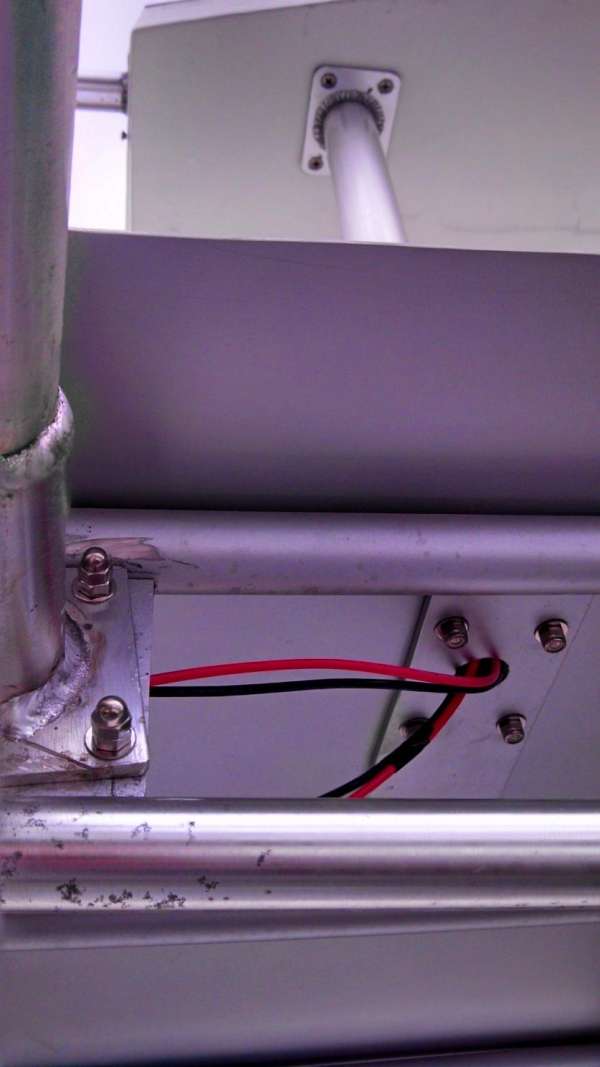
Brian has engineered in enough slack in the cables to allow for the top control box to fold down for transport. Also the electrical connections for the spreader light are on a quick-disconnect for easy fold-down of the tower.

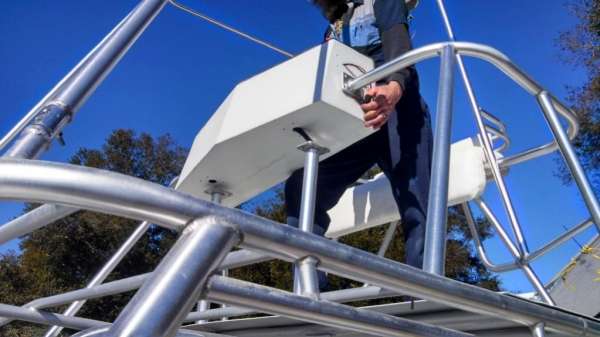
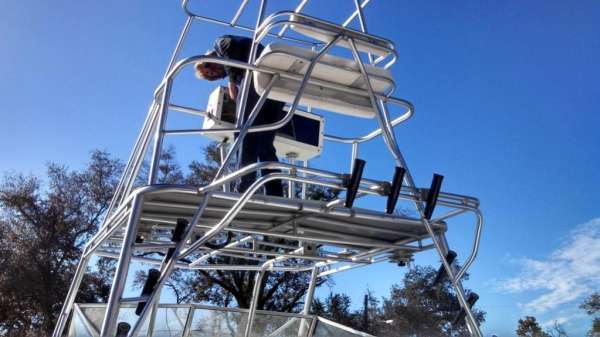
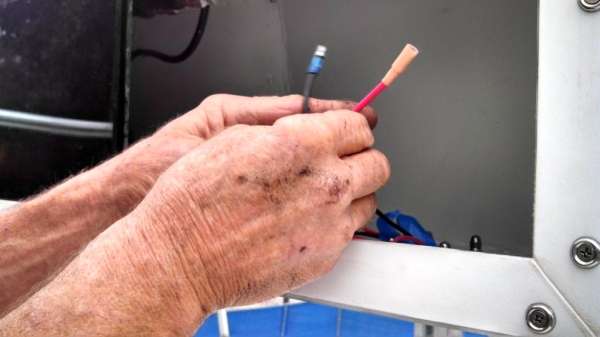
Clearly this has cluttered up the engineering closet quite a bit, but everything is still clean and well-labeled.
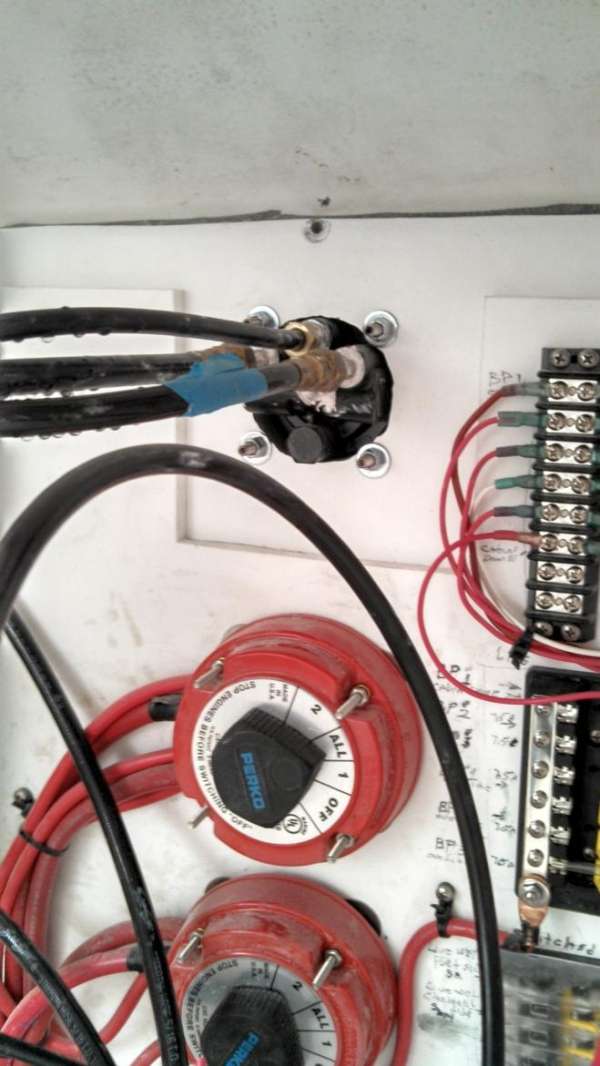
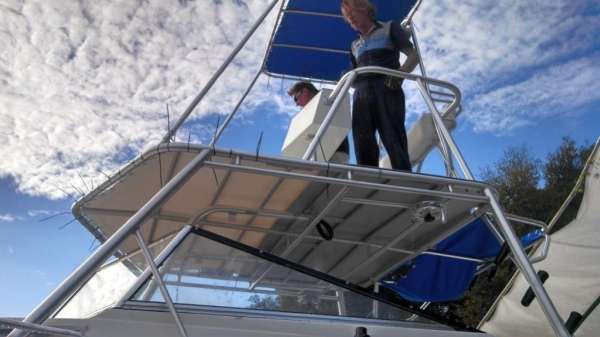
Craig was so stoked to see the tower up that he got right to work lacing up the canvas tops.
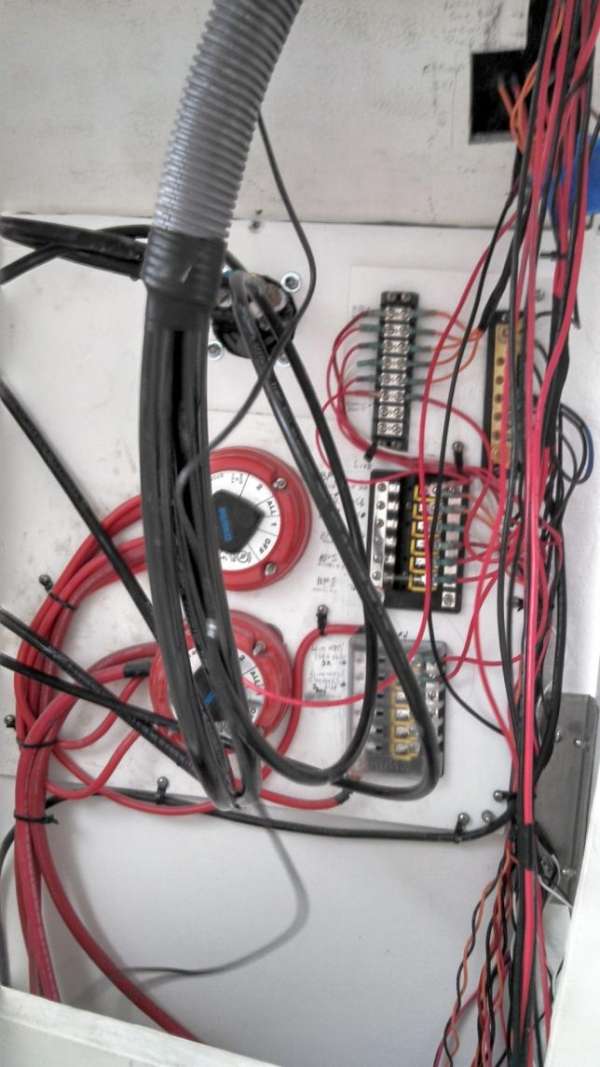
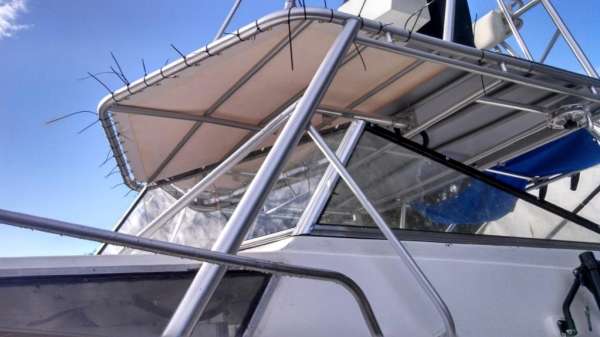
Meanwhile, Matt has been below decks finishing off all the wire runs with clamps and conduit.
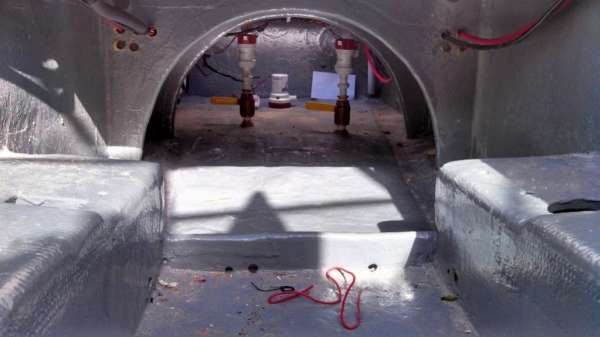
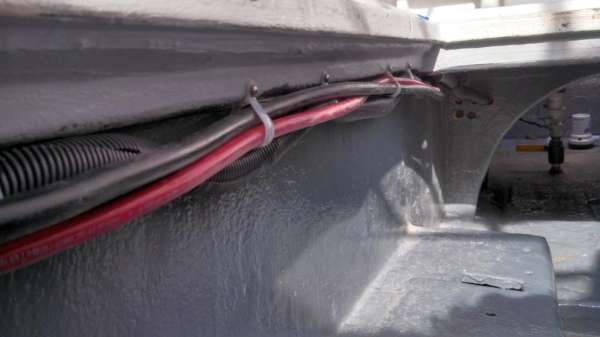
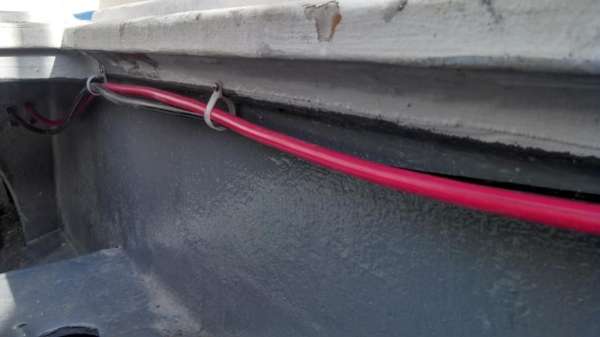
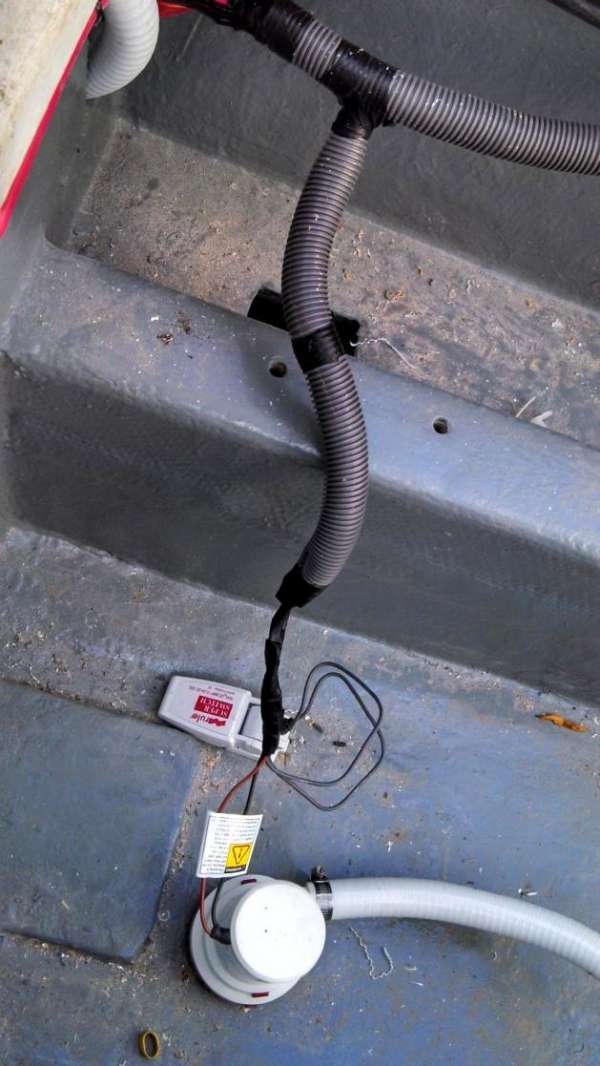
He also has fabricated up a neat plate to mount the three way valves under the fighting chair; these valve placements must be 1.) Strong enough to accommodate the weight of the valve, 2.) Easily reachable from the cockpit, and 3.) Not pierce through the stringers to which they are mounted.
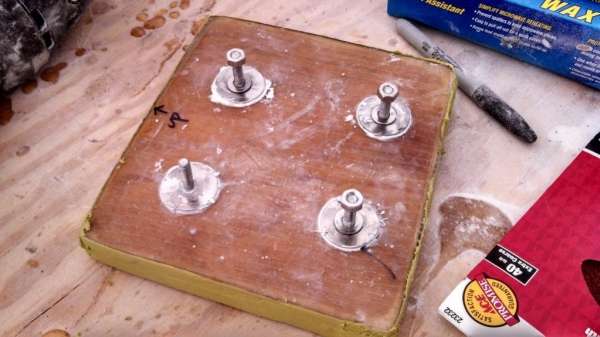
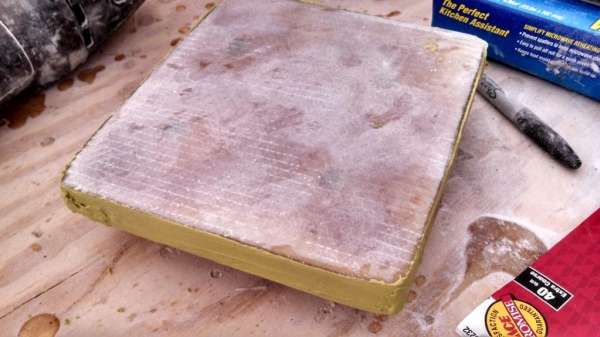
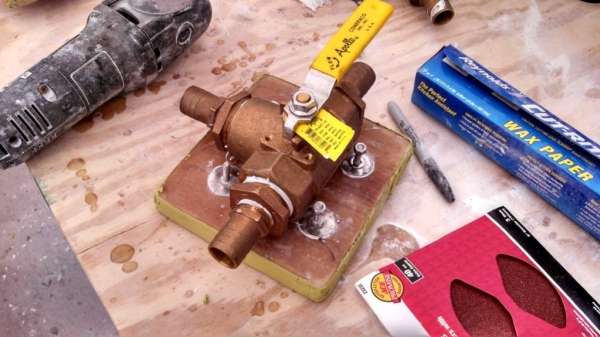
These countersunk bolts are epoxy-sleeved within a marine plywood sandwich. The whole plate is then epoxied into place, and soon will be further wrapped in fiberglass and painted to match the bilge.
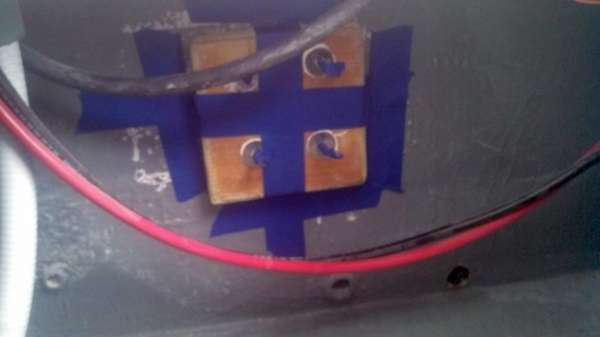
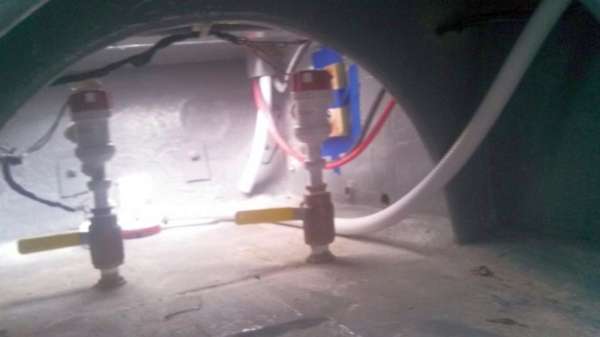
This is definitely one of those things that would be a lot easier to install BEFORE cluttering the area with pumps and wires, but this is the fun of one-off boats….NO PLAN!
While we were under the floor we installed the fighting chair mounting plate, epoxy-sleeved of course.
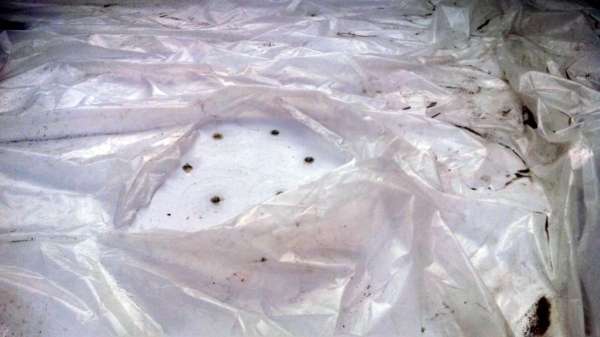

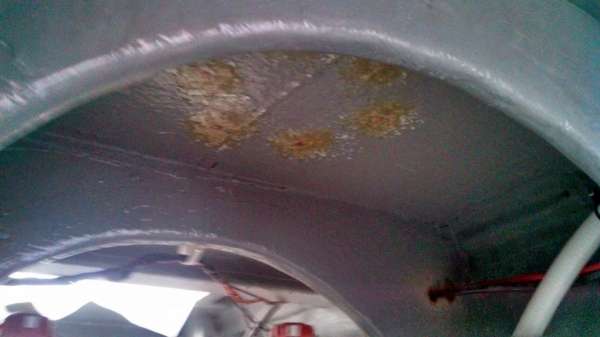
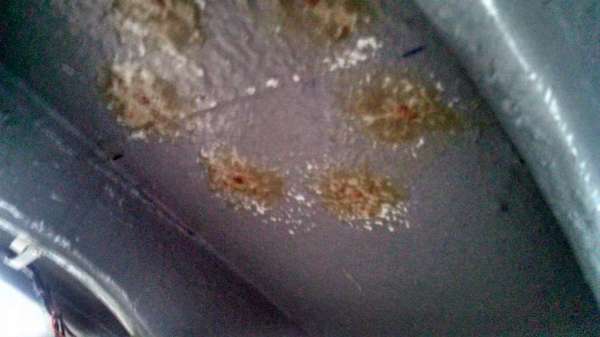
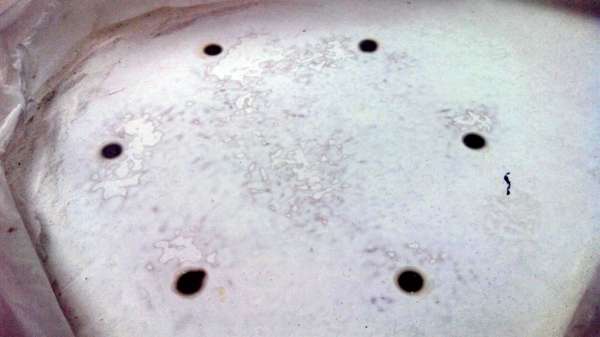

Most recently Matt rolled the whole interior with a final coat of textured gelcoat. This helps cover up the scratches, nicks, and spills accumulated over the last few months of rigging.
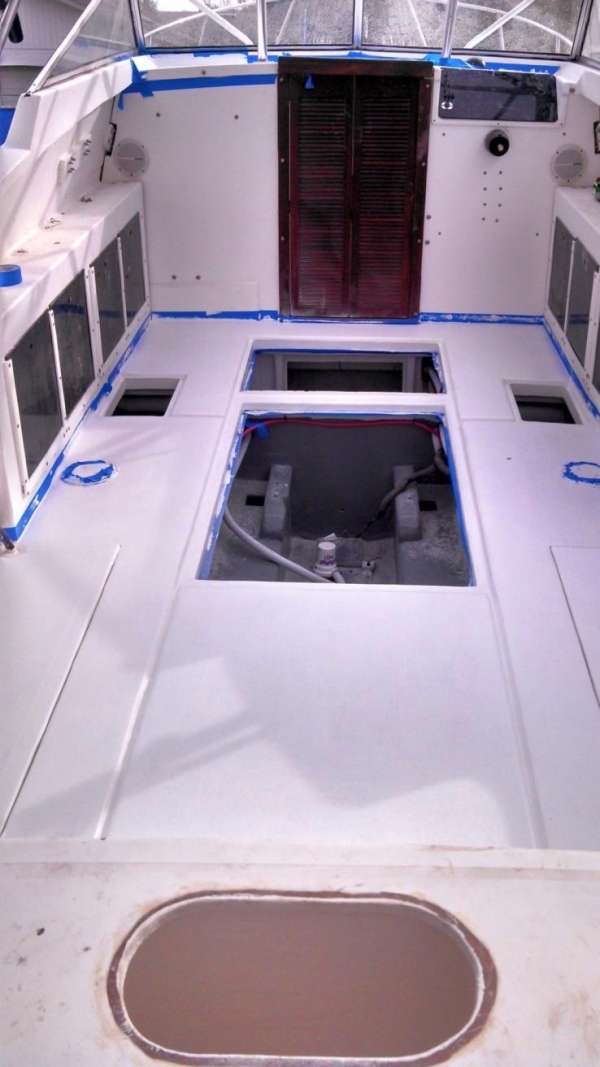
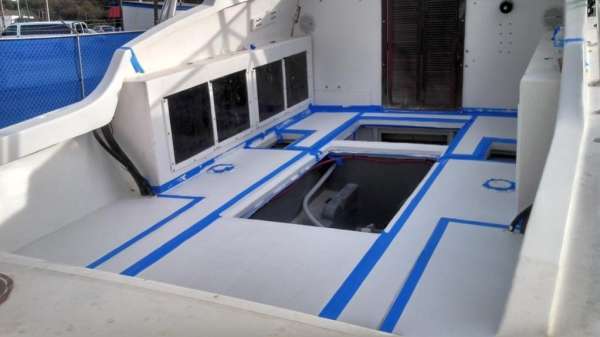

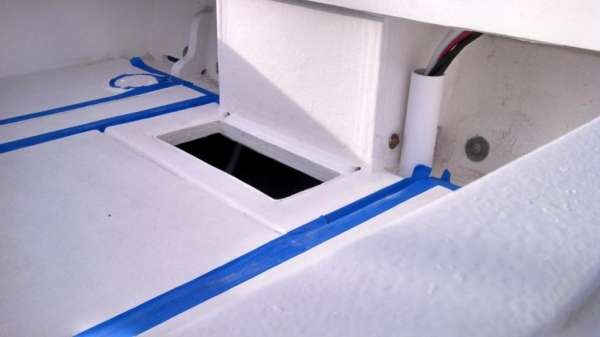
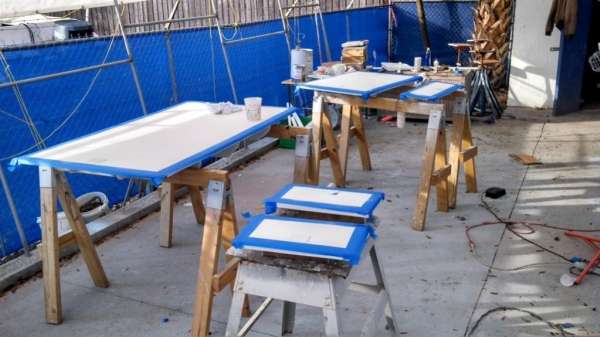
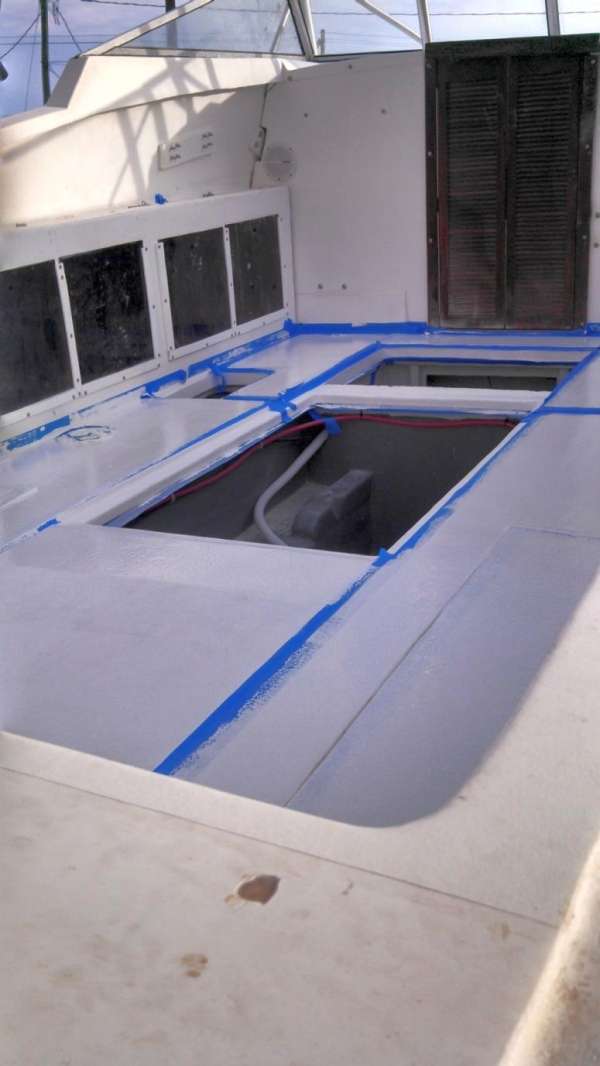


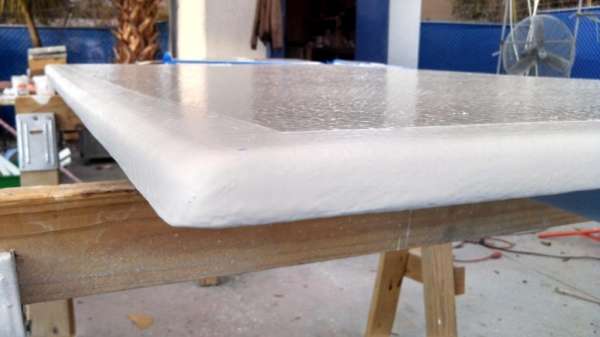
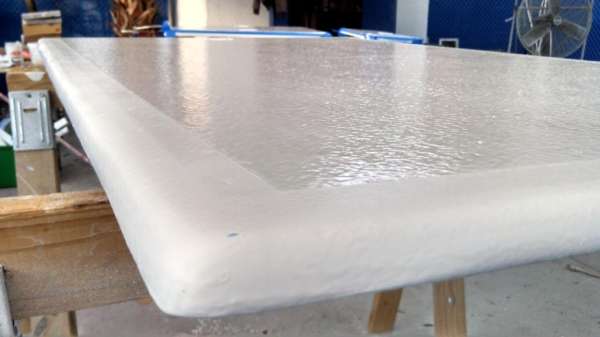
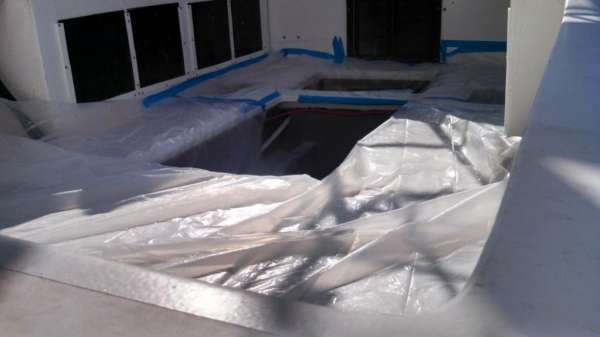
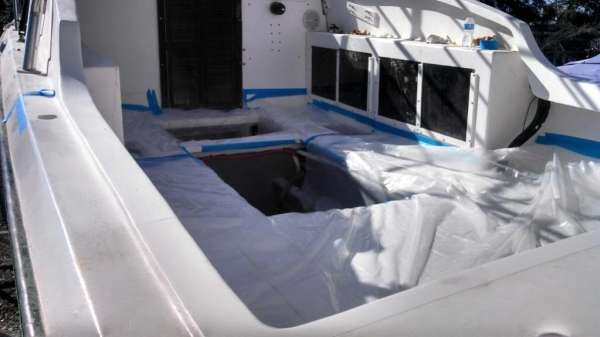
Up next is the steering, throttles, and a little bit more odds and ends like upholstry, installing the head, and of course installing the motors and fuel delivery system…still after coming this far is hard not to peek ahead at the finish line.
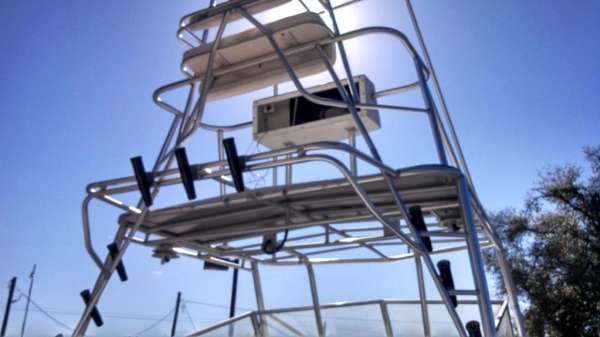
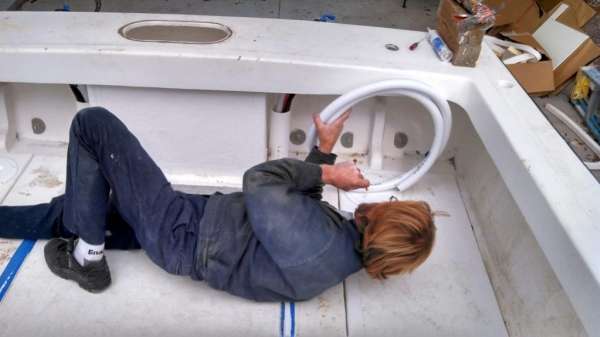
![]()
March 10, 2014 – Day 710
Big news from The Discoverer Project!
With a lot of help from our pals over at Tidewater Boat Works, our pair of Yamaha 150’s are hung and ready to fire.

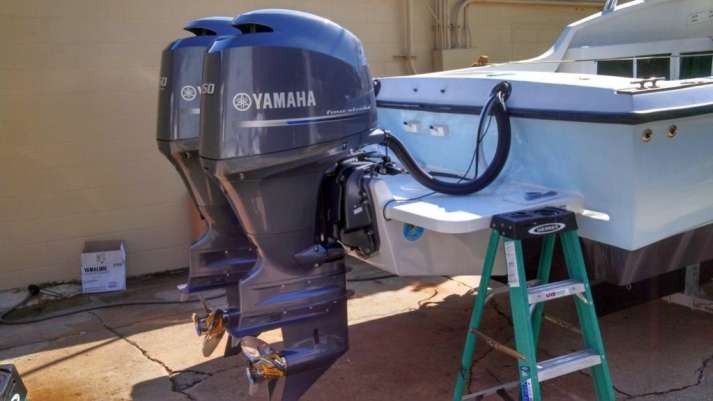
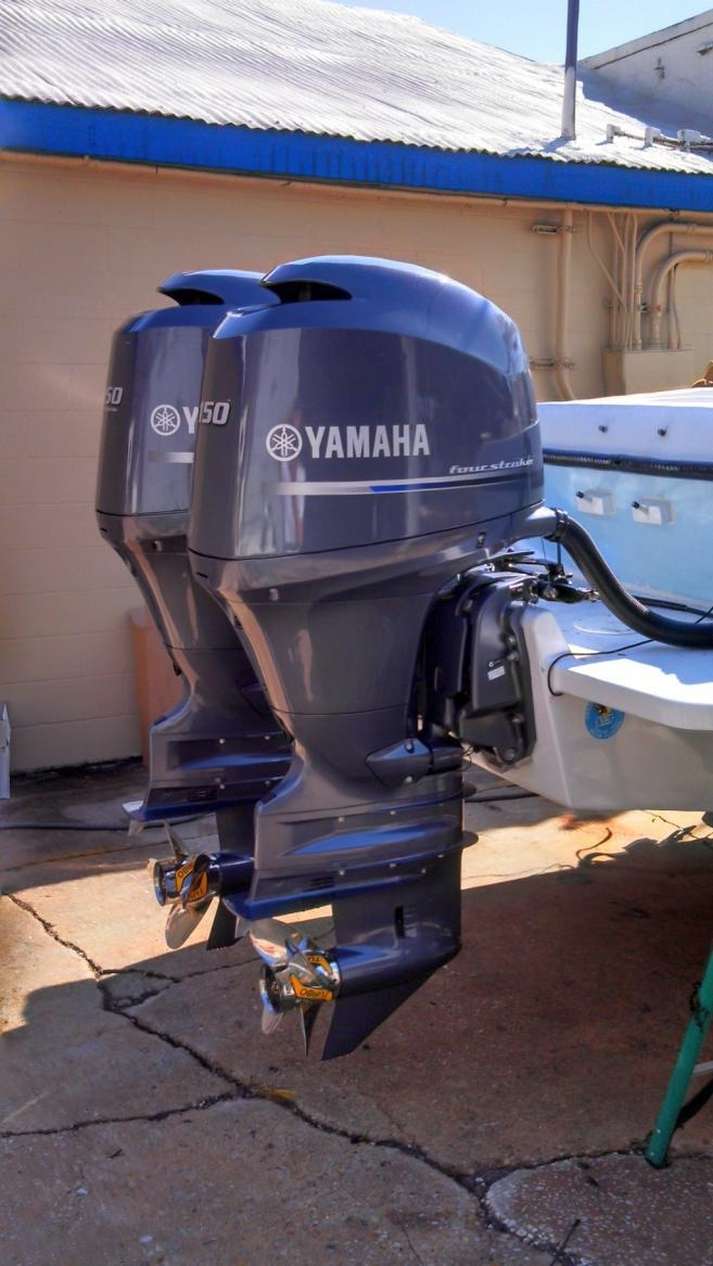
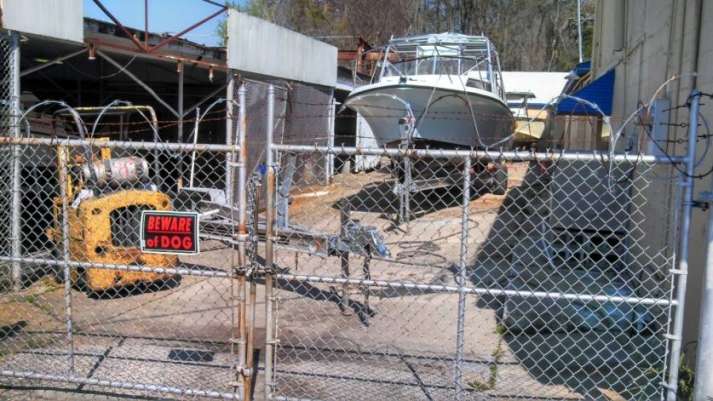
Brian and Craig were on hand to assist and to hook up the power lines, fuel hoses, and finish installation of the fuel/water separators.

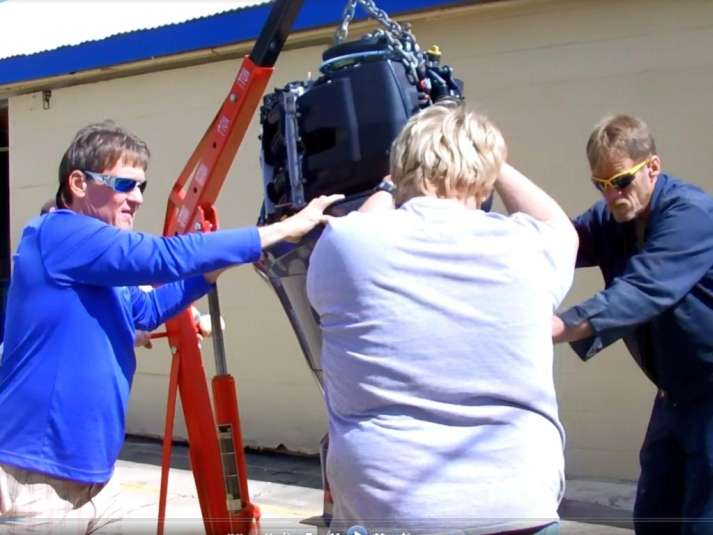
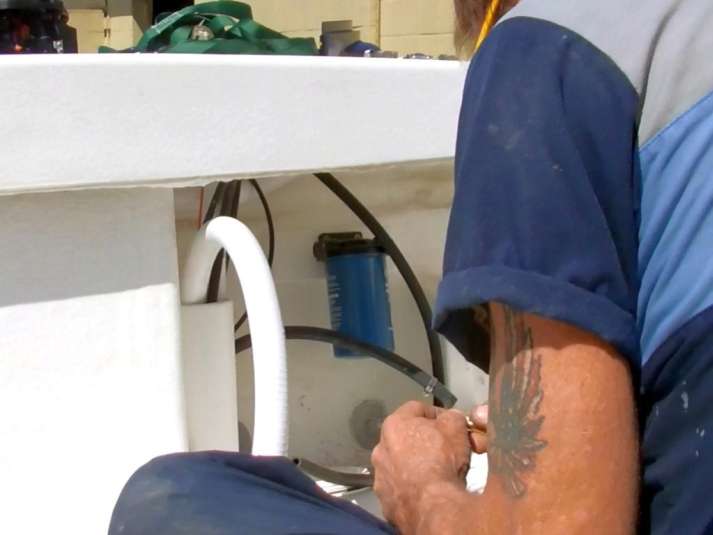
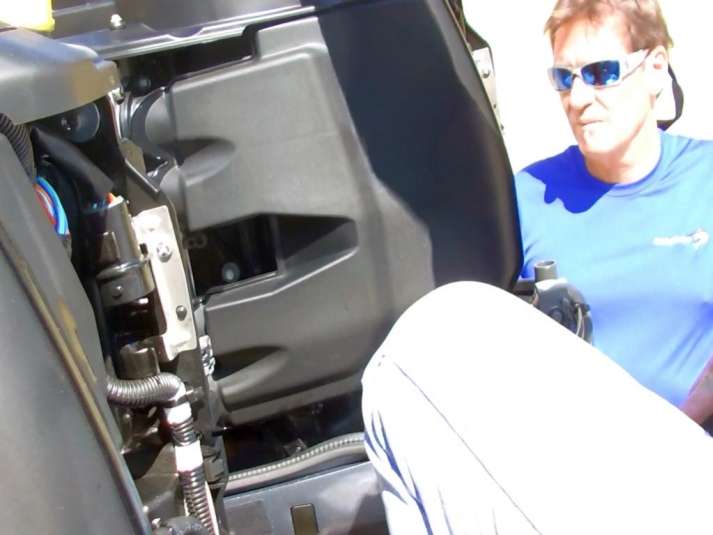
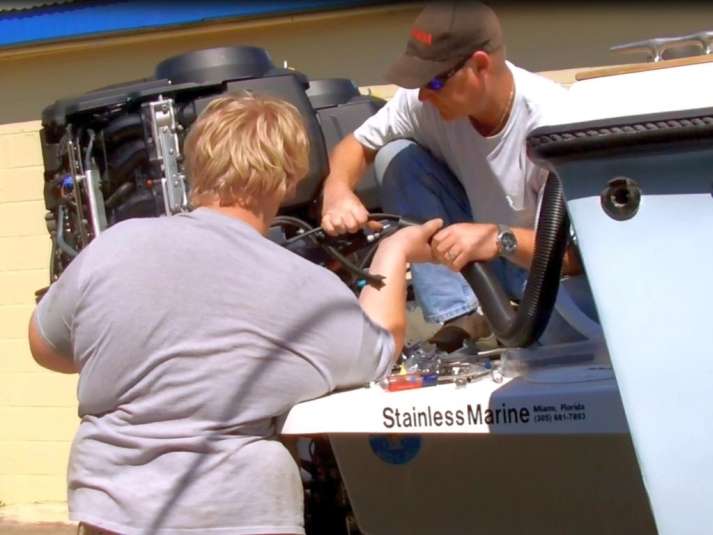

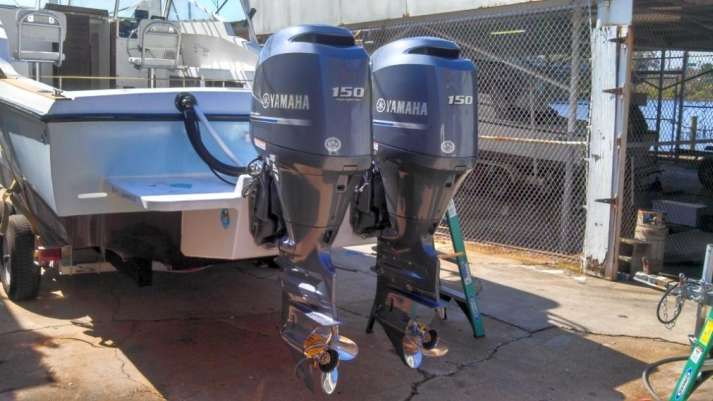
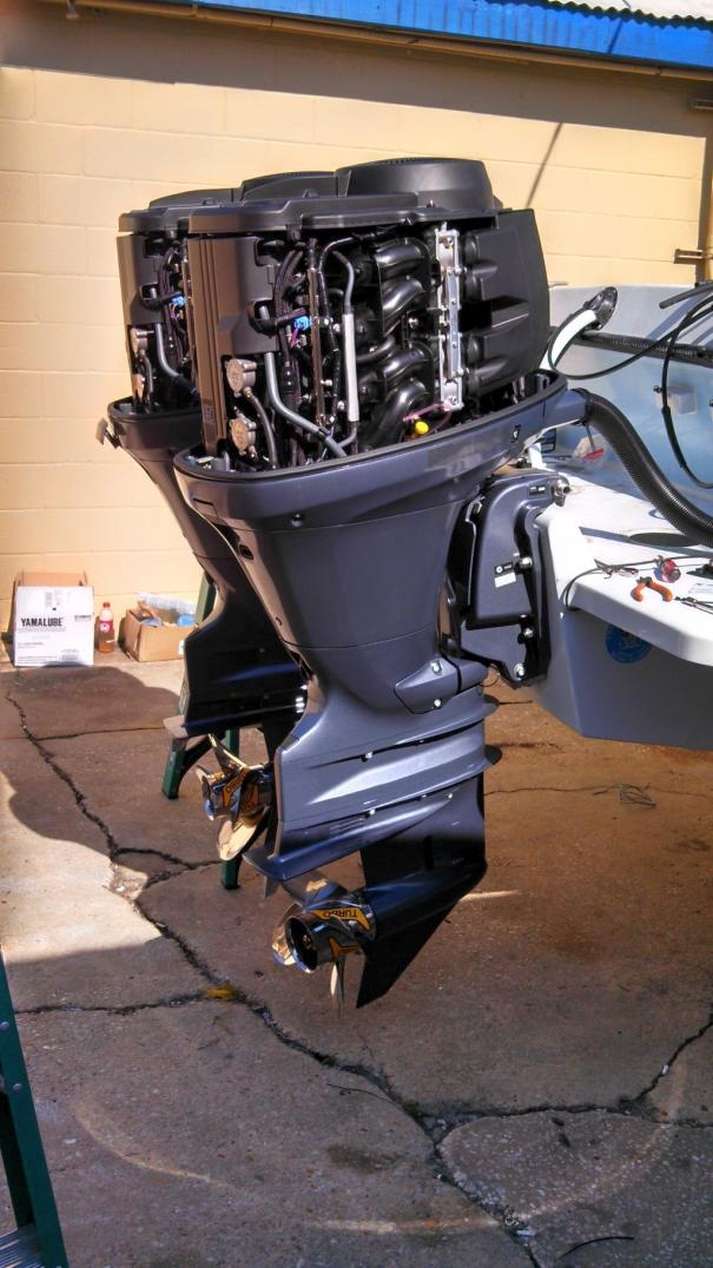
With Craig set to leave town for a pair of boat shows, we only had Monday March 10th open to put the boat in the water.
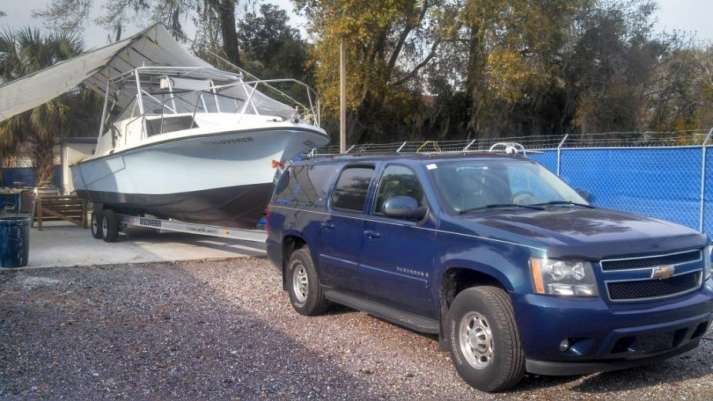
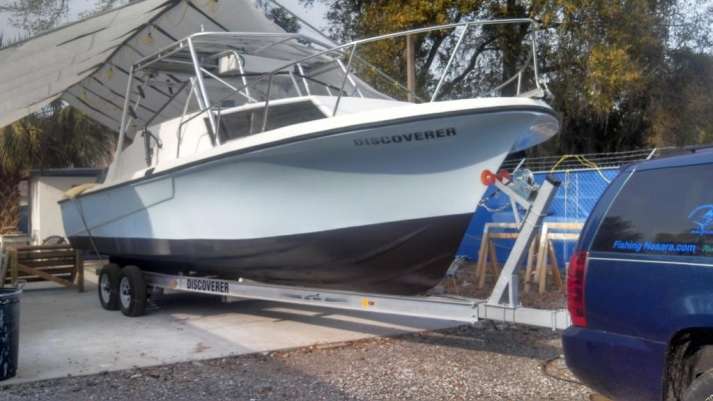
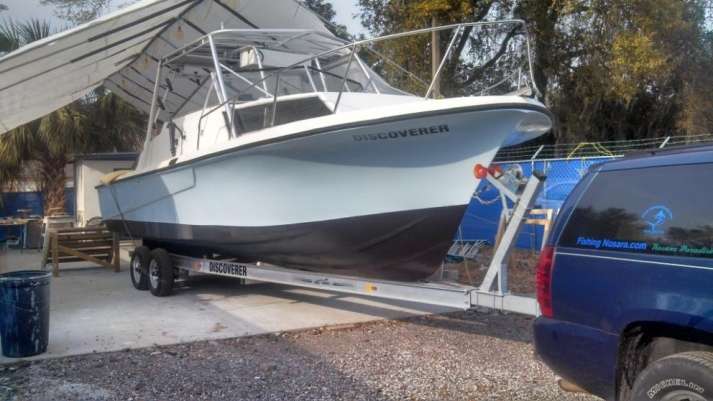

First Water Test:

It felt great to see the Discover making waves, and of course the water test revealed a few small details we need to address. Still it’s been a long time coming.
We are keeping the boat in a marina until it is ready to ship, but that doesn’t mean that the boat shop is lonely…in fact we have already scrapped the tent and are preparing to build a much more permanent structure for the next boat project.
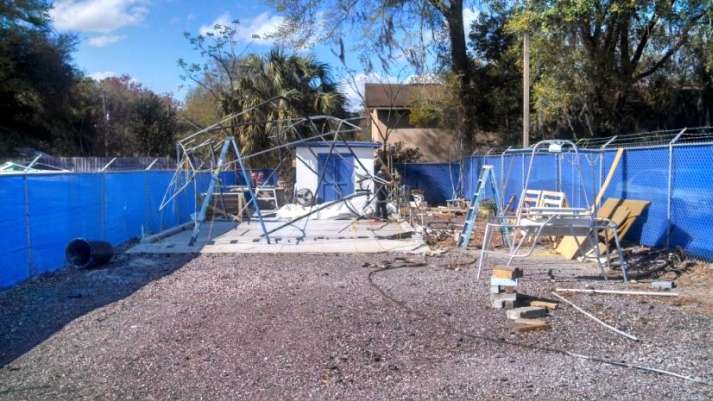
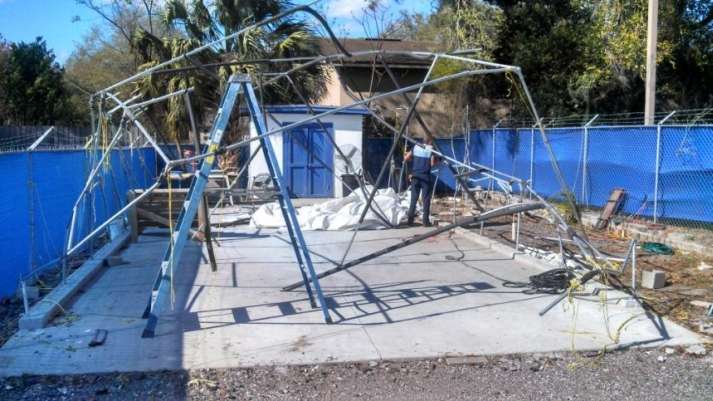
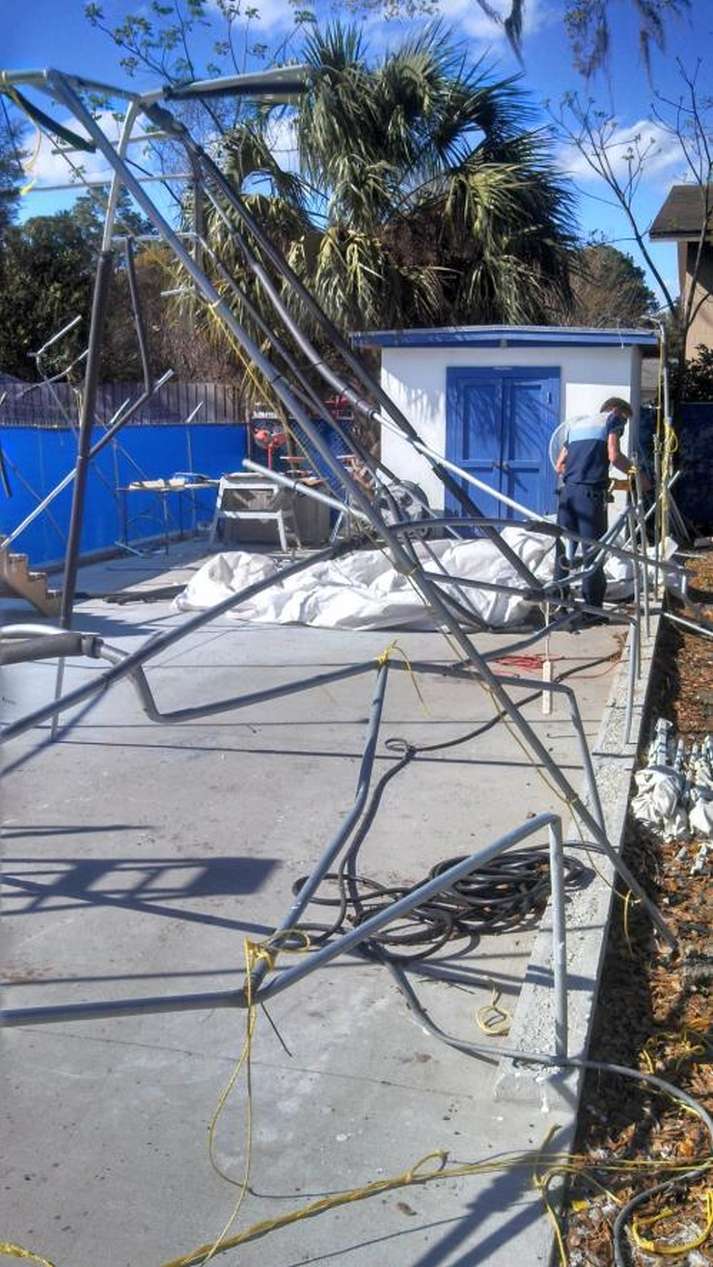
For now we will break in the new shop with another batch of Safari Carts.

Before too long we expect to start construction of a tightly-kept secret project: the Mega Panga.
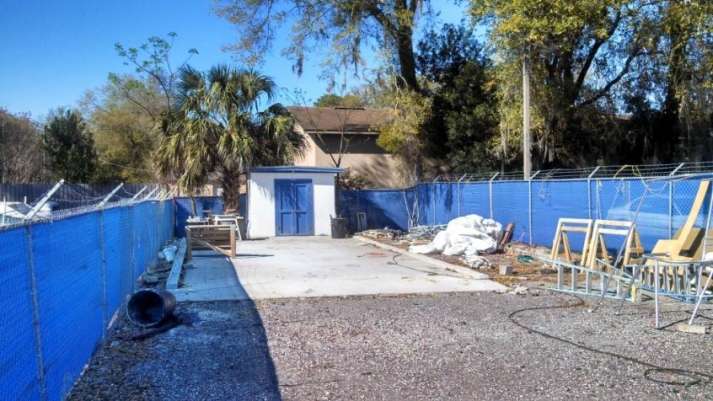
More on that soon, but we will continue this thread for a few more posts as we get the Discoverer buttoned up and sent off to her new home in Garza, Costa Rica.
![]()
March 23, 2014 – Day 713
Final water test of the Discoverer is complete! She is on the way to Costa Rica right now and we expect to be fishing hard by May 1st.
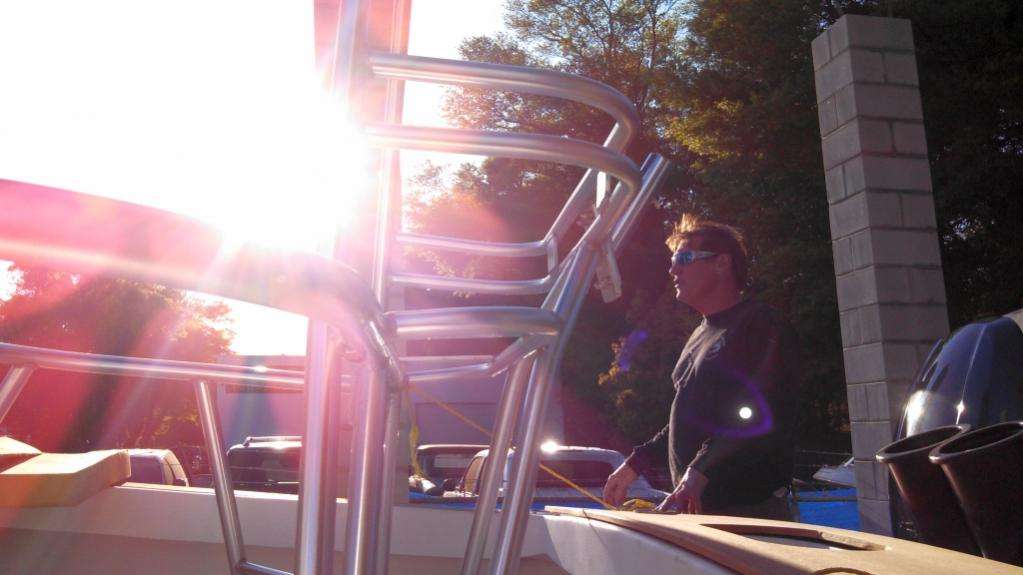
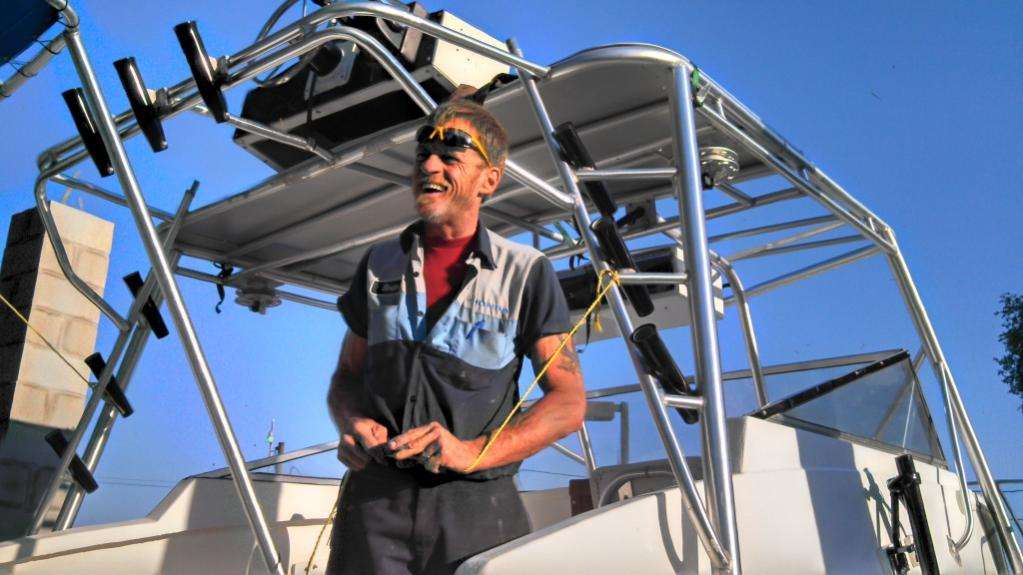
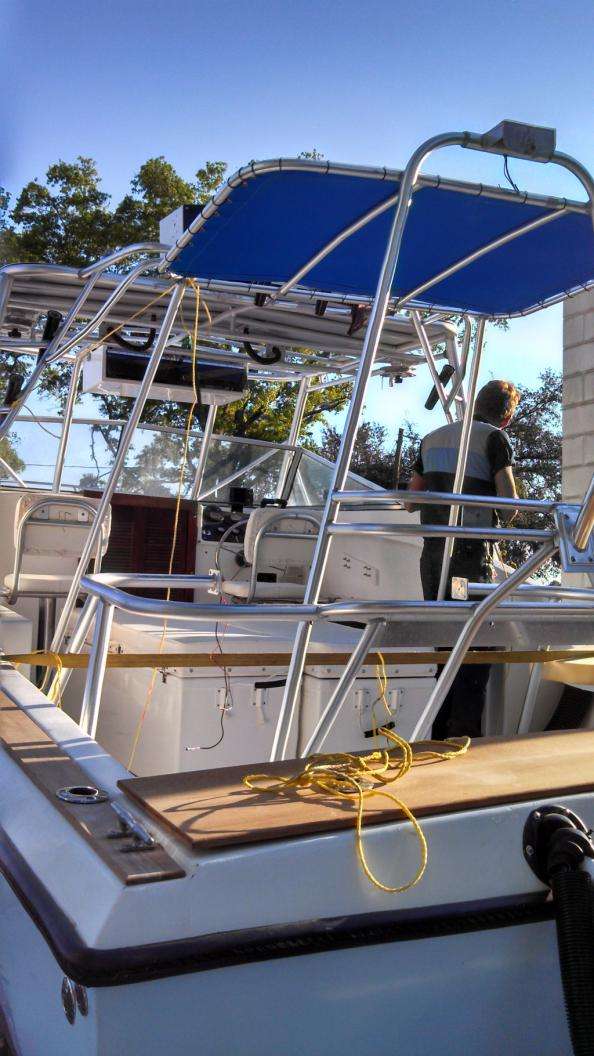
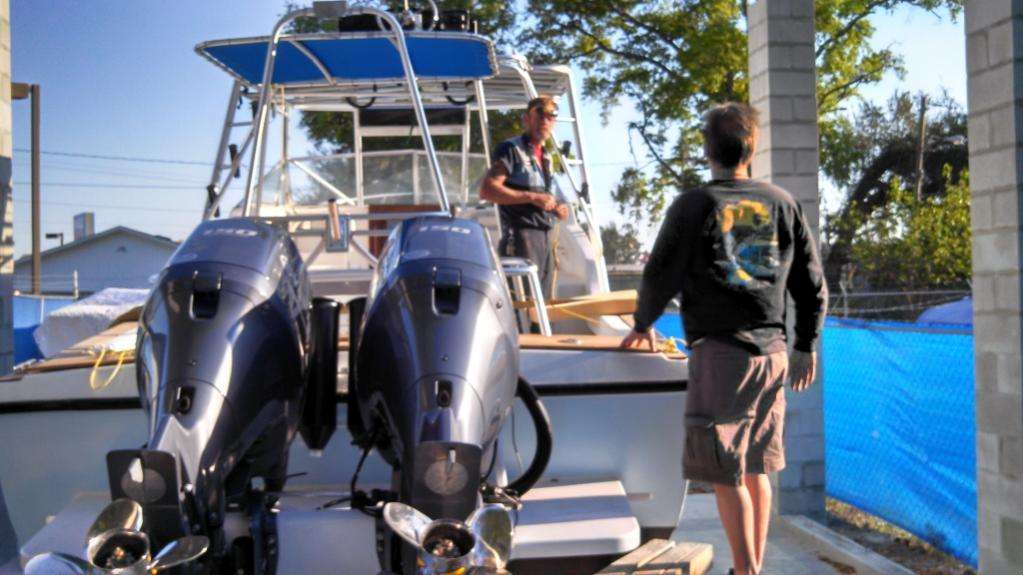
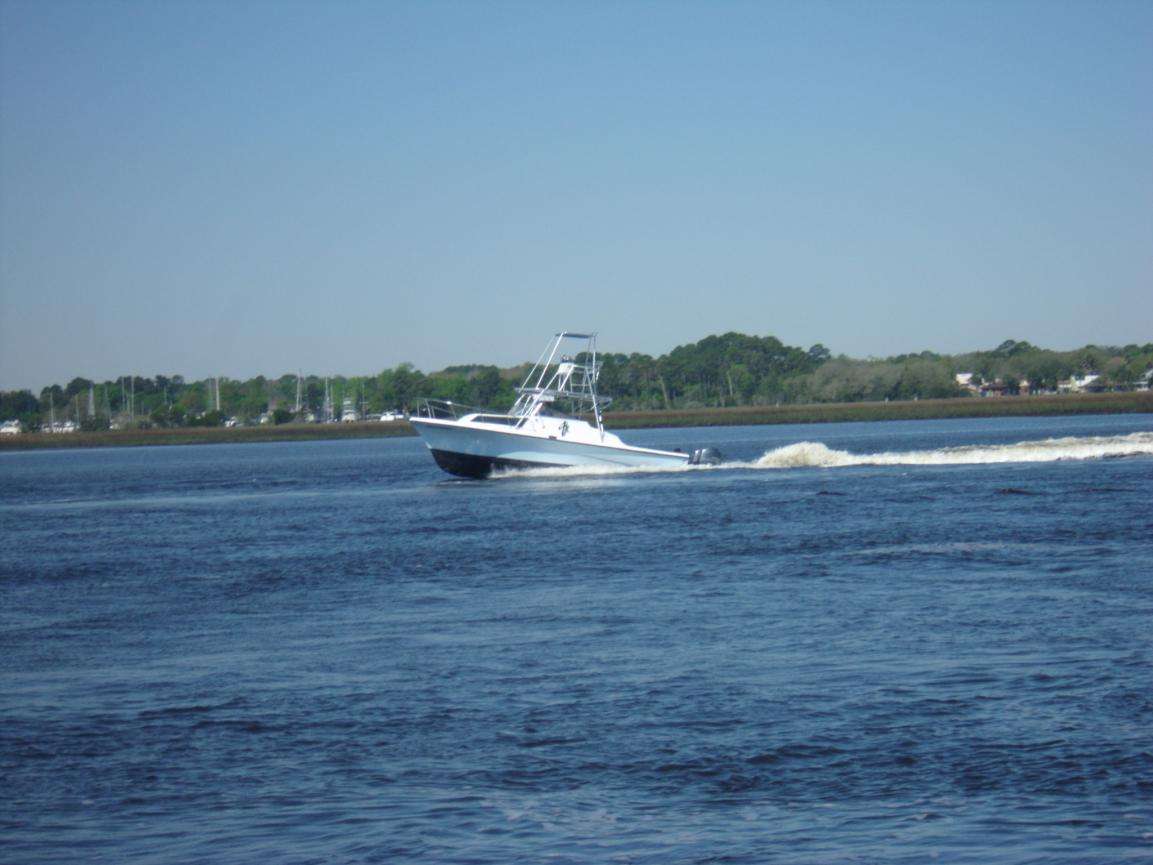
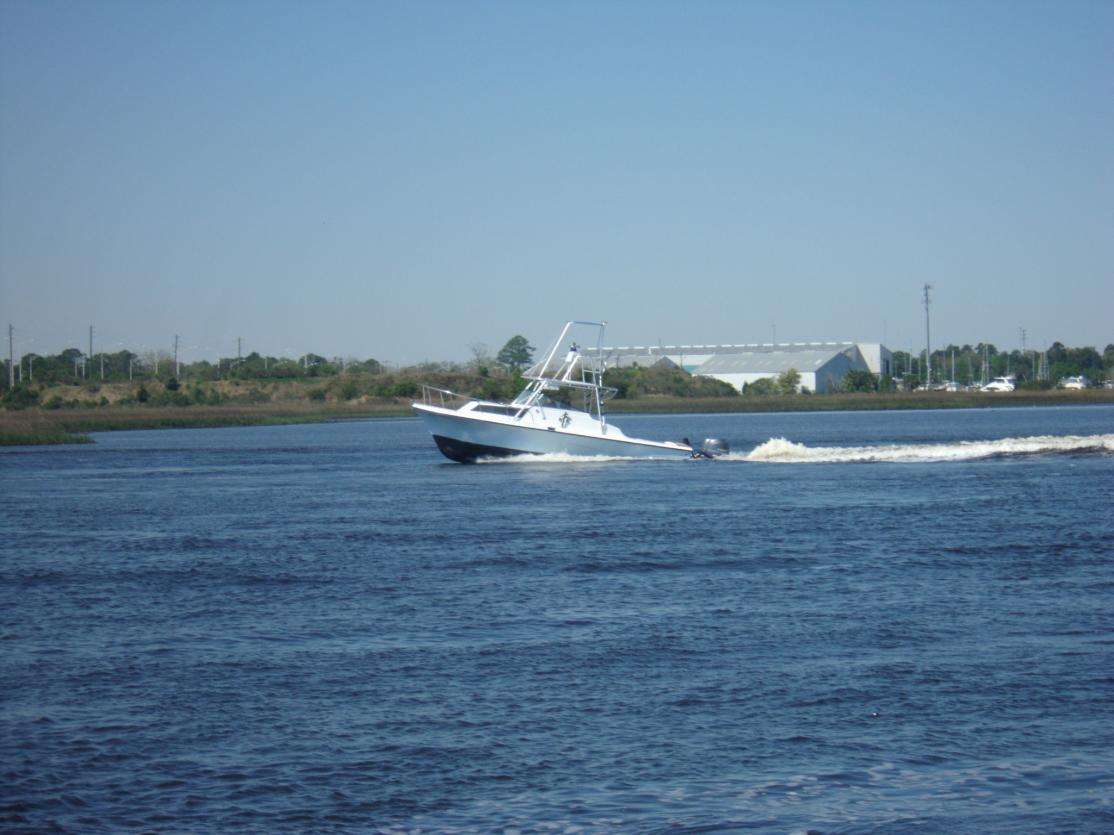
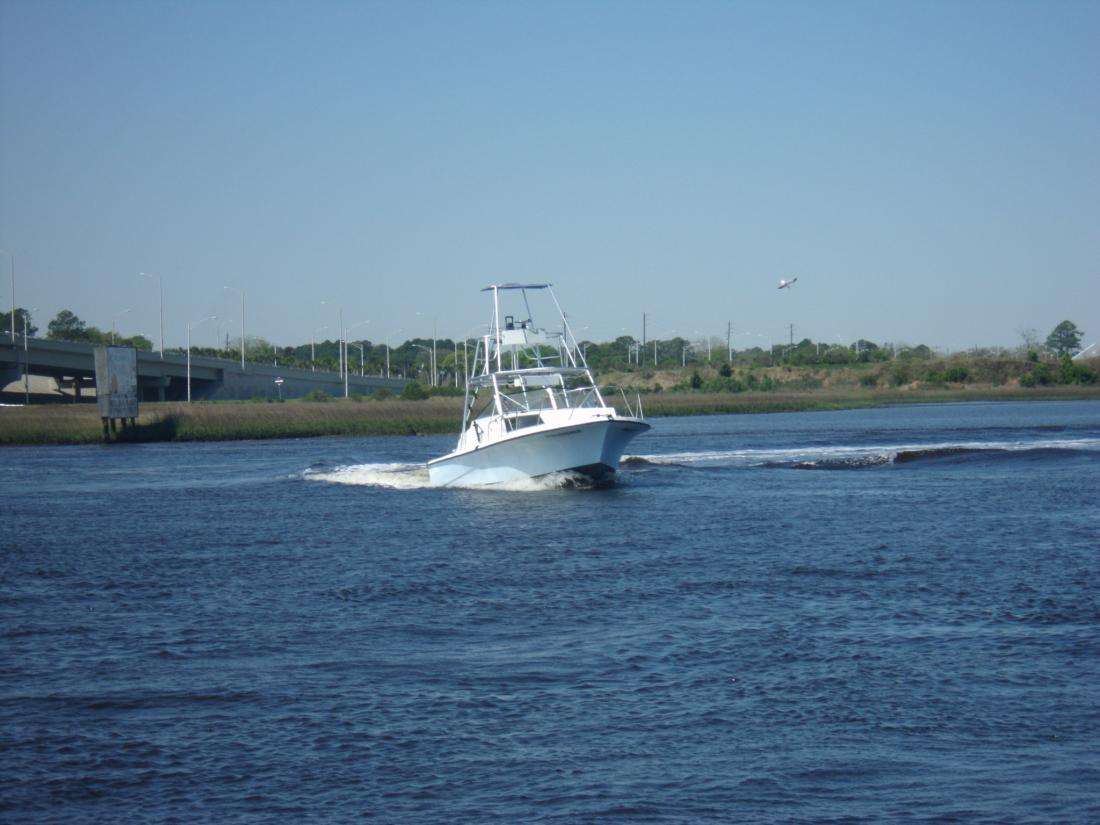


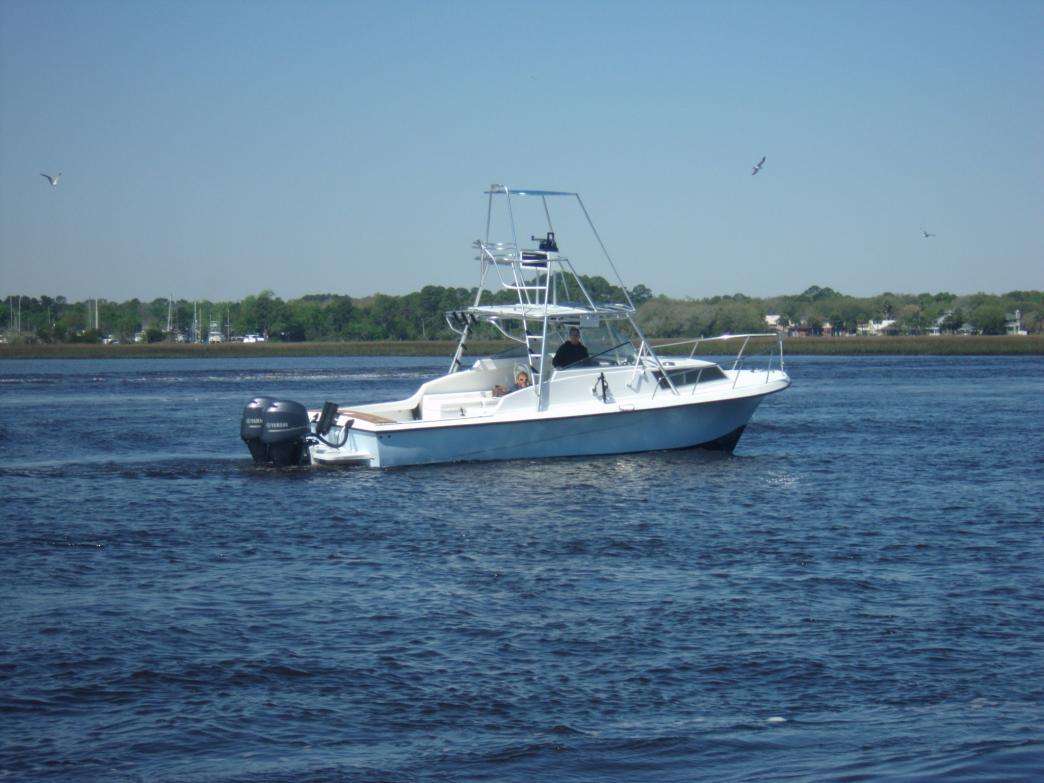
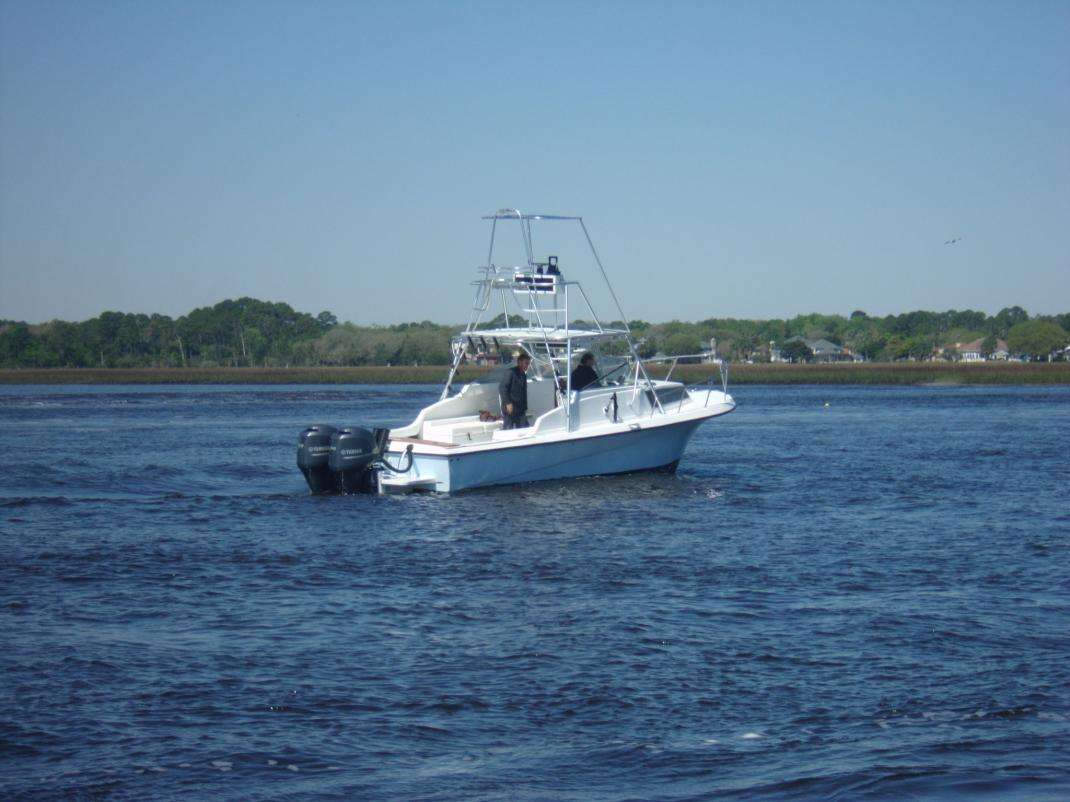
Check out the farewell voyage up and down the St. John’s River in Jacksonville:
![]()
April 17, 2014 – Day 736
Howdy all,
Sorry for the radio silence the last two weeks, but the process of importing a finished boat to Costa Rica is beset by many perils: highway hauling, greedy customs agents, and bandits who’d love a new pair of Yamahas, for starters.
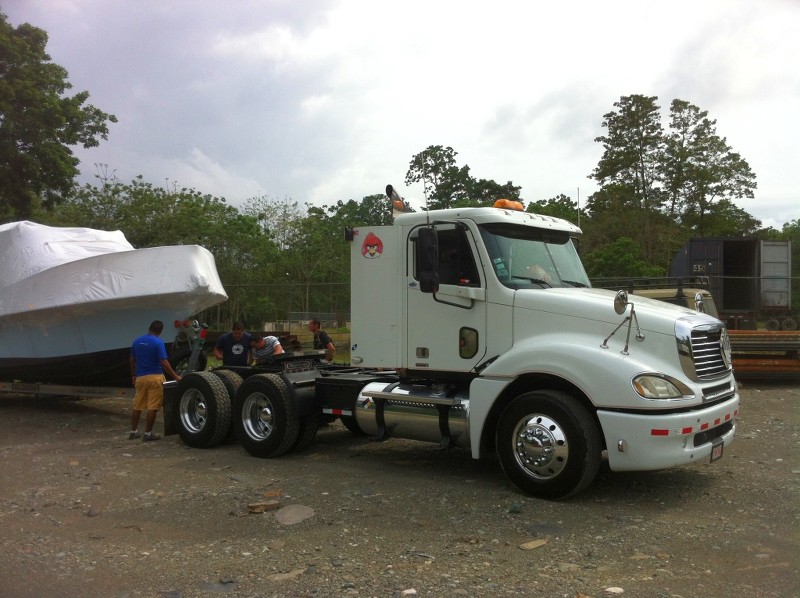
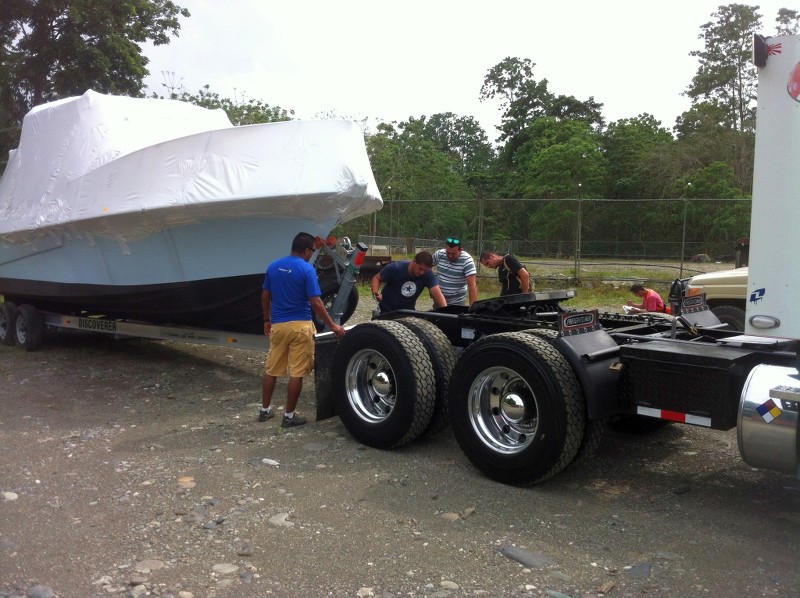
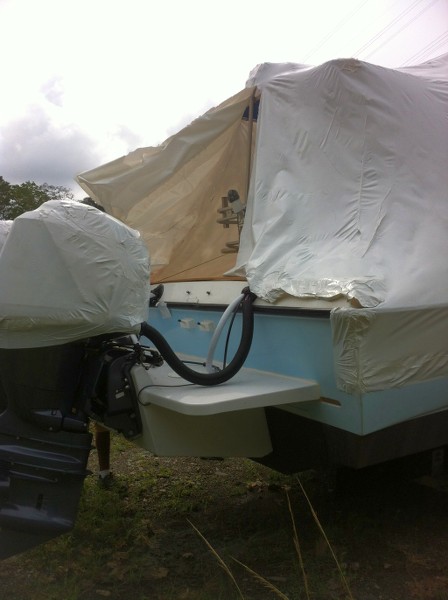


However we can rip the lid off the can now: The Discoverer has arrived safely to her new home in Nosara, Costa Rica!
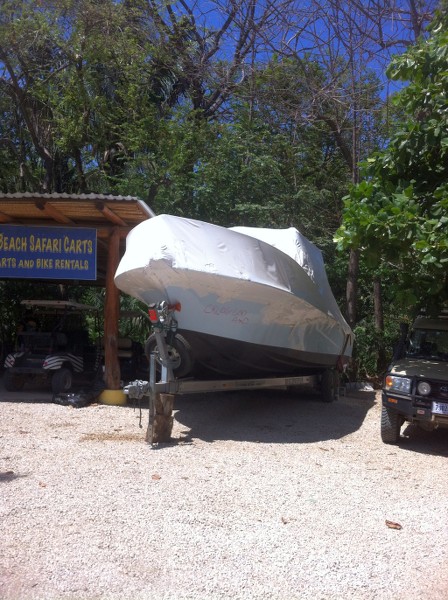

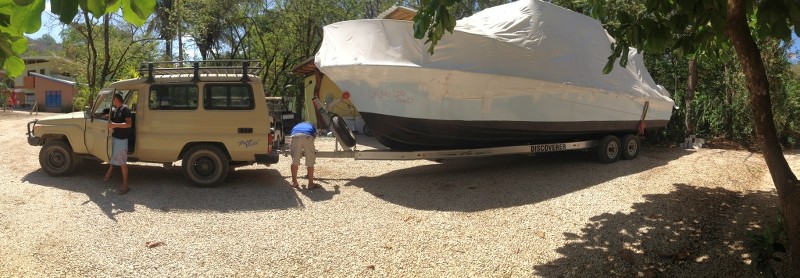
The boat crews have a few details to tidy up (epoxy down the teak wood trip, assemble the outriggers and tackle, detail and wax) but we anticipate fish on in a few days.
Craig will be in there next Thursday for the final shake down, and our first paying clients are already lined up for May 2.
I’ll make sure to get pics from the boat in the water soon, and hopefully some bloody decks to go with it!
It’s been a crazy ride, but the feeling of accomplishment right now is indescribable.
![]()
May 2, 2014 – Day 0
Work on The Discoverer Project has reached a fever pitch as we have multiple irons in the fire right now. First off, the tower has been delivered to our sister shop over at All Jak’d Up Motorsports where the master fabricator Craig Sutton Jr. has begun the modifications. He has already added our shade extension to the rear:
In addition to increasing the sun cover for the clients, this hoop drops the rod holders a few inches which will allow for quicker access to the rods by our Costa Rican crewman who are all under 6 feet tall. Craig Jr. will also be adding breakaway hinges to the upper superstructure so we can fold the tower down for road transit. Should be exciting and of course we will keep you up to speed as progress unfolds.
Also, Matty is running himself ragged trying to perfect the final surface fiberglass repairs to the foredeck, rubrail area and transom. The foredeck has been a long process but it is finally coming to fruition:
We were turned on to a technique that surfboard repair guys use involving wax paper on top of hot resin. The wax paper allows you to smooth out air bubbles and force resin down into small crevices and holes that can form while building up layers of fiberglass.
An added bonus is that the paper traps the heat from the catalyzer and makes the form cure much more quickly.
For the rub rail we elected to fill all 117 of the old holes with fiberglass plugs. The quicker and easier approach would be to run a layer of glass around the outside and be done with it, however we want as fresh a start as possible once we get to assembling the rubrail, so this tedious effort is worth it.
Lastly, Craig Sr. is doing everything he can to strengthen the areas around the hull where water intrusion has eaten away the wood. Of specific concern is the area around the forward deck hatch and the cabin windows.
The previous owners knew that water was leaking through the windows and rather than repair the leaks properly, then laid a bead of epoxy caulk over it and called it a day. Well that trapped moisture really did a number on the wood so Craig is taking this opportunity to fix it right. He picked and blew all of the rotten wood from between the hull elements, then methodically pushed a chopped-strand/resin mixture into the crevices. It is essential to do this in layers so as not to create trapped air pockets.
It seems like everywhere we look there are more areas that need fiberglass repair, though fortunately we are getting better and better at it each day.
We are still working hard and holding out hope that there is a pot of gold at the end of this rainbow.
February 25, 2013 – Day 323
Hi folks!
These are the kind of threads that have been going back and forth on my emails:
Matt: Sorry I didn’t get back to you on Saturday because I was busy working on the boat.
CR Office: No problem, how long for the Discover?
Matt: Fish on by December 2013 at the latest, November 1 at the earliest. Why, do you want to switch jobs?
CR Office: No thank you. See you in 2014 ha ha
So it is safe to say that we are chomping at the bit to continue progressing on The Discoverer Project but with the daily demands of jobs, wives, and serving lots of fishing clients here in the high season, it is hard to find time to invest in the boat.
Still we are plowing ahead with the small details to get this thing ready for paint. I went around the whole cabin with fiberglass plugs and epoxy filler and sealed up all the holes, big and small:
Before:
After:
This is a major undertaking that we did not expect to confront; on the Wanderer most of the holes were very well serviced (tight bolts, real stainless steel, ample 5200) we got to reuse most of the holes. On the Discoverer we have “discovered” that the previous owners were not as apt as the late Captain Jack Woodruff and instead put their faith in crappy wood screws, polychrome bolts from Home Depot, and no sealant at all.
Basically, I don’t trust a single hole on this boat so they are all getting filled and fixed.
For the top of the cabin I overdrilled all the holes to find good wood, then inserted plugs of torn-up fiberglass matte with a metal pick, forcing the material into all the null spots between the hull. I applied the hot resin with a pediatric syringe to keep the mess under control while still being able to apply the resin with some PSI behind it; between this and the wicking effect of the chopped-strand matte I am confident the these rotted out holes are now watertight plugs.
They still may look like holes, but once the gelcoat hits them no one will ever know they existed.
We also are attacking the problem from the underside with a really handle epoxy product called West 610 from West Marine / Port Supplies line of products. It’s a caulk gun-applied binary epoxy that is great for filling gaps and adhering parts; I burned through two tubes running around the underside of the cabin cap, rub rail line, and under-gunwales filling up everything that looked out of place:
These repairs may look nasty now, but once sanded down flush with the surround bulkhead (once again) no one will ever know they existed.
Also we finished wrapping the starboard side window in fiberglass tape. On the port side we tried to wrap it all with one 4-inch wide piece of tape. We learned the hard way that this stuff will bend 90 degrees, but not twice with one piece. It took a few hours with a horse syringe and a micro drill bit to fill up all the air pockets, and the raining hot resin to the forehead serves as a reminder not to try and cut corners to save material.
Here is the proper way to do it, with two overlapping pieces of tape:
In the bathroom we cut out a piece of the wall to remove the toilet, and wouldn’t you know it that we lost the piece? We made a patch out of 3 pieces of woven roven, then after an overnight cure screwed it into place over the hole and ran a coat of tape around the seams to get it trained into place.
The next day came a bead of the 610 epoxy caulk around the edges to really hold it down.
Coming up this week we will remove the screws, fill in the holes, then run a couple of fresh pieces of glass over the repair.
Before leaving for Costa Rica last week, Craig undertook the difficult process of filling the load bearing holes with pure epoxy resin. Most of the holes Matty hit will never bear more load than a compass or a radio clip, but these holes here are where the tower, rubrail, and outriggers connect; each of these objects bear extreme strain under open-sea conditions.
Craig uses the pressure of the syringe to force the epoxy resin deep into cavities all around the holes. Epoxy resin is more expensive than Polyester (which we have used heavily throughout the project) but when fully cured boasts over 2000 PSI of compressed strength (feel free to correct me forum folks, I got that number off the internet somewhere and don’t know for sure)
Lastly the cabinets on the side of the hull had to be cut in half to remove the giant fuel tanks (see prior post). It was a real PITA and to make matters worse when we reinstalled the back halves they didn’t perfectly line up flush with the front halves. Rather than go crazy trying to make these large pieces setup at a perfect level, I decided to “fake it” by applying layers of chopped strand matte in the low spots, then use wax paper (an old surfer trick) to form the curing hot resin to shape.
A little more work with the sander and these will be level seats for our clients’ behinds.
At this point in the project we are fairly experienced with this fiberglass repair process and the speed of our progress is picking up. Unfortunately March is the peak of our show appearance schedule and most of us will be out of town for 15 days out of the month. But you can be darned sure we are going to maximize every second we can to keep things moving towards a fish on for the Discoverer.
March 16, 2013 – Day 342
Hey guys. This week Matty and Craig are in Somerset, NJ promoting FishingNosara at the Saltwater Fishing Expo:
This means that Jack has the shop to himself and can get some work done without getting distracted by our shenanigans. We are so satisfied with the way the foredeck came together that we are repeating the same process on the side gunwales.
Here you can see that Jack has peeled back the top layer of fiberglass to expose the rotted wood beneath. We turned out to be pretty wise in this decision, because if you look closely several sets of rod holders have been drilled in this boat’s history.
The only way to be sure that OUR rod holder holes will be strong to replace this entire section with a fresh piece of marine plywood.
Before we left for New Jersey we took a visit from Earl Newton, the man who sold us this boat back in April. Earl is a great old boat man and is always a great source of advice for us on this project.
Earl dropped by the shop to discuss some last minute details for his trip to Costa, and we are proud to report that his fishing day on the Discoverer‘s sister ship the Wanderer brought multiple great Sailfish releases plus some nice Mahi for the dinner table.
Great work Earl…can’t wait to see you back at the shop for a good fishing story!
March 26, 2013 – Day 352
The whole team is back together in the shop and we have some great progress to report. First off Craig Jr. has finished his modifications to the tower:
The extended hoop on the rear will provide extra sun-shade to the fish-fighters in the cockpit. The real trick part of the modification is that now the tower can be removed for road transportation:
Great work by Craig Jr. and the whole crew over at All Jakd Up Motorsports!
Meanwhile we saw in the last post that Jack has completed gutting out the old rotted wood on the side gunwales, so Craig came in and fabricated epoxy plugs to fill the voids from the old rod holders.
The epoxy is really clear but the plugs look blue in the pictures because of the painters tape on the bottom.
Now we are ready to start fabricating the new wood.
We will be using the same marine-grade plywood we used for the foredeck, and as before want it to be as tight as possible to the edges so that the wood carries the stresses, not the fiberglass.
Craig is busy sanding the “floor” of this repair so that the new piece has a solid surface upon which to bond. The next step will be to encapsulate the new wood in fiberglass. Once it cures we will set it into place and start building it back up to the level of the gunwale.
This used to be difficult, but now that we’ve got the hang of the fiberglass process this one should go smoothly.
April 1, 2013 – Day 355
The fur has really started to fly in the boat shop as Craig and Matt are half-way through the replacement of the cockpit gunnels. This area had been completely eaten away by water intrusion with about three generations of rod holder holes to show for it. In the prior post we cut the new wood and prepared the ‘floor’ of the repair to accept the planks.
There is still an important step in preparing the planks: fully encapsulating them in fiberglass matte. This adds another layer of protections from future water intrusion, however if we install the rod holders correctly (with 5200 and through bolts) then this element shouldn’t ever come into play.
It’s a little tricky to made the fiberglass tape wrap around 90 degree corners so we encapsulated these pieces in two separate pours: first the top and bottom, then the sides and edges. In hindsight this was the backwards way to do it so I will use foresight and say that next time we will start with the edges.
We don’t want to leave anything to chance so we added another layer of protective fiberglass over our previous rod holder repairs. This is a little bit overkill but better safe than sorry.
We gave the planks and the floor a final pass with the sander and mixed up a batch of epoxy resin to glue the whole thing together.
This is the strongest epoxy that Fiberglass Coatings makes and takes a full 72 hours to cure. Rather than fuss with complicated jigs and clamps we opted for an old trick we’ve developed over years in the car industry.
Any ballast would do to apply this steady downward pressure, but hey we have lot of batteries around so why not?
Craig made a quick save when he noticed wet epoxy falling out of the back of the floor and thoughtfully lowered the boat trailer to level. This leveled out the pour, but there was still some voids that Craig filled by hand while the epoxy was still wet.
While we wait on this to cure we have tackled a few other projects around the boat and are feeling good that our ‘to-do’ list is shrinking by the day. Here are some of the side repairs:
Fiberglass Belly Band
Fill Voids around the tower mounts
Repair cracks in the cabin bulkheads
Finish leveling the side seats
This has been one busy week but we are stoked about the rapid progress. This week we will be finishing the gunwale repairs and tackling the last rotted element: the rear gunwale and deck.
We should be able to apply everything we have learned to-date on this, the final repair before spraying our base layer of gelcoat.
Comments are encouraged and welcomed. Stay tuned!
April 5, 2013 – Day 359
Hey guys and gals. It’s been another busy week and we are really on a roll now.
Little taste of Costa pulled up to the bar next door, and the office staff in CR got a kick out of this picture.
We were excited to remove our battery ballasts to find that our new wood has indeed adhered to the gunwale floor. The next step is to pour epoxy resin mixed with phenolic microballoons to fill up the voids between the new wood and the old hull.
This epoxy sets up slow and (with the microballoons added) has a paste-like consistency. This makes it easier to work with than straight liquid epoxy.
While waiting out the 48-72hr. cure time Craig busied himself with a few nagging repairs in the cabin and around the exterior. When working with slow-curing material it is essential to have other things to work on, otherwise one is tempted to rush into an area that is stull curing.
There are still some low spots on the inner gunwale that need to be built up so Craig got into it, while very carefully avoiding the still-curing epoxy around the wood.
This is a step when the details really count, and by paying special attention to the corners and seams we are hoping that our final layers of fiberglass mat will set up smooth and flat.
Once these low areas are built up we can form the new gunwale lip and lay up a few sheets of woven roven to finish the side gunwale repairs.
Yee haw!
April 11, 2013 – Day 365
April 25, 2013 – Day 379
The Discover Project has increased to a fever pitch as we close in on a major milestone: completing major reconstruction of the hull. Once achieved we will spray the gelcoat and basically at that point we are back in our comfort zone. The entire project to date has been ‘off the edge of the map’ for us as we have no significant experience with fiberglass or hull repairs; once we have a strong gelcoated hull we know what to do with it.
Since the last post we ran a full mat of 90 degree bi-axial fiberglass down both gunwales. This layer encapsulated the new wood (see last post) and since we ran it all the way to the foredeck also serves to tie all our repairs together into one surface. This stuff is really cool because the ribbing makes it roll over corners smoothly. A little work with a block sander and this whole repair will be complete.
The looming storm cloud for this phase of the project has been the rear transom deck. We could tell by standing on it that the wood is softer than ice cream on a hot day, but a glance underneath revealed even more problems.
Apparently they had a pair of livewells cut into the deck at one point in time, and then someone else came in and attempted to patch them up. The result is pure waterlogged swiss-cheese; none of this area is strong enough to ‘build-up’ and incorporate into the finished product so it’s time for a fire sale (everything must go!)
The first step is to mark out the cut line. Since the existing fiberglass is so thin and weak we used a small flashlight to mark our line from below. This is a handy trick to make sure that you cut out the bad parts while leaving the good.
The next step is to score the cutline with an angle grinder or cut-off wheel. Once the outer layer of fiberglass was pierced we got our first close look at the disaster area:
Uggh. That is nasty. The third step is to cut out the ‘floor’ of this deck with a skill saw; we add a slight angle (10 degrees) to the blade to help create a beveled edge for the forthcoming deck wood.
Once the big nasty wreck came free, the final step was to clean up the cutline and edges.
After a few days of head-scratching we have devised a plan to make this rear transom deck stronger than ever. We will reinforce and strengthen the fore side of the hole and create a lip for the wood to rest upon. Then we will build wood rib supports from the fore to the aft of the hole. As long as we measure our angles correctly the new wood should curve smoothly and fit the rest of the lines on the hull.
The first step is to build three sections of stiff fiberglass sheeting to build up the decayed lip on the fore side of the hole:
These were made by pressing two sheets of woven roven together between wax paper. We trimmed out the edges with a grinder and glued them into place with West Marine 610 epoxy. We couldn’t lay our hands on clamps big enough for this application, so we reverted to the ole’ tape-and-wait approach.
The overnight cure was a success, so first thing the next morning we sealed up the edges of the sheets with bi-axial so that no liquid would pour out of the sides and bottom.
Then we poured a thick mixture of epoxy and phenolic microballoons into the channel. The viscosity of this material means that gravity will pull it downward, filling all of the impossible-to-see cracks and crevices below. Once cured this should make the forward lip hard as a rock.
After a day’s curing we are ready to finalize this forward lip. I little touch-up grinding and a protective topcoat of the 610 epoxy and this are will be ready for wood. In the meantime we also got the aft lip prepared by grinding off the old material and creating a good surface to which we can bind the ribs.
In the next post we should have the ribs in place and the deckwood ready to go into place. We will have some extra hands on the project this weekend to help put the boat up on stands and finish sanding the whole thing. The much-dreamed of day when the repairs are complete and the gelcoat is flying is near…once that day gets here I hope this truck is ready to get emptied:
’til next time….
April 29, 2013 – Day 383
Over the weekend we finished installing the four stringers that will support the forthcoming wood for the rear transom deck. It started simply enough by gluing together two 1/4″ pieces of marine plywood together to form a 1/2 inch piece. Then we cut out four pieces about 30 inches in length; the hole itself varies from 23″ to 24″ so at this point you want a little extra wood.
Then we test fit each piece and label them according to their slot…certainly would be a fail to let these things get mismatched.
We used a plumb-line and some simple trigonometry to make sure that each stringer fits the slanted back wall of the transom. Here is an example of the fit we are going for:
Once we have a rough fit we encapsulate each stringer in fiberglass matting; an addition to strengthening the wood and making in watertight, this also add thickness that we can grind away until we have the perfect fit.
Here are all the pieces in place, supported by temporary screws:
The final step is to lay down some fiberglass to lock these stringers into place. There are some tight corners here, and one small mistake can prevent a stringer from locking in properly.
After an overnight cure, we were not pleased to find that two of the four stringers failed to adhere:
Fortunately with fiberglass, you can always grind it off and try again. Here is the final result.
This week we will be shaping and installing the top piece, then we will run our top layers of woven roven and fiberglass matting. Ideally this repair will seamlessly match the prior repairs to the side gunwales. Stay tuned!
May 9, 2013 – Day 393
Hey everybody! Craig and Matt are in Nosara this week trying to catch fish, so here are the pics from last week. To finish the major reconstruction of the rear transom deck, Craig ran fiberglass tape around all the corners underneath the deck. The idea here is to create a seal to catch the forthcoming epoxy mixture.
These are very tight corners and it is virtually impossible to create a perfect seal with no air bubbles with a single piece. That’s why Craig laid all of these corners with two layers of tape; it’s twice the work but is the only way to be sure it will work properly.
With the new plywood secured to the stringers and all the seams covered, Craig proceeds to pour epoxy mixed with phenolic microballoons into the void. This mix should penetrate all the gaps and created a bullet-proof level of strength for this whole section.
You can see in these shots that the back-fill worked to perfection with nary a drop of the red stuff falling through.
All that’s left now is to wait 24-36 hours for this epoxy to fully cure and harden, then it is on to finish fiber-glassing.
Meanwhile we are continuing to search for little spots that have evaded our repairs so far with Craig tending to the anchor box and Matty continuing to shape the rear deck, gunwales, and foredeck.
May 30, 2013 – Day 414
Hey everybody!
So we are back from Costa and fired up to keep jamming on the Discoverer so we can take it on down south for a good old time.
In the last post you can see that the new piece of marine plywood has been laid on the new stringers. After the initial epoxy set up, Craig backfilled around the entire piece with an epoxy/microballoon mixture. Notice in the final picture that all the edges were coated in fiberglass tape so that the epoxy would not seep through around the stringers.
The week before we left for Nosara it rained everyday and we couldn’t pour any fiberglass to encase the top of the marine plywood, which was still raw and exposed to the elements. The last day before leaving we got a break in the humidity and poured a hasty piece of woven roven over the wood.
You can see that there were air bubbles along the edges and that everything is far from level, but at least it is encased and can withstand the rain while we go do this:
So once we returned the next step was to level out the hasty pour from before and get a fresh start at making this thing look right. We used the 90 degree biaxial weave because the ribbing helps it hold tight to corners.
The pour came out much cleaner than the first attempt, and you can see in these shots how well the corners set up. While there are some air pockets and other imperfections that will be ground out and replaced, most of the corners achieved adhesion with no air bubbles at all.
This also allows our first unobstructed view of our marine plywood and we were happy to see no cracks, fissures, or other signs of stress in either the wood or the fiberglass.
After another round of block sanding Matt applies a hot coat of resin and wraps it in wax paper; using a spatula we can work out the air pockets and create a nearly common level in preparation for the final run with the sander.
One trick is to remove the paper as soon as the resin begins to set because if you leave it too long the paper with shred and get encased in resin, which is a pain to correct and costs time.
Next up we will apply the same technique to these fuel covering boards and the central deck cover, as well as a final pour on the nose and foredeck to bring everything to a factory-perfect level. We’ll see…
’til next time!
June 18, 2013 – Day 433
The end seems so close, but as the old saying goes: “In a 100 mile race, 90 miles is halfway.”
The true test on a project of this scope is to finish strong and not start cutting corners now due to frustration, hastiness, or laziness.
A perfect example of this challenge is the floor. Easy to take for granted and a nightmare if it goes bad, the removable fuel covers and center section are the last step to complete our new floor.
When Charlie fabricated these sections we had not yet gone ‘fiberglass crazy’ and thought that a simple brushed coat of hot resin would be enough to seal these pieces. Now the paranoia of water intrusion has grown to the point where we need to re-wrap these pieces in fiberglass matte.
In a weird way it probably for the best that we saved this center section for last; it’s 32 three-way right angles is like the final exam for fiberglass corner wrapping…if you can make these pieces stick, there is no stopping you on the fiberglass battlefield.
Meanwhile, Matt went to work finish sanding the fuel deck covers and the main center piece. This arduous process relies heavily on the plane sander (right) and the rotary DA (left); the former creates uniform flat surfaces on the top and bottom while the latter allows for the smooth rolled edges.
As tempting as it seems to start spraying gelcoat, we need to test fit our hardware so we can properly prepare their holes. First we re-installed the bow rail:
Notice that we used tapping screws here rather than bolts…we will hog out these holes, backfill them with epoxy, and then after the gelcoat will run the bolts through the epoxy plugs; this means that there is a 0% chance of water intrusion around the bolt holes.
We also test fit the side vents and the bow pulpit and anchor guide:
Lastly, we invited our old buddy Carl over to show us his tricky way to install rod holders. It’s a game of angles, with the aft-most holders pointing straight back and then rotating progressively outwards for the foreward rod holders.
(aft-most, straight back)
(forward-most, 30 degree outward angle)
Precise measuring is called for to make sure that both sides match in both their relative distance from the transom and their relational distance to the side gunwales. One inch off either way could be a major problem.
The two forward-most holes are for the fuel fillers so they are drilled straight down, however the rod holder holes have to be beveled to accept the slanted rod holder sleeve. See here how Carl makes use of some simple logic: it sticks up at the same angle it sticks down.
Notice that he is holding the tool to match the rod holder? Seems low-tech but the result is perfection:
Let’s check out our new holes:
One nice by-product of this cut is that we get to see and detailed view of how our new side gunwales set up via the discharged puck:
Looks like the epoxy (red, just below the wood) and the deck wood adhered to the existing fiberglass (bottom) and our new fiberglass (top). No visible air pockets or fissures gives us nice peace of mind for us moving forwards.
The next steps include wrapping all of the new holes in fiberglass as well as the area around the console…like I said, water intrusion paranoia is at record highs!
I must say that it feels good to get out the tools and start drilling and cutting because this is the kind of boat-building we are used to (rather than all of this sanding and fiberglassing). Alas we still have to finalize our fiberglass work before spraying this thing…once that happens we will be back in our comfort zone and this boat should come together pretty quickly.
Stay tuned!
July 3, 2013 – Day 448
Things are moving fast as The Discoverer Project reached the final days of prep work and reconstruction. We are already dreaming of the day we arrive at the shop to a freshly painted hull and we can get into what we know (boat building) rather than the exploratory exercise of fiberglass repairs.
Last week we reached a major milestone when we delivered the aluminum top of the Discoverer to the folks down at Showboat Custom Coatings for a shot of their famous SB-230 coating.
It was a tough task to fit the top to the trailer and make it secure enough for a 300 mile ride to South Florida, but the end result will definitely be worth the effort. With the SB-230 applied there is no need for polishing or waxing to keep the metal shining, just a little soap and water.
Before we loaded it up Craig, Jr. gave everything one more pass with the aluminum welder to make sure that all of his seams were super-tight. Once the coating is applied all the tooling marks will be invisible; still the raw welds look great even without the finish.
As we approach the July 4 weekend, we are striving for our independence from a dastardly foe: Fiberglass. We are in the final days of wrapping ourselves up in Tyvek suits and respirator masks as we are running around the boat chasing down all the small repairs and neglected spots from the last 8 months of massive reconstruction.
Here you can see Craig tightening up the console area by injecting thickened epoxy for strength, then applying a protecting layer of fiberglass matte around the seams.
Later Craig went to work on the seams around the fuel covers in the deck, first hand-sanding the divide and injecting epoxy then running a piece of fiberglass tape to keep the repair watertight.
Matt set about leveling the rear deck. This is a little tricky because the all of the different levels in play here. In order for the level sander to do it’s job everything has to be above grade before the sanding process begins.
On this center section we had to cover up all the divots where Charlie screwed in the piece. You can see in the above picture that each cavity was filled with a 1 inch square of chopped strand, then we started adding uniform layers over that relatively level repair.
In the last post we began test fitting all the hardware to make sure that all of our fiberglass work hadn’t disrupted the fit of the pieces. This is also the time to beef up the structures and watertightness of these areas.
The block of wood under the gunwale is designed to add another layer of firmness to the cleats on the rear of the boat, since this is where our crews tie up the panga boats and (in an emergency) tow other boats. It is crucial that this cleat be a rock, so this wood block is 100% marine grade plywood wrapped in two layers of fiberglass. No chance of weakness due to rot on this piece.
Water-intrusion leads to wood rot, and wood rot leads to problems. To combat this issue we plan on using a custom boat trick on the Discoverer called epoxy-sleeved bolts. The concept is simple but the execution is very precise.
On the left is the way most boats are put together. The wood is encased in fiberglass, resin, or epoxy (represented as pink) to keep the water out; however over time the seal around the bolt head, nut, and shaft of the hardware can allow water to seep in. With epoxy sleeving (right) each hole is overdrilled then backfilled with epoxy. Once cured, the epoxy plug is drilled to the proper size leaving behind a “sleeve” for the bolt to pass through.
Here we see the foredeck with all the hardware removed, the holes overdrilled, and the epoxy setting up in place:
We did the same thing on the rear cleats…this is why we put the wood block in place first, so that the epoxy sleeve will stay constant all the way down to the nut.
We also cap the epoxy plugs top and bottom with a layer of fiberglass to keep the whole thing snugly in place and at level with the surround decks.
We also wrapped the deck pipe hole with fiberglass tape to seal it from the elements, finalizing a front deck that is now truly bullet-proof.
The last step is to drill our pilot holes so we don’t lose these plugs once the gelcoat goes on. We feel confident that this approach will keep the internal guts of the Discoverer dry in the immediate future and well into the next few years as this hardware will be removed and re-installed regularly over time.
The last few steps are underway now: finishing the level sanding of the decks, strengthening the fighting chair mount, injecting foam around the gas tanks, and about a half dozen other little items. By this time next week we should be shooting gelcoat.
Almost home!
July 26, 2013 – Day 471
It’s hard to believe that three weeks have passed since the last post, but know that we have been neck-deep in The Discoverer Project for every second of it and we have some excellent results to report.
In the last post we completed our epoxy sleeves for any bolts through the decks.
We turned our attention to final details and we doggedly approach painting time; first up was filling small fiberglass pit-pockets with a muddy mix of polyester resin and phenolic microballoons:
This stuff finished off so smooth after sanding that we decided to coat the entire deck and floor with the same process:
It’s always the out-of-the-way spots on boats that are the tricky ones, and Craig set about chasing down potential water intrusion spots in every conceivable place.
During this work it was discovered that the sides of the boat in the rear had too much flex in them for our liking, so we added a horizontal fiberglass stabilizer from the lip of the fuel deck to the outer hull.
We patched in a small overlap section in the back so that this repair would be continuous down the whole side of the boat.
We then backfilled the newly airtight cavity with Great Stuff Pond and Stone which is much more water-resilient than open-cell Great Stuff.
Matt enclosed some raw wood under the console which was so out-of-the-way that an access panel needed to be cut in the bathroom floor:
Craig continued to chase last minute items:
The nose:
The mid-ship access covers (freshly cut and wrapped in fiberglass):
The feet around the fighting chair mount:
Fuel tank rear supports:
Final clean-up and wipedown:
Lastly, we are lifting the level of the footpads about 1/8 of an inch where they bolt to the deck.
Plus it adds that much more strength and resistances to water intrusion in this critical area.
So where was Matt during all this?
Let’s get painting!
July 27, 2013 – Day 472
It took a whirlwind day of painting, but we sprayed every drop of gelcoat we had and have a pretty good jump on the paint work for The Discoverer Project.
Our pal Ginno was the trigger-man with Matt backing him up on the mixing station.
We’re pretty pumped that our gelcoat spraying technique worked out and we got two coats on before running out of materials. We are certainly excited for the next 15 gallons to arrive on Thursday so we can finish this thing off!
August 3, 2013 – Day 480
Ah the misery of logistics! Just when we were getting a head of steam built painting the white part of the boat, The Discoverer Project hit a snag when we ran out of gelcoat, hardener, and paint strainers.
We waited 6 days for our Thursday delivery from FGCI and there is only so much piddling around one can do on a boat that is all ready for paint.
Then on the fateful day to spray, Ginno the painter called off because he had some other projects to do. We decided to proceed with the final paint work ourselves rather than putting the project off any further.
We started by hand brushing gelcoat over any spots in the hull that needed extra material, and as it set-up we sprayed more gelcoat over the top.
Also, Matt came back around and filled in the couple of square feet where the lack of white gelcoat had hampered our first spray. Check out the rear transom deck, finally completed:
All told we are pumped to have reached this point, but the next challenge is equally murky and daunting: how to best prepare this gelcoat-only paint job to make it look shiny and new.
We are planning on wetsanding the whole thing with P400, P600, P800, and P1000 over the next few weeks. Until then we are proud of this result:
August 8, 2013 – Day 485
Still rocking and rolling on the paint work for The Discoverer Project. First up we slid the tripod boat stands a few feet so that we could spray in those areas:
Also we discovered that one of the tripods was hiding a dirty little secret: two cavities in the hull that went all the way to the original fiberglass. Here is the repair process:
Most recently we rolled, brushed, and sprayed some nice marine grey gelcoat into all the sub-deck areas.
Also we have gone around the new paint job filling in tiny little air pockets…these look rough now but will sand down beautifully.
Feeling good and looking good. Stay tuned!
August 19, 2013 – Day 496
Hey everybody!
When we left off we were looking at a fully-sprayed but still-unfinished wad of fiberglass and gelcoat; the challenge now is to get this thing looking like a proper boat!
First order of business was to lay down some texture on the floor of the boat. On factory boats the texture is usually built into the mold so the lines are geometrically perfect; since this is a rebuild we have to rely on two-inch masking tape and steady hands to get those perfect lines.
First we sanded down the original surface with 180 grit (wet), then taped it up. After a blow-off and an acetone wipe the new gelcoat would adhere both chemically and mechanically. We brushed on activated gelcoat and quickly rolled the texture with a GlassKoter roller cover; they claim that these leave less lint behind than a standard roller, but the pictures attest that it still left some.
The second coat was required to achieve the proper 30 mil depth that we were after. We’ve been told that as long as you apply your second coat within 12 hours then their is no need to sand or acetone between coats.
We are confident in this approach after completing the floor, so we replicated the procedure with the fuel covering decks before moving on to the foredeck.
The foredeck was a little tricky because of the long continuous front sweep and the long reach required to get to the center; when working with activated gelcoat you have to move fast, so a little foresight goes a long way. We had four ladders set up and a long-handled roller to maximize coverage to the middle of the deck.
Matty was feeling pretty confident with this texture coating by now, so he tried a little experiment on the foredeck. See that little FishingNosara vinyl sticker in the middle?
Check out the result when removed after the second texture coat:
Meanwhile, Craig and Jamaal have been fixated on the exterior appearance of the Discoverer. Craig picked out a nice pair of teak planks for the side gunwales and is scouring the southeast for two matching-grain planks for the transom.
We are aiming to match the look and functionality of the teak covering board on our current T-Craft, the Wanderer.
Also, Craig made the trip down to Showboat Custom Coatings in Pompano Beach to pick up our refitted tower. They hit it with their special SB230 coating which should make this aluminum bulletproof forever. We’ll have a full report on their process and images from their shops soon!
Lastly, our buddy Jamaal has brought his deep experience with finish sanding to bear on the outer hull.
He is wetsanding the entire hull using a 6 inch DA and progressively increasing his grits from P180 up to P1000. Here is where we are now, just after the P600 and before the P800
You can see that it is starting to shine in places, and more importantly there are no spots where the fiberglass is showing through; this means that we have achieved proper depth with the blue gelcoat.
Hopefully we’ll be up the P1000 this weekend, then its on to compound and wax. Meanwhile it’s time to start scheming on re-installing the bow rail, deck hardware, tower, and outrigger mounts.
Stay tuned!
August 22, 2013 – Day 499
August 24, 2013 – Day 501
The gelcoat polishing continued this week on The Discoverer Project as Jamaal and Matt have been pouring hours into wetsanding.
It’s hard to take pictures that properly illustrate the smoothness, but the reflections are beginning to tell the tale.
We started with P400 to knock down the high spots, then progressed through P600, P800, and P1000. The function of the high grit is to bring out the shine and eliminate tooling marks from the lower grits.
We are also investigating the best way to finish this thing off; we may compound it before wax or we may just wax it.
Also we have to figure out the best way to apply the bottom paint, thinking that we may have to prime with a gel-etching primer then apply the best bottom paint we can find.
However we also are finally ready to start putting the boat together in other ways too. Time to swap out the fiberglass grinders for saws and drills; nice to be back in a familiar problem.
August 26, 2013 – Day 503
Video recap of the last eight months in about eight minutes!
September 5, 2013 – Day 513
The long weeks of wet sanding the Discoverer are nearing the end, but as we progress we are constantly being set back by our own mistakes. Jamaal has nearly completed the entire blue surface of the hull and it looks fantastic in the spots where the gelcoat set up nice and thick.
Jamaal has very steady hands when it comes to achieving uniform sanding depth, however when he got to the swoop of the nose bare fiberglass began to show through the blue. This is not his fault; in fact his depth perception was perfect. It’s the gelcoat that was not thick enough in this curve to begin with.
This photo doesn’t show just how thin it is, but in person these brownish spots are evident all over the portside nose section. To solve this we re-sprayed the entire section.
During the initial spray we shot regular thickness gelcoat, but on this touch in we added 4oz. of Patch Booster to the quart to improve adhesion. The drawback is that thinned gelcoat flys out of the cup gun like a fox from a forest fire. Check out Matt dumping a full quart in 68 seconds:
Notice that he uses a open-faced wand stroke to prevent gelcoat from piling up near the nose. Check out :33 of the video how Matt uses his feet to maintain proper spray depth rather than reaching in with his arm.
When spraying a surface with depth (rather than a flat plane) it is better to move your feet then to reach with your arm.
The finished product came out very smooth, and with some careful sanding around the edge this section should blend seamlessly.
We ran into the same problem on the top cap of the cabin. Because of its position relative to the boat the centerline of the cabin did not get sprayed thick enough on the initial pass. Check out the reach needed to hit the middle:
Even though some material covered to the center, it is not nearly thick enough as evidenced once sanded:
Once again we taped off the entire section, but this time used the roller to apply a double thick texture coat, just like on the foredeck and cockpit floors. This way we know that the gelcoat is plenty thick!
As an added hurtle, it’s lovebug season here in Jacksonville and these little a-holes kept landing on the wet gelcoat…something about the smell of instant chemical death must be appealing to these, the dumbest of the insect kingdom.
Still we carry on and it turns out that lovebug wings and feet don’t stand up to a DA sander. After curing and a quick lap with P1000 grit we are confidant that this area is finished.
We are continuing to fill pinholes around the hull and Craig is almost finished touching up the interior…We hope to move on to compound and wax this week with the goal of beginning to re-assemble the boat next weekend. Wish us luck!
September 21, 2013 – Day 529
Howdy all!
The Discoverer Project endured a setback this week as we unearthed a horrible secret about our hull: the gelcoat is just too thin.
In the last post you can see where we tried to patch over some of the thin spots with more blue gelcoat, but we ran into problems matching the color and getting the new patches to blend seamlessly. The white areas were also a bit thin in spots, but white blends with white pretty easily so we simply brushed on additional layers until the coat was properly thick.
Also most of the white is texture coated anyways, so it doesn’t really hurt to slap on some extra material.
The blue is a whole different affair.
Jamaal did excellent work to get 98% of the hull shined up to showboat standards, but even the best compound and wax job can’t thicken up thin paint.
The only part that came out nice and thick was the rear transom, but that’s because we sprayed three coats plus an extra coat of gelcoat thinned with patch booster to fill up the low spots.
Six weeks of sanding went down the drain as we scuffed the entire hull with 80-grit and removed all the compound and wax that Jamaal had meticulously applied.
Second time is a charm, right? This time we planned ahead and aimed to replicate the thickness of the rear transom.
Knowing that the job would require between 4 and 6 gallons of gelcoat, we bought 10 gallons of gelcoat and tinted it all to the same shade of blue…this way the boys in Costa will have ample amounts of color-matched material for touch up work in the future.
The second spray was a 6 hour ordeal that put us in conflict with brutal heat, high humidity, scattered thunderstorms, and the dreaded scourge of North Florida the Lovebug. We also had the trigger mechanism from the cup gun fail midway through the second coat, but fortunately we had spare parts robbed off of another gun whose nozzle had failed.
Although this was a heartbreaking ordeal, clearly this was the right thing to do. The gelcoat set up beautifully and should require a fraction of the sanding time to regain the nice shine.
Since it takes a few days to properly cure and harden, the team has already moved on with assembly on the topside.
A few posts back we explained the concept of epoxy sleeving, but now is when we find out if we were precise in our measurements or if we just wasted a bunch of time and money.
When we drill the holes for the bow rail and nose hardware, the sawdust from the hole should be pure epoxy and not a grain of wood:
Nailed it!
The bow rail and all the nose hardware is now in place with the proper amount of 5200 marine sealant to keep the holes watertight. On the backside of the bolts we use only cap nuts (sometimes called acorn nuts)
If you’ve seen any of our other boat builds, you already know that we are some cap nuttin’ fools!
It is much easier to use standard open ended nuts because then the length of the bolt doesn’t really factor in; you could theoretically use multiple length of bolt on a single installation. However the finished look of precisely deep bolts and snug cap nuts is stunning, plus it eliminates the chance of injury at sea.
This week we will begin sanding the blue hull once again and will re-establish the high shine that we achieved before this re-spray. Also the Discoverer will take a field trip to our pals over at Oasis Boatyards in St. Augustine to be fitted for her transom motor bracket. We also still need to mount the fuel tanks and install the rub rail and tower, but after that we are nearing the home stretch.
Stay tuned as the next few weeks should unfold very rapidly.
September 28, 2013 – Day 536
The Discoverer Project is back on the good foot as the new triple-thick gelcoat has set up beautifully and the team continues to plow forward on the topside assembly.
Jamaal has completed his first two laps around the blue hull with P400 and P600 grit wet sandpaper, and the shine he has acheived is already breathtaking. He will advance to P800 and P1000 before adding compound and wax to the finish.
It’s worth noting that his progress has been accelerated by the thickness of the gelcoat; he is really able to dig in and grind since he isn’t ‘walking on eggshells’ regarding the thickness.
Meanwhile Craig and Matt installed a Taco flexible vinyl rubrail. We have attached one of these to three other boats, but this time we tried a very unique approach: we read the directions!
The correct process is to attach the rail to the nose, then ‘pre-stretch’ the whole thing, pulling back as hard as possible. This way once you come around and put in the screws you don’t have to constantly be stretching.
On the Wanderer we stretched the rubrail as we went, and you can see from this picture that it has a lot of wobble in it:
Clearly the new rail on the Discoverer is proper:
You want to attach the screws every 4 inches, working in four foot sections with ample 5200 laid in behind the rub rail. We used a tape line to maintain accuracy in the depth of the rail.
We were relieved to find that we had just enough rail to meet in the rear; this was sold as a 70 foot rail and our boat is 31 feet long with a 9 foot beam…do the math: 31+31+9 = 71 feet. That’s not including any lost length due to the flair of the bow.
Clearly the pre-stretch isn’t just for looks; it is a crucial step as it created the extra couple of feet required to make it around the boat.
Big thanks to this video of an ancient episode of Ship Shape TV for the insights:
Check out 7:35 for the stretch.
Here is another useful video for installing a rub rail:
It’s newer (higher def) and little easier to watch, especially because it features funky music and a cute chick saying things like “Larger than the shaft of your rivet”. But I digress….
We continued on hardware installation with the nose lifting eye:
We then moved on to the Bomar hatch. On the Wanderer we never serviced this unit, and we paid the price a few seasons later when the handles and rod needed replacement. This was a pain because it is difficult to tap new threads into aluminum while the unit is on the boat.
This time we bought new handles and a new rod as a preventative measure for repairs down the road. I think that these spare parts are the best hundred bucks we have spent on this project to date…I’d rather spend $100 now than replace the unit (for $600) or living with a crappy hatch (not an option)
Or as Craig likes to say regarding cost vs. value: “The best thing about good hardware is you only have to buy it once.”
We also finalized the front deck by cleaning and re-installing the mooring bitt, rope pipe, rope guides, and solar fan. Check out the before and after:
Unlike the original installation, we are using bolts and nuts with lots of 5200 rather than pointed screws with lots of laziness.
This week the Discoverer will take a trip to St. Augustine’s Oasis Boatyard for installation of the transom bracket, while here in the Jacksonville shop we will convert the boat shop over to a wood shop for replication of the old beat up cabin wood.
Ideally when the boat gets back after a few days we will be ready to build out the cabin.
October 1, 2013 – Day 540
October 18, 2013 – Day 558
Howdy everybody!
It’s been a little weird looking out into the boat shop and seeing this:
We took this opportunity to get the shop straightened up and to pressure wash the last 18 months worth of fiberglass dust and gelcoat residue off of the tent and bodega.
Meanwhile Craig and Matt took a trip to St. Augustine to check on the progress at Oasis. We set up a simple bilge pump system to keep rainwater out of the boat; keep in mind this is the first time she’s been out of the tent since we started.
Once we arrived at Oasis we were blown away by how their shops compared to our humble little hovel. We’ve grown used to scraping together enough extension cords and air hoses just to get by, so it’s a real shock to see how the pros operate:
We learned a lot from our trip to Oasis Boatyard in St. Augustine. We enlisted John and his crew to hang our new Stainless Marine Transom bracket, and we also benefited from a few minutes of time drawing on his expertise.
The challenge here is one of geometry. The Discoverer is a very flat in the bottom rear of the hull which means that the leading edge of the transom has to be perfectly level with the bottom of the boat or else the handling will be all screwy.
Without the motors on hand we needed careful measurements from a known good boat. Fortunately the Wanderer handles like a dream so we made a quick call to the boys in Costa and had them measure the transom on the Discoverer‘s big sister.
John made a smart decision while were were running around getting these measurements together: Call Stainless Marine, get the template, and mount the damn thing!
Which he did brilliantly! We only asked him to drill the holes and tighten up four bolts for the ride back to Jacksonville. This arched his eyebrows a little, but we are certain that of all the bolt holes on this boat, these need to be epoxy sleeved the most.
We took this opportunity to let the transom air out and thoroughly dry. At night we used the heat lamps to keep the evaporation on schedule.
Then we overdrilled the holes:
And then taped off the inside and inserted the 610 Thickened Epoxy:
After a day to cure, we fixed the epoxy sleeve into place with a thin (and I mean THIN) layer of fiberglass matte.
On the inside of the transom there was also a huge amount of work going into the Discoverer.
Brian has sanded away all the spots on the transom where we plan on building our new livewell. Notice the bare spots on the left and right of the livewell; this is where we will install elbows in the corner to add strength to the floor-transom connection.
This connection is a concern on the underside as well, so upon John’s advice we laid up an additional 5 layers of Woven Roven to really make this area strong.
Here you can see the initial phase of removing the center access tube. We will install a dual tube set up once the livewell is in place, but for now we simply want to fill this gaping hole in the floor.
As we sit now the transom is just about ready to install, even down to the custom fitted backing plates. These two freaks will fit in the areas where the bolts go right into the stringers.
As new hardware gets installed, new holes get drilled in the boat. This means that we have been constantly wrapping these new holes in fiberglass to keep out water intrusion. This also gives us a chance to build up any areas where the gelcoat got thin during the sanding process.
Recently we received our custom fuel tanks from Sunshine Marine. How custom can a fuel tank be, you ask? The model name is ‘Craig Sutton’.
We got some 4lb. Pour Foam from our pals at Fiberglass Coatings and it is a hoot to work with. Once mixed you have about 20 seconds before your cup overflows like a volcano…we have some good video of this install and will post it soon.
Soon we will be ready to hang the bracket for real and install the tower. The ‘to-do’ list is now officially shorter than the ‘done’ list and we are stoked to be in the home stretch on The Discoverer Project.
October 18, 2013 – Day 564
The Discoverer is really starting to look like a boat!
Once we removed the transom and set those holes up with epoxy (see previous post), we turned our attention to the tower. Showboat Custom Coating already got this old tower shined up to like-new condition so we had to be extra careful not to ding this shiny aluminum.
We enlisted a few guys from the auto garage next door to have some extra hands on the lift; the tower is not really heavy as it is awkward.
Everyone breathed a little easier once the bolt holes lined up and the tower was secure.
We still have to make backing plates for the bolt, but for now we are leaving the tower in place as we continue work around the interior.
We moved forward with assembly of the windows and window frames; the aluminum frames were in nice shape once we sanded off all the old paint, so all we had to fabricate was some new window ‘glass’ from lexan plastic.
The fit is nice and once we clean off the sanding dust and errant 5200 these windows should shine like dimes.
In the last post we secured the fuel tanks with pour foam, but it didn’t expand quite as much as we thought it would (or feared it would, depending on your point of view). Here you can see where we added a bit more to really fill the cavity.
Craig and Bryan are full-steam-ahead on the cabin build. Recall that the cabin wood we removed from this boat was rotten and horrible, meaning that we would be fabricating the pieces whole. The only use of the old wood was for patterns.
However John at Oasis Boatyards turned us on to a sweet product called Coosa Wood which is a lightweight fiberglass board that is fun as heck to work with since it sands and cuts easy.
They began by replicating the four main walls of the cabin.
They used a specially-ordered 60″ wide piece to form the bathroom doorway.
Lastly they built this false wall behind the controls. This is where we will install all of our electronics and controls.
Finally Craig came up with a nifty way to cut the vent in the bathroom door. We were going to try the old outhouse crescent moon, but instead settled on a shape a little closer to the heart:
The Coosa wood has been such a godsend that we have decided to use it on the transom elbows and live well. Look forward to those results in the next post.
This week we hope to remount the transom and finish tightening down the tower. After that we will wrap the Coosa wood in fiberglass and spray it with a fresh coat of bright white gelcoat.
Once the cabin is installed and the livewell is built it we will be finished with principal construction and assembly; at that point it’s down to final rigging!
Feels good to be this far but there is still plenty that can go wrong and set us back. Stay tuned as we close in on the finish line for The Discoverer Project.
November 15, 2013 – Day 592
Howdy everybody!
Crazy how fast 20 days can go by, but rest assured the big work is getting done on The Discoverer Project.
When we left off the entire cabin had been fabricated from Coosa wood and we were just starting the time intensive process of wrapping all the pieces in fiberglass matte.
Although the resin-based Coosa is inherently waterproof, we are concerned that it needs more strength to stand-up to the punishment of a full-time charter boat
We started small with the elbows, then worked up to the bigger pieces.
It’s easiest to wrap all the edges first, then sand them flush to the faces. This ensures good adhesion and a nice flat finished product.
The gelcoat should be first applied to the edges (just like the fiberglass). This keeps the mess under control by preventing material from clumping up on the edges when we spray the faces next week.
Among these pieces are the rough shaped for the livewell, so while Matty worked on the cabin walls, Craig and Brian proceeded on the final installation of the Discoverer‘s livewell.
Also lots of small elements are coming into focus, such as fitting the fuel filler necks to the deck covers and waterproofing the holes with fiberglass.
The support elbows were epoxied into place and then coated with layer of fiberglass mat to mate it to the floor and transom.
Jamaal has put in countless hours with the progressive sanding and buffing of the all-gelcoat hull and right now he is applying the first of many coats of wax. This thing looks like high-dollar paint!
Lastly, we finally bolted up the transom bracket after successfully sleeving all the holes with epoxy.
It took a few ‘do-overs’ on some of the holes to match the 11 degree slant of the transom, but with perseverance managed to get all 18 holes perfectly sleeved in epoxy.
This week we will spray all the cabin pieces with gelcoat as well as the new construction in the rear of the cockpit. We are getting close to running electrical wires and control cables as we strive that much closer to getting the Discoverer in the water.
November 27, 2013 – Day 604
The Discoverer Project is barreling down the tracks full steam ahead! While Craig is off in Nosara getting the team prepped for the 2014 fishing season, Matt and Brian have been assembling the next great Costa Rica fish-fighting weapon.
The livewell installation is a slow and precise process. In the prior post we cut the individual pieces and wrapped them in fiberglass. Now we have epoxied three of the walls and the floor into place.
Before the front piece goes on, the interior edges had to be wrapped in multiple layers of fiberglass.
Basically we are in the most tender area of the boat; the transom area is where the floor, the motor bracket, and the livewell (which is full of heavy sea water) all come together…this amount of weight produces a lot of physics that can literally shake the boat apart. That’s why we are over-fiberglassing and epoxying this part.
Once the interior of the livewell was strong, we installed the front wall and repeated the multiple layers of glass.
Meanwhile the shaping of the cabin walls was completed and Matt proceeded to spray three layers of gelcoat. Once the paint set-up we progressively sanded it down from P400 to P1000 then applied compound and wax.
Fresh and shiny, Matt and Brian put the pieces into place. We had a two quick setbacks: The first was that in our haste to get the cabin built, we forgot to address the areas that were inaccessible with the plywood supports in the cabin.
Matt epoxied these and after and overnight cure finished these ancient areas with new gelcoat. The second setback reared its head when we put the pieces into place; it was apparent that the wall wouldn’t fit flush without cutting away a few small notches to allow for hardware clearance.
Little mis-steps like this are to be expected, but it really sucks to put the install on hold while waiting for a postage-stamp sized swath of gelcoat to dry.
The cabin installation is all but finished; we are holding off on installing the control room wall until we have some of the basic wiring in place; no need to create a cramped space until we have to, right?
By this time next week we should be painting the livewell and transom elbows, then moving on to install the teak wood and rod holders. Also the wiring and plumbing should be underway by then.
Stay tuned!
December 9, 2013 – Day 617
Been jamming out as we progress on The Discoverer Project! Brian and Matt finished off the livewell with four layers of fiberglass and then three layers of gelcoat:
While we had the gelcoat sprayer was out we figured it was a good chance to fix up some details around the edges of some of the external pieces.
Also we prepped the bottom for bottom paint using a clay and citrus dewaxer.
Then Jamaal rolled two layers of gray primer and a final coat of black bottom paint.
Now we are plowing ahead turning this hull into a boat; the console is in place and the access tubes are cut for the steering and controls. Also Brian and Craig have taken the proper steps to ensure that water drains into the bilge from all the external compartments, including the fuel tank holes.
Stay Tuned!
December 16, 2013 – Day 624
Is that Christmas snow here in our Jacksonville, FL shop?
Nope, but it is proof that we’ve become some hardcore carpenters as The Discoverer Project nears it’s conclusion.
Brian has made excellent progress on the tackle drawers for the cabin utilizing marine starboard for the material.
We are using notched drawers so there won’t be any steel rollers or other hardware…no hardware means no chance of hardware failure.
Brian kept the carpentry rolling by building new covers for the cabinets.
Craig has stayed in the cabin working on the rigging table and installing a hatch in the foreward of the cabin.
Jamaal has focused on the trim wood and the cabin door…looking sharp!
We also got the tuna tubes mounted. As usual we epoxy-sleeved the bolts, and notice the piece of holding wood we added to accommodate a shorter screw.
Matt has finished the reassembly of the outrigger mounts.
Notice the photograph used for reference…it’s been a long 19 months since we took this unit apart, so the older posts are really coming in handy as we put everything back together.
Most recently we rolled a coat of bilge paint into the center to help beef up the gelcoat. This should keep the bilge protected for many seasons.
We are progressing at a rapid speed and look to report more good news as we roll ahead on The Discoverer Project.
January 4, 2014 – Day 644
The Discoverer Project is at full sail as we are finished with construction and are down to final rigging. We can’t lose focus just yet though as these final touches are the margin between a good boat and a great boat.
The early stages of Brian’s tackle lockers were detailed in the prior post, but the finished product is really exciting.
In addition to the four drawers, he built a system of cubby holes to hold loose items like fishing tackle, drink cups, camera cases, etc. While he was at it he also built a slick paper towel holder mounted on an open top box for even more storage
Another big accomplishment this week was the re-installation of the windshield and side windows. Recall how easily they broke during the tear-down (skip to 6:05 for the break):
So clearly we were very careful with the new windows. A thick bead of black 5200 and several #8 screws and bolts did the trick on this install.
Safety first! This boat is being rigged to USCG standards so a Kidde Marine Fire Extinguisher was the first thing to get mounted.
Brian has moved ahead and prepared the main console with a piece of black lexan. He then cut out a hole for the compass.
He finished his preparation for wiring by mounting the stereo speakers for the AM/FM/CD unit.
Matt built a pair of coosa wood backing boards to add strength to the outrigger mounts, and is in the process of epoxy sleeving all the thru-deck holes for the mounts.
Also we are clearing up a snag with the two legs of the tower that pass the control lines…they were never welded into place when the tower was installed, so instead of welding on the boat (a dangerous and messy proposition) we are welding the pieces on the ground and then will mount them plate-to-plate.
Before:
After:
Matt ground the existing material down to a smooth finish so it is now ready to accept the new pipe. While we wait on the welding shop, Brian finished the upper control station.
We plan on using our hand-held GPS units on at the upper station, so we have taken the precaution of mounting a 12V cigarette lighter charging receptacle.
The plan is to pull the boat from under the cover by next week and start building the tower. We’ll then be ready to run pumps, hoses, electrical lines, and hydraulic lines.
Once that’s done all that’s left is clean her up, hang the motors, fill her up with gas, kick the tires and light the fires!
Stay Tuned!
January 7, 2014 – Day 647
January 10, 2014 – Day 650
We’ve kept up the good sledding on The Discoverer Project, even though the 20 degree temps have put the kibash on fiberglass or gelcoat work.
Cold temps don’t affect aluminum so Brian and Matt finished the installation of the control tubes on the tower. Here is how we left it in the last post:
Before:
After:
We decided to have a collar welded onto the existing pipe on the ground rather than try to weld aluminum up on the boat. The result is not only simple, but also allows for easy removal of these arms should the need arise down the road.
These pipes will carry the steering lines, throttle cables, and electrical to the tower-mounted station, plus the add strength to the tower in general.
On Friday the weather finally broke and Matt was able to finish the epoxy sleeving for the outrigger mounts.
Also, he is beginning to finalize the deck panels by adding a 10-inch access hatch for the fuel valve and putting an additional layer of textured gelcoat to the topsides.
Behind the scenes we finally have most all of the pieces we need to finish this boat…bilge pumps, the radio box, lots of electronic gizmos, wiring, and plumbing are all in the shop and ready to install.
Let’s hope we get the most precious commodity (time) next week so we can really leap ahead on The Discoverer Project.
January 14, 2014 – Day 654
Closing time on The Discoverer Project! Despite the freezing temps outside we are cooking with gas in the boat shop as the final details are starting to come together.
In the last post we had tightened the bolts on the tower control legs, leading to the next step which was to install the roof.
border=”0″ />
The original boat had an half-cloth / half-aluminum top. We’ll be fabricating new cloth, but the metal section was actually in good shape despite negligent care.
Our pals at Showboat Custom Coating did the tough work of stripping this piece prior to applying their incredible SB 305 Silver coating.
It was up to us to rivet ‘er into place, and Brian and Matt knocked that out with the help of some big wrenches and clamps plus in a pinch 285lbs. of ballast (Matt)
We then moved on to the final install of the outrigger mounts. This Lee’s Tackle design is strong as a brick and well-proven, however you have to get the angles just right for them to lay flat without binding.
In the last post we epoxy sleeved the holes, and now we have secured them permanently.
Recall two posts ago we glued and screwed the windshield back into place. They are in there super-strong, but the look was a little ragged.
Previously this boat had vinyl curtains that snapped into the window rail, but now Brian has fashioned this slick black lexan trim pieces.
We’ve detailed how the closed Craig ever comes to blueprinting something is a post-it note sketch:
or a magic marker:
But this takes the cake. Check out his detailed instructions for the dashboard, marked out in fiberglass dust.
It works though! Check out the first wave of dashboard installation.
Below decks Craig installed the first three pumps and seated a pair of scuppers on the bottom; these will feed the livewell and tuna tubes.
The last exterior detail was the installation of the rubrail rope. The only old wives tale to make this easy is to get the rubrail in the sun and soak the rope in soapy water.
With sub-30 degree temps, we were not about to do either. Instead the three of us rotated between holding the rope (easy), spreading the rail (medium-hard), and hammering the rope into place (hardest).
The toughest part is that it is all over-head work, meaning that eventually your arms turn to jelly.
It took about three hours, but we are stoked with the result.
Most recently Matt rolled a few fresh layers of gelcoat on the interior.
We have nicked up the floor so bad that the entire surface will be repainted by the time we are finished, however these two areas were bumped to the top of the to-do list.
This is because we need to install the captain’s chairs and fighting chair, and don’t want to screw around with tape lines.
We are getting there, but as the old saying goes “In a hundred mile race, 90 miles is halfway.”
January 20, 2014 – Day 661
The accomplishments are coming in bunches on The Discoverer Project. We have completed a large portion of the electrical wiring and plumbing.
We did not want to hamstring ourselves, so we have held off on installing the wall to the electrical closet until the wiring is complete.
Clearances are tight so we are trying to plan ahead as much as possible.
Oddly enough, the bilge outflow hoses won’t fit through the control tubes under the transom because of all the battery cables and control lines.
Therefore we are running them to the middle of the boat and then run out under the gunwales. It requires a lot more hose but cleans up the clutter in the bilge.
We also received our new seat covers and cushions and installed the pads for the upper station.
Also Craig and Brian finished fitting the fuel deck covers after installing the shut-off valves.
A rouge hailstorm and 50+ mph winds cause a little damage to the tent, but a quick morning of repairs got us back in business.
Anyways, we won’t need the tent for much longer as we have finally hit a major milestone: installing the full tower.
The tower presents more routing issues, but in the next week or so we should have all the lines and cables run for the throttles, steering, and power for the upper station.
We look forward to completing the final repaint of the inner hull and tacking on final accessories like the bottom machine / transducer, chairs, and of course twin outboards.
February 7, 2014 – Day 679
What a fantastic week of accelerated progress on The Discoverer Project!
With the tower in place Matt and Brian plowed ahead with the tricky task of routing a wad of control lines and hydraulic tubes up to the flying bridge.
Brian has engineered in enough slack in the cables to allow for the top control box to fold down for transport. Also the electrical connections for the spreader light are on a quick-disconnect for easy fold-down of the tower.
Clearly this has cluttered up the engineering closet quite a bit, but everything is still clean and well-labeled.
Craig was so stoked to see the tower up that he got right to work lacing up the canvas tops.
Meanwhile, Matt has been below decks finishing off all the wire runs with clamps and conduit.
He also has fabricated up a neat plate to mount the three way valves under the fighting chair; these valve placements must be 1.) Strong enough to accommodate the weight of the valve, 2.) Easily reachable from the cockpit, and 3.) Not pierce through the stringers to which they are mounted.
These countersunk bolts are epoxy-sleeved within a marine plywood sandwich. The whole plate is then epoxied into place, and soon will be further wrapped in fiberglass and painted to match the bilge.
This is definitely one of those things that would be a lot easier to install BEFORE cluttering the area with pumps and wires, but this is the fun of one-off boats….NO PLAN!
While we were under the floor we installed the fighting chair mounting plate, epoxy-sleeved of course.
Most recently Matt rolled the whole interior with a final coat of textured gelcoat. This helps cover up the scratches, nicks, and spills accumulated over the last few months of rigging.
Up next is the steering, throttles, and a little bit more odds and ends like upholstry, installing the head, and of course installing the motors and fuel delivery system…still after coming this far is hard not to peek ahead at the finish line.
March 10, 2014 – Day 710
Big news from The Discoverer Project!
With a lot of help from our pals over at Tidewater Boat Works, our pair of Yamaha 150’s are hung and ready to fire.
Brian and Craig were on hand to assist and to hook up the power lines, fuel hoses, and finish installation of the fuel/water separators.
With Craig set to leave town for a pair of boat shows, we only had Monday March 10th open to put the boat in the water.
First Water Test:
It felt great to see the Discover making waves, and of course the water test revealed a few small details we need to address. Still it’s been a long time coming.
We are keeping the boat in a marina until it is ready to ship, but that doesn’t mean that the boat shop is lonely…in fact we have already scrapped the tent and are preparing to build a much more permanent structure for the next boat project.
For now we will break in the new shop with another batch of Safari Carts.
Before too long we expect to start construction of a tightly-kept secret project: the Mega Panga.
More on that soon, but we will continue this thread for a few more posts as we get the Discoverer buttoned up and sent off to her new home in Garza, Costa Rica.
March 23, 2014 – Day 713
Final water test of the Discoverer is complete! She is on the way to Costa Rica right now and we expect to be fishing hard by May 1st.
Check out the farewell voyage up and down the St. John’s River in Jacksonville:
April 17, 2014 – Day 736
Howdy all,
Sorry for the radio silence the last two weeks, but the process of importing a finished boat to Costa Rica is beset by many perils: highway hauling, greedy customs agents, and bandits who’d love a new pair of Yamahas, for starters.
However we can rip the lid off the can now: The Discoverer has arrived safely to her new home in Nosara, Costa Rica!
The boat crews have a few details to tidy up (epoxy down the teak wood trip, assemble the outriggers and tackle, detail and wax) but we anticipate fish on in a few days.
Craig will be in there next Thursday for the final shake down, and our first paying clients are already lined up for May 2.
I’ll make sure to get pics from the boat in the water soon, and hopefully some bloody decks to go with it!
It’s been a crazy ride, but the feeling of accomplishment right now is indescribable.
May 2, 2014 – Day 0