The Discoverer Project – January 30, 2013

“Thats a lot of work, I am curious to know if you have calculated the amount of weight you have added with all that glass and resin?

I am also wondering why you did not use non woven biaxial fabrics to save weight and improve the overall strength? You could have also used a light weight fairing putty to fill the low spots on the deck and skipped that final layer of matte.

It seems like you guys are doing more work than you need to but I will give you tons of credit for taking on the job. Good luck and keep them pictures coming.”

-Dave Meyers, Florida Sportsman Forum Senior Member

January 30, 2012 โ€“ Day 296

Hi Dave,

Thanks for the reply! You are totally correct that the approach we are taking with the nose seems extremely overbuilt, and common wisdom tells that a lighter nose / bow means a softer ride, better gas mileage, and less horsepower required to get up to plane.

We currently have a boat almost identical to the Discoverer in service down in Costa Rica and the front deck has been a constant source of concern in our specific application. We keep this boat (the Wanderer) in the water year-round tied off to a mooring point and last year a freak set of waves swelled into our harbor at Garza Bay.

The Wanderer incurred serious damage from this event as a rouge wave came over the back, filled the cockpit, and sprung the whole boat up on her nose. When it crashed down, here was the result:

Name:  post29.jpgViews: 0Size:  82.6 KB
Name:  post31.jpgViews: 0Size:  77.5 KB
Name:  post29.jpgViews: 0Size:  82.6 KB

Also as a charter boat we have come to expect the unexpected when it comes to client behavior. Sometimes we have hardcore anglers want to sight fish off of the bow; other times we have 10 yoga students who want nothing more than to hang off the bow and look at dolphins:


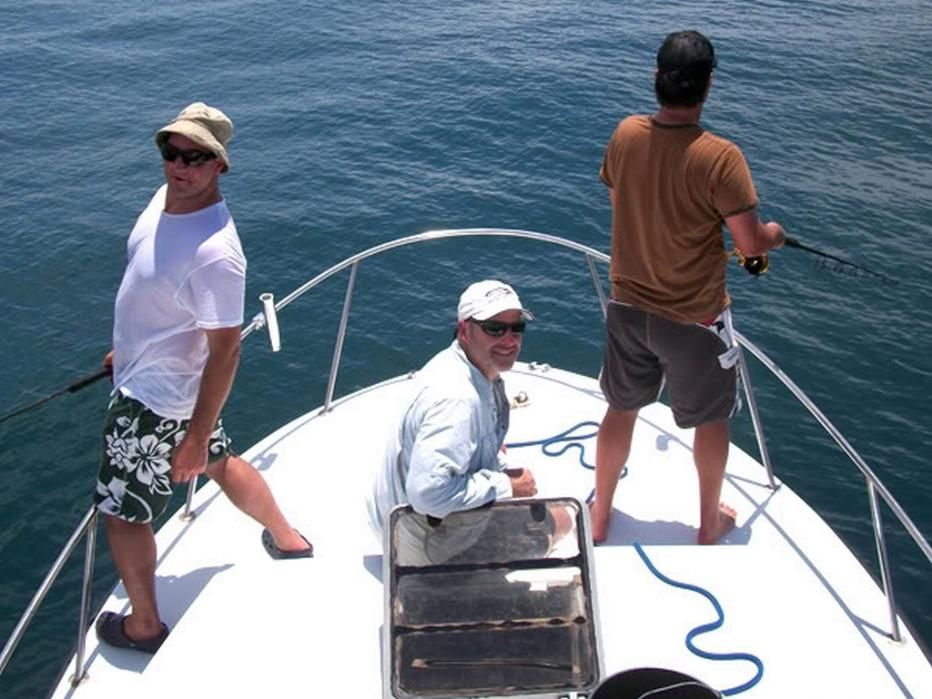
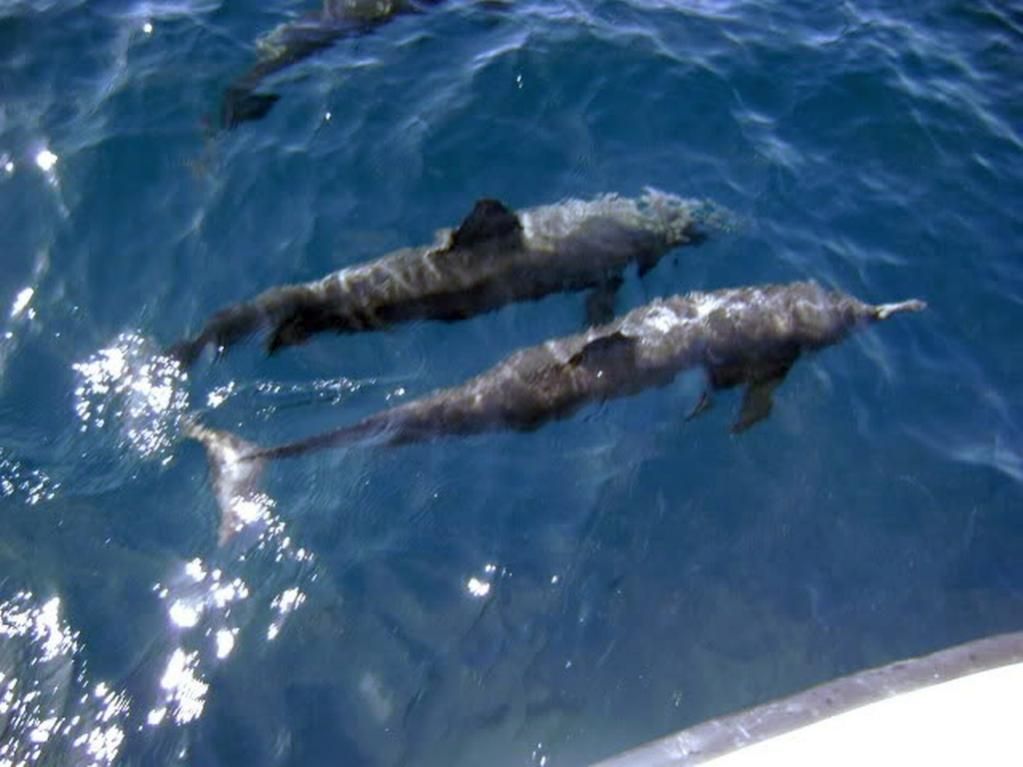
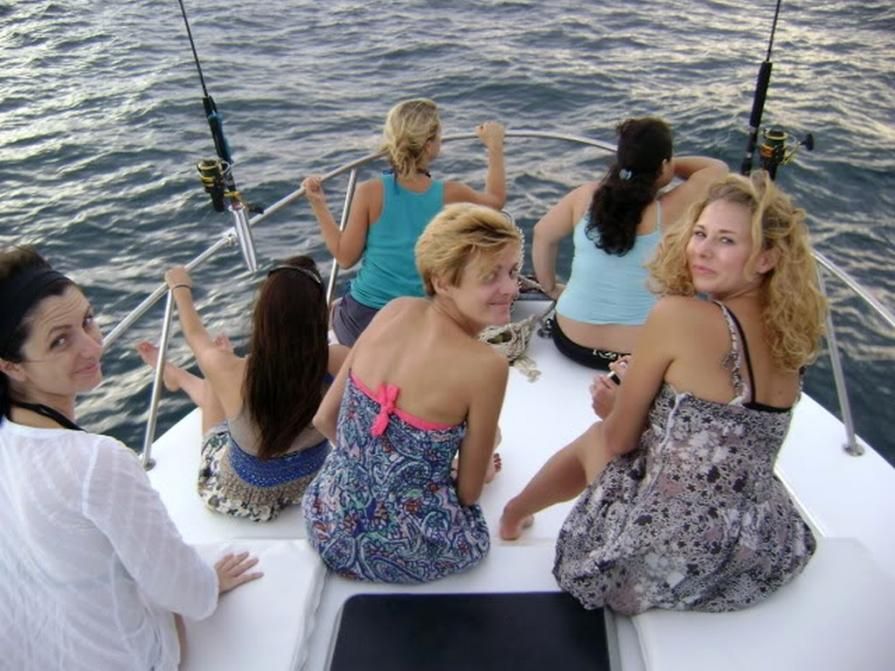
The Wanderer has taught us the value of having a strong foredeck because the unexpected is always right around the corner for us. Read the details on the whole in-country repair process here: Wanderer repair – September 2011

As for the weight issue, we have a very short ride to the blue water (less than 6 miles) and never need to exceed 25 knots even during tournament time. With the Discoverer I figure we have added approximately 75 pounds to the nose so far and will probably end up just short of 100 pounds added by the end of the process.


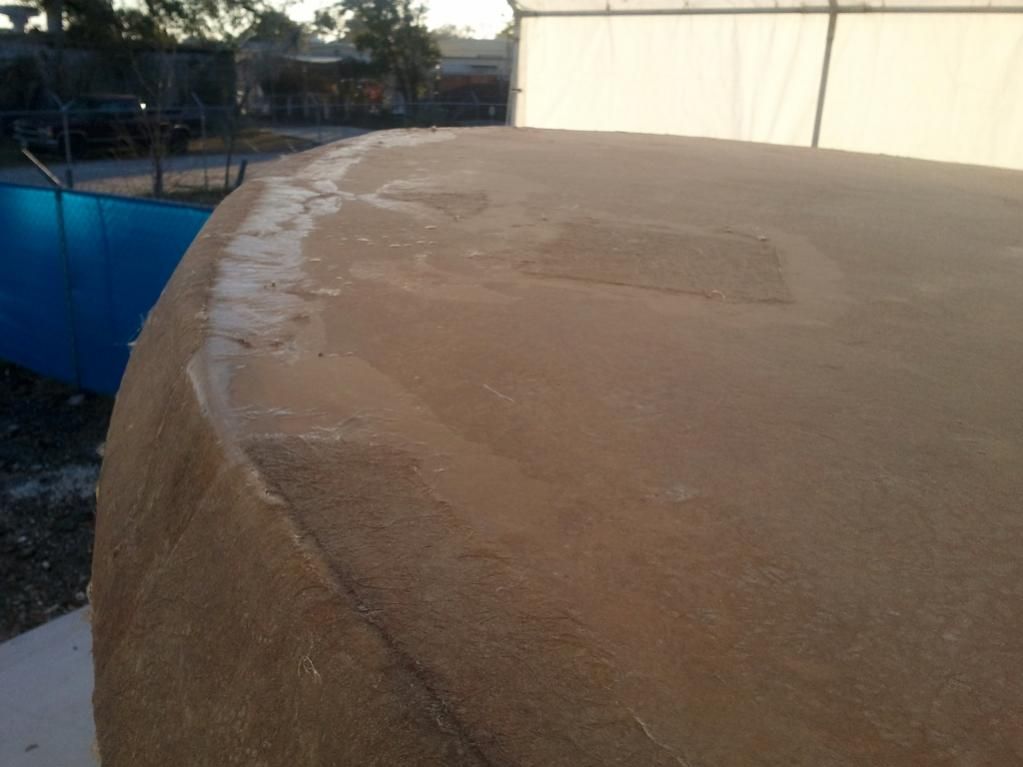
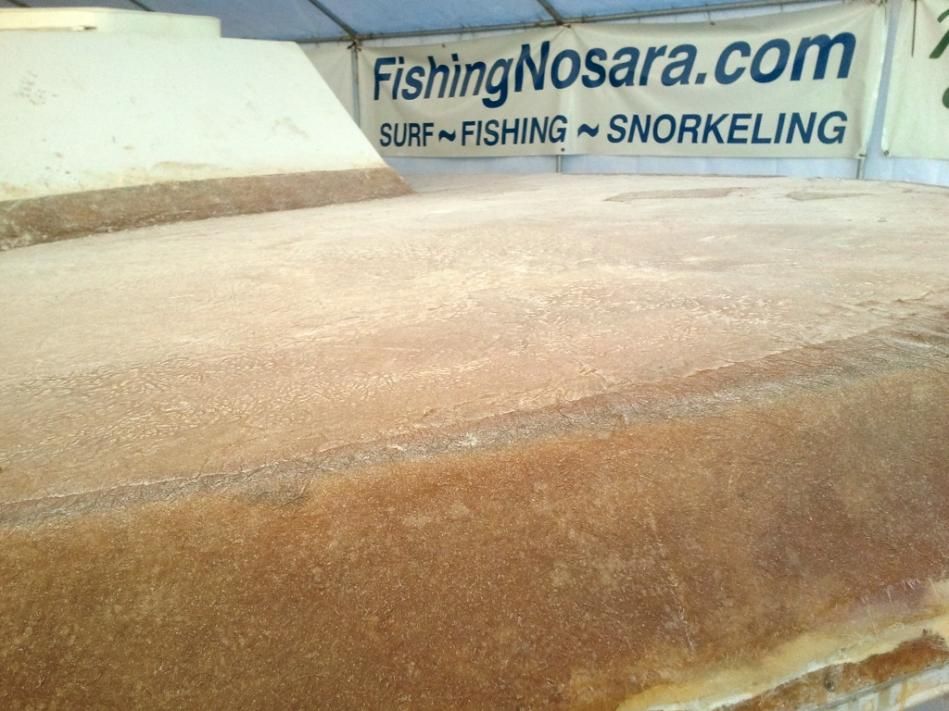
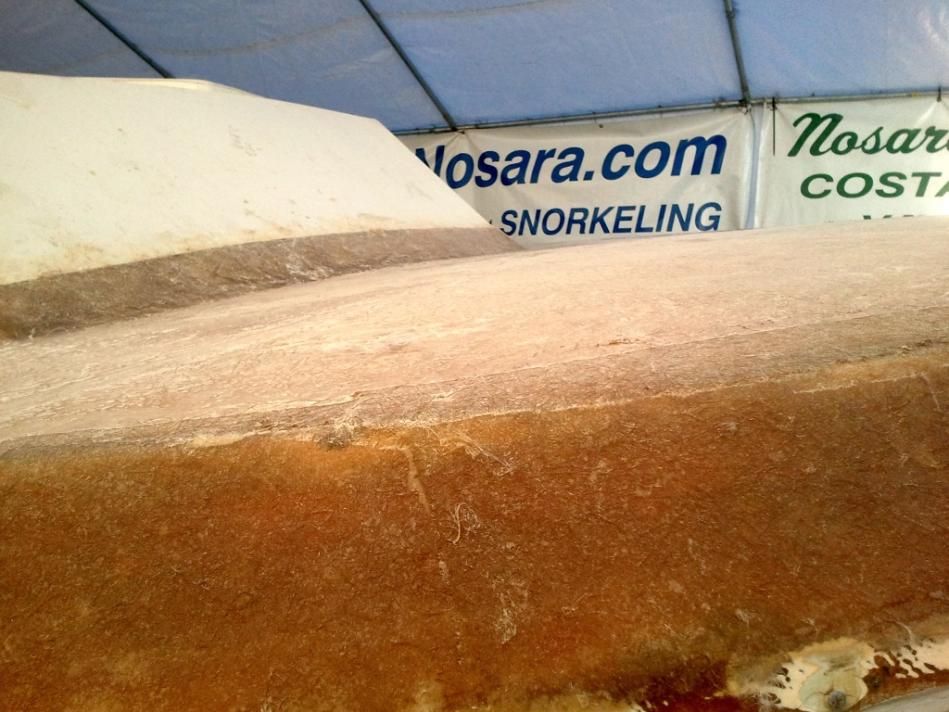
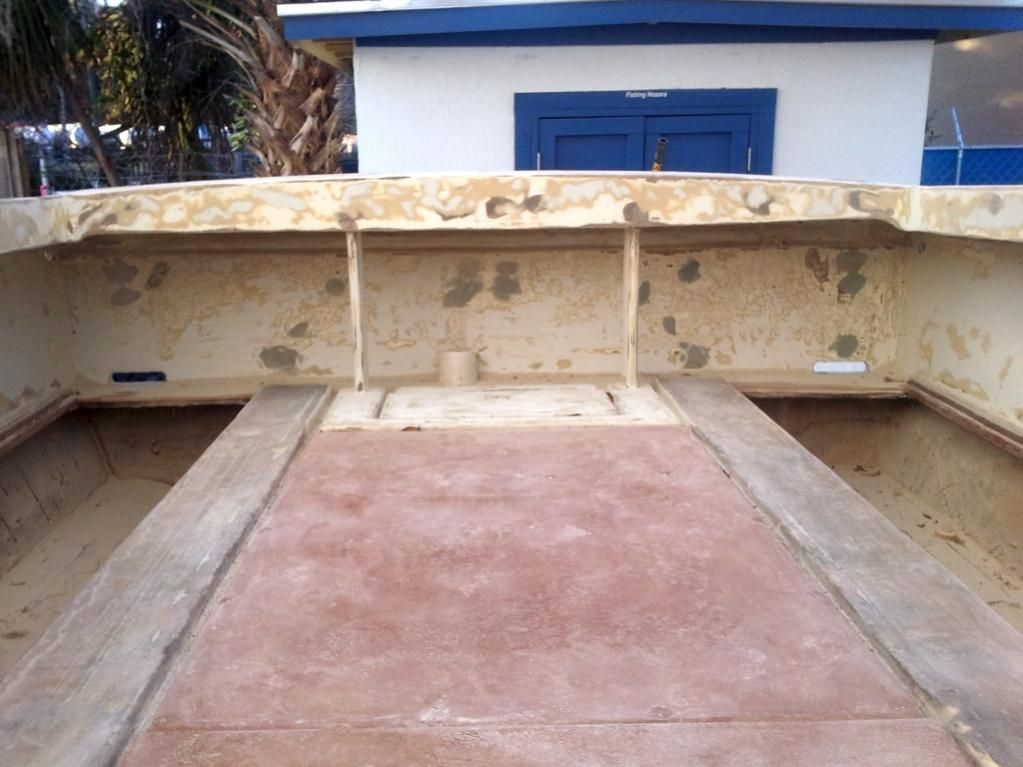
As for the finish work, you are also right that we could use either a lightweight fairing puddy or even a micro balloon mix to fill the low spots rather than fussing with whole sheets of fiberglass mattes. However in this case we are trying to replicate the materials that are available to us in Costa Rica.

You see our area is so remote that there are no legitimate boat suppliers. The only materials we can acquire locally for repairs are standard polyester resin/hardener and matte. The best way to make sure that we can easily repair this foredeck with local materials is to only use locally-available materials from the start.


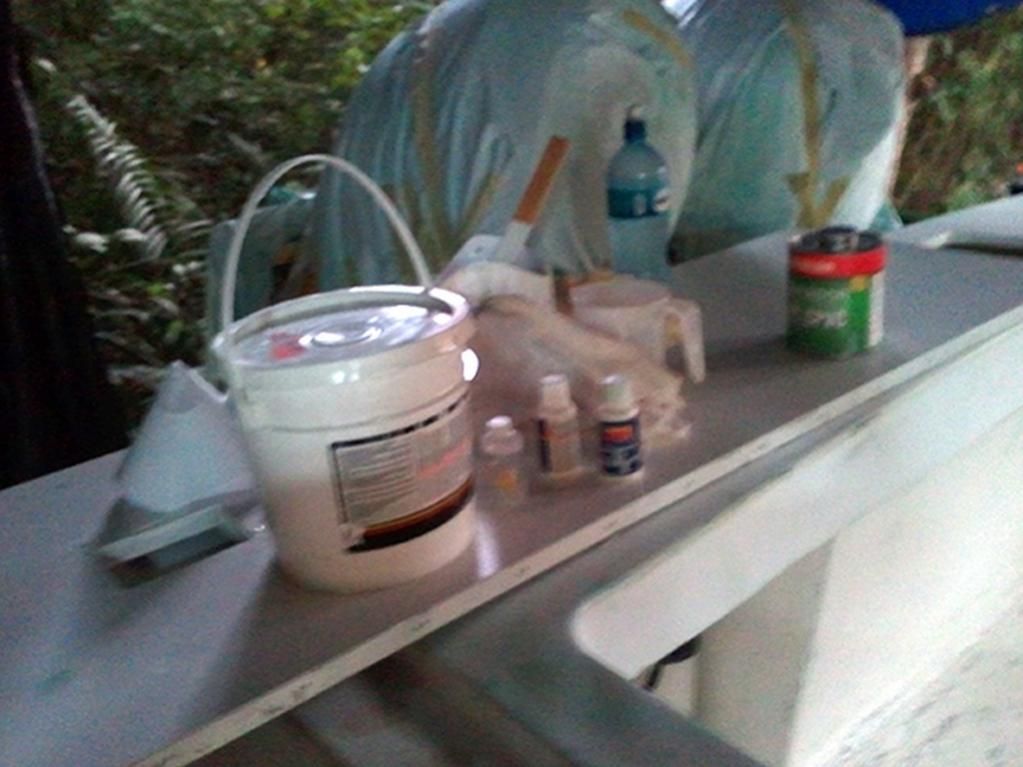
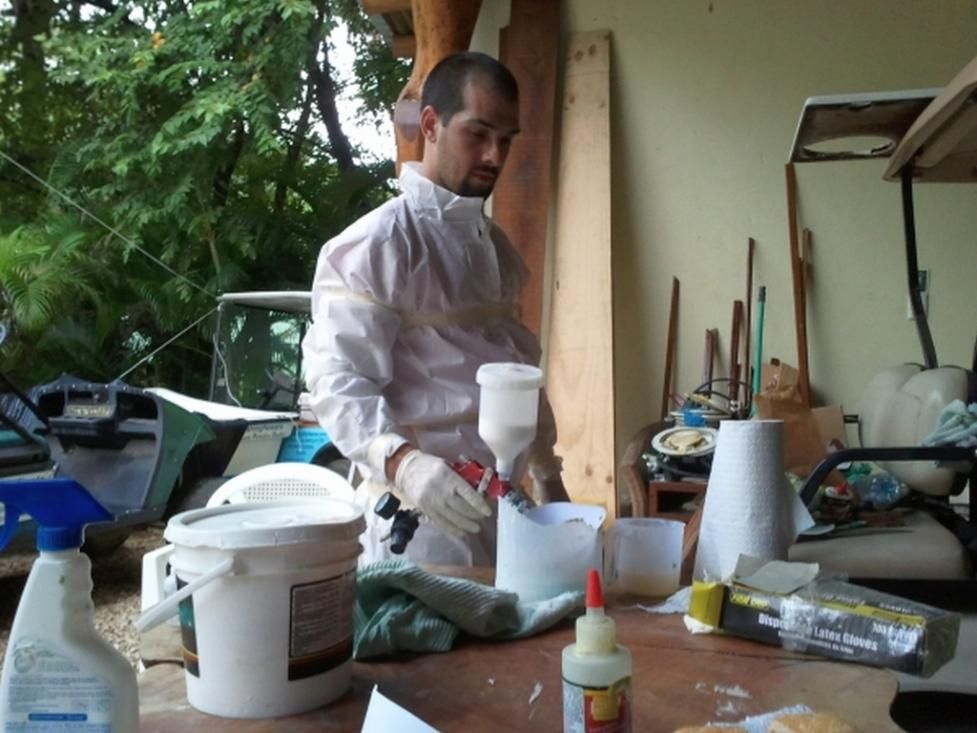
Another example of this is our choice to spray gelcoat rather than marine paint…you can’t find good marine paint anywhere in Costa Rica, but gelcoat is available in almost every hardware store. Here is a link to our last gelcoat spraying escapade: Wanderer Refit – September 2012

It seems like you guys are doing more work than you need to but I will give you tons of credit for taking on the job.

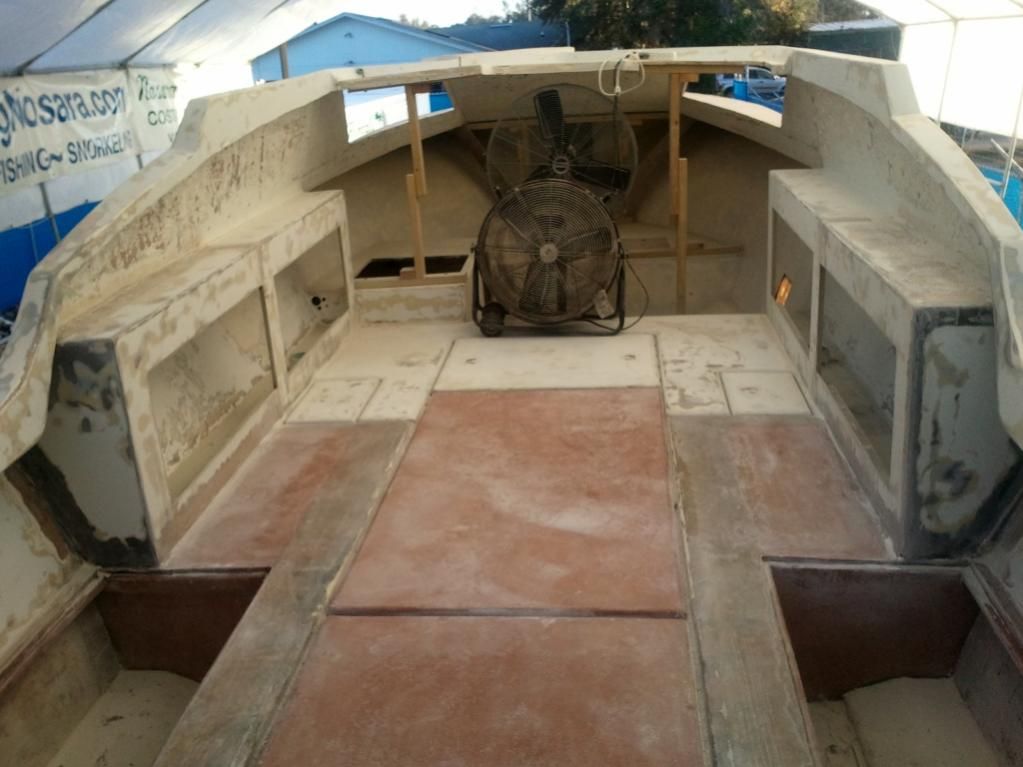
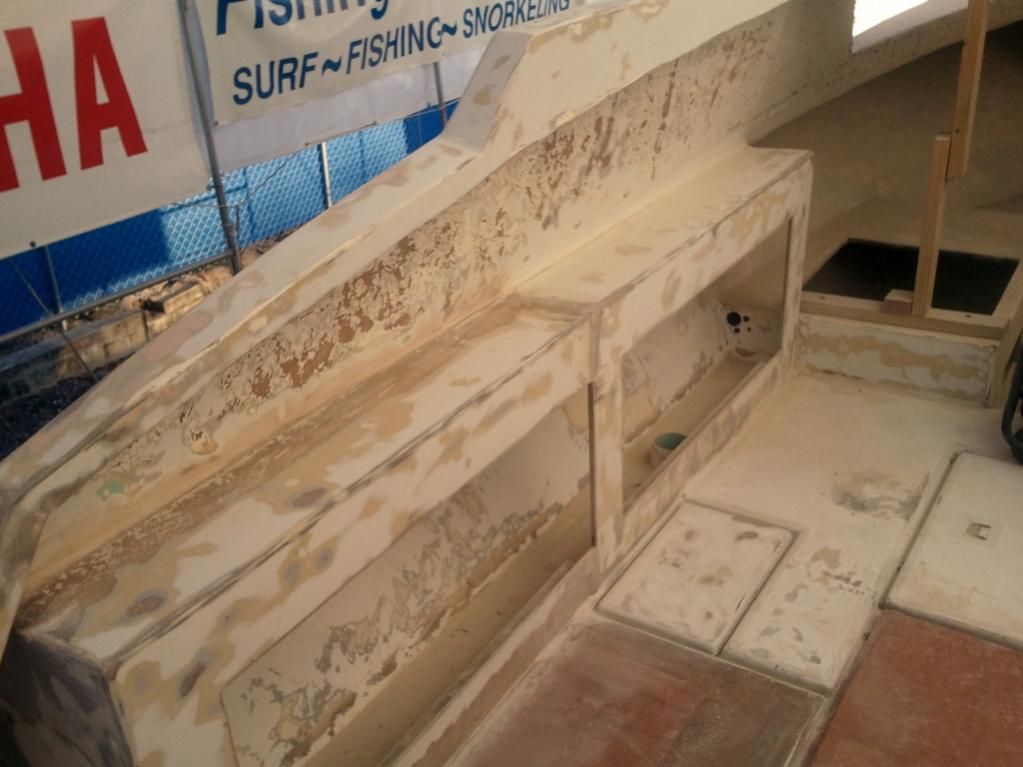
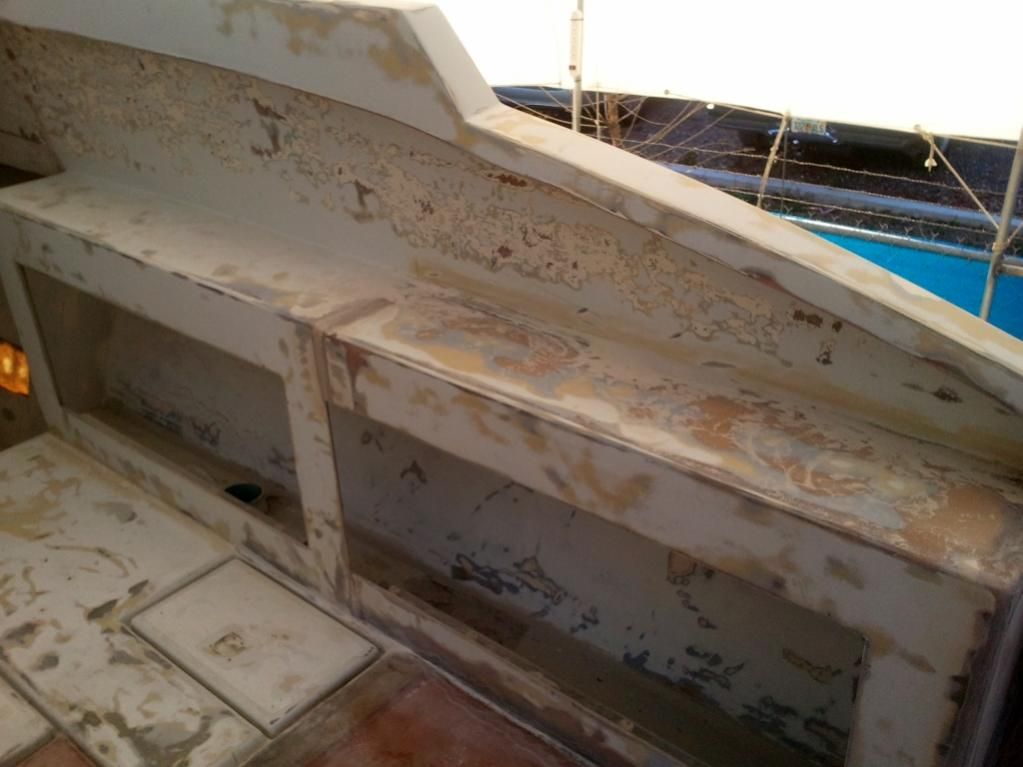
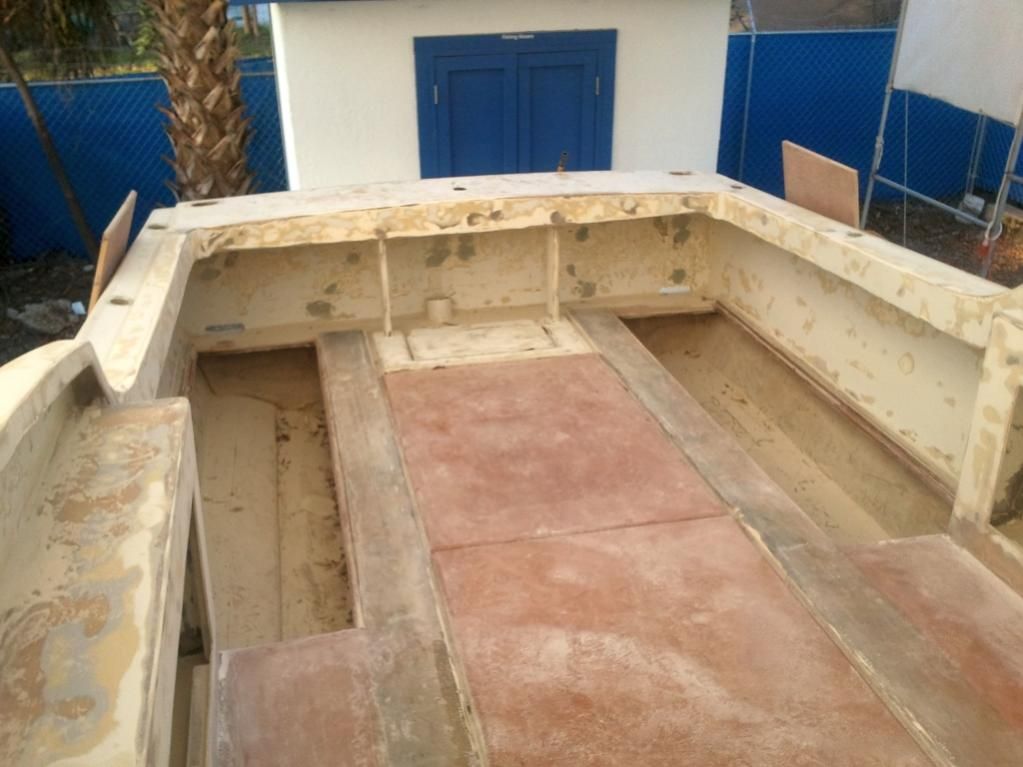
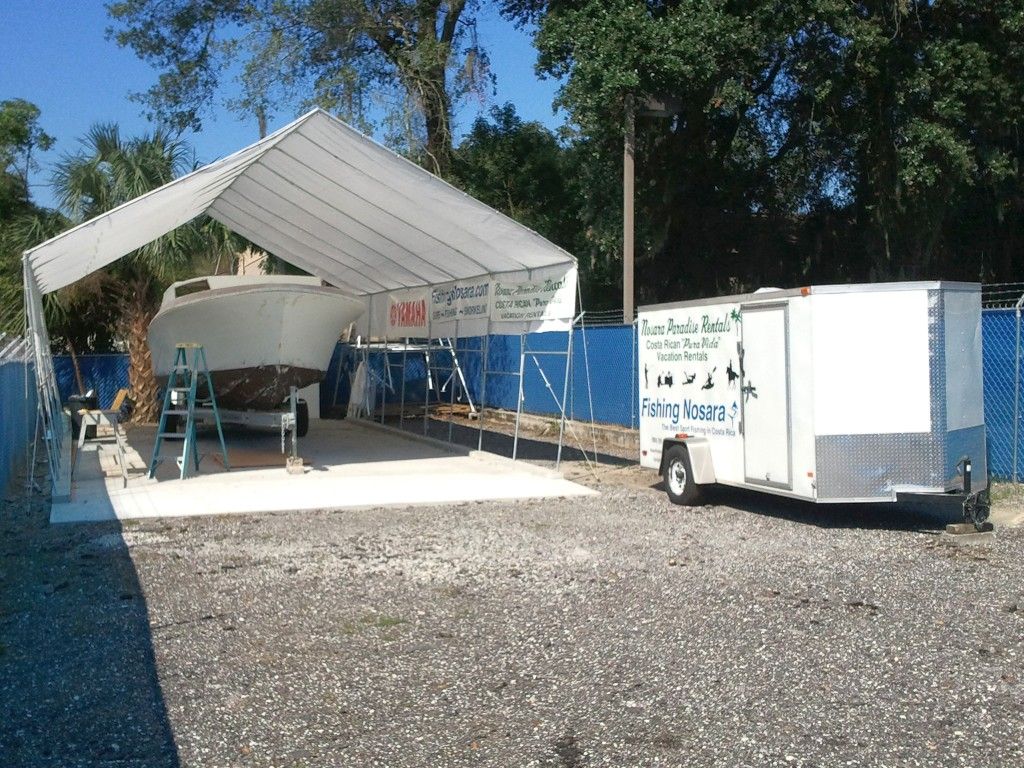
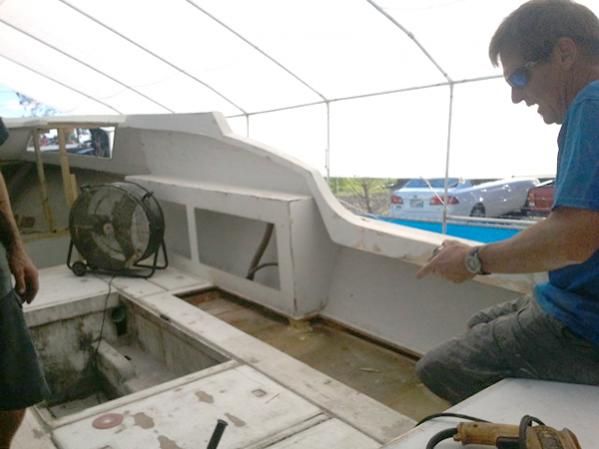
You are totally correct, and thank you for the kind support. We will keep the pictures coming and should be spraying gelcoat soon. Here you can see that Captain Jack has plowed ahead with prep-sanding the interior and the cabin. A little more clean-up and a few more repairs and we will be throwing material at her in the next few weeks.


December Discoverer Update

December 19, 2012 โ€“ Day 254

Sorry for the long layoff, but weโ€™ve been super busy standing behind the sanding machine for the last three weeks. Matty has grown fond of his new Porter Cable electric DA sander and has been wearing out lots of 80 grit and 40 grit sanding discs.

Name:  prep1.jpg<br />Views: 0<br />Size:  26.7 KB

During the sanding process we discovered a flaw in our front deck installation (see previous posts). The bulk of the deck set up perfectly, however some significant air bubbles formed on the outer edges of the installation.

Name:  2012-12-15155241.jpg<br />Views: 0<br />Size:  94.9 KB

Matty used a grinder to expose the affected area and to rough up the surrounding area to accept the repair:

Name:  2012-12-15155306.jpg<br />Views: 0<br />Size:  96.2 KB

Name:  2012-12-15155314.jpg<br />Views: 0<br />Size:  94.9 KB

Name:  2012-12-15155328.jpg<br />Views: 0<br />Size:  93.1 KB

Then Craig went around the area with a compressed air blower to clean all of the dust out of the crevices; any trapped sanding dust could create more air bubbles and put us right back at square one.

Name:  craig2.jpg<br />Views: 0<br />Size:  42.0 KB

We mixed up a load of resin / hardener with a bunch of chopped-strand fiberglass for thickness, then Craig worked quickly to fill the voids before the material set-up.

Name:  00.jpg<br />Views: 0<br />Size:  30.0 KB

Name:  01.jpg<br />Views: 0<br />Size:  41.8 KB

Name:  06.jpg<br />Views: 0<br />Size:  35.0 KB

Hereโ€™s a look at the finished application of the raw fiberglass material:

Name:  02.jpg<br />Views: 0<br />Size:  44.9 KB

Name:  03.jpg<br />Views: 0<br />Size:  36.7 KB

Name:  04.jpg<br />Views: 0<br />Size:  42.4 KB

Name:  05.jpg<br />Views: 0<br />Size:  40.2 KB

Name:  08.jpg<br />Views: 0<br />Size:  36.3 KB

Name:  09.jpg<br />Views: 0<br />Size:  32.2 KB

Craig followed up with a double-thick layer of fiberglass tape to secure the area and to provide a better surface to begin finalizing the curved lip of the deck.

Name:  10.jpg<br />Views: 0<br />Size:  37.5 KB

Name:  11.jpg<br />Views: 0<br />Size:  37.3 KB

Name:  12.jpg<br />Views: 0<br />Size:  36.6 KB

Name:  14.jpg<br />Views: 0<br />Size:  34.6 KB

The next day Matty came back with the sander and knocked down all the high spots to match the level of the deck. The low spots remain, and will be filled up to level by the forthcoming layer of resin and fiberglass mat.

Name:  high spots done.jpg<br />Views: 0<br />Size:  22.5 KB

Name:  tape finish.jpg<br />Views: 0<br />Size:  23.4 KB

We are getting close to finalizing all of the fiberglass repair and will be shooting our first layer of gelcoat very soon.

Name:  end shot.jpg<br />Views: 0<br />Size:  23.3 KB

Clearly The Discoverer Project is gaining momentum as we near 2013.

December 27, 2012 โ€“ Day 262

Craig rolls into the office the day after Christmas and throws the fishing calendar down on the table. โ€œWe need another big boat!โ€ he exclaimed, pointing at the line for the Wanderer.

Name:  wanderer sched.jpg Views: 0 Size:  65.8 KB

Heโ€™s right! A quick look shows the blue beauty fishing every single day except Christmas (and that wasnโ€™t due to lack of demand) and clearly the market is primed for the arrival of the next great Costa Rican Sportfishing vessel. The only thing standing between the Discoverer and the blue water is about 1000 hours of labor and God-knows how many dollars.

Nothing to it but to do it, so Craig got back to work on the new front deck of the Discoverer. Here is how we left things before the break:

Name:  deck01.jpg Views: 0 Size:  81.5 KB

The high spots have been block sanded down to the same level of the rest of the foredeck, and the spots that are still shiny are lower than the surrounding level. Craig applies liquid resin / hardener with no additives (also called a โ€˜hot-coatโ€™) to the low spots, then we add another layer of fiberglass tape over top of the resin.

Name:  deck02.jpg Views: 0 Size:  84.7 KB

Name:  deck03.jpg Views: 0 Size:  81.3 KB

Name:  deck04.jpg Views: 0 Size:  80.7 KB

The idea is bring everything up to the level of the foredeck, and if we accidentally build it up too much thatโ€™s no problem because we can always bring it back down with the sanding block.

Name:  deck05.jpg Views: 0 Size:  67.4 KB

Name:  deck06.jpg Views: 0 Size:  69.9 KB

Name:  deck07.jpg Views: 0 Size:  71.3 KB

After an overnight cure and some early morning sanding, Craig returned to repeat the process; there are no shortcuts when it comes to building up levels of glass like this, just lots of time spent on a sanding block.

Name:  deck12.jpg Views: 0 Size:  89.2 KB

Name:  deck13.jpg Views: 0 Size:  90.3 KB

Name:  deck14.jpg Views: 0 Size:  74.6 KB

Name:  deck16.jpg Views: 0 Size:  78.5 KB

Finally the entire deck is at the proper level! All that is left to do is a final touch with the block sander, then clean it up and add our final layer of chopped strand.

Name:  deck18.jpg Views: 0 Size:  92.0 KB

Name:  deck19.jpg Views: 0 Size:  75.0 KB

Here is last bit of this deck that will ever see the sunshine:

Name:  last shot1.jpg Views: 0 Size:  92.6 KB

Craig is fired up to keep this thing moving so he began forming the chopped strand sections even though Matty had one more round of block sanding to go:

Name:  deck20.jpg Views: 0 Size:  79.8 KB

Name:  deck21.jpg Views: 0 Size:  82.1 KB

Name:  deck22.jpg Views: 0 Size:  73.3 KB

Name:  deck23.jpg Views: 0 Size:  67.0 KB

Name:  deck24.jpg Views: 0 Size:  72.9 KB

Meanwhile Charlie came around and added another coat to his hole repairs by the bathroom and the rear transom. He moves like a ninja and makes this stuff look easy, but trust us this is high-level detail oriented work:

Name:  deck09.jpg Views: 0 Size:  86.4 KB

Name:  deck10.jpg Views: 0 Size:  95.7 KB

Name:  deck11.jpg Views: 0 Size:  69.8 KB

We are stoked for the final coat of chopped strand and you know where to find the picsโ€ฆright here baby!

Discoverer Update – November 21, 2012

It’s Thanksgiving week and with all the talk of stuffing, and getting stuffed, etc. Charlie decide to ‘stuff’ some more holes in the Discoverer. As we rapidly approach the final prep sanding phase and look forward to applying paint, we keep finding more and more little issues like these that need addressing.

Name:  2012-11-20 16.40.58.jpgViews: 0Size:  57.0 KB

Name:  2012-11-20 16.41.04.jpgViews: 0Size:  78.3 KB

These holes along the top of the aft gunwale are a pretty straightforward fix. The fiberglass and wood are still sturdy this far above the waterline so the fiberglass is truly ‘plug and play’.

Name:  2012-11-20 16.41.11.jpgViews: 0Size:  57.6 KB

Name:  2012-11-20 16.41.28.jpgViews: 0Size:  63.2 KB

Up near the head was a whole different story. The pair thru-hull fittings were (Surprise, surprise) lacking any 5200 sealant so water has intruded around the holes. The damage extends about 4 inches outward from the hole so Charlie had to scrape out the damaged wood, stuff the crevice with chopped strands of fiberglass, and push the hot resin up to fill the void.

Name:  2012-11-20 16.41.50.jpgViews: 0Size:  77.1 KB

So far the inside of this pair of holes is all patched up and the outer layer is coming soon.

Discoverer Update – October 18, 2012

It’s been another crazy week on The Discoverer Project as we have moved ahead with sub-floor fabrication in the cockpit. Craig and Jack made a heck of a mess grinding and cutting out the fuel tanks (see last post) so the first step was to clean up the evergrowing mess of fiberglass dust and wood shavings.

Name:  1 Craig cleans.jpg Views: 0 Size:  88.5 KB

Charlie has already cut replacement rails for the holes in the floor and now begins the process of glassing them into place. The red clay-like material in the foreground is actually millions of microballoons that (when mixed with hot fiberglass resin) turn into a putty that can fill gaps much better than fiberglass alone.

Name:  2 pieces ready.jpg Views: 0 Size:  89.0 KB

Name:  3 pieces readyb.jpg Views: 0 Size:  85.6 KB

Name:  4 charlie preps.jpg Views: 0 Size:  89.8 KB

Charlie laid his first round of fiberglass tape around the two large central openings, then cut six pieces of marine plywood that will be encapsulated in glass and eventually become the new floor for the Discoverer

Name:  5 boards cut.jpg Views: 0 Size:  77.1 KB

Name:  6 board cutb.jpg Views: 0 Size:  66.4 KB

That night disaster struck as a fog bank rolled through Jacksonville and wrecked havoc on the fiberglass resin setting up. When Charlie showed up to check his test section of fiberglass the whole piece detached.

Name:  7 glass fail.jpg Views: 0 Size:  93.1 KB

Name:  10 fiber box.jpg Views: 0 Size:  83.0 KB

There is no avoiding moisture-related setbacks when you are working on a boat outside in Florida. Fortunately we are getting to the time of year when the temperature and the humidity are on the decline and hopefully we can get through all of the fiberglass and paint work before the summer starts again in February.

Name:  75 charlie.jpg Views: 0 Size:  90.7 KB

Name:  13 finished rail.jpg Views: 0 Size:  89.6 KB

On his second attempt Charlie achieved adhesion and could move on with enclosing the forward deck holes. Since the forthcoming fuel tanks are significantly smaller than the old ones we will fill this dead space with marine foam; you can never have too much foam in a hull.

Name:  8 fiber redux.jpg Views: 0 Size:  76.6 KB

Name:  9 fiber redux closeup.jpg Views: 0 Size:  94.1 KB

Name:  11 craig checks.jpg Views: 0 Size:  88.9 KB

Name:  12 box glassed in.jpg Views: 0 Size:  84.4 KB

The next trick up Charlie’s sleeve is to build a fiberglass arch intended to tie the fighting chair directly into the stringers. On the Wanderer we struggled with the best way to secure the fighting chair; not only must it withstand the abuse of reeling in 600+lbs. Marlins, any fighting chair gets grabbed alot by anglers and crew seeking balance. Sometimes the weight of three people are yanking on this thing so through-bolting it to the fiberglass floor is just not strong enough for us.

On that boat the solution was to screw a 3/4 stainless steel plate into the stringers horizontally. It did the trick strength-wise but weighs alot and is not very elegant. Charlie has proposed a dynamite solution with which we are quite happy.

Name:  14 arch build1.jpg Views: 0 Size:  89.3 KB

Name:  15 arch build2.jpg Views: 0 Size:  90.7 KB

Name:  16 arch in place.jpg Views: 0 Size:  73.9 KB

Name:  17 arch detail.jpg Views: 0 Size:  90.0 KB

Name:  18 arch underside.jpg Views: 0 Size:  79.1 KB

This arch will receive another coat of glass that will fully secure it to the stringers, and once it does we will have a perfect spot to secure the fighting chair on the Discoverer. Speaking of fighting chairs, check out the rebirthed Wanderer chair:

Name:  100_0806.jpg Views: 0 Size:  78.1 KB

Name:  100_0807.jpg Views: 0 Size:  92.8 KB

First Mate Alex really outdid himself on this project. I can’t wait to see this baby in action come November 1!

Next up for Charlie is finishing the covering decks for the fuel tanks and running final surface coats of fiberglass to the cockpit floor and the front nose deck.

Name:  19 next up.jpg Views: 0 Size:  75.0 KB

Meanwhile we are waiting for our fuel tanks to arrive and getting our ducks in a row for the upcoming month of hanging the transom deck and painting the boat. Stay tuned for more fun as it happens!

Discoverer Update – October 6, 2012

It’s been a dirty week of work on The Discoverer Project as we moved below decks into 20+ years of diesel-flavored sludge and muck. Charlie has taken the next step in fabricating the floor by installing these 1″x2″ runners along the edges of the fuel tank compartments and the center compartments.

Name:  2 Charlies runners.jpg Views: 0 Size:  56.5 KB

Name:  3 detail.jpg Views: 0 Size:  35.8 KB

These will be encapsulated in fiberglass to ensure that they are watertight and Charlie has an idea that is common among expensive custom boats: in every spot that will receive a screw, we will drill out about a 1 inch hole and fill the hole with epoxy resin. This way the wood never gets penetrated by a screw.

Name:  4 frame complete.jpg Views: 0 Size:  56.3 KB

It’s a little tricky to line everything up, so stay tuned as we progress on this element.

In the last post we removed the deck plates over the fuel tanks, and to our surprise these tanks are much larger than we anticipated. The tanks run flush to the transom and extend all the way forward, almost to the seat pedestals. We estimate that each tank holds 120 gallons of fuel.

Jack began the delicate work of cutting an access panel into the top of the tanks to allow for our friends at Independent Waste Oil get their sucker hose into the tanks.

Name:  5 cutting begin.jpg Views: 0 Size:  36.0 KB

Name:  6 cut detail.jpg Views: 0 Size:  27.5 KB

Name:  7 hole detail.jpg Views: 0 Size:  39.5 KB

Remember on every aspect of the fuel tank work everything must be done twice.

Name:  8 second cut.jpg Views: 0 Size:  41.9 KB

Name:  9 pump out.jpg Views: 0 Size:  55.2 KB

Handy trick: Raise up the front of the boat as much as safely possible while draining the tanks; this ensures that a maximum amount of sludge and fuel make it out of the boat.

Name:  10 jack on jack.jpg Views: 0 Size:  68.0 KB

The Discoverer will feature aluminum tanks similar to those on the Wanderer. Aluminum tanks are far more lighter and durable than their fiberglass counterparts, plus by having them fabricated to fit we free ourselves from the existing dimensions of the holes in the floor. We are very pleased with the tanks built for us by Atlantic Coastal Welding in Jacksonville on the Wanderer, so we plan on using their services again.

However before we start designing the new tanks, the old ones gotta go!

Name:  11 begin tank cut.jpg Views: 0 Size:  39.0 KB

This is tricky because of the limitations of the situation. First off, you can’t use a sawzall or any other ‘deep-cut’ tools because of the tight clearance between the bottom of the tanks and the outer hull; one slip and we are patching a gash in the side of the boat.

Also, you can’t generate too much heat because of the low flashpoint of the leftover diesel fuel mix, so forget about torches, jigsaws or body saws.

The only tool for this job is a low-RPM cutoff grinder borrowed from Jack’s automotive toolkit. Jack kept the RPM’s low and made long scoring cuts rather than digging in and dragging.

Name:  13 tank cut halfway.jpg Views: 0 Size:  38.3 KB

This is an arduous and nasty process, but Captain Jack ain’t scared of a little grinding dust. In the above picture he has already cut away the 3/4″ lid of the tank and proceeded to cut out the horizontal baffles. Here is a close-up of the baffles:

Name:  14 baffle detail.jpg Views: 0 Size:  33.0 KB

Jack and Craig then cut horizontal grooves into the bottom of the tank (carefully!) so the tank could be removed in sections. The tank is way too big to come out in one piece…quite frankly I think they built this boat around the tanks!

Name:  15 pry out.jpg Views: 0 Size:  36.9 KB

Even with the sectioned removal approach, we battled a layer of foam insulation that held the tanks in place. No exotic way to knock this out; just the old fashioned prybar and balls.

Name:  16 pry out.jpg Views: 0 Size:  55.3 KB

With the tanks gone, Charlie can begin fabricating the new covering boards for the forthcoming aluminum fuel tanks. Meanwhile we will begin cleaning our sanding dust and wiping the hull with acetone. It won’t be long until we are prepping for paint and then it is off to get the transom installed. Stay tuned as we continue work on The Discoverer Project.

Discoverer update – September 29, 2012

Well the team is back together as Matty, Craig Jr., and Craig Sr. put the finishing touches on the refit of the Wanderer and made it back to Florida last weekend. We finally got our hands dirty on the Discoverer again after a barnstorming trip to Tampa for the Florida Sportsman Expo the day after we got back from Nosara.

So through the hazy fog produced by jet lag, culture re-acclimation, and soothing wives/girlfriends angry with us for always being gone, let’s take a look at the current state of the Discoverer:

Name:  2012-09-29095930.jpg Views: 2 Size:  89.2 KB

You can see that the DA sanding of the hull is moving along nicely, and we almost have all of the shiny spots roughed up. One more day of sanding and she will be nearly ready for paint.

Name:  b.jpg Views: 2 Size:  17.2 KB

Name:  Cabin.jpg Views: 2 Size:  24.6 KB

Charlie Keen has worked his magic on all of the holes in the rear transom as well as the pickups under the boat; last post we mistakenly reported that the boat was being lifted on pipe jackstands when in fact those stands were holding in the fiberglass plugs.

Name:  charlie1.jpg Views: 2 Size:  47.8 KB

Name:  transom outer.jpg Views: 2 Size:  31.3 KB

Name:  transom.jpg Views: 2 Size:  36.5 KB

Notice anything missing in that last picture? If you said “half of the floor that covers the fuel tanks” then you are correct.

We weren’t sure the size or conditions of the fuel tanks until Craig and Jack started cutting, and what we found is shocking. This pair of 120 gallon tanks are the largest I’ve ever seen in a T-Craft and getting them out will be a challenge.

Name:  Jack.jpg Views: 2 Size:  29.5 KB


Name:  cut fresh.jpg Views: 2 Size:  41.5 KB

Notice that in the rear these tanks butt up to the transom, and up front they are covered by the side benches. These benches are fiberglassed directly to the hull so their ain’t no removing them except via the sawzall. On the Wanderer the 100 gallon tanks lifted right out through properly cut access panels; on the Discoverer we will have to get more creative.

Name:  fuel tank overhead.jpg Views: 2 Size:  36.7 KB

Name:  fuel tank port.jpg Views: 2 Size:  45.5 KB

Name:  fuel tank strboard.jpg Views: 2 Size:  40.4 KB

Our working plan is to drain the tanks then cut them into small enough pieces to remove.

ย Afternoon Update:

Just ran outside and shot some up-to-the-second pics. Here is the aforementioned jackstand that is holding in the bottom fiberglass plugs:

Name:  stand.jpg Views: 0 Size:  36.5 KB

Here we see the starboard side bench cut out to allow for removal of the tank. This cut killed our cut-off grinder, so it’s off to the hardware store to buy another…bummer.

Name:  side removed.jpg Views: 0 Size:  36.5 KB